
Masking plays a crucial role in the quality of your retouching. There are so many tools available to create and refine masks, that’s often times we forget the most basics and useful ones. One of them is a bit hidden and it seems like many don’t even know it exists! However, it’s probably amongst the most useful options to refine a mask and make your adjustment shine through in a more natural and convincing way. It’s the feather option and I’m going to show you how you can use it with a real-world example.
Creating a convincing vignette is not extremely complicated, but it has to be soft at the edges to look natural and blend well with the rest of the image. Feathering plays a huge role for that matter. Until I discovered the feather slider, I used to blur my masks using gaussian blur. It does the job, however, it cannot be altered later on and it’s not the most practical solution either. The feather slider will do exactly the same job as a gaussian blur on a mask but it can be adjusted anytime.
The option is found on any layer that can have a mask. Let’s create a curve layer on my image to add a bit of vignette. I’m going first to create a selection around my model and then create the adjustment layer I need.


With our newly created curve, we can create the vignette by simply pushing the RGB curve down to darken the selection.

As you can see, because I selected my model when creating the layer, she’s the part of the image being toned down. To invert the selection, simply select the mask and press cmd/ctrl+i.

It looks much closer to the result I have in mind. However, the transition between my adjustment and the rest of the image is way to sharp. This is where the feather slider is coming into play. It’s available in the Properties panel when the mask is active or by pressing the mask icon next to the curve in the Properties panel.

There isn’t anything complicated about it, it’s just like opening the gaussian blur filter and selecting a radius. Move the feather slider and you’ll see the result in real-time, both on the image and the mask.


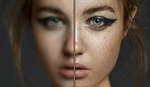
And if we take a look at the image before and after the addition of the vignette, we can see that the adjustment is strong enough to make the model more important in the frame but not too harsh that it looks unnatural.


The example above is one that I use on a regular basis. But the concept could apply to many other uses. For example, when compositing multiple images together, if the edge of a selection is to harsh, you could use it to soften it a bit. The way you use it is only up to the work you produce and the masks you create.
I’d love to hear your thoughts on the feather option. Is it something you’ve ever used or do you still use the gaussian blur to get the same result? Let me know in the comments below.


A very useful option indeed, I tend to use it a lot when blending luminosity masks. A small value can bring back some lost micro-contrast and edge definition when trying to recover highlights for instance. The result suddenly looks much more natural.
I think Mike Kelley mentioned it in one of his WAMA tutorial too.
Literally had no idea this existed!
First saw this in Mike Kelley's Architectural Tutorial here on Fstoppers. Embarrassed to say I didn't know about it either. Like Frederic I've been using it on Luminosity masks since then.
Neatly explained. Thank you for sharing this.
Very well explained , but a bit complicated to use. Since I discovered this: http://www.coreldraw.com/en/pages/gaussian-blur/index.html I am applying gaussian blur effect easily and it gives me better results than Photoshop tools. Anyway you made a great work .
There can never be too many tips when it comes to PS use! BTW, the Density slider just above the Feather slider in the Mask properties panel can make the transition even smoother.