There’s more to focusing than half-pressing the shutter release. Focus is one of the three most important technical variables in photography; it can make or break a photograph. Here are ten things, some basic, some more advanced, to help you shoot better photos.
Before I start, I should point out that there are artistic variables too. These are, arguably, more important. However, without the technical elements – the other two being metering and exposure – the artistic elements would be unachievable.
1. Overriding Auto Focus
There’s no denying that automated focusing systems do a great job in many situations. Nevertheless, there are times when overriding the various focus settings will help you, such as shooting at night, finding a subject deep with the twigs of a tree, using vintage lenses, capturing the pupils of the eye instead of on the tips of long lashes, etcetera.
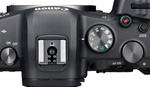
Camera manufacturers made a big mistake with most DSLRs. Because they assumed photographers would always rely on autofocus, they made the viewfinder image ridiculously small. Consequently, accurately composing and manually focusing is not easy unless using Live View.

Many DSLRs have very small viewfinders. While better than most point and shoot cameras, they are inadequate for accurate manual focusing and some can even struggle to compose with them, especially as they don't have 100% coverage of the scene.
This is one of the areas where, over the last few years, mirrorless cameras have outshone most DSLRs. When I let my DSLR-owning students look through the viewfinders of my Olympus OM-D E-M1s, they are taken aback by the size, brightness, and clarity of the display. Furthermore, mirrorless cameras have tools to assist with manual focus, such as magnifying the selected focusing point and outlining the in-focus area with a thin, colored line. Consequently, manually focusing and selecting the correct depth of field is much easier with mirrorless than with a DSLR.
2. Shun the Obvious
It’s generally accepted that having a sharp subject is what a photo requires. It may not occur to the novice photographer, and even to the more experienced one, to move focus away from the obvious subject and choose somewhere different instead.

The obvious focus here would have been the third gull from the left that was calling with its head in the air, but I chose the second gull that, anthropomorphically, appeared to be looking disdainfully at it.
3. Focusing on Moving Subjects.
Most cameras have continuous autofocus, which they call C-AF; it’s AF-C for Sony users. I’ve written before about stupid camera nomenclature, and this time it’s Canon that wins the Golden Gobbledygook Award for giving this function the ridiculous and misleading name of AI Servo. In most cases C-AF works well for moving subject matter, keeping the subject in focus as it gets closer to or further away from the camera. Wildlife and sports photography, images of a bride walking down the aisle, or anything that is moving is great for C-AF. However, it is dreadful for stationery subjects.
Although continuous autofocus is perfect when subjects are moving towards you, if your subject moves around within the frame, then subject tracking can help you keep the subject in focus. It’s a fantastic feature to use for flying birds or planes. However, it can get confused if the background is cluttered.

Continuous autofocus keeps moving subjects sharp.
4. Focusing on Stationary Subjects
Single autofocus; S-AF, locks the focus on one point. Again, Canon confusingly calls it One Shot. (I’ve met many novices who think that refers to the single image shooting in the drive mode.) Single autofocus is great for stationary subjects and rubbish for moving ones as the subject will move out of the in-focus area.
Some cameras have a hybrid system that, in theory, automatically switching between S-AF and C-AF as needed. Canon calls this AI Focus (oh, dear!), for Sony and Nikon users it’s AF-A. Many experienced photographers ignore it because they find it doesn't perform either task very well. My cameras lack this function altogether, and I don’t miss it.
5. Choosing Where to Focus
If you are working with a shallow depth of field, such as when using a wide aperture, a long lens, or being close to the subject, then that area of focus is an important part of the composition. Typically, you would place the sharp area over your chosen subject and position it to cohere with the composition. Similarly, you would usually look for the exposure to be correct in relation to the rest of the image.
6. Camera’s Focus Points
The default setting for most cameras is for multi-point autofocus where the camera will lock onto whatever is closest to the camera. However, there is a choice not to do this. You can, instead, choose a single point on which the camera will focus. This is how I usually have my camera set.
Some top-end cameras have a joystick to select the focus point. But on many, moving the point around the frame involves pressing a button to select that function, and then using the arrow pad that surrounds the OK or Set button. You can usually switch off the need for pressing a button first, so just use the arrow pad. Doing that speeds the selection.
Cameras vary considerably with the number of focus points they have. When I first switched to digital photography from film, my camera had just three points. My latest camera has 121, which is plenty. Some have many more, but in all honesty, that is gimmickry; 1053 points, really?

Using a one focus point on the puppy's eye allowed me to shoot through the grass in the foreground and have the eye nice and sharp.
For landscapes, I may well focus on the hyperfocal distance. For portraits and wildlife, it will be on the subject’s eye.
When photographing moving subjects, such as birds in flight or running pets, I still use a single focusing point; I’ve had a lot of practice at this. However, many photographers will instead choose to select a small group of focus points. Find out what works for you. There is no right or wrong way of doing it.
Advanced cameras can override the selection and, instead, identify and lock onto particular subjects. Face and eye detection is quite common but the Olympus OM-D E-M1 X very successfully identifies various moving vehicles. Now, with a firmware update, automatically focuses on birds too.
7. Phase Detect and Contrast Detect Autofocus
There are two types of focusing systems: phase and contrast detection. This is a simplified explanation of how they work.
Phase Detect
If you use an old film SLR camera, you may be familiar with the split screen in the middle of the viewfinder that separated the subject into two halves. Initially, those two halves don’t match, the top is too far to the left and the bottom too far to the right, or vice versa. As focus is achieved, they became aligned. As an analogy, that can be used to describe how phase detect works. The camera uses separate pixels to compare the light coming from your subject from two different perspectives. Newer, more sophisticated cameras have cross-type sensors that can detect that misalignment vertically, horizontally, and diagonally and not just on one plane.
The advantage of this system is that it is fast. The camera can tell whether the subject is too close or too far from the camera depending upon how the light is misaligned. However, it is not quite as accurate as contrast detect.Phase detect is especially great for moving subjects such as sports, wildlife, and street photography. With DSLRs, it’s the focussing method used through the viewfinder. It is available on some, but not all, mirrorless cameras

The Olympus OM-D E-M1X combines phase and contrast detect autofocus. It also has subject recognition that accurately identifies cars, motorbikes, trains, and birds.
Contrast Detect
When an image is out of focus, it has low contrast: whites, blacks, and grays disappear into a smooth, gray smudge. As the image becomes more in focus, separate tones become more defined as contrast increases. That’s how contrast detect works. The disadvantage of it is that camera cannot tell whether the subject is too close or too far away, so it is slower to focus than with phase detect because it must hunt for correct focus. Furthermore, it struggles to focus on low contrast scenes. However, it is more accurate. This is the system that DSLRs use in Live View.
Contrast detect is particularly useful for macro, still life, plus other situations where speed is not essential but focusing accuracy is. Saying that, contrast detect only mirrorless cameras are getting faster at locking on to their targets.
Most mirrorless cameras use one, other or both focusing types. A couple of cameras use both cross-type phase detect plus contrast detect at the same time, giving both accuracy and speed.
8. Out of Focus Areas
Just as important as the in-focus area of the image is the out-of-focus area. In many cases, photographers try to achieve a completely blurred background with attractively smooth bokeh. However, this doesn’t necessarily have to be the way to shoot an image. We may want the out-of-focus areas to remain intelligible, adding context and meaning to the image, like in the sitting puppy image above. So, we must consider getting the balance right between adding context and preventing possibly extraneous objects from being a distraction.

The out of focus area can help isolate the subject, as in this shot, but background details can also add context, as in the earlier pictures of the gulls, and the puppy shots.
9. Hyperfocal Distance
On your camera, the depth of field changes with the focal length, the aperture, and how far away you are focussing. The hyperfocal distance is the measurement from your camera to the point that gives you the maximum possible depth of field for the focal length and f/stop.
When people say to focus a third of the way into the frame, it’s a guesstimate of the hyperfocal distance. There are apps available for smartphones, such as PhotoPills, that will calculate for you how far away you should focus to get everything from a point near your camera to infinity in focus.

The hyperfocal distance allows the photographer to achieve maximum depth of field throughout the picture and, thus, front to back sharpness
10. Back Button Focus
By default, your camera is set to focus when you half press the shutter. However, there are times when you don’t want that to happen. For example, when shooting a still life. Then there is little need to refocus between shots. Or, if you have subjects moving erratically towards you and want to continuously start and stop autofocus, back button focus is a boon. I use back button focus all the time, but some people prefer the conventional focusing method. It takes a little getting used to, but it is something worth trying.
I hope you found that useful. Of course, there are big variations in the way different cameras operate, and it is impossible in a short article to cover every setting combination for one camera, let alone all of them. So, why not put some time aside to discover the different focussing methods in your cameras. If you've not tried back button focus, or used the hyperfocal distance, give them a go. Please let me know how you get on in the comments.