
Star trails are magical. They show the apparent movements of the stars over a long period of time, a result of the rotation of the Earth. And even better, they're easy to photograph and process in Adobe Photoshop!
The first part, photographing in the field, is easy. Take many photos of the night sky in succession, one right after another. Of course, you'll want to use a tripod to keep everything steady.
That was simple, wasn't it?
Now, you can use Photoshop to "stack" them to make them into long star trails. Photoshop has some nice advantages for "stacking." I'll point some of these out near the end.
Step One: Stack Your Photos!
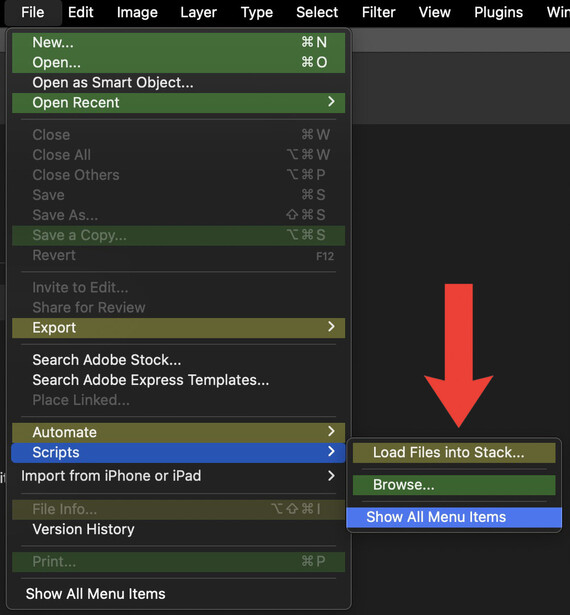
Fire up Photoshop. This'll be fun. Simply go to "File." Select "Scripts." Then select "Load Files into Stack."
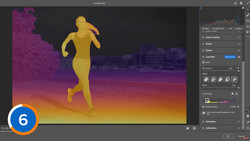
Step Two: Select The Files You're Gonna Stack for Star Trails!
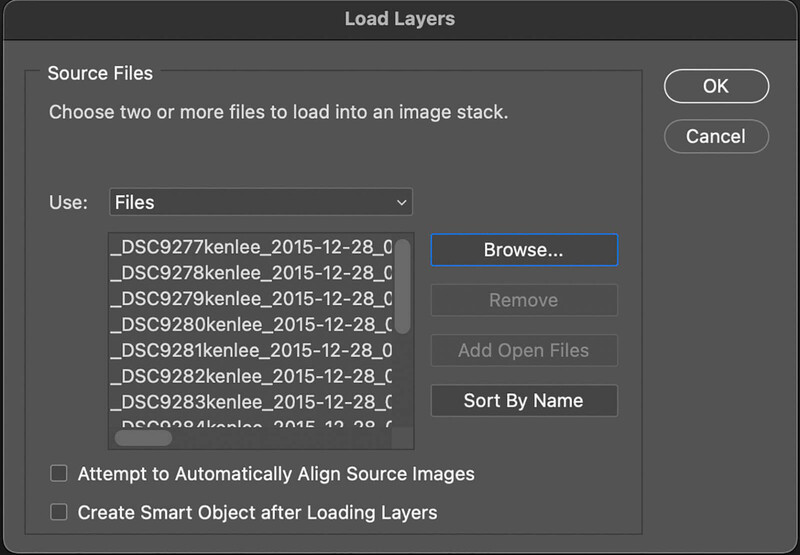
After selecting "Load Files into Stack," Photoshop will produce a dialog box so you can select the files you want to stack into your glorious star trails.
Click the "Browse" button. Then simply navigate to where your files are, select them, and hit "OK." You don't need to check any of the boxes below, assuming that your camera and tripod did not move. Besides, that'll make the process take longer!
Step Three: Let Those Stars Shine Through!
Photoshop will stack all of your photos. That's right, a stack.
Here's an example. If you had printed all of your individual photos on paper, it would be as if they were all stacked on top of each other in one neat pile.
Photoshop is just doing this digitally. Lean back and relax. If you have many photos and a slow computer, go get a drink.
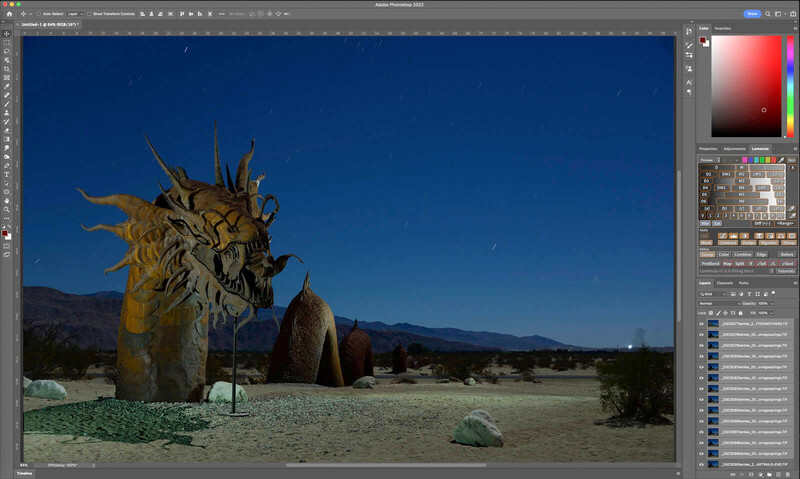
Once Photoshop is done, you might say, "Okay... I see all the layers of photos on the bottom right side... but I don't see any star trails!" And like our examples of stacking printed photos, you wouldn't see them there either.
But you and Photoshop have magic powers. You can turn your stacked "digital papers" (our layers, in other words) into "magic paper." Cool, huh?
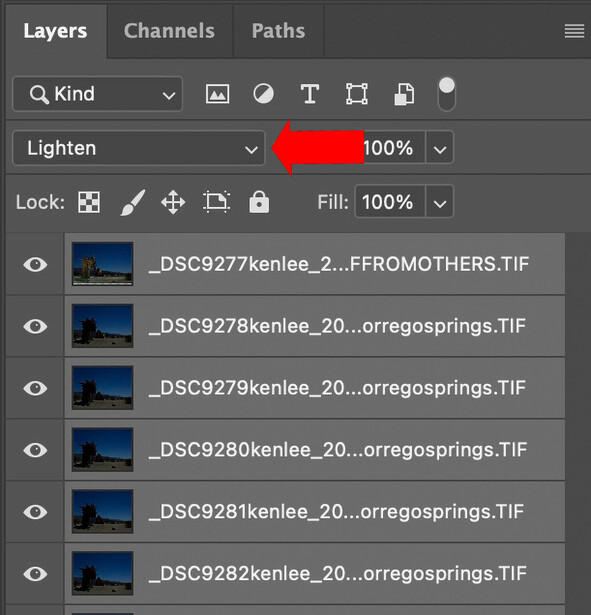
First, highlight all the layers except the very bottom layer.
Then go to the Layers tab just above where all your images are stacked. See where the giant red arrow is pointing? Change that from "Normal" to "Lighten." Then lean back and smile. Yeah. Instant star trails! That's one of my favorite parts. I love seeing that instant transformation when all the stars shine through to reveal those beautiful, long trails.
Bonus Tip: You Can Get Rid of Airplane Trails or Unwanted Lights!
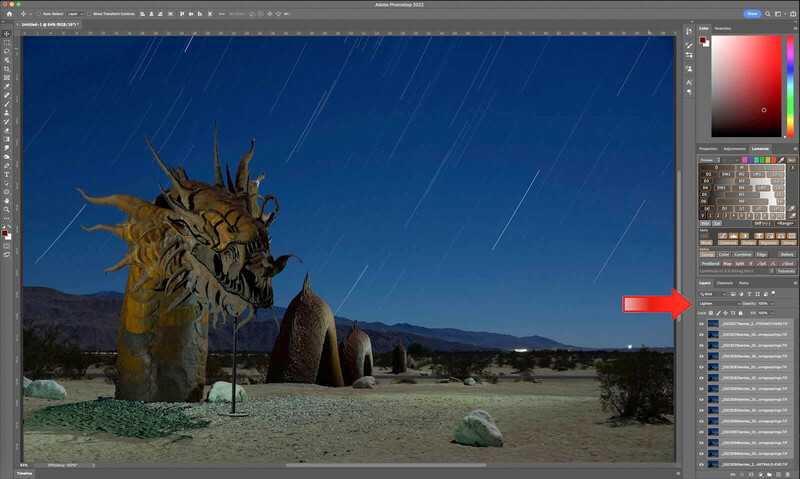
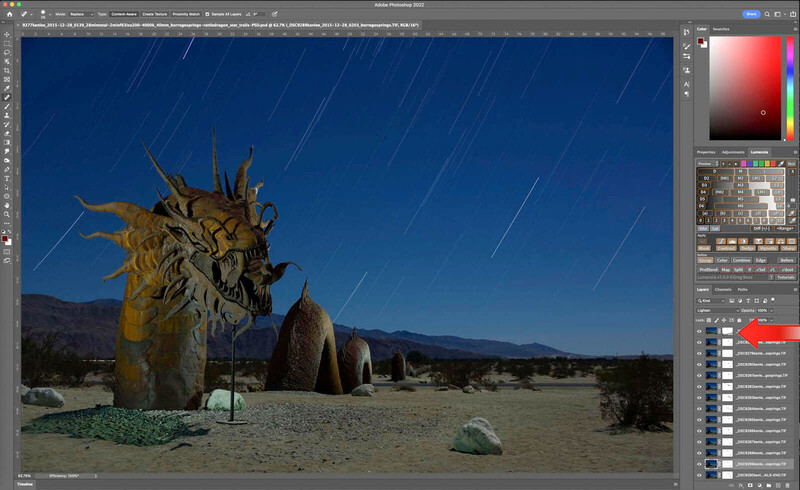
If you look at this photo above, you can see some airplane trails and some lights from me mistakenly shining the light into the camera while illuminating the giant dragon sculpture. Next, we will discuss how to get rid of that.
Some people don't want airplanes in their star trails. Or maybe you mistakenly shine a light in the camera, and you don't want that. This bonus section is for you.
Some choose not to do this. And that's okay too. It's your photo. You're in charge!
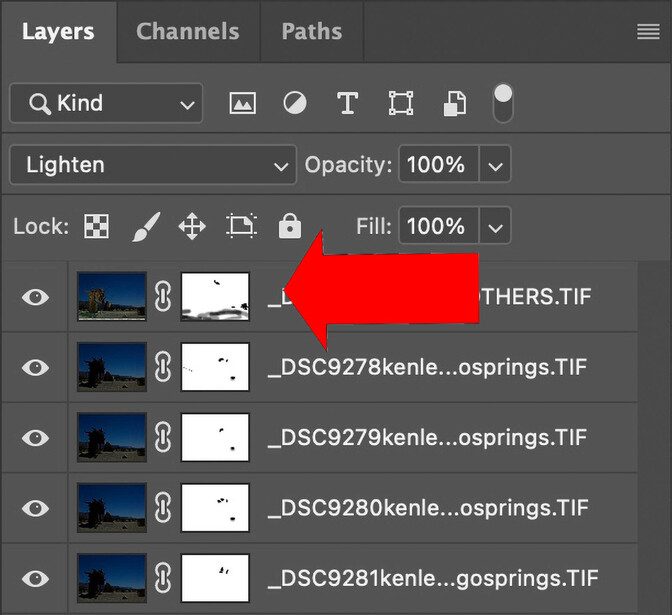
The red arrow is pointing to one of the many white layer masks. I've created a lot of layer masks, one for each layer. I wanted to get rid of the many airplane trails. There were ten airplanes that flew through while I was taking photos for this image. This location is directly in the flight path to San Diego, so there are a lot of airplanes.
Creating Layer Masks So We Can Mask Out All That Stuff We Don't Want
Select one layer that has the airplane trails or unwanted light that you don't want. Go to the top menu. "Choose Layer" > "Layer Mask" > "Reveal All." Or hit the layer mask icon at the bottom right corner. Either way works. This should produce a white rectangle to the right of your selected layer. That's your layer mask!
Then select the Brush tool. It's located on the left side of the image. Choose the black color. Make sure that the white layer mask is selected instead of the actual layer itself. Then simply start painting away on the area that you want concealed. You should see the unwanted item begin to disappear. The black color stops that one part of the image from shining through! It's like magic! White reveals, black conceals.
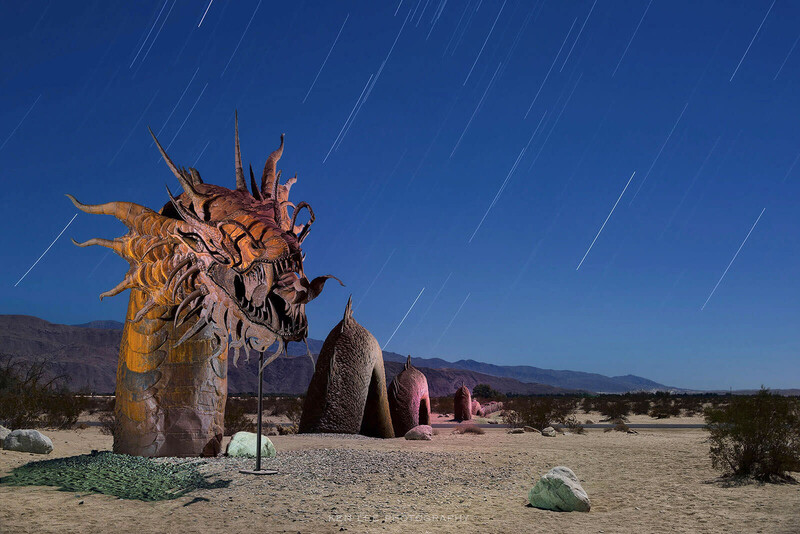
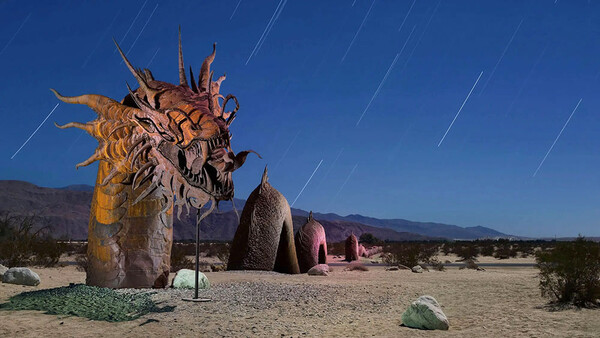
You can see the final image without the airplane trails. This image is 28 minutes of total exposure. Each individual photo was a two-minute exposure at f/6.3 and ISO 200. The star trails are relatively straight because I am zooming in from farther away, and we are not facing directly north or south, so they tend to be straighter and longer when they are farther from the North or South Celestial Poles.
It's really that easy. If you don't like it, hit "Undo" (or paint over what you did after selecting a white color).
What Else Can We Get Rid of Using Layer Masks?
Layer masks can be used to get rid of "hot spots" from your light painting as well. Or shadows. Really, anything that only exists on one layer, you can eliminate non-destructively. If you don't like it later, go back and change it.
About This Enormous Dragon Serpent Sculpture
The enormous rattledragon sculpture is located in Borrego Springs, California. The sculpture was created by master sculptor Ricardo Breceda. The entire dragon serpent is 350 feet long, seemingly undulating under the desert sand. I used a handheld light to illuminate the sculpture. This took me a while since I had to walk a long distance, even crossing a road, to illuminate it all!


Join the Fstoppers community for free
-
Post comments and join in the discussions
-
Browse the site ad-free
-
Share your work and get featured in the community
-
Compete in the photo contests for fun and prizes
4 Comments
Super useful. A lot of people aren’t doing star trails because they are intimidated by the process, but it’s actually a lot easier than most people think.
Thanks. I tried to break it down and make it simple. Hopefully this will help as many people as possible!
I use StarStax for making star trail photos. It's a super simple, super fast and totally free. This is the best alternative for those who don't have, don't know how to use or just can't afford Photoshop.
I completely agree. StarStax is about as easy as it gets. And yes, the price is certainly right! StarStax also has some other bonuses, including gap filling, automatic comet, and the ability to create cumulative star trails for time-lapses. Great program! Photoshop is good to use for people who already have it and want to be able to remove inadvertent lights such as mistakes in light painting or removing airplane trails. Thanks!