
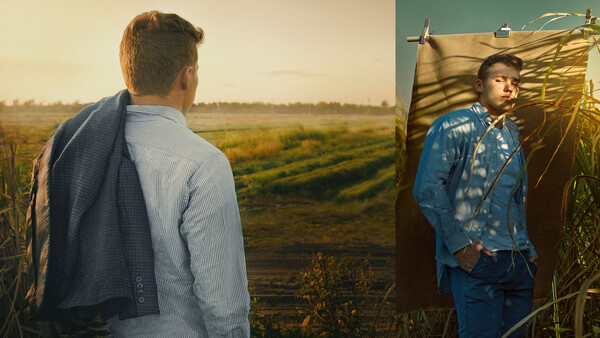
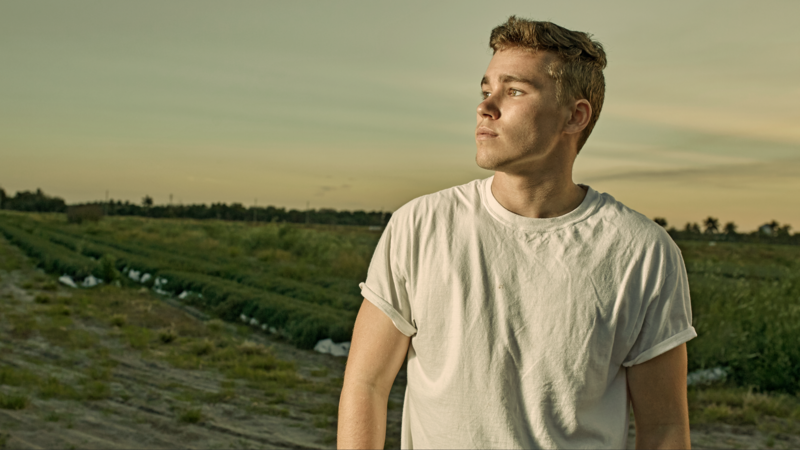
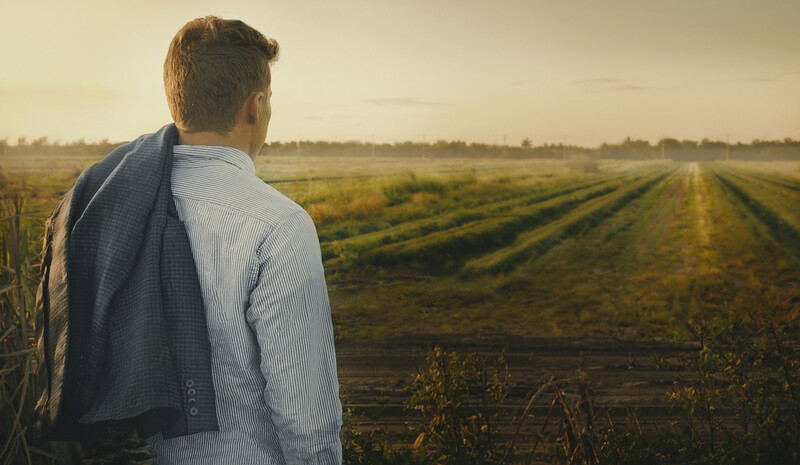
When you see an incredible location in images, often our gut reaction is, that it must be Photoshopped or that you need to go to an epic location to get great shots. In this article, see how I shot these cinematic portraits on the side of a road in my area by using just one camera and one lens. No fancy lighting or Photoshop.
The Backstory
A few weeks ago, in my class at college, the prompt was to shoot a series of portraits and had five weeks to do so. When I heard the prompt, I immediately resorted to my go-to setup, which is shooting portraits in a very controlled studio environment. For the first few shoots I did, I setup in my home living room studio and cycled through my signature lighting setups. I was thrilled with the results, but when I sent them to my professor to critique, his reaction was a bit underwhelming at first. He told me that they are simply average, the lighting was fine, but I was still stuck in my comfort zone. He encouraged me to go out into the environment, and lose control of my lighting and background, and rather be more willing to accept what the environment was bringing to the scene. On my way home from class one day, nestled in the middle of a residential development, and a fire station, I spotted this corn field out of the corner of my eye and instantly knew I should do a shoot there. So, the next week, I called up a friend whose never modeled before, grabbed one camera and one lens, and set out to create a set of work that was out of my comfort zone.
The Camera Setup
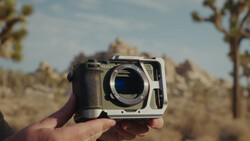
Since the goal was to loosen up my style, and get out of my comfort zone, I left all my fancy lighting toys behind and only brought the essentials: one camera, and one lens. My choice of camera and lens for this shoot were the Canon 5D Mark III and Sigma 35mm f/1.4. By using this simple camera and lens combination, it allowed me to focus on the composition and expressions of the model and forced me to constantly move around the scene to create interesting composition and angles. When using a prime lens, what you see is what you get. If you want more of the scene in frame you move back, and if you want less, you move your body close. Another point to note, is that since I wanted to stay light, I shot all of the pictures handheld, and left my tripod and tether station at home.
The Settings
Since I shot the entire series of pictures without the use of a tripod, the foundation for my camera settings became contingent on that factor. I knew since I was shooting handheld, I would need a high enough shutter speed to eliminate any camera shake. So I set my shutter speed to 1/500th. The next thing I needed to think about what my aperture. As for personal taste, when I shoot any scene, I like to keep everything in focus to maintain the realism of what I saw in real life. With that in mind, I pumped up my aperture to f/8. By raising my aperture, it also helped cut down my ambient light to give me a more balanced exposure. The last thing I had to dial in was my ISO. Since I was already losing a significant amount of light from the high aperture and the high shutter speed (which I opted to keep consistent), to compensate for the constantly changing natural light, my ISO was the one factor that changed. I started with a low ISO of 250 but as the sun continued to go down, I raised it to ISO 1000.
The Lighting
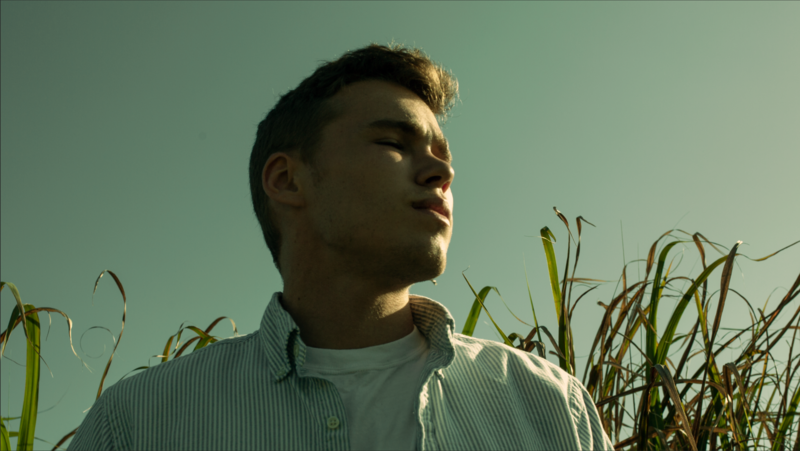
When approaching the lighting for this set of images, the ever-changing natural golden hour light was something I had to quickly adapt to. Since I wasn't in my comfortable living room and in control of every aspect of the lighting in my images, I was at the discretion of mother nature and how she wanted the lighting to fall on the scene. This idea was both terrifying and inspiring at the same time. As opposed to shooting in studio, every time my model tilted his head, the light changed. Since I was shooting through blades of grass, the way the light traveled through it, created interesting and unpredictable shadows across my subject. This loss of control is something I hadn't experienced since the beginning of my career four years ago, and I'll be honest, despite being hesitant to my professors suggestion, I legitimately enjoyed it. The excitement of the unknown was the factor that propelled the shoot forward and help contribute to the end results.
In order to account for the sporadic beautiful light, and to be able to truly "see" how it affected the scene, I switched my camera into monochrome mode. The notion of switching my camera into Monochrome mode when shooting during golden hour may seem counter intuitive, but doing this allowed me to see my scene in highlights, mid-tones, and shadows. I didn't have to spend the limited time we had focusing on the particular nuances of color, which ultimately I could change later if I wanted, but rather focus on the overall quality of light and how it spilled over the scene. At the end of the day, black and white is just a rendering of color. Since I was shooting in raw, when I imported my images into Capture 1, it automatically converts it back to color, so there's no reason to not shoot in monochrome mode. If you want a black and white and color version, simply change your settings to raw and JPEG to give you maximum control in the editing process.
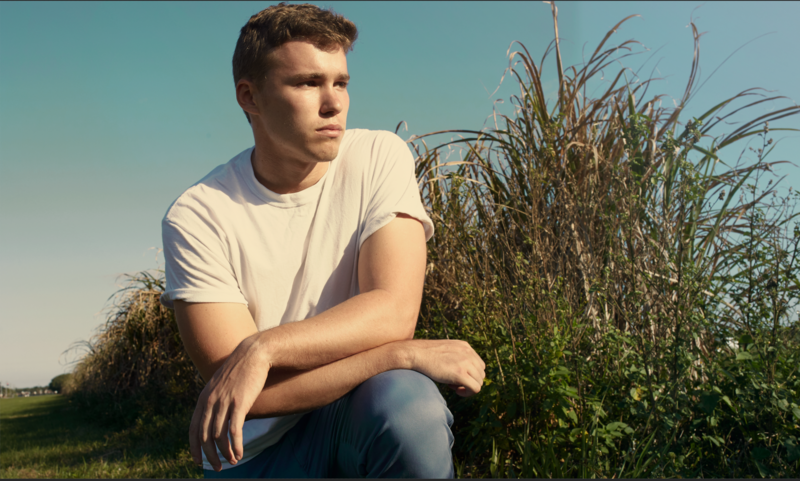
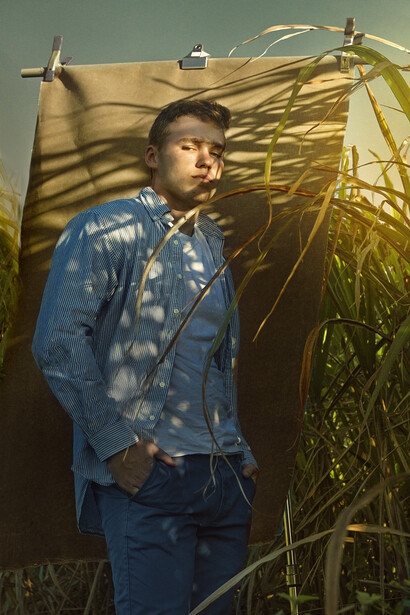
The Final Images
Closing
When I got back home from this shoot and looked at the images, I had an overwhelming feeling of excitement and satisfaction that I hadn't felt in a long time. By listening to my professor and getting out of my comfort zone, I realized that is so easy as artists to get into a particular way of doing things and we become reluctant to breaking free of those boundaries that we created. But, the instant you let go, and just go out and lose control, you'd be amazed at the things you are able to create. So the next time you're feeling uninspired, set out to do something that is out of your comfort zone, and I assure you will walk away re-inspired and excited to create more innovative work.
Do you have any photographs that you tried something new? Leave them in the comments below!


Join the Fstoppers community for free
-
Post comments and join in the discussions
-
Browse the site ad-free
-
Share your work and get featured in the community
-
Compete in the photo contests for fun and prizes
13 Comments
“How you” > “How I”
Thanks!
Same here!
What makes these photos "cinematic"? The word is in the title of the article, yet there is no mention of how these are "cinematic." That's why I clicked on the article in the first place... I wanted to see how you make "cinematic" photos.
I hear what you're saying. By cinematic I meant the way they were composed and the dramatic lighting. Most of them are in a 16x9 ratio which is that of movies. How would you define cinematic?
"grabbed one camera and one lens"
also cramps, background... and dont tell me you did not bring a reflector with you?
> He told me that they are simply average, the lighting was fine, but I was still stuck in my comfort zone.
why were you "thrilled" with the first results? what make you "thrilled"?
>When using a prime lens, what you see is what you get.
nope, unless you`re using a 40~50mm lens. and if we talking about looking through the viewfinder than even with zoom lens - what you see is what you get. lol.
>So I set my shutter speed to 1/500th.
why? 1/125 is enough :) with 35mm especially. unless your hands are really shaky. no need to go iso 1000 now.
>This loss of control is something I hadn't experienced since the beginning of my career four years ago
i think you should loose control more.
> But, the instant you let go, and just go out and lose control, you'd be amazed at the things you are able to create.
if anything, your article proves that you did not let go and are a control junkie.and you rushing for appreciation to early. the title of this article, all this piece proves - that appreciation means to you much more than the actual process of taking portraits. thats why its so technical. you should be more poetical - than it becomes cinematic.
also this
Thank you for a very in depth critique and analysis of my article. I appreciate the time it took to write it. Would you care to elaborate on your last point about rushing appreciation and how it means more to me than the process of taking portraits?
well, here is what i told you if you were my student - who brought to me this pictures explaining to me, what you wrote here. (i did not teach photography btw, i teach drama course for 1st year film students in japan).
first of all. i think you need to go deeper in the meaning of cinematic. and here what the actual masters of cinema has to tell on subject. tarkovsky. kurosawa. scorscese. antonioni. e.t.c. who ever inspires you (and find out who inspired those who inspire you - that is the a great way to learn)
i think the pictures are good, but good is not enough. it seems they are made for the sake of being made, and moved by technical aspects - rather than concept with some actual meaning. try sending this pictures on some proper portrait contest and see the winners. check out recent Portraits of Britain, f.e.x.
you told you liked the spot. why you liked it. why this situation? have you tried just to spend there a day alone, before the shoot? what sounds this place produce through the day? what it makes you actually feel? have you tried base the shoot on that - rather than the first idea you had?
what are you relationship to this person? do this images actually represent him or he is just a model in your own design (which is ok in commercial work, but you dont need to rush there). was there a a spontaneous moment with the model, where he revealed himself, put his guard down. have you tried to portrait him in a more naked way? or have you projected yourself on him? why him? how do you direct him? how he directed you? there are more much important questions you suppose to deal with. was there a moment when you loose control, or your subject lost himself in honest expression for your camera?
the lack if discussion of this subjects in your story shows me that you are more interested in being appreciated through images, rather than the images and the power they can posses itself. mood or a feel - shows only that, they are a glossy wrap, whats inside the wrap is much more important. cinema is made to tell a story, show drama. and cinematic qualities of the images are made to convey the story, they made not just for the sake of being cinematic (though there are a lot of movies or images that does only that). there is a way to work with just mood... Wong Kar Wai, or Kim Ki Dok, or Lee Chang Dong are great masters in that... but they have very deep stories behind it. they have a reason for there style, it deeply connect with their identity, its their own. there are masters in mood in photography also, Todd Hido and Javier Vallhonrat comes to mind, but ones work connects deeply with his trauma and past, roots; another is so philosophical its almost unbelievable how much thought goes behind his, what appears to be "fashion" photography.
dont get me wrong - its good enough for a beginners commercial work and if its only what you aspire to be -than maybe its all good, again in the beginning. but if you really go deep into commercial work you will know - that it has a lot of thought behind it.
also, get as far as possible from fstoppers, youtube, blogs, instagram. read BJP (British Journal of Photography), browse through photo-eye.com, check out BFI's Sight & Sound or American Cinematographer if you interested in cinema, study proper photography masters. than come back to fstoppers, youtube and e.t.c - now they will be just complimentary tools to your own path.
if you want to discuss some more hit me up in private.
OK - I get it, I've been in this class in Art School too.
Critique time, since you're still in school & learning.
If this is a story, I would thinking toning should be the same, your toning is all over the place.
If this is a story, tell a story, right now he's just looking off frame, it's too model-y.
If this is cinematic, then I don't know if I'd include the Vertical shot. That said, I think your vertical shot is the strongest image, but it still can be pushed - maybe better cropping, if you're going to show the background in an environment, go full body - think Annie Liebowitz, or crop out the C-Stands and clamps and just make it about a nice portrait with a clean muslin & corn stalks / light coming across the model's face. It feels like you're walking both lines right now and it's kind of meh for a strong portrait.
This is to FStoppers Editors, not the Author: This also feels like the article should be on a reddit forum or flickr (not that it's still around, really) or a facebook group. This feels amateurish, not professional. Maybe I'm wrong to think that there should be more professional articles on here?
This is an extremely valid and helpful critique. People should look to this when blatantly saying negative things without any constructive suggestions. I very much appreciate you taking the time to write it. I agree with all of your comments above and will definitely incorporate those tips into my next portraits.
So much better! :)
Cinematic describes anything related to cinema. It may refer to: any movie updates, cinema nights, cinematic review
https://en.wikipedia.org/wiki/Cinematic