
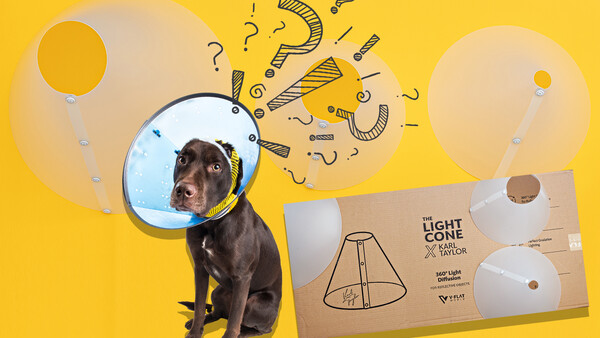
When V-Flat released the new Karl Taylor Light Cone, the comments ranged from dismissive jokes about "the cone of shame" to excitement for a product designed by esteemed commercial photographer Karl Taylor. I decided to take the cones into my product studio and see for myself if this simple tool really delivered the effortless results it boasted.
To be quite honest, I was skeptical of the Light Cone. Lighting for product photography is very specific and requires extensive knowledge. Like most commercial photographers, I have spent years fine-tuning the skill by testing different softboxes, diffusion papers, and light modifiers. The idea of throwing a cone on top of a product and everything magically working out gave me the same thoughts I have when I walk by the "Brazilian Butt Boost" pills at the international market. Please. If it were that easy...
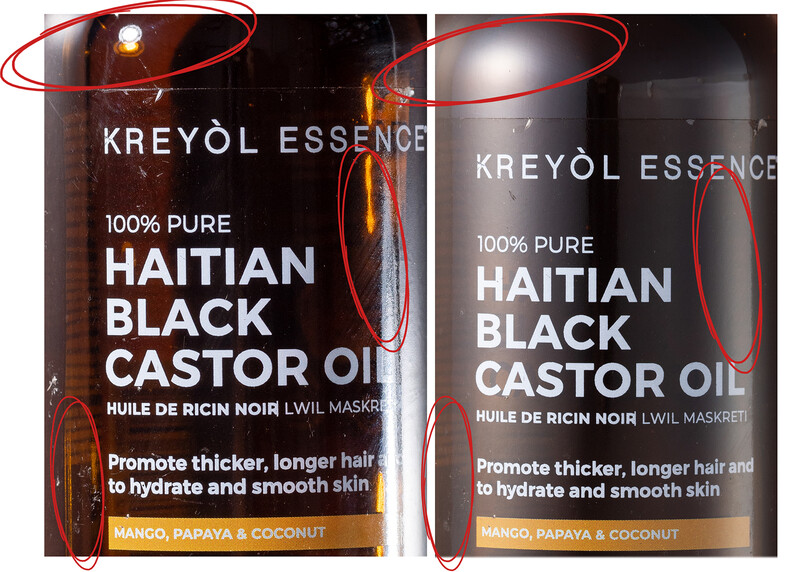
And then I tried it. Wow. Look at these results for yourself. I will let the images do the talking. This first comparison shot was with the light placed above, pointed down at the cone.

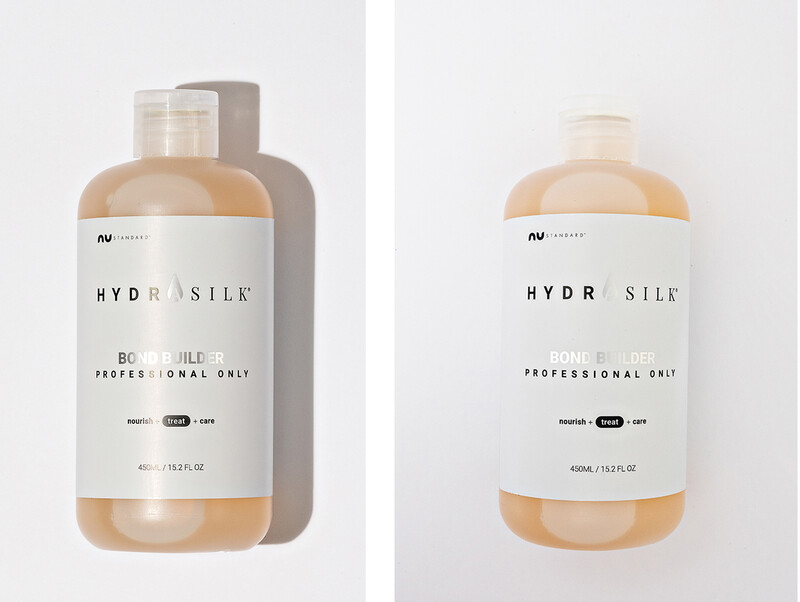
In this second comparison image, I placed the light to the left of the cone and the bottle inside the cone.
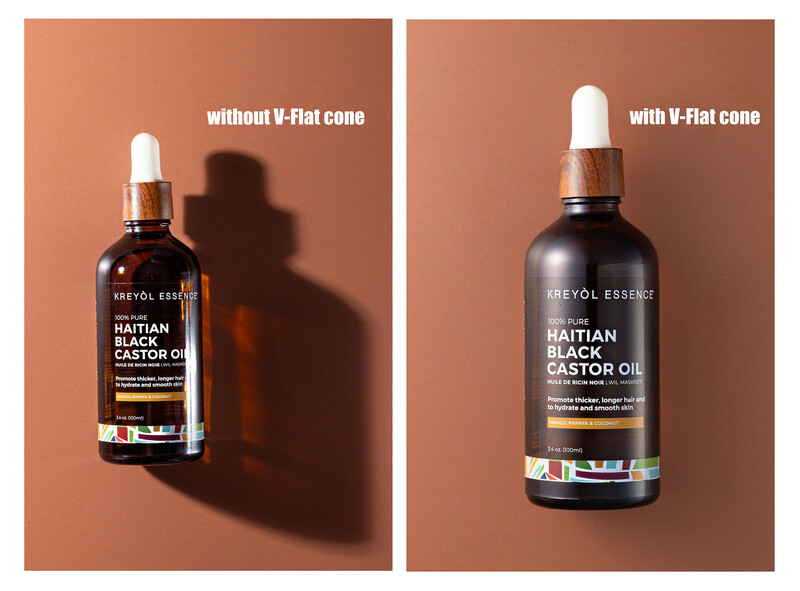
Hard light (left) is most definitely a trending look. I'm often hired for its my use in my work. I love the bold crispness of it. However, if you are after a creamy, smooth look, I can tell you with certainty this tool will be the easiest and most efficient way to achieve it. One thing that is almost miraculous about this cone is how it erases imperfections. I chose to test the cone on this brown bottle specifically because for the last many years, it has been the hardest bottle for me to photograph. If I wipe it down, there are filaments all over it no matter what I use. If I blow it with an air gun, there is dust. Every imperfection on the label seems amplified once the light hits it. Somehow, despite microfiber gloves, it just creates fingerprints out of thin air! This bottle has been the bane of my existence for years. I was stunned with how the bottle looked nearly flawless by simply using the cone.
You can see the same astonishing results in this test shot.
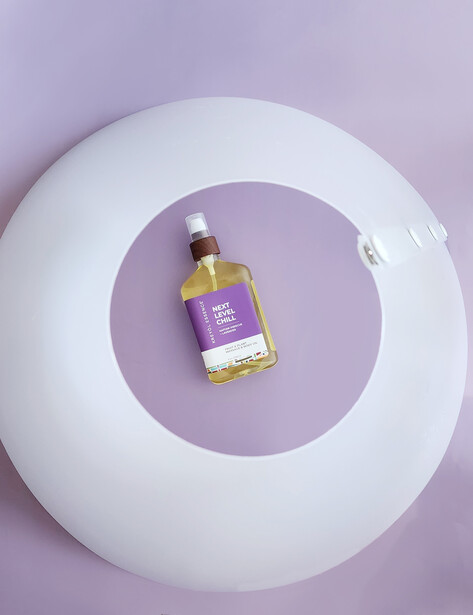
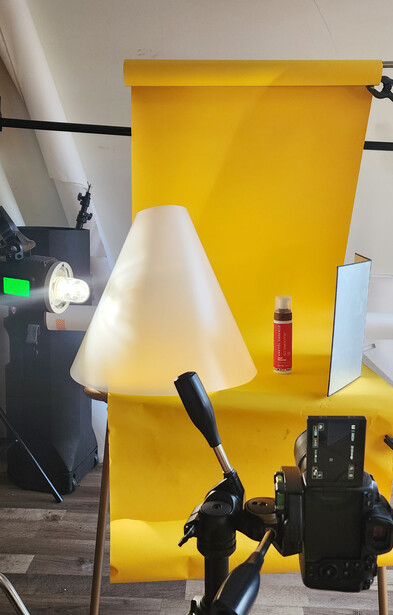
For this third shot, I wanted to try something a little unconventional, so I put the entire cone between the light and the product without placing the product inside the cone. I was curious about what would happen if I used it simply to break up the light. I used a bounce card to reflect a little light back onto the bottle's right side.
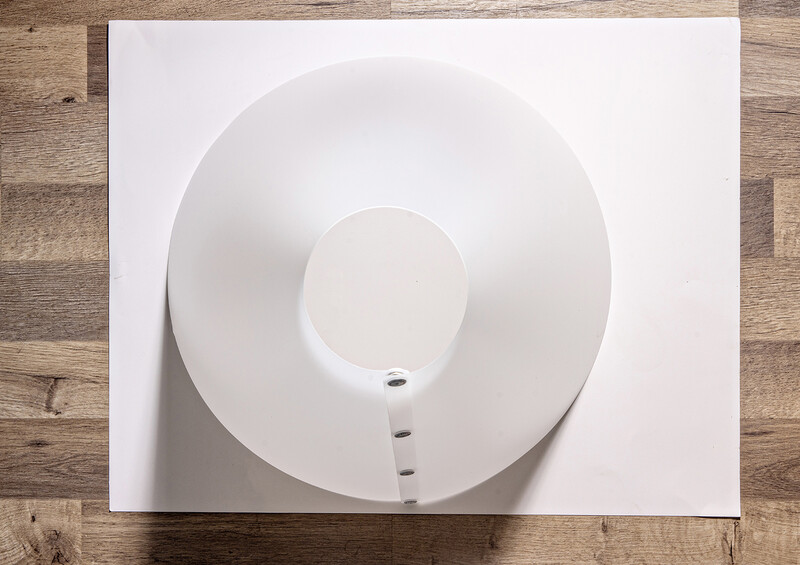
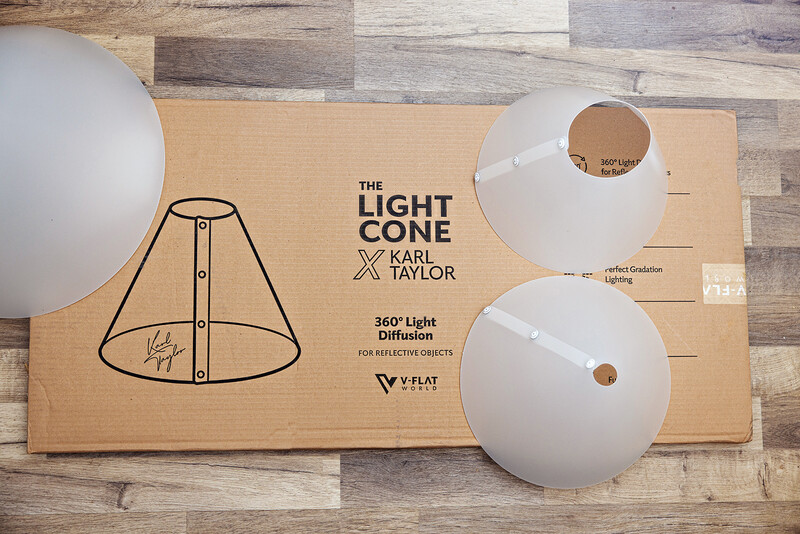
It was interesting to learn that Taylor worked for two years, testing different materials and shapes. Once settling on this material, he continued fine-tuning the cones to the best optical density for the material. The cones come in three sizes. You can buy the set of three, or either of them individually. If I had to choose just one, I would purchase the large, which measures 20" x 18" x 5" and retails for $69.95. It really is a game-changer. It’s so easy and effective that it can allow a novice to achieve professional results instantly.

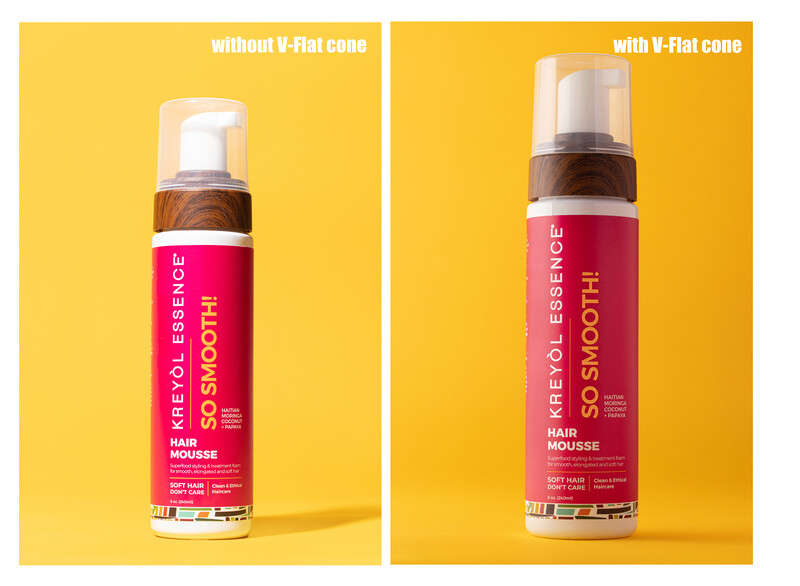
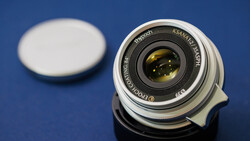
The only drawback I came across while using the cone was photographing a product which was a little bigger. I prefer to shoot product work with my Canon 100mm f/2.8 .In the case where the product was larger, like this shampoo bottle, in order to get the whole product in the shot, I had to switch lenses to a wider one: my Canon 24-70mm f/2.8, which causes distortion on the product, as seen below.
If you shoot product photographs, I am confident this tool will be a tremendous time-saver. It will cut time on lighting and editing. It’s affordable, easy-to-assemble, and it stores flat like the stack of backdrop,s which are surely piled up in your studio. This is the one case where “too good to be true” actually is. Hats off to Karl Taylor and V-Flat.
After this and their Lindsay Adler spot, I’m anxiously awaiting their next release. You can pick up the Light Cone here.

Join the Fstoppers community for free
-
Post comments and join in the discussions
-
Browse the site ad-free
-
Share your work and get featured in the community
-
Compete in the photo contests for fun and prizes
24 Comments
I do like the results. However, you can purchase a 2' x 4' piece of flexible translucent plastic from eBay or Amazon for less than half the price. Then you can make them any size you want.
That's a great question/remark. I know the team at Vflat/K. Taylor worked with much detail on determining the best optical density for the material. It would be an interesting follow up to do a test shoot of translucent plastic vs his cone. I must say, the diffusion amount did seem just right.
Your images do look very nice.
Thank you! I appreciate that
I would like to see if the same image quality comes out if someone replicates the light cone with cheap plastic. Is it really that much cheaper? I'm also thinking about the labour time (buying, cutting, shaping and fixing).
No, I made it easy for myself and ordered the large light cone, unpacked it, assembled it and tried it out immediately. Results as in the report. All within 5 minutes. The biggest problem was being able to buy this product in Europe. At the beginning of January the time had come. And since then, product shots have been a real pleasure.
This is great feedback. Shopping online, getting the plastic, cutting it, etc. is tedious. The large cone was $70, which, in my book is a great value for the amount of time it saves me on lighting and the quality with which it shapes the light. An interesting follow-up indeed would be a shoot off. I loved how the cones had the snap buttons to close- very convenient. At that price, and with the results it gives, I can't think of any good reason to try to DIY this one and hope it's as good.
Not much to cut a cone. It's just a semi-circle folded over itself. The material should cut easily and from the looks of the original it won't need much to fasten itself together. To each his own I guess.
professional still-life photographers have been using frosted plexiglass cones and various other shapes for literally decades. Some will create or modify diffusers for specific projects or effects. While this product is a entry into better still-life lighting control, it is not exactly a new innovation.
Yes, you're correct in saying this. I myself often grab everything from parchment paper to various shapes of matboard or anything in my surroundings to shape the light in the way that the product needs. Some photographers which I admire such as The Orgel Visual Group have put together light shaping set ups that are mind blowing! But as you said, I think there are MANY "entry level" photographers coming into the "content creator" space. They don't have the advanced technical knowledge of some of the industry veterans. I feel that this product is simple, affordable and easily accessible to them. Would you agree?
Great article and examples Michelle. I'll have to show this to the students as they'll be interested in this.
Thank you! I hope they love it as much as I do
On behalf of Scott Choucino I disapprove this device :)
He shoots hard light- Totally different!
there are so many filters roll diffusion from rosco or lee with uncountable lighting stops even we can put inside one into others to block easily whatever will be the amount of of light you want to stop or effect to make. And we can make the right size for your lens. baker paper is the cheapest way.. 2 layers of this will be enough for the less demanding. I apologize for my lousy english
Your English is excellent and thank you for this contribution. I use Vellum paper to shoot through a lot. You gave me a great idea to make an oversized cone for the compositions that are too big. I usually hang my vellum paper from a C stand arm and shoot through it flat like a sheet- but this cone shape is really interesting how it shapes the light.
Ridiculous especially for the price. This is basically an overpriced IKEA lampshade. 😂
It would be interesting to take different items mentioned and do a shoot off
The Kreyol Essence body oil product photos suffers from two main problems. First, it was shot on a colored background, which, for transparent/translucent products blocks the refractive properties of the bottle, incorrectly skews the color of the product and makes the product look too dark. If you look at the Kreyol Essence website, this product is much lighter in tone and it’s stood up so the reflective and refractive properties render nicely. Unfortunately it appears they used a ring light on the bottle as there’s an odd oval shaped reflection in the upper left corner.
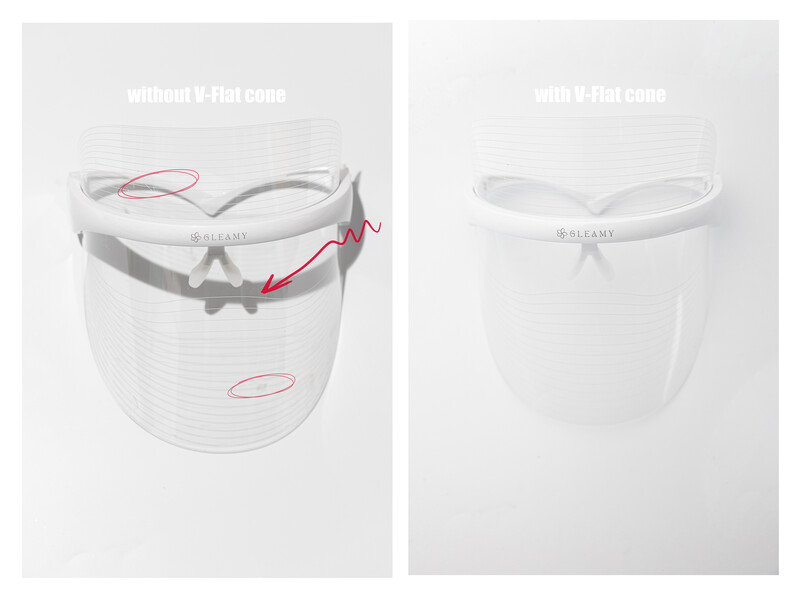
The Gleamy LED Face Mask has been lit in the second photo to eliminate the drop shadow of the band. However, in the process the mask is almost invisible. If you look at how the manufacturer handled this you’ll see they used a strong side light to show a good display of the properties of the curved mask and its parts.
The HydraSilk bottle also displays the similar problems of the Kreyol bottle in that it’s laid on a surface and the refractive qualities of the contents may not have been correctly rendered because light couldn’t pass through the bottle. Second, the Bone Builder words on the label are unevenly lit and hard to read. A large enough curved reflector (whether white or some shade of gray) for just the words is needed to get the foil stamped words to be lit evenly and read clearly. Easier to do when the product is standing up and free from the confines of a restricted space cone.
The lighting in both of the Kreyol Hair Mousse product shots is fine, it’s a subjective call as to which is more acceptable. The label reads better in the harder light photo on the left. However, the shots are on a colored background so the product probably reflects orange on the sides and definitely on the base and refracts orange through the clear cap. Without seeing the product shot on a neutral background it’s impossible to know the correct color of the product.
The cones may be useful for some photos, but as someone who shoots art glass, glass beads, functional glass, stained glass, jewelry (frequently with natural stones and inclusions), gems, mineral specimens, and highly reflective collectible knives, I light products uniquely for each item to bring out the best reflective AND refractive properties. The cone reviewed above is too restrictive in terms of the actual light and reflections produced plus the size and shape of the products I shoot, many of which won’t fit inside even the largest cone.
You nailed it.
Awww! Ty. I would say Vflat nailed it but im glad you enjoyed!
No. Vflat did NOT nail it. There are much better ways to photograph these products. The cones are GREAT for chrome objects but not the items you present. I think Doug nailed it.
I wouldn't recommend this product. The reflections are not pleasing to the eye. There are much better ways of dealing with reflections then some dog lovers idea for the cone of shame.
Quick Hack to save yourself some money go to Ikea and purchase a MELODI lamp shade. around $8 -$12 just enlarge the hole at the top and It does the same thing as the Light cone.
Too small. Plus, the march through IKEA is a PITA.