
When I moved in to my studio a little over three years ago, I needed a place to hang, store, and use my rolls of seamless paper. I didn’t have many — just a few nine-foot rolls of white, gray, black, and green — but I wanted them out of my way. Storing them vertically wasn’t a good option in the space, and storing them laying down is never a good idea. So, I wanted to figure out a simple system that I could build that would do the trick. Here’s what I came up with.
It’s a simple system, really, and it doesn’t take much time or tools or money.
What you’ll need:
- 1 2x4x10”-ish piece of lumber
- Some sort of attachment hardware to attach the wood to your walls (Screws, bolts, etc.)
- Bike storage hooks
- Some sort of long metal poles
- Paint, if you want to make it pretty
Tools:
- Saw
- Drill with appropriate bits
- Measuring tape
- Level
- Paintbrush, etc.
- Safety goggles (safety first!)
It’s a Straightforward Assembly Process:
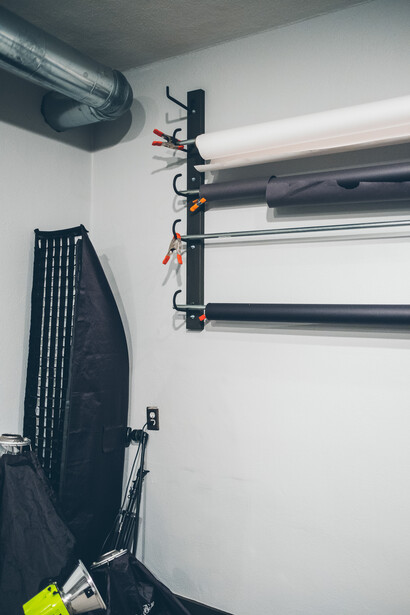
1. Cut the 2x4” piece of wood into two sections of whatever length you want, making sure the two pieces are equal in length. Mine are about five feet long. Paint them, if you want. Might as well make it pretty.
2. Attach the wood sections to the wall you want to hang your paper rolls on. They should be vertical (use the level!) and spaced far enough apart so that the paper fits in between them. Not so close together so that the rolls don’t fit, but close enough that the metal bars you’ll be hanging them on will span the distance with a few inches on each side.
How you attach them to the wall will depend on what kind of walls you have. My studio walls are old, old, crumbly concrete. I had to drill holes in the wood and then into the concrete and use some large toggle-type bolts that expand when you screw them in so they would expand into the concrete. You might be fine with multiple long wood screws if you’re screwing the system into a wall stud. This is the hardest part of the whole process, and your mileage may vary.
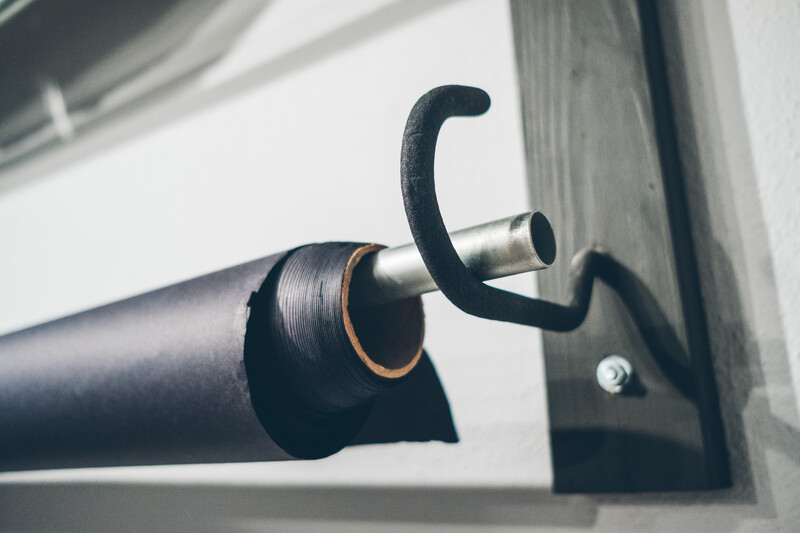
3. Figure out how many rolls of paper you want to hang, and buy that many bike storage hooks… times two. You’ll put one hook on each piece of wood to support each bar. I can hang five rolls of paper on my system with ten hooks.
Measure twice, and drill once. Figure out how far apart you want the rolls (I recommend them to be about a foot apart), pre-drill the holes with a drill bit slightly smaller than the hook’s threads, and then put the hooks in. You want to make sure the hooks are spaced appropriately so that when the bars are sitting on them, the bars are level.
If you want to get fancy, you can put a large hook in the top spot to store more rolls side-by-side.

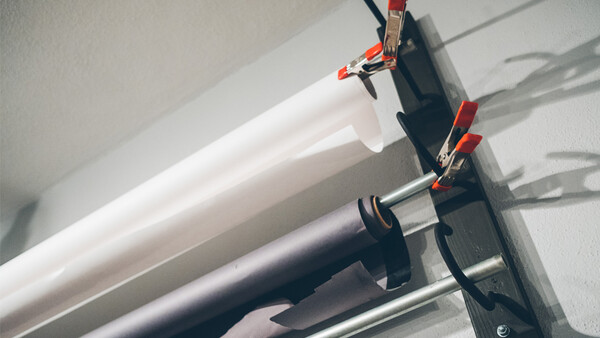
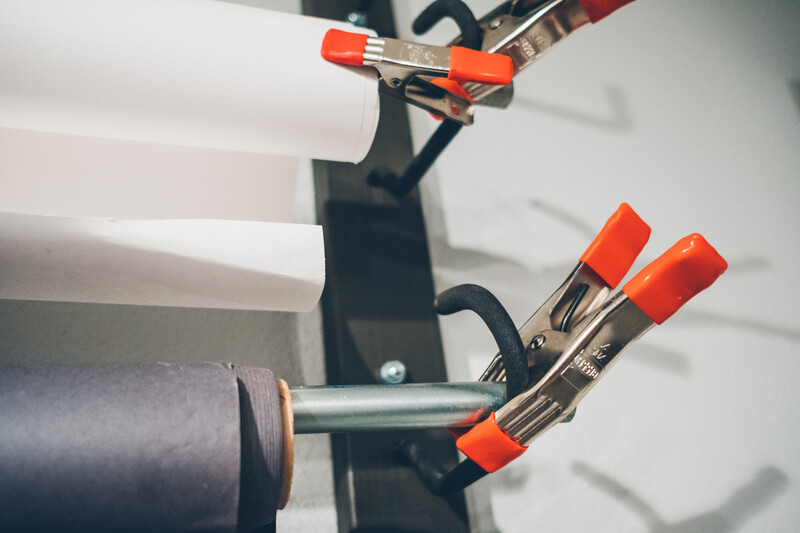
4. That’s it. Put your paper rolls on the metal bars, and then put the bars on the hooks. Hopefully, you left enough room so that the bars stick out just enough past the hooks so that you can use a clamp to attach the rolls to the hooks so they don’t move when you unroll them.
(Please excuse the messy studio)
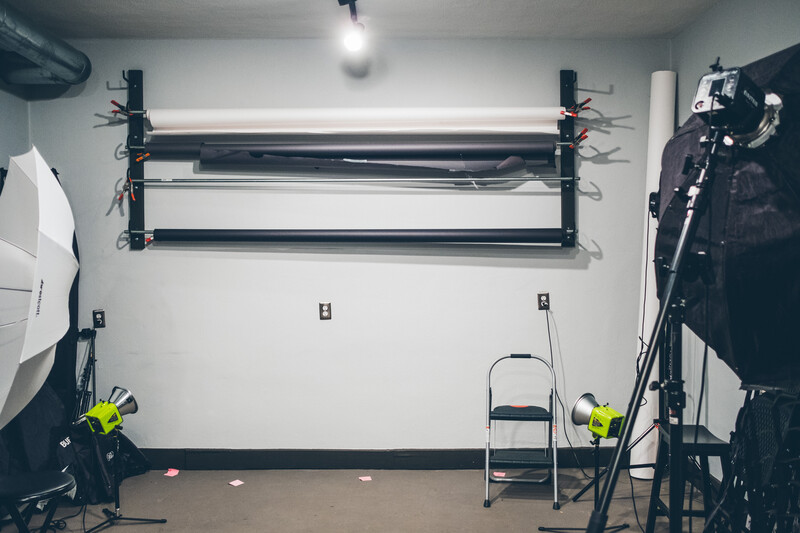
It’s not a perfect system, but it works for what I need at the moment. I can store the rolls on the wall and use them quickly when I need to. I can move the rolls up or down a hook quickly to adjust for whatever height I need them at. I don’t have to mess with backdrop stands, and didn’t pay over $1000 for a roller system. A couple of hours and a trip to the hardware store should do the trick. Yes, storing them hanging on a rod/stand is less than ideal compared to storing them vertically, but that’s not always an option — and this is better than having them laying on the ground. You could also use this system to store other types of backdrops if you were so inclined.
Do you have any DIY tips for building things in your studio? Let me know!


12 Comments
Great idea.
Back in the days when I started I used the same process, except I used a bit wider tubing which allowed me to bore holes on both ends and the tube then fitted nicely on the bike hooks.
Yes, the tubing is the one thing I didn't do well. I wish I would've gotten something even a few inches longer. I used electrical conduit, and should have just put the supports a few inches closer together or found something a little longer! It works, though.
You could also try and use something threaded at both ends to be able to screw something larger to stop the tube from crashing down on a model.
DIY Studio Seamless Paper Hanging System On the "CHEAP" is the title. -- 8 Baby Plates = $96 or right angle Baby Plates = $152 Compare that to the bike hooks at 8 for $12. Some things call for special tools and equipment that can be VERY expensive and there is no way of avoiding that. For something like storing seamless rolls. I say go cheap and save up your pennies for the big stuff. In the high end world of photography this dollar amount probably isn't a problem but for those just getting started if I could apply an extra $100 to a lens then I'm ahead.
I like this idea. I've been accumulating a collection of different colors and need a way to store them. I was wondering what is the problem with laying them down? I assumed that as long as they were flat it wouldn't be an issue.
The problem is the weight of the paper itself, when stored horizontally the weight at the top of the tube pushes down and causes the paper roll to become slightly oval....then when you go to use it you'll find ripples all the way down your paper.
Storing the rolls vertically eliminates this as the compression just goes down the length of the tube and doesn't distort its shape.
hope that makes sense.
Jon
www.jonroberts.co.uk
You can get "flat spots" in the roll by laying it down. Basically you will end up with a repeating series of creases as you unroll it. I use a very similar method as shown in this post (I used shelf hangers that have hooks on the end to space it out from the wall) and it works for a fair amount of time. 2 rolls store on the top "flat" portion of the hook and then my "working" roll on the hook. After about 3 years of hanging, you'll start to notice some big flat wrinkles in the roll. But for the cost of seamless paper, it's not bad to replace it that often.
Plastic pipe can be more modular than metal pipe.
Keep in mind too that you need strong enough pipe to support the weight to keep it absolutely straight. Otherwise as many said here, is the paper will crease or wrinkle and destroy the whole roll. The cheapest strong pipe is iron drain pie found at Home Depot. It's also available in longer lengths (12 ft plus) if you need to have your wall supports far apart.