
Slides contain a lot of memories from events past: anniversaries, weddings, birthdays, family vacations and more. If you want to preserve those images for generations to come, you need to think about digitizing them. Here's a rundown of the options available and the results you can expect from each.
First, why do you need to convert slides anyway?
-
Risk of getting lost or destroyed. This is the #1 and most compelling reason to digitize your slides. According to some estimates, the average American moves 12 times in a lifetime. There is always a risk of certain items getting lost during a move and slides stored in small boxes are easily misplaced in the relocation process. They can be accidentally thrown out during a round of decluttering for example. In addition to this, there are other unforeseen events that may wipe out a set of old slides stored in the attic or basement. Faulty electrical wiring may spark a fire in the attic or a toilet may spring a leak and flood the entire basement. While you may not want to dwell on such scenarios, you still have to be prepared for them and take steps to ensure your possessions against destruction. Converting slides to digital format is one way to preserve these images even if the physical slides are irreparably damaged.
- Slides deteriorate. A slide is nothing more than a very thin piece of film enclosed in a rigid square of paper or cardboard. The film can become a place for mold and mildew to grow in moist conditions. In the heat, the glue holding the film in place can melt and ruin the image.
- The pictures are trapped in an old format. Hardly anyone uses a slide projector anymore, and many of those photos don't exist in any other format. Getting them converted to digital makes these photos accessible and shareable.
- The ability to retrieve lost stories. Those photos capture moments in time. However, if you don't know the story behind them, you may not fully appreciate the significance of those moments. Your parents or grandparents are likely to know the details behind these photos. Converting them to digital gives you the chance to ask for and document the stories for future generations to enjoy.
- Simplifying physical storage. For convenience, many slides are held in projector trays, which are bulky and take up a lot of space. When you convert them to digital, you can store them in an archival slide box designed to preserve them. This is more streamlined and space-saving than a projector tray.
When it comes to converting those slides to a digital format, you can choose to take the DIY route or use a professional service.
Doing It Yourself
If you decide to tackle the project yourself, you will need to purchase, rent, or borrow one or more pieces of equipment to help you with this process. You will also need decent quality photo software to clean up the digital scans.
Here is some of the equipment to consider for your slide digitization project:
- Slide scanner
- Flatbed scanner
- Slide projector and camera
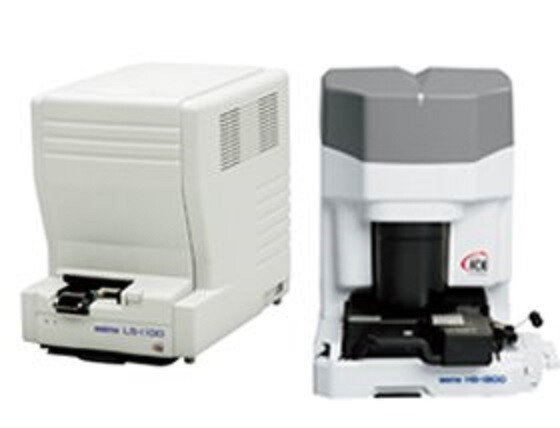
Slide Scanner
A slide scanner is designed to scan and digitize individual slides quickly and efficiently. If you have hundreds or thousands of slides to convert rather than just a box or two of them, the cost of a slide scanner may be justifiable. When selecting a slide scanner, you need to consider the quality, speed, and compatibility of the equipment with your laptop or PC. Better quality scanners will give you higher resolution scans but also come with a bigger price tag. Speed is another important consideration. A slower scan rate translates to more time spent digitizing a single slide. You also need to factor in the time spent transferring the scan file from the scanner to the computer.
Lastly, compatibility with your current laptop or PC is a key factor. Some scanners have trouble transferring files to older computers.
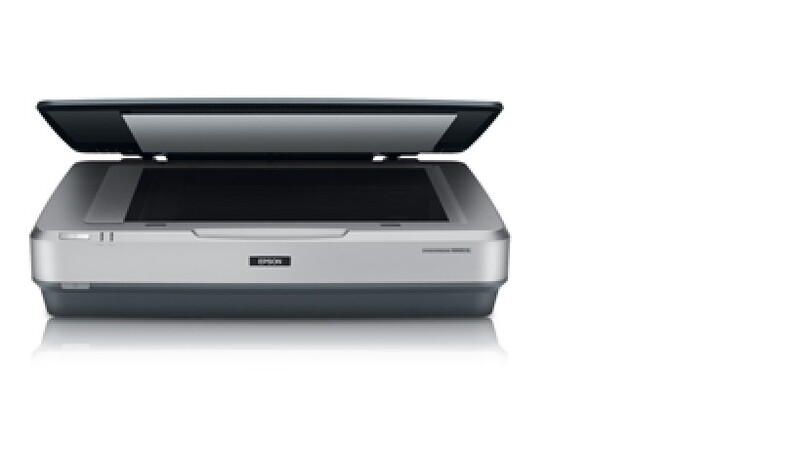
Flatbed Scanners
A flatbed scanner is a more economical option for scanning slides compared to a slide scanner. However, since they are not entirely designed for slide scanning, the results may be variable.
Flatbed scanners capture images based on how light reflects off a document. In contrast, slides are meant to have light projected through them in order for us to view their images. When using a flatbed scanner for this project, you will have to provide some form of backlighting. The scanned image may still suffer from poor lighting and need tweaking with a photo editing application.
Another consideration with flatbed scanners is their ability to capture the details in a 35mm slide. Higher resolution flatbed scanners are more costly.
Projector and Camera
The last option for converting slides to digital is the projector and camera method. It involves projecting a slide onto a wall or screen, then using a digital camera to capture the image. The results are not likely to match the quality of either of the other two methods.
Going With a Professional
The best and most hassle-free option for converting old slides to a digital format is to let the professionals do it.
Here are a few reasons to consider a service:
- Quality: A slide-scanning service uses professional-grade equipment to scan slides. This results in clear scans that capture all the details in the original slides.
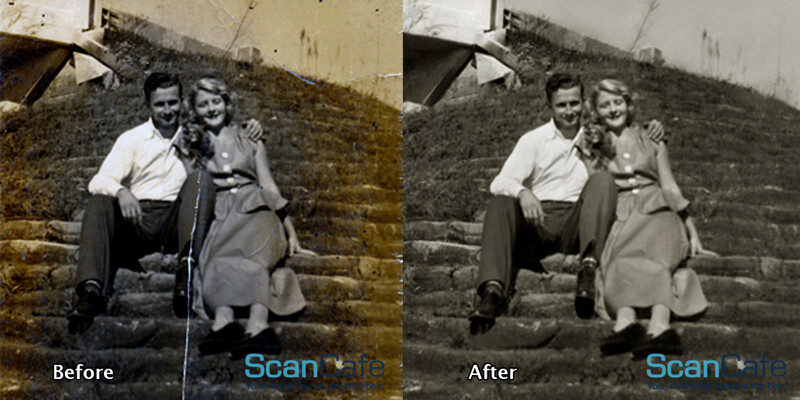
- Professional editing: Once a slide is scanned, an experienced professional will adjust each scan to correct for the effects of time. They may involve color correction, red-eye removal, scratch removal, and much more. The final image can look as fresh and updated as a recent photo.
- Speed: DIY slide scanning can be tedious and aggravating for the non-photo specialist. It takes a minimum of 2-3 minutes to scan a single slide and transfer it to your computer. Then you have to use photo software to tweak and optimize the image. By using a professional service, you can have any number of slides scanned and converted in a short period of time.
- Convenience: Using a scanning service will eliminate the need to spend precious weekend hours on a project that may take a fairly long time to complete, depending on the number of slides you have in your collection. All you have to do is box your slides and ship them to the service, and they will take care of the rest. If you value your time, then using a service is not just more convenient, but may also be more cost-effective in the final analysis.


Join the Fstoppers community for free
-
Post comments and join in the discussions
-
Browse the site ad-free
-
Share your work and get featured in the community
-
Compete in the photo contests for fun and prizes
19 Comments
I've just do this but I used a macro lens and speedlite. Pretty decent results for my needs. If I had more then 5 slides to copy as solution like yours would work better.
It’s that easy?! Going to try this it! Thanks!
Macro lens and an adapter like the Nikon ES-2, Film Toaster, or some sort of DIY rig to hold slides in place is a pretty good solution to speed through a bunch of slides. Good thing here is that many older macro lenses are plenty sharp for this purpose so you don't even need to necessarily buy the newest thing for hundreds of dollars. I use a Nikon 55mm f/2.8 AIS with a PK-13 adapter that I picked up for $100 and it's sharp enough to get crisp 40+ megapixel "scans" from slides and negatives with the ES-2.
The only crap part is that if you do it this way, you need to make sure you're keeping your environment and workflow clean because you won't have the feature present in most dedicated scanners to do automatic dust removal for you. Pros and cons...
What about color depth? I'm no expert, but I know my DSLR maxes out at 14-bit color while my scanner can do 48-bit color. It would seem the latter would be better for the increased dynamic range of film, even if it ultimately ends up as an 8-bit JPG on the web.
14 bit per channel... so 42 vs 48. The output jpg is 24 bit colour jpg... :)
Ahhh. So it’s not 48-bit per channel on a scanner but overall.
great post! very recently a favorite uncle and me have been reviewing a lot of memories he has stored on slides of the family. in some cases the slides are of memories from almost 60 years ago.
There is one more method: Use a macro lens and a film holder to photograph slides using a DSLR or an ILC. However, I found it very difficult to deal with negatives. I still have my LS5000 + slide changer and roll film adapter. Nikon Scan software was so primitive regarding white balance etc, and they simply let it go when film scanning turned secondary. I agree, that scanning is very laborious and I am tempted to look into a professional scanning service, such as ScanCafe. Price is a factor though: I have almost 200 rolls. With ScanCafe price of $0.35 per image it totals to $2520 is my math is correct...
To shoot my negatives I cut a hole the size of the negative in a black piece of thin cardboard and use a couple of lite weights to hold it in place on a backlite. I use a100mm macro then download the pics into Photoshop and invert the pic and make adjustments.
Ummm - projecting the image and shooting the projection? I guess you could or you could use one of the many slide duplicating lens attachments out there. Like the Nikon ES-1
https://www.nikonusa.com/en/nikon-products/product/slide-copy-adapters/…
This is how I do it: http://blog.brunodomingues.photography/2018/11/20/scanning-film-negativ…
Sony A7R III with a Canon 100mm Macro (and some other bits and pieces) :)
I use the Epson Perfection v700 scanner to do this. Here is a link to my blog where I give a bit more detail.
https://geoffthompsonsblog.blogspot.com/2017/08/save-it-for-rainy-day.h…
I use the Epson V370. But I'm not a professional and the only slides I have are 50 years old from my grandparents' basement. So $110 for a scanner that allows me to get to 2400dpi without it taking too long is sufficient.
There is NO question that the V700 blows the doors off the V370. But the V370 is the hobbyist's version. It comes with a rack for slides and it comes with a rack for 35mm negatives. The software works well (PC for me) and the cost is right on.
I was a little shocked that the article didn't touch on the fact that there are now plenty of flatbed scanners that are designed with photographers in mind. The idea of needing to "figure out" how to scan slides with a flatbed is not really a thing any more. It was plug and play for me.
So is this article meant to inform people about the possible means of digitizing old film and slides, or meant to just convince people that it's just no fun and too much work, so they pay someone like Scancafe and Photogurus to do it? The author didn't even bother to mention the option of digitizing slides by photographing them using a Macro lens instead of projecting them against a wall. This article is nothing more than an ad.
I used an LED lightboard that’s used for tracing drawings and a macro lens and the results were super. The negative looks like nothing . It’s amazing when you turn it positive. Slide film in particular converts really well. Colours were excellent. A couple saw their 1950’s wedding in colour for the first time. They were given slides but never had a projector to view them.
https://goo.gl/images/H5bbk8
Pick up a nikon film / slide scanner used on ebay. Scan all your stuff. Sell it on ebay for what you paid... free slide scanning!
I designed and 3d printed this contraption for holding and lighting slides so I could shoot them with a gh5 and a macro lens. It's freely downloadable on thingiverse for anyone to print. Works great for converting many slides very quickly. If I have a slide that needs more attention, I use a flatbed. https://www.thingiverse.com/thing:2613530
I've always used www.supaphoto.com but his has really given me a great insight into the process and I find it truly fascinating, definitely something I see myself trying in the future.