
Many countries around the world are now experiencing social distancing and practicing self-isolation, me (in the U.K) included. So I’m pledging to run a series of photography tutorials for those of us affected by these measures.
The idea behind this series of tutorials is to shoot a different style of photography in each room of my house. The reason being that we all have different housing statuses and I don’t want anybody to be excluded. So whether you’re confined to one bedroom in a house share, live with a partner in an apartment, have a growing family in a semi-detached house, or have oodles of space in your mansion, there’s going to be at least one article for you.
I want to make these tutorials as inclusive as possible, so I’ll be making sure they can be done on a minimal budget, with items we already have in the house or can easily make in a DIY fashion. So let’s get started with our first tutorial: product photography in the living room.
To keep things as simple as possible I'm going to use one light, one product and my camera on a tripod. I've stripped it right back, discounting backdrops, photo boards, flashguns, flags, or scene dressing. There should be no reason (short of not owning a flashlight) that you can't replicate this in your own home. However, if you find that you can't do this for whatever reason, reach out in the comments below and I'll be sure to take a look and help out.
Set up Your Scene

The Nikon D750 was on the tripod to keep the camera still during exposure. The SLR, my product, was placed on the sofa, near the edge to allow the background to fall out of focus.
I grabbed my flashlight and an old SLR then set myself up on the couch. My plan was to light up sections of the camera with my flashlight during a long exposure, similar to light painting techniques, to give the effect of shooting in a studio with big softboxes and complicated flag set-ups. I put my Nikon D750 on a tripod as I needed it to remain completely still during the long exposure, to keep things sharp.
Make it Dark

I closed the curtains to make it dark enough for a longer exposure without having extra ambient sunlight, lighting my scene.
My aim here was to only capture light from the flashlight, leaving the background to drop into darkness, so I drew the curtains. That way, the bright light from the flashlight would overpower the ambient light in the shot and isolate the SLR from the background.
Shoot in Manual Mode

A narrow aperture and low ISO allows me to get a long shutter speed of three seconds to complete my light painting.
In manual mode, I chose a narrow aperture of f/16 in a bid to keep things dark enough so that I could use an exposure length of a few seconds without overexposing my image. Unfortunately, that wasn’t quite enough so I dropped my ISO down below 100. On Nikon cameras, this displays as Lo and I chose the lowest on my D750: Lo1.0. This gave me a shutter speed of around three seconds, just enough time to maneuver my flashlight.
Bonus tip: engage the self-timer or exposure delay mode to give yourself enough time to get in position with the flashlight, and stop any camera movement before your long exposure to keep things sharp. Alternatively, you could use an external remote shutter release.
Experiment With the Light

Moving the flashlight in a semi-circular arc around the SLR during a three second exposure, I gave the impression the product was lit with more than one light.
It took me several attempts to get happy with the position of the flashlight on the camera. Eventually, I settled for a circular pass over the top of the SLR, starting at the bottom-left and drawing a semi-circular arch around the SLR until I finished at the bottom-right, shining the light down onto it as I went.
Take Multiple Shots

Keep the camera and tripod steady while you shoot, and try not to reposition. I took several shots of the SLR and highlighted different sections of the camera. Because I kept everything still, that meant I could composite the images together in editing software later and highlight certain areas of the product by masking them in. Something which I’ll be demonstrating in the next part to this tutorial.

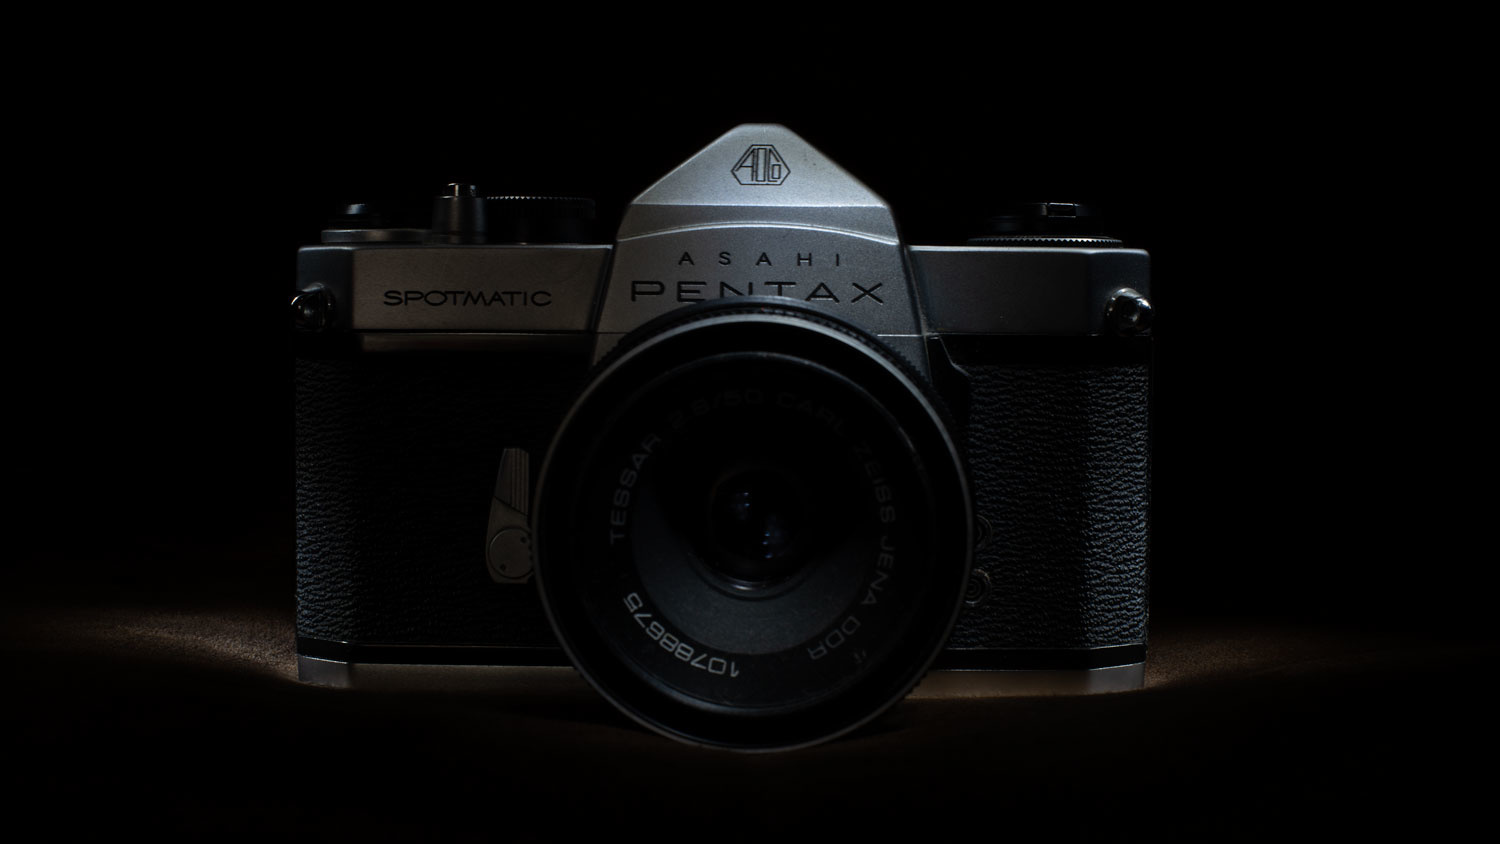
Using a little light painting and by blocking out sunlight we can achieve a simple, stylish product shot with just one flashlight
The finished product. With a narrow aperture, long shutter speed and low ISO I've managed to create a shot that looks like it's lit with multiple lights, instead of just one flashlight. You can't even tell it's just taken on my couch as the background is nice and dark.
To all you professional product photographers out there: this is intended to be a quick and simple approach to product photography — so you might find it a little easy. So I intend you to scale these to your skill level. Therefore, I challenge you to find some awesome ways to enhance the end result. If you do, please share your experiments down in the comments below.
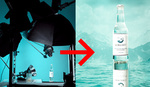
The second part to this tutorial will be on editing three separate, light painted shots together in editing software, by using a combination of blending modes and masks to reveal more detail and texture to this product photograph, so be sure to check back soon for that update. Also, come back regularly to find more content from me in this self-isolation series for fresh projects to try. I'm going to cover topics such as portraiture, macro photography, nature, food, abstract, astrophotography, and time-lapse. Plus, I've yet to venture into the kitchen, bathroom, bedroom, and hallway. I don't have a garden but I will be shooting from my window to prove you don't have to have a garden to partake in these tutorials.


The question I have; how do you sell the photos? What legal documents do I need to write up for rights? Where to find clients?
It was pretty clearly stated to be a photography tutorial, not a business tutorial.
Very nice, thanks. That gave me a few ideas!