
Over the last several years, I've spent a lot of time testing phone cameras capabilities, and the results are better than you'd think. If you want to get up to speed, you can watch last year's comparison between my Canon R5 and the iPhone 15 Pro. If that isn't enough to convince you, then maybe you'll be interested in how well these images print as well. Or if you want to save some time and just take my word for it, modern phone cameras are very capable cameras.
This touches on a really important mindset when it comes to phone photography. You need to take yourself seriously. Just because you aren't using a mirrorless camera with a bunch of big lenses doesn't mean you aren't fully capable of producing professional images. In fact, one of the greatest weaknesses of phone cameras is also their greatest strength. You lack lens choices, settings choices, and versatility. This lack of choices restricts your ability to create, but this is when creativity thrives the most. Typically, we find ourselves being the most creative when we have the least amount of resources. This means that if you find yourself learning photography on your phone and walking away with good images, then you'll always take good images, no matter what you're using.
Shoot With Intention
The most important tip in this entire article isn't about settings, composition, or how to shoot. It's to rewire your brain to stop associating your phone with quick and thoughtless photos. One of the biggest differences between someone making images with a phone versus a dedicated camera is how they approach a scene. A landscape photographer shows up to a sunset and potentially spends hours looking for a composition or waiting for the best light. Typically, people capturing images on their phone walk up, take a quick photo for their memories, and walk away.
This difference is what separates amateur from professional, not necessarily the camera, settings, or gear being used. Thus, it's important that you treat your phone like a camera in the moments you're either trying to improve your photography or capture more meaningful photos. Take your time, slow down, and put thought into the images you're composing.
Settings and Camera App
The first setting you want to enable is grid lines. I personally shoot on an iPhone, and the grid line setting is located in Settings > Camera > Grid. I suspect Android has a very similar setup. Regardless, this is a simple feature that more often than not will help you compose your images by just making sure your horizon lines are straight. Newer iPhones even have a feature to add a leveler to your interface, which I also recommend using. Furthermore, using this will start to introduce you to composing using the rule of thirds, which is one of the foundational pieces of composition in photography. Not something in the scope of this article, but absolutely something you can learn right here on Fstoppers.
The most important setting is to shoot in raw, especially if you plan to edit your images. Raw is essentially a format that will give you more data to work with and capture more details in your image. The cost is twofold in that raws are meant to be processed or edited in some capacity. Thus, if you're shooting in raw, you should plan to at least add basic corrections in editing. The files are also going to be large or potentially much larger, which might be an inhibiting factor depending on your phone's storage. A good way to manage these large file sizes is to remember to shoot with intention, take your time, and only take images like you've got one roll of film left.
There are different levels of raw when it comes to phone photography. Apple, for example, has raw, ProRaw, and ProRaw Max. As a baseline, try to shoot in raw, and if you have the space, choose the highest quality, such as ProRaw Max, keeping in mind the very large file sizes.
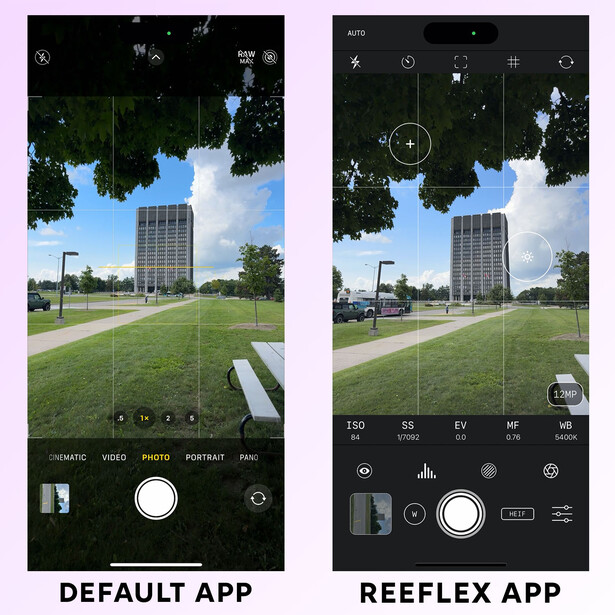
Lastly consider using a camera app that adds some more professional controls to your images. I used Reeflex throughout my video and it has features like histograms, ISO control, and the ability to set focus separate from exposure. Regardless of what you use, the best feature of using an app is actually a mental reset. It will help to shoot with intention, remind you to slow down, and think about the images you're taking.
Composition Practice
One of the foundational fundamentals of photography is composition. A topic you'll likely spend years learning and not something to be taught in a few sentences in an article. However, there are a few great tips you can try out, even having zero knowledge of what makes for a good or bad composition. As mentioned before, you can apply basic rule of thirds principles, which is essentially a guide on where to place your subjects within a frame to help balance an image. But I'm going to give you some even easier tips to try.
The next time you are out shooting with intention on your phone, find a subject and try to photograph the same subject five different ways:
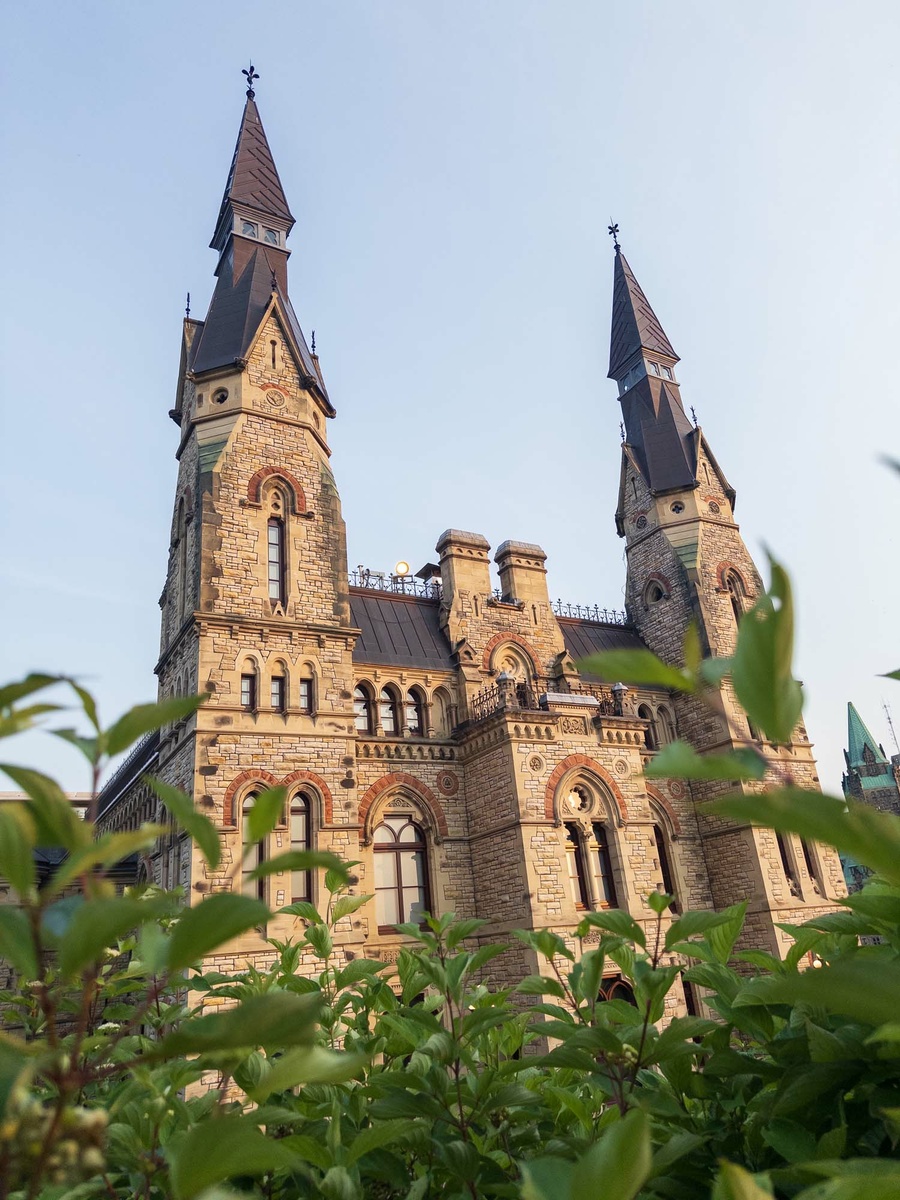
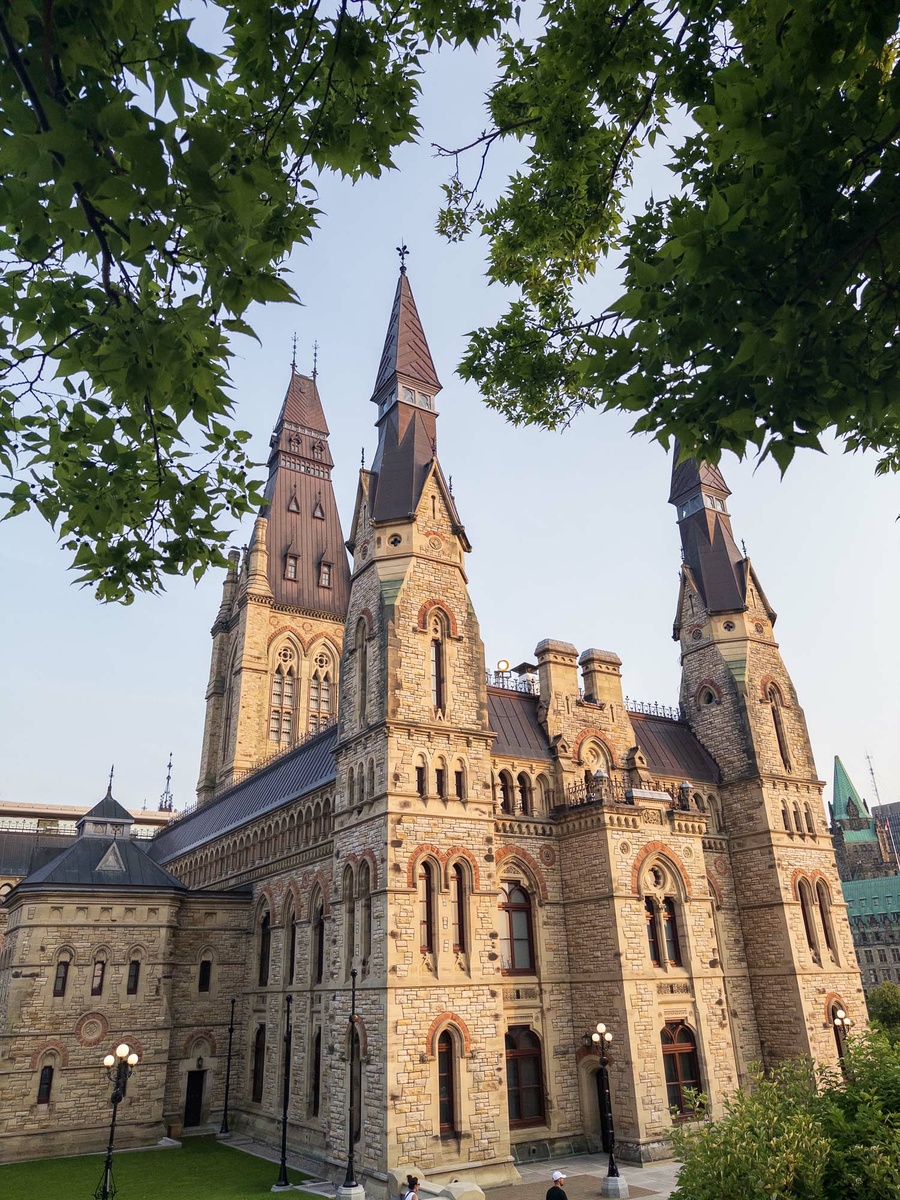
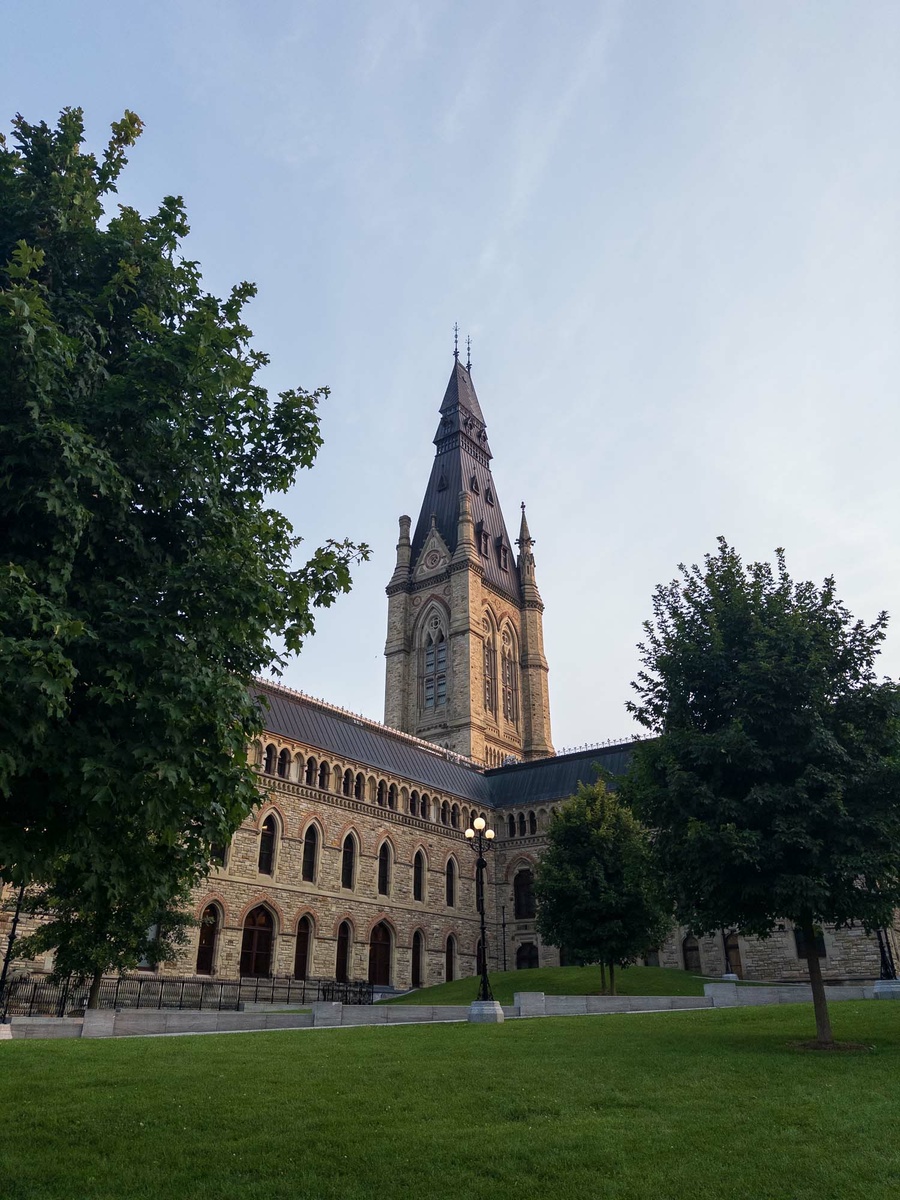
- Try getting lower to the ground. Don't just walk up to the subject and not move around! Getting lower to the ground provides a unique perspective and can put a foreground element in the bottom half of the frame that makes for a much more interesting image. See the above example, taken only a few steps apart from each other.
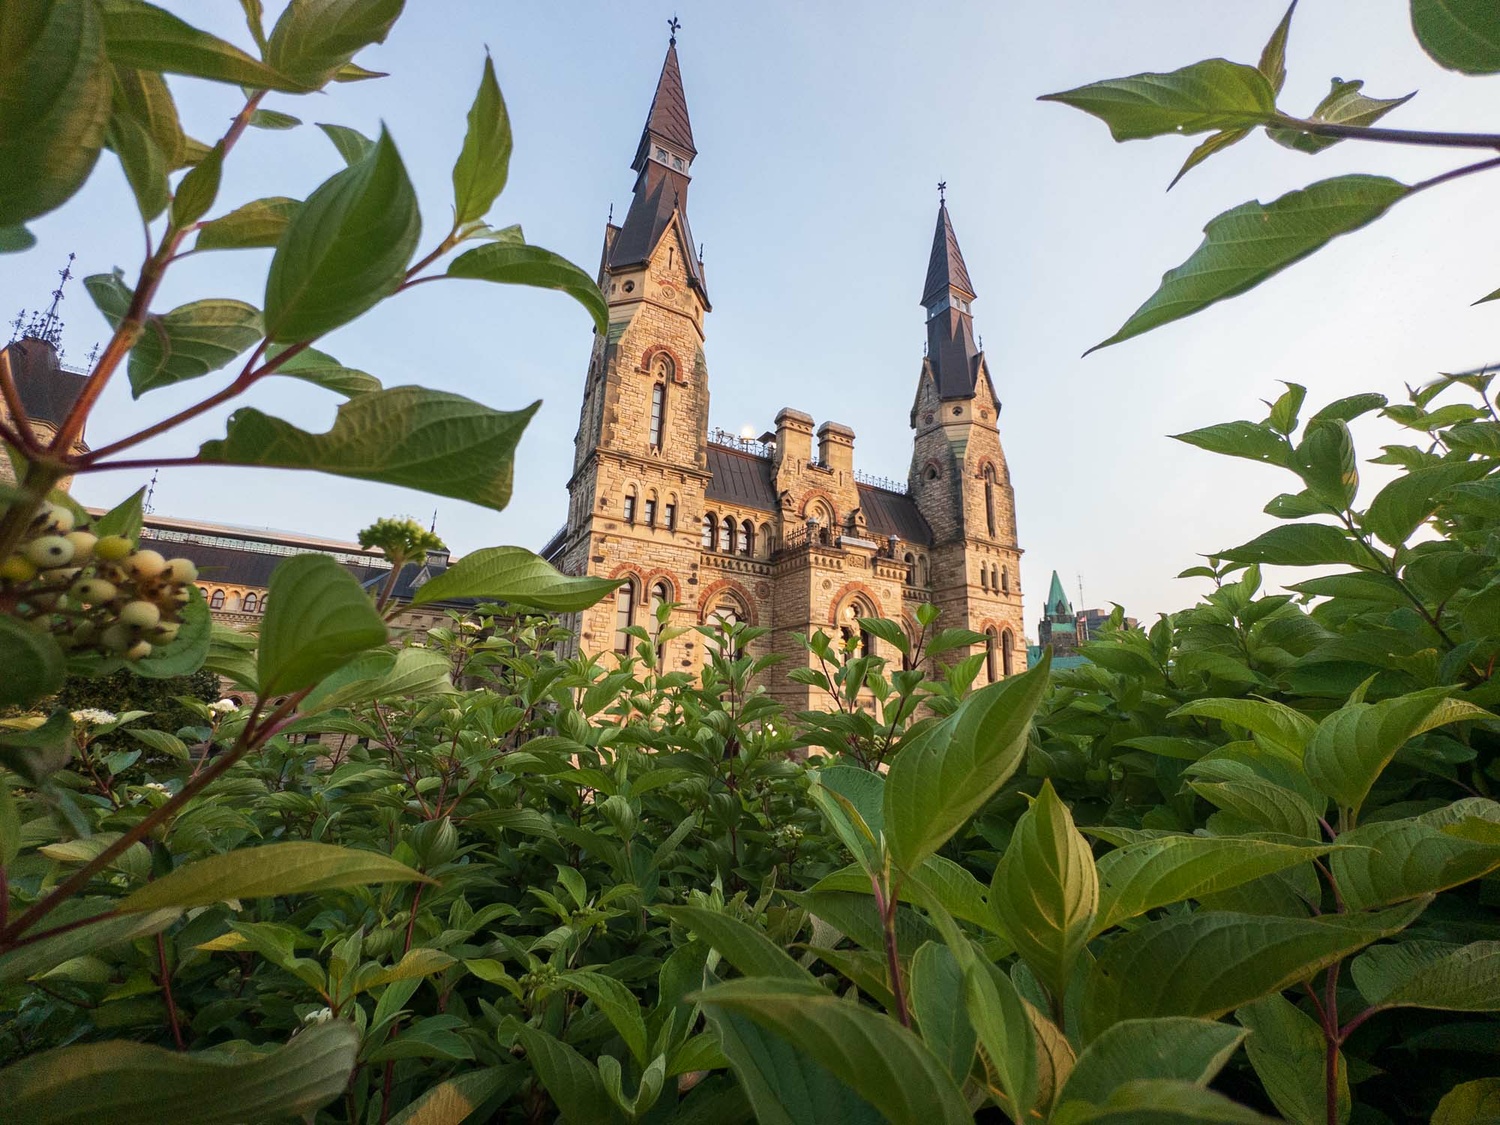
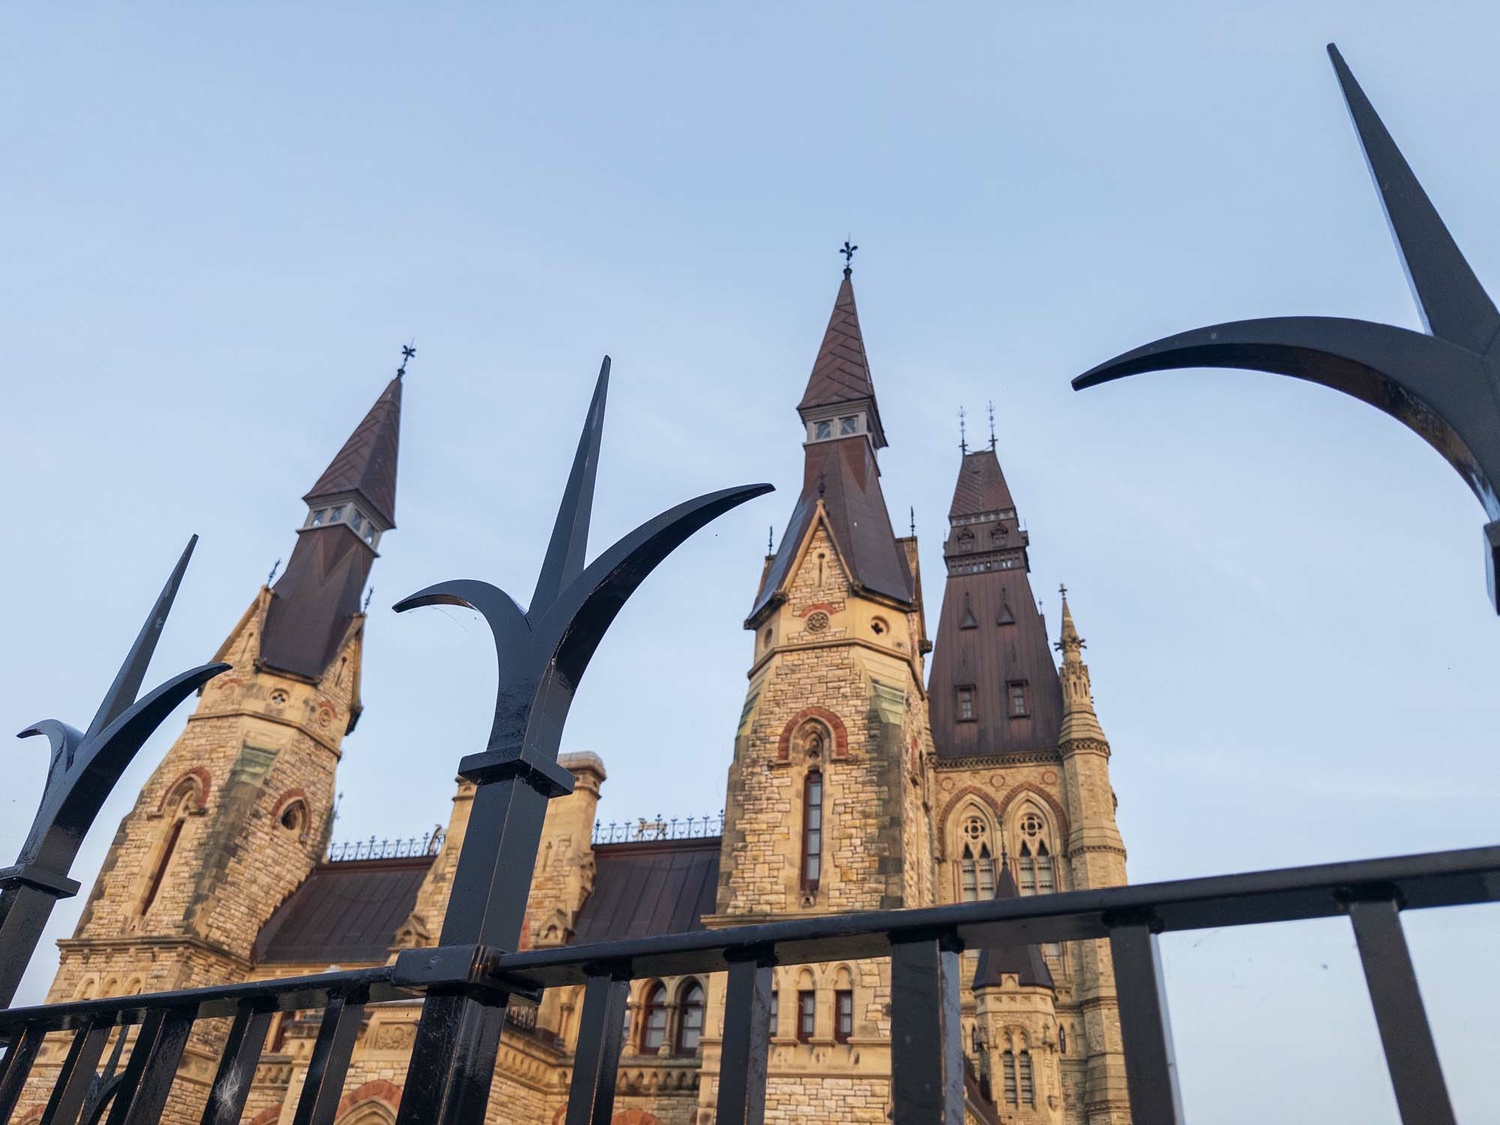
- Shoot through something else. This could be a fence, a tree, a bush, some flowers, leaves, anything. Got a bunch of boring blue sky in your photo? Find a tree and use the leaves to fill the top of your frame with that element while still capturing your subject.
- Walk around paying attention to the light on a subject. Where are the shadows? How do they interact with the angles of your subject? Be sure to think about how the light is falling on your subject and continually remember your camera will not necessarily be as good as your eyes, so you'll need to move around and find where the light is best.
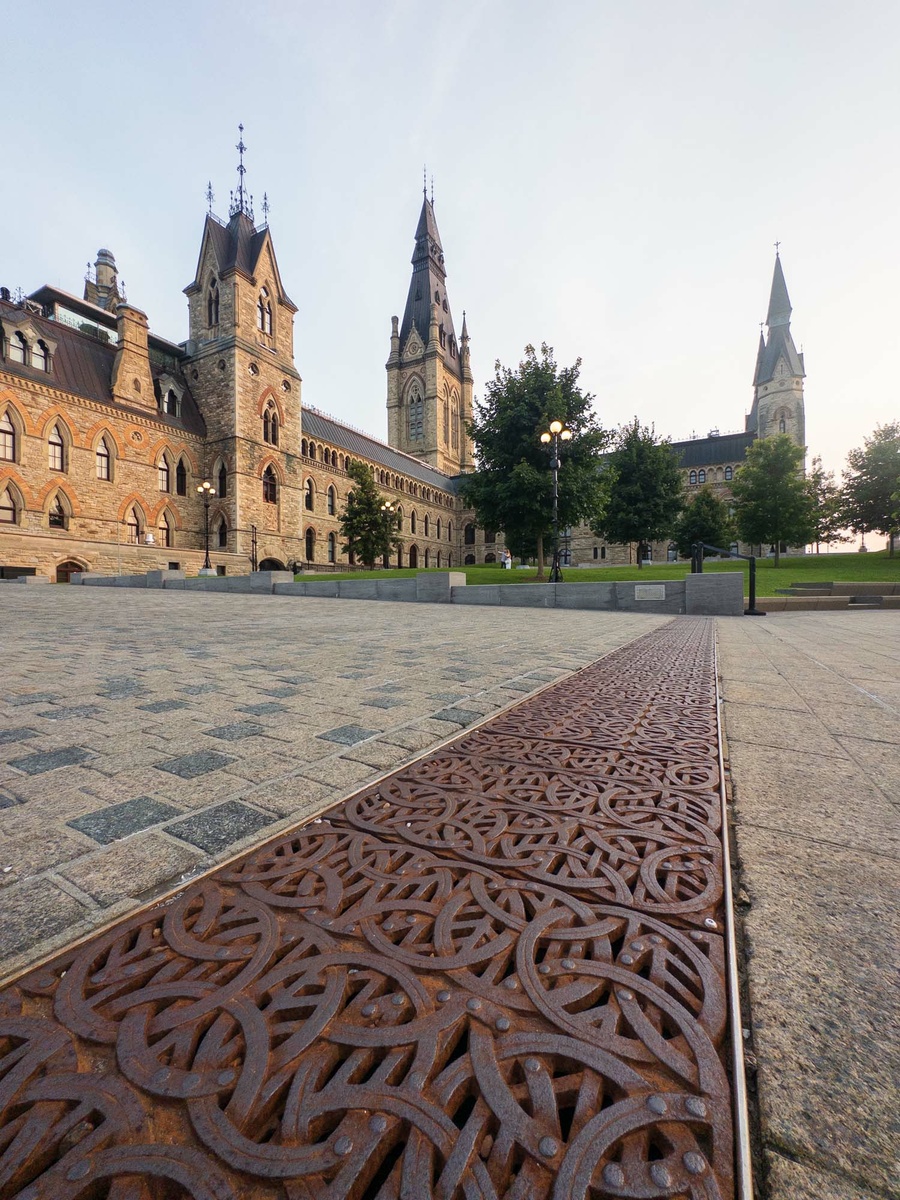
- Find a leading line such as a pathway, a road, a row of trees, water, anything. Try putting something in the bottom half of your frame that guides your viewer's eye to the subject.
- Find a secondary subject and use it within your composition. Instead of photographing that building, photograph it behind a lamp post or a stop sign. Instead of photographing that mountain, photograph a flower or cactus with that mountain in the background. This is a dance and balance you'll have to play around with. Have fun with it!

Lighting
Any professional or practicing photographer will tell you that the single most important aspect of photography is lighting, regardless of what genre you shoot. Just like in composition, this is something you'll spend years learning, but for the scope of this article, the important thing is recognizing when we typically take our phone photos compared to when professionals take their photos.
It all comes back to shooting with intention. Many of our phone photos are taken during midday on a bright sunny day walk around the city or on a hike in the mountains. These are the times that typically just aren't going to have as pleasing light (depending on the genre of photography). But if you push yourself to be up for sunrise or be out during overcast light at the right time, your images will dramatically improve.
There are so many different styles of light based on the genre of photography that interests you the most that it's impossible to cover here. The point is to prioritize finding good light instead of just snapping photos when it's convenient. I can take sunrise photos on a potato that will likely be more pleasing than if I shot clear blue skies midday with an expensive camera. Learn what lighting excites you the most for whatever it is you want to shoot and prioritize going out during those times.
Editing
Editing doesn't have to be complicated, and one of the most important roles of editing isn't the edit itself. It's that it forces you to review your images. It makes you sit down, go through your mistakes, and critically look at all the work you created. This forces you to decide what image is better than another and why it pleases you more than another. It also gives you the chance to see what you can improve in the field the next time you're out capturing images. If you just take photos and never look at or touch them again, it will greatly slow down the progress you make in your photography journey.
When it comes to editing itself, I recommend grabbing Lightroom mobile for your phone. It's free (with limited abilities) and handles raws directly on your phone. There are more powerful phone editing apps that will cost a fee but likely not a subscription. However, I'm recommending Lightroom because it is something you can grow into if you continue to pursue photography. The interface and tools carry over directly to their paid version, thus giving you room to grow within your editing. That being said, most tools will likely transpose from one app to another, but if you, for example, wanted to learn editing via YouTube videos, then the majority of those will be done within Lightroom.
The best way to start learning editing is just to explore what everything does. Adjust some settings, press buttons, and see what you can come up with. Then once you want to know more about specific tools or ideas, you can start researching and teaching yourself at your own pace what you want to learn. Some people love the process of editing while others don't even want to touch it. That's for you to decide and find out!
I hope you enjoyed this, and I'd love to know your own experience or tips in the comments. I'm going to end this with a few more quick tips to follow when you're shooting phone photography.
- Don't shoot with the sun in your frame. Phones are still quite bad at capturing the sun.
- Only use native lenses on your phone. Do not pinch to zoom. This will digitally crop your image, which you can do yourself later in the edit.
- Clean your lenses before shooting!
- Pay attention to where your hands are when shooting. It's much easier to get your fingers in front of your phone lenses than a camera.
- Take yourself seriously. Phone cameras are cameras, just in a different package.


Join the Fstoppers community for free
-
Post comments and join in the discussions
-
Browse the site ad-free
-
Share your work and get featured in the community
-
Compete in the photo contests for fun and prizes
11 Comments
This was really well done and I think having Sophia tag along with you made this more relatable. It also added great teaching moments that all of us "professionals" probably overlook. Well done!
Thanks Patrick! This will be an ongoing series overtime with her that I hope to provide a new perspective with!
Nice one Alex. Great video. I’m a long time long in the tooth photographer, but have struggled taking images with my phone, Apple 15Pro max. I’ve just found the whole process using the phone awkward. After watching your video and installing the Reflex app I’m going to try to put into practice on a trip today what I learnt from your video. I really liked your friendly approach so I’ll be checking out your other content. Great job.
Thanks so much Eric!
Composition mistakes are the most frequent formy mobile photography, thank you for highlighting this.
"Don't just walk up to the subject and not move around" oh man, that's what I do alllll the time! Gotta work on breaking this habit.
Thank you for talking about editing, too. I found out it's always easier for me to edit my pictures on a bigger screen, so I mostly do everything on pc and use Photoworks, but some pictures are fine with a little Snapseed touch-up. It always depends on a photo and there is no such approach that would fit everywhere.
Its a lot easier than you'd think. Thank Jenny!
Excellent Alex and many thanks for sharing these tips!
I've seen newer phones, that is newer than mine that is "starting" to have abilities to really 'capture' professional photos. There is only one photo in my 'Best-Of' list that came from my phone, I'll post that. I think portraits can be done 'ok' with a phone... maybe. But those newer phones (that is ones I don't have yet), they can zoom and can do AI things that my phone from a couple years ago will not do. For instance I was downtown in my city and I saw these birds, not more than 10-15 feet away up in the air feeding. My phone had no ability to capture them... I know those newer Galaxy S23 or the IPhone15 that you mentioned would have no problem with their zoom capability. Of course I didn't have my real camera and lens with me at the time either. I have included one of the only 'landscape' phone photos I have ever considered worthy. Typically the problem in the past was that Phone-photos just simply didn't have enough mega-pixels, and printing them or doing a lot of editing on them wasn't a great option. Of course you couldn't crop for composition much without there being that digital zoom effect.
As much as I love the photo I posted here... I post a lot to Shutterstock, they still relegated this photo to their 'Data-Collection' instead of in the general search-stock. So someone thought it was 'worthy-but-not-quite-worthy'.
One accessory that I find that really helps switch the brain into 'photographer mode' is a Bluetooth Snapgrip. I was surprised by how strong the Mag safe connection actually is, and not only does it make the phone easier to handle, but I find that when connected I shoot with greater thought.
I actually posted a blog on my own experiences using a Snapgrip if anyone is interested - https://www.alanbrownphotography.com/blog/snapgrip-pro-review
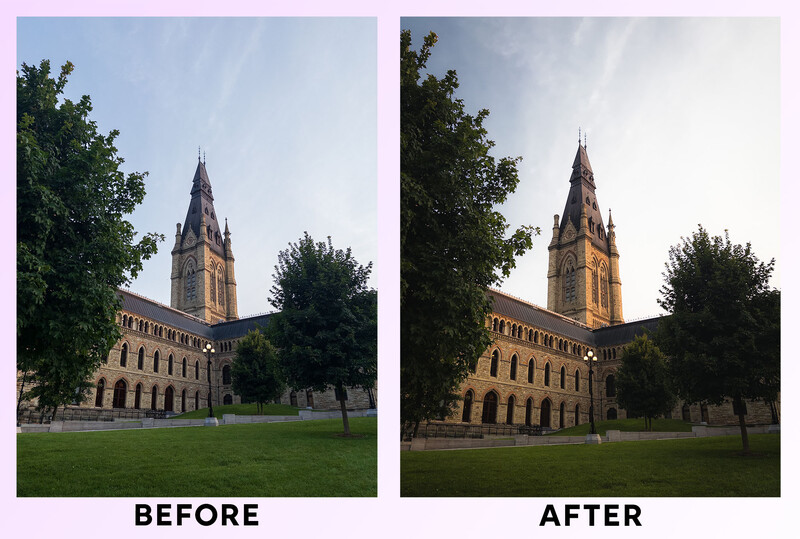
Great article, thanks! Funny though .. I prefer the ‘before’ image of the Lightroom edit (tower & building through trees). Brighter exposure & some colour!
yeah... agree looks a little crushed in the 'after photo'. Sometimes you look at the ending edit and compare the original and go. hmm is it really better? and chuck it and start over.