
A lot of new photographers are told that shooting in manual mode is the mark of a professional. And while manual mode is certainly useful and a great learning tool, you could be missing shots if it's all you ever use.
What Manual Mode Is and When It Is Useful
Manual mode gives the photographer total control over all three exposure parameters: shutter speed, aperture, and ISO. This gives you the highest level of control over both the technical and creative aspects of your image. That might sound like what you want at all times, but the truth is that while humans are smarter than their cameras in the sense of being able to evaluate a scene and make appropriate decisions about technical and creative parameters, processors are far faster at raw calculation, and in scenarios where the exposure is changing at very fast speeds, you simply might not be fast enough to adjust (and I don't mean you, specifically; that goes for all photographers). In these scenarios, it might be better to compromise by deciding which parameters you want control over and allowing your camera to compensate for you using the other settings.
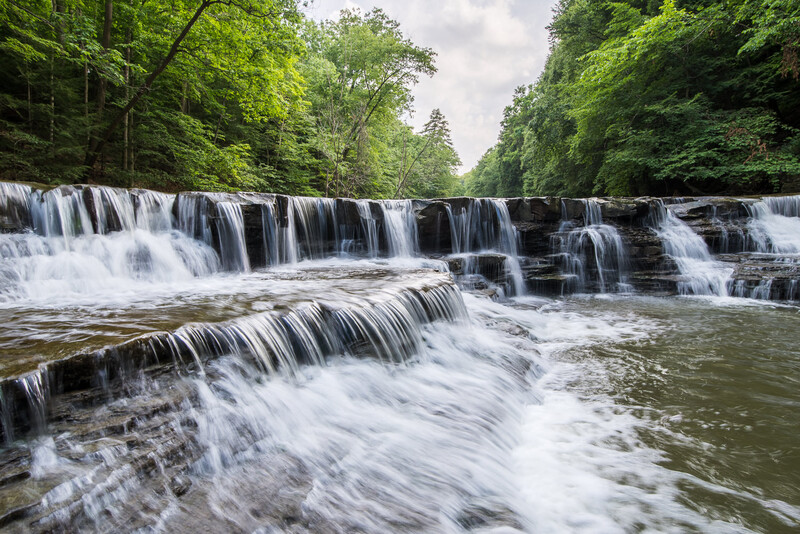
Of course, there are absolutely situations where manual mode is the best choice. For example, a studio photographer with control over their lighting will generally dial in their settings and leave them. Certainly, it would be very annoying to have to correct minor variations in exposure due to your camera's metering in post. Landscape photographers also frequently use manual mode. Anytime you want consistent exposures and a consistent look and don't need to deal with rapidly changing lighting, manual mode is probably the best bet.
Manual mode is also a fantastic learning tool. The exposure triangle is a game of technical and creative gains and tradeoffs, and the successful photographer has mastered these balances. With manual mode, you can vary one parameter at a time and observe the difference. I firmly believe that when you're learning anything (not just photography), one gains the most clarity and understanding by varying one thing at a time so you can observe its direct effects and not have to try to tease apart multiple parameters and consequences simultaneously.
Why Manual Mode Isn't All There Is
Let's be clear: manual mode is a tremendously useful tool for taking control of your images, both from a technical and creative standpoint, and I am not advocating that it never be used. Rather, I am advocating for reaching past the perception that it is all professionals use. Let's look at a wide variety of situations in which another mode would be better suited for the task.
Shutter Priority
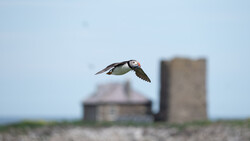
Let's say you're photographing birds during the middle of a partly cloudy day, when there's plenty of available light. Since you are photographing them against the sky, there aren't concerns about a busy background. Your primary concern is freezing the birds in flight to get a crisp shot. In other words, your primary concern is shutter speed. Given the high level of available light, why not use shutter priority mode to keep the fast shutter speed and low ISO, then let the camera decide on the aperture since the background isn't a concern?
Why is this superior to manual mode? Well, given that it's partly cloudy, the sky is likely a mixture of clear areas and clouds of varying brightness. Tracking a bird through the viewfinder while using a telephoto lens is hard enough, and none of us are quick enough to manually change the exposure as the birds alternate flying in front of clouds and clear sky. Your camera's processor is perfectly suited to that task, though.
Aperture Priority
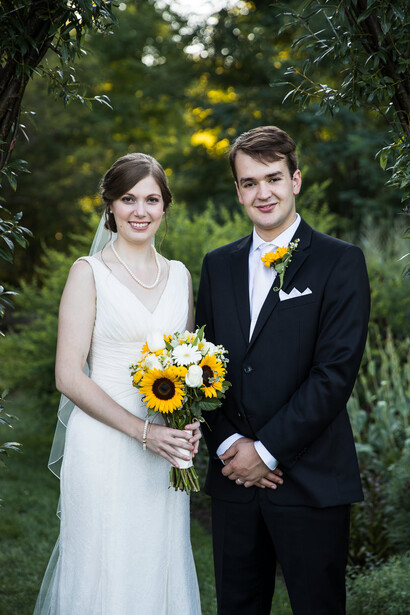
Wedding photographers love this mode and for good reason. In this mode, the photographer sets the aperture, and the camera compensates accordingly with shutter speed. This is highly useful, as it allows you a lot of control over the look of your images, as aperture is one of the most powerful tools creativity. For example, say you're shooting a wedding and moving in and out of a tent to photograph guests at the reception. Given the rapidly changing lighting, you might want to use a semi-automatic mode to keep your exposure in check, and given the busy background of a crowd of people at a reception, you might want to always use an aperture like f/2. This would be the time to tell the camera to hold the aperture and compensate with shutter speed, giving you properly exposed images with the blurry background you desire. Aperture priority is probably the most popular semi-automatic mode.
Manual Mode With Auto ISO
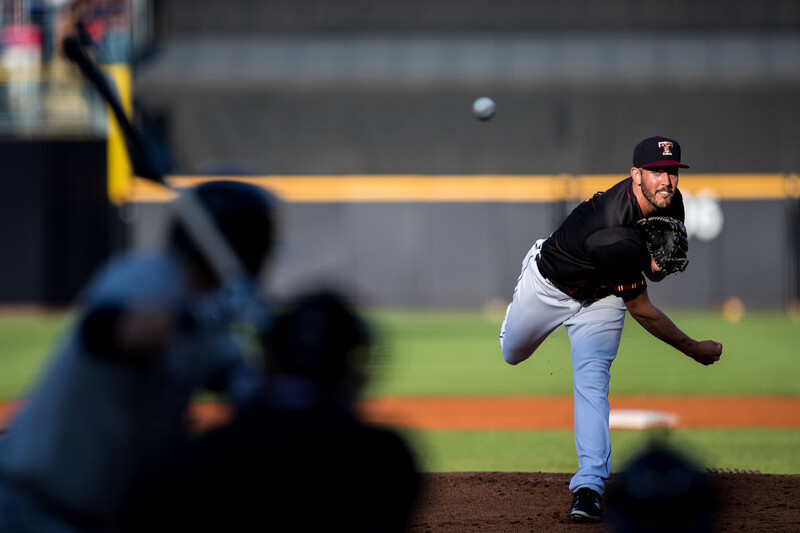
This is the mode I use for shooting baseball games. Baseball fields are full of light and shadow, and when the ball is flying across them at speeds often exceeding 100 mph, there is simply no way to adjust your exposure in real-time. However, given the action, I definitely want a fast shutter speed, normally around 1/1,000 s or 1/2,000 s. And given the crowds, banners, and generally busy backgrounds, I almost exclusively shoot at maximum aperture (this is also often necessary for light-gathering reasons). So, what's left? ISO. For these scenarios, I use manual mode with auto ISO linked to my focus point.
How to Get More out of Semi-Automatic Modes
Metering Modes
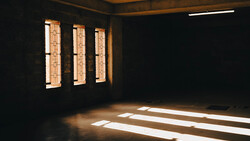
Something that does not get discussed enough is the choice of metering mode. However, this is crucial, as this determines how your camera weights the light in a scene when it decides how to adjust the parameters you've given it control of in a semi-automatic mode. Most cameras default to an all-purpose mode that measures light across the majority of the frame and gives it relatively equal weighting. This might not be best, for example, if you are shooting a dark subject against a bright background and don't care if the background is blown out. The bright background can trick your camera into lowering the exposure and underexposing your subject. Consider switching to a differently weighted metering mode. My personal favorite is autofocus point linked spot metering. In this mode, the camera meters the exposure wherever the autofocus point is since that is probably an important part of the image. Not all cameras have this mode, but if yours does, I recommend giving it a try.
Exposure Compensation
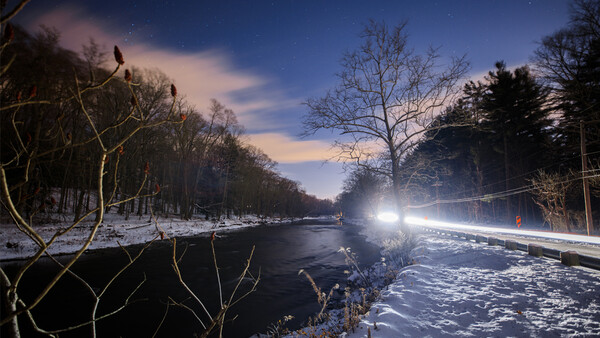
Every camera metering system is imperfect, and part of your job as a photographer is to anticipate its behavior and compensate appropriately. Remember that digital sensors are far more unforgiving of overexposure than underexposure. As such, when I shoot with auto ISO in manual mode, I normally set my camera to underexpose by a third of a stop. It gives me just enough of a buffer to be safe, and raising an exposure by just a third of a stop or so in post if necessary almost never affects the overall image quality, especially if you're shooting in raw. Generally, there are certain situations that will fool a camera's meter (such as a bright, snowy backdrop), and you will often have to anticipate and adjust accordingly to get your desired shot.
Set Parameters
Most cameras will allow you to do things like set lower bounds on shutter speed in aperture priority. This basically tells the camera to use the aperture you set at the lowest possible ISO and adjust the shutter speed accordingly, until the point at which the shutter speed becomes too slow to obtain a sharp exposure, at which point it should begin raising the ISO instead. Settings like these dramatically increase your keeper rate in scenarios in which you are using semi-automatic modes with more extreme shifts in lighting.
Conclusion
No doubt, manual mode is a fantastic tool for photographers. That being said, it's not the only tool, and we should take advantage of our cameras' capabilities to make exposure adjustments faster than we can when dealing with rapidly changing lighting scenarios. Used properly, semi-automatic modes can significantly increase your keeper rate and make you job far less stressful.
Join the Fstoppers community for free
-
Post comments and join in the discussions
-
Browse the site ad-free
-
Share your work and get featured in the community
-
Compete in the photo contests for fun and prizes
19 Comments
I've definitely messed up some potentially great shots by fumbling around with Manual mode settings. I'm gonna start using the semi-auto modes more often. Good article
Shoot in whatever gets the shot.
Totally agree. I usually travel with a Leica that I use in manual mode and a Ricoh GR that is almost always set to snap focus and aperture priority. They both do the job, but generally at different times and at different locations.
Dont even have to read this to know, YUP. Over thinking gets me everytime.
Aperture priority most of the time for me... oh and cheating with mirrorless where I just see the actual shot before I click the shutter. I think manual is fine when you’re on a tripod and have time, otherwise one of the priority modes and exposure compensation makes life way easier.
What works for me is using either Aperture priority mode (mostly landscape or stationairy objects) or Shutter priority (moving objects or low-light conditions) in combination with exposure compensation. This way, you have full control over your exposure while still using the potential of the camera's intelligence.
I've tried auto ISO when shooting BIF and have gotten some over exposed images. I'll have to try dropping the EV. Good article.
Depends on what you are shooting and what you want to achieve. There is no one mode that suits all. In my case, I switched over to manual almost a 6-7 years ago for wildlife when I missed a shot in one of the creative modes. The whole idea of using full manual (excepting AF) is to utilise the capabilities of the gear and recover in post and know when not to shoot (light) since it would be deleted later anyway.
I have shared a short video on this based on my experience...
https://youtu.be/7gISjsn-xbk
There's no "magic" to manual mode - it seems that some people seem to think it's how you get the picture that's important. It's not, it's the result that counts.
I shot manual mode exclusively for the first 20+ years of my photography because that's all there was (often with a hand held light meter to boot - I wonder how many of those self-appointed manual mode gurus actually know how to use an incident meter?)
When aperture and shutter priority came along, it was a godsend for speed of operation, and guess what, no degradation of image quality!
I do still use manual mode occasionally, but not often, and never when I can get the result using something easier.
I wish I had read an article like this before I went to Japan last year. I had just been bitten by the photography bug and only had my camera for a month before this once-in-a-lifetime trip. I was a complete newbie but I took all my photos in manual mode because that is what I was led to believe would be best. I now have over a thousand sub-par photos of an otherwise fantastic trip.
You live and you learn I guess.
The manual mode takes a lot of time and effort to learn. It involves your gear and its reaction to light which you have to judge manually. Then you need to round-trip to LR or similar to figure it out.
"P" mode works fine most of the time to start with and you can also override in most current camera bodies. That way, you will have some good shots and the raw which you can process later as and when you get into that part.
The only good thing I did as a newbie was to enable my camera to save JPEG and RAW. I was able to learn how to manipulate my raw files to match or improve on the jpeg versions and it was a good intro to Photoshop. I still haven't gotten the hang of using LightRoom, maybe I'll make that my weekend project.
All the best :)
Use a DAM like LR to organise and keyword your photos from the start, saves a huge amount of pain later. I have a small video on starting to do that, but, the assumption is that you are somewhat familiar with LR...
https://youtu.be/GhnEl1P51p0
I'm slightly surprised that you managed to get over a thousand shots wrong without noticing, no offence. Which raises the next myth that really needs dispelling; that chimping your shots is somehow something you shouldn't do. Checking you have the shot and that it's in good order is something that you absolutely should do.
No offense taken, I am rather disappointed in myself.
So what I meant is that I have closer to 500 shots, duplicated in JPG and RAW, typical amateur tourist shots. Many have typical newbie mistakes like exposure or unintentional blur. My tour had a very fast pace and we covered a lot of ground, so I didn't have time to relax and think of composition. Also, almost every park/site we visited actually had signs posted saying no tripods allowed, guess I wasn't expecting that.
My point is, I should have been more honest with myself and said "I'm not ready for Manual mode 100% of the time."
Don't beat yourself up. Manual mode isn't what it's cracked up to be.
It depends on how you shoot, what you are shooting, and how you want to illustrate it. I used manual for most of my life shooting, half that time shooting B&W Kodak Tri X film. Manual was the only option. I did not need to meter after shooting after awhile most of the time as it became an instinct. Also, the instructions on the box of the film was pretty accurate on exposure. When needed to I used a handheld meter and a spot meter. Also, I approached all my shots like a sniper as processing and printing were expensive.
I love digital and Photoshop. I still shoot like a sniper, with a handheld meter, and on the manual setting. But I love the flexibility of all the aperture priority and shutter priority, it makes life simpler to meet the objectives of what I am shooting.
As for missing a shot, it is ok sometimes you need to take time to just look at the world without a camera and think about it.
My own take on the issue is that the end result is what really matters be it print or digital file, everything else is a means to an end; horses for courses I use whatever it takes including P.