
Some discoveries in life are intentional and some are just happy accidents that work out in ways we never anticipated. I rely on the Transform tool in Lightroom to correct lines and perspectives, but I learned that it can completely change the look of an image to add interest and trick the eye of the viewer.
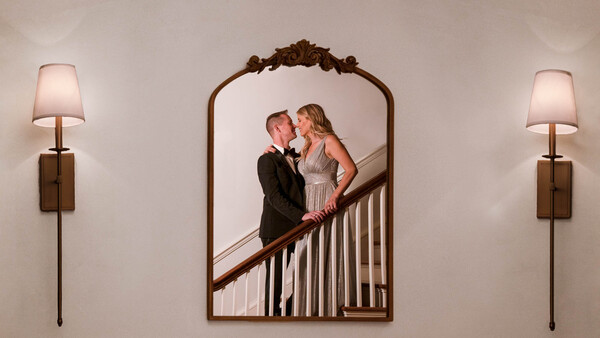
We did a photo shoot for some friends and were faced with the constraints of being in a narrow foyer with a hallway and staircase. I noticed a beautiful mirror and wanted to frame them within it rather than photograph them directly. I find that reflections add some intrigue and dimensionality to the story of a photo, so I’ve trained my eye to look for mirrors, glass, water, etc.
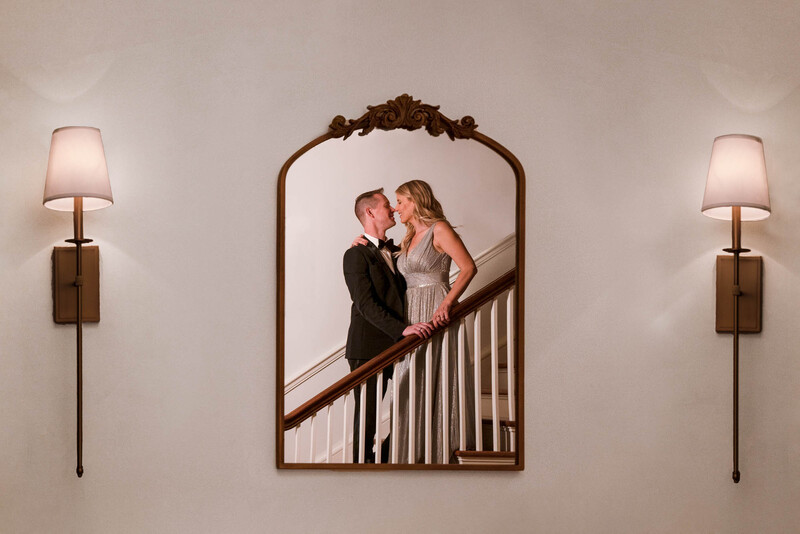
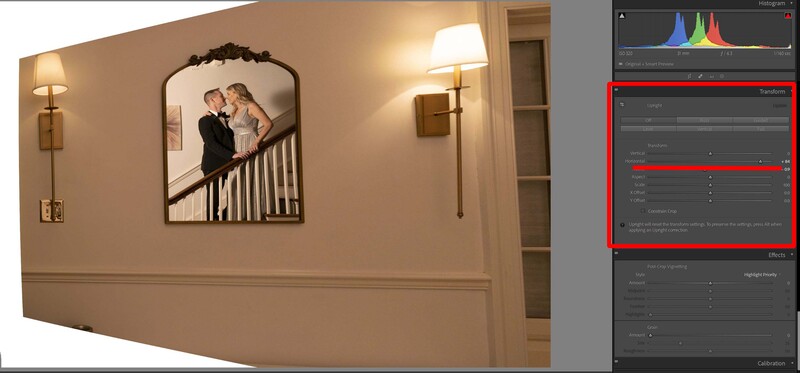
Overall, I was actually pretty content with my original composition but wanted to correct the perspective somewhat and straighten the lines. I almost always use the Transform tool in Lightroom for this, often successfully with just the automatic adjustment. For instances when “Auto” is ineffective, I switch to the individual sliders or use the “Guided” function. In this case, I used the horizontal slider and noticed that it improved the image dramatically. I exaggerated it and found than it essentially brought the subjects directly into the middle and made it appear as if it the shot was taken straight on. The practical effect of this is to trick the mind. Because the mirror is now perpendicular to the shooting angle, one would expect to see me as the photographer in the image yet I’m nowhere to be found.
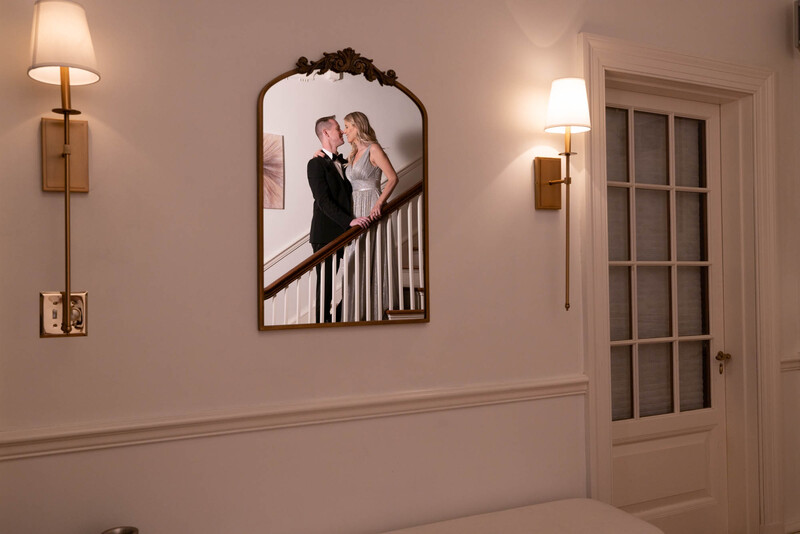
At this point, I had a vision of where I wanted to take the photo, but I needed to fix some issues resulting from the perspective correction. I cropped the photo and used Content-Aware Fill in Photoshop to supplement some areas that had been affected by the transformation.
Another issue was that the right side of the image was altered far more than the left because of the horizontal slider. Imagine the left side of the photo as a door hinge and the horizontal slider is pulling the right side toward your eye. This increases the size of the light fixture on the right side in an unappealing way. I used the pen tool in Photoshop to select the light on the left, duplicate it on a new layer, and then move it to the right side. After this, I merely focused on taking out some undesired objects like the light switch and distracting objects in the mirror like the wall art and the harsh shadows.
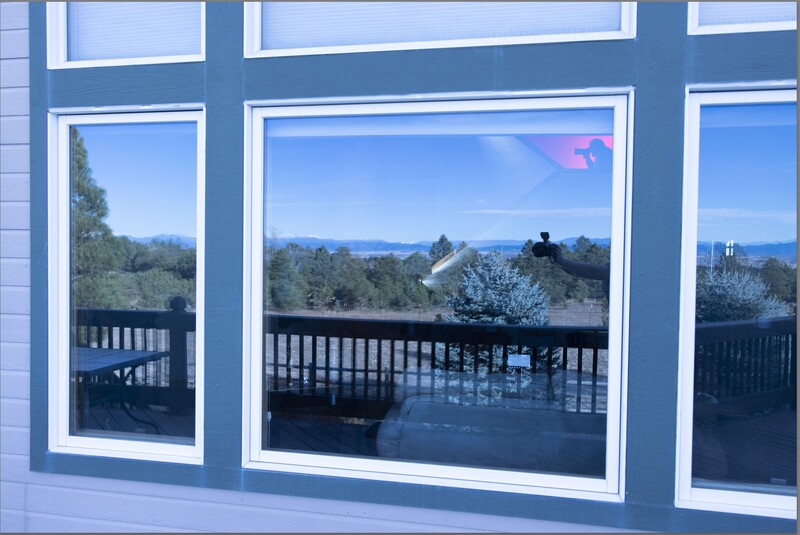
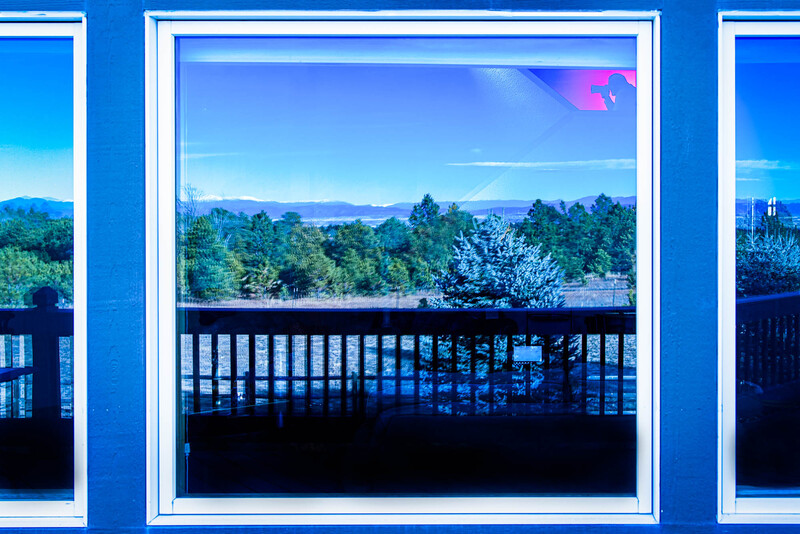
Having discovered this technique experimentally, I’m now able to apply it deliberately as a tool. I took the following image at the Fusion workshop recently in Denver put on by Moira & Jesse LaPlante along with Christian Cardona. It was an incredible experience and they tasked us with specific photo challenges to apply what we had learned. I shot this photo outside the house looking through the glass, but I didn’t want myself to be present in the image so I stood to the side and held my camera out, facing the window.
In this case, I used the “Guided” function, which is part of the transform tool. I find this very helpful when nothing else seems to be working. For those unfamiliar, clicking “Guided” brings up a line and a magnifying class. You then just click two points along the path you want to straighten.
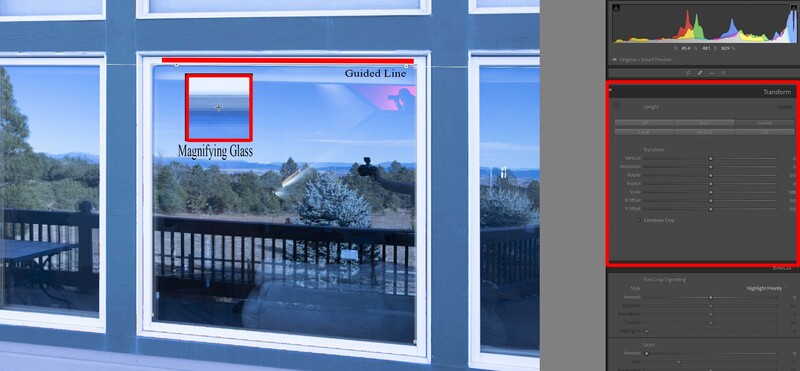
You can do this multiple times until you get it where you’d like. Here I used 4 guided lines around the entire window frame. This basically snapped the window into a perpendicular orientation and then I just needed to clone out my camera from the reflection and do routine post-processing.


Join the Fstoppers community for free
-
Post comments and join in the discussions
-
Browse the site ad-free
-
Share your work and get featured in the community
-
Compete in the photo contests for fun and prizes
1 Comment
I like messing with the guided tool when doing up close architecture shots. If there are a lot of parallel lines, I've found that using that too can actually provide a perspective as though I shot from high up in the sky. Real fun!