
As photographers, we come across many different scenarios, and it might not be possible to get the perfect shot with the perfect lighting 100% of the time. It could've been that we didn't have the right gear with us or that we were in a rush. Either way, that shouldn't be a reason to shy away from trying to get the best possible shot and bringing it to life in post-production. In this video and article, I'll be showing you how to fix a portrait with bad lighting in post using Adobe Lightroom.
Before we begin, be sure to download the exercise file here and follow along as I edit!
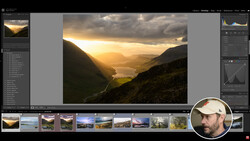
Get the Best Exposure Possible in Camera
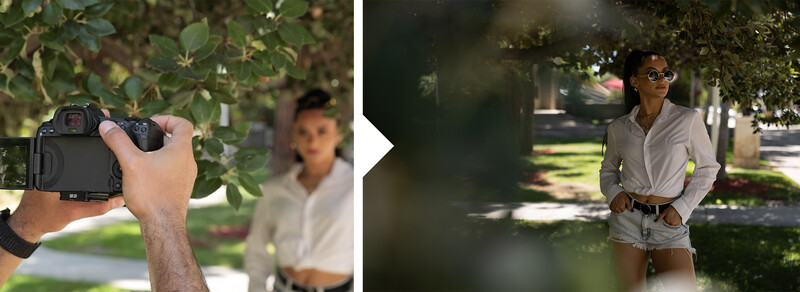
I walk through how I shot this image in a previous video where I discuss the Canon RF 28-70mm f/2 and why it's my favorite lens. Some good practices I follow to get the best shot possible are:
- Shoot in raw format to capture as much information as possible.
- Expose properly to preserve as much detail in the shadows and highlights as possible.
- Work with natural lighting.
Step #1: Bring Up the Exposure
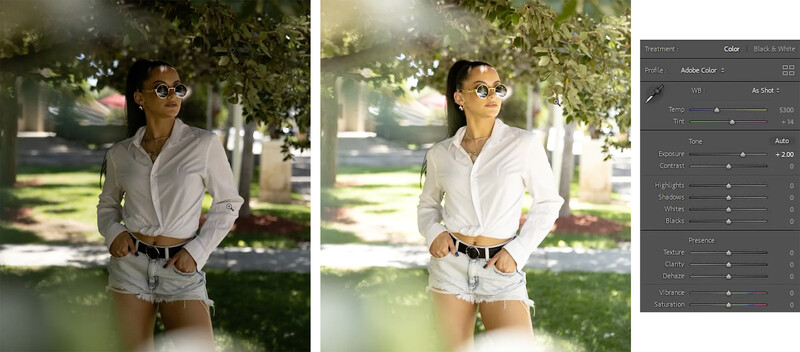
Let's start by setting the correct exposure on the subject. Since this shot wasn't lit perfectly, the background will blow out. My main focus is making sure that the exposure is right on the subject.
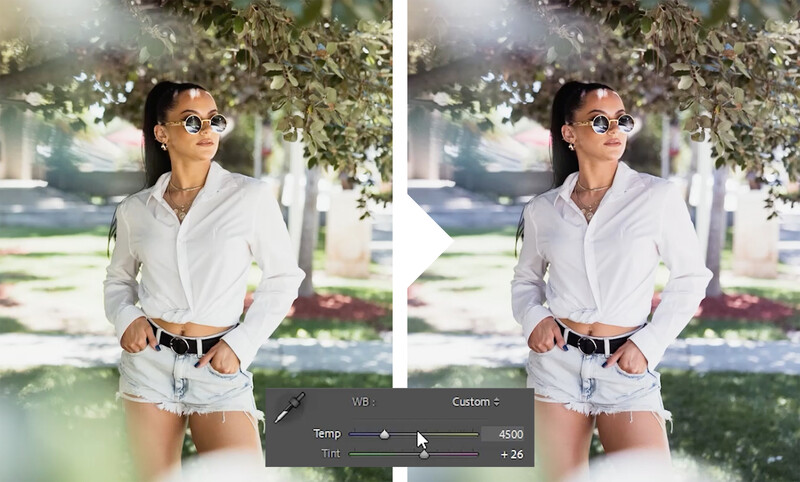
Step #2: Set the White Balance
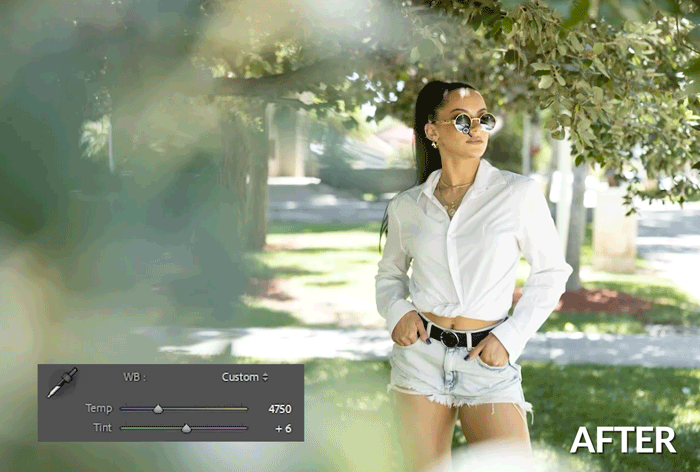
I selected my model's shirt to set the white balance using the eye-dropper tool. Despite that, we still have a strong green color cast caused by the leaves and the grass.
Step #3: Basic Tonal Adjustments
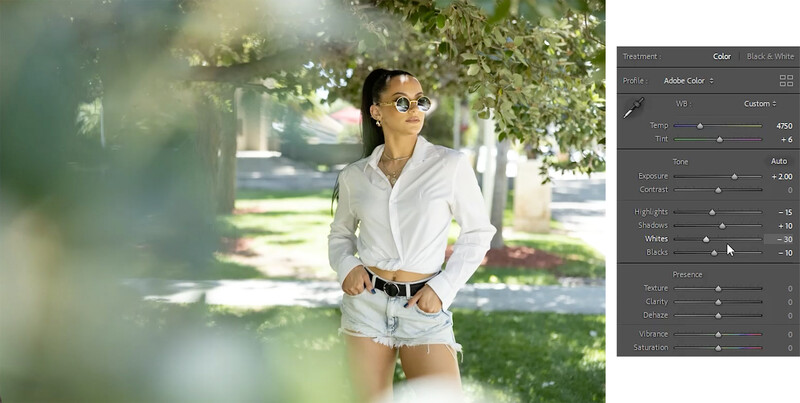
No big changes here. I simply brought out more detail by lowering the highlights and raising the shadows.
Step #4: Set Contrast With the Curves
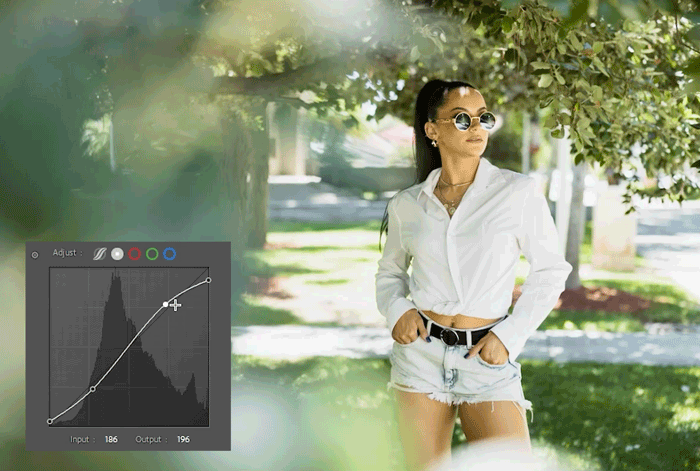
I set the main contrast here. Using a basic S-curve, I then created a matte look by pulling down the white point and pulling up the black point. This causes the whites to turn to a light gray and the blacks to turn to dark gray. Be sure you don't lose too much detail in bright areas such as the white shirt.
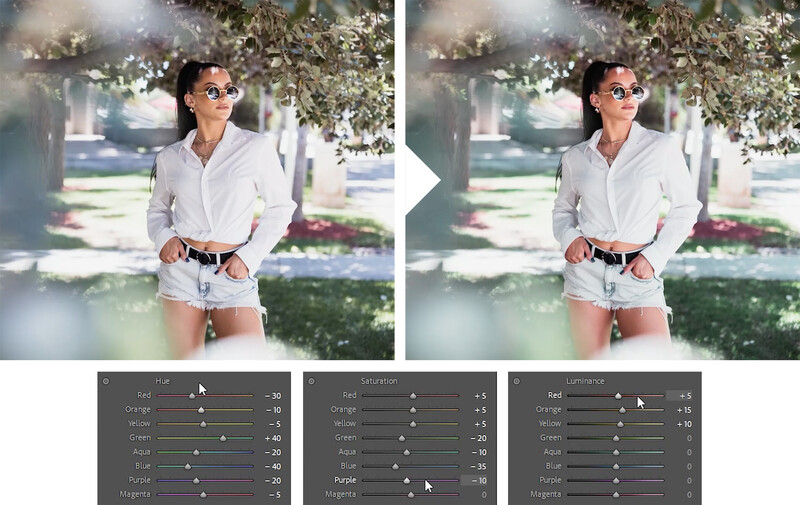
Step #5: Remove the Color Cast With Calibration
Here's where we'll remove much of the color cast. I adjusted each channel to restore the skin tone.
I then adjusted the white balance to match the updated colors.
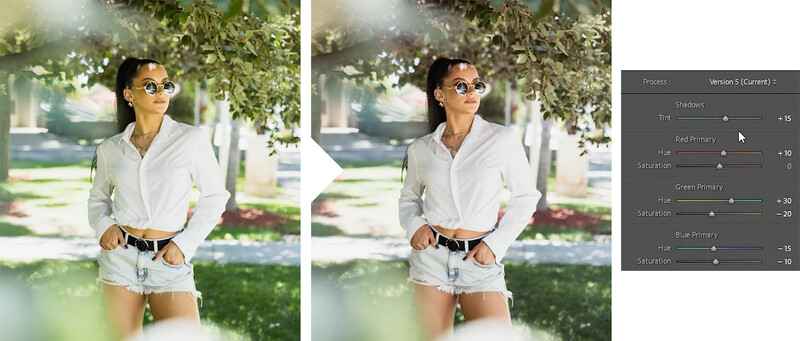
Step #6: HSL Adjustments
Here, we'll continue to separate all the colors and make the skin tone pop. Notice the green tint is pretty much gone at this point.
Step #7: Split-Toning
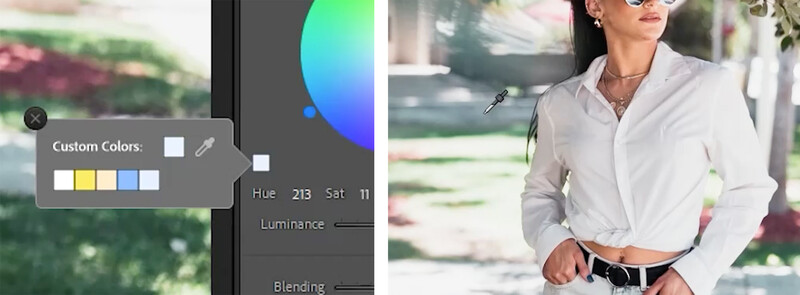
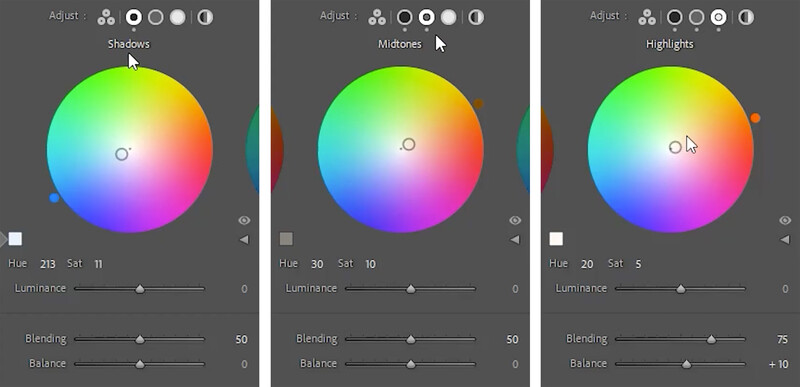
Use the Custom Color eyedropper to select specific tones from areas in the image and do this for each tonal range.
Step #8: Back to Basic Adjustments
Final tonal adjustments go here. I added a touch more contrast with some little tweaks to the basic adjustments.
Step #9: Finalize With Local Adjustments
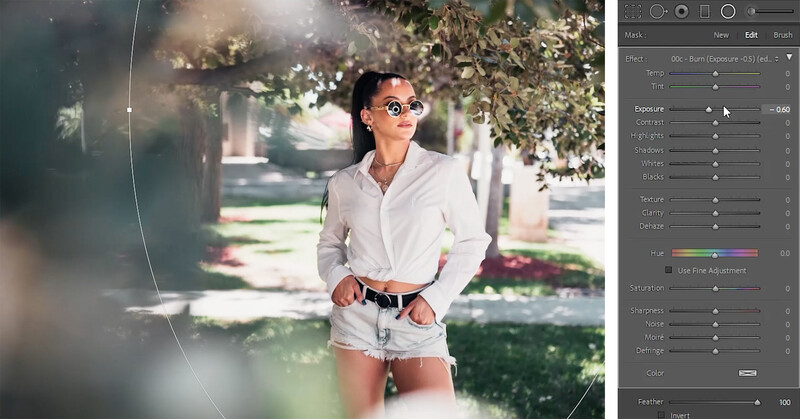
To finalize the image, I added a subtle radial filter from Visual Flow's Retouching Toolkit. This creates a subtle vignette to draw more attention and focus to your subject.
The Final Image
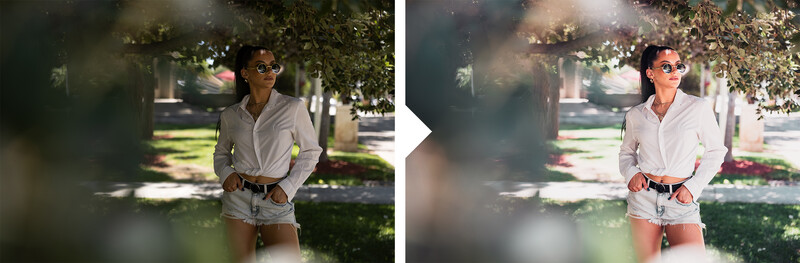
Here's the final image compared with where we first began. The difference is huge!
Conclusion
I hope you enjoyed this article and video. Learning these editing techniques is crucial for any photographer. When you run into imperfect lighting scenarios, having an understanding of what you can do in post will allow you to still take a decent image and turn it into a stunning portrait. That being said, none of this should be a substitute for trying to get the best possible shot in camera. Always get as close to perfect as you can before post-production.
Before you go, be sure to check out the Complete Lightroom Tutorial on SLR Lounge Premium. In addition, check out Visual Flow for the Retouching Toolkit as well as intuitive, lighting-based presets. Thanks for joining us this week!


No comments yet