Most of the problems I get asked to fix in my role as technical support for photographers has to do with Lightroom. This article will show you the way I use Lightroom to be able to find any photograph I've shot in the last 10 years in under a minute. This is how best to organize and categorize your files to best serve you as a photographer and the tips and tricks that you might have otherwise missed.
Finding your files in Lightroom can be a pain if you haven't done the initial groundwork. I'm not just talking about keywording your images here or even putting your images into date/location/style folders. This is having a good system that allows you to find your client's images in a reasonable period of time. For now, we're going to assume you have access to all of the images in a single location. If not, take a look at my article Network Storage Is the Only Safe Way to Store Your Photos, then come back to this.
Start With a Single Catalog
Okay, so I know there are going to be people that disagree with me on this, but hear me out. A single catalog can hold over 3.4 million photographs. How do I know this? I've seen it done, and I've seen it working. A single catalog separated into perfectly organized folders will allow you to find exactly what it is you want, and if you can't remember everything about the shoot, you can at least narrow it down and find what it is you are looking for with a faster method than just scrolling blindly through old folders. A single catalog is easier to back up, and it's much easier to manage the ever-expanding previews file. Also, make sure your catalog file is either stored on your main drive (just the catalog mind, not the images). Using Time Machine for Mac or a similar program to back up Windows will allow you to have your single catalog file safely backed up.
Store Your Presets in Your Catalog Folder
There's an option within Lightroom Preferences under Presets - Store presets with this catalog. This is a great and recommended option, as it moves all of your presets into the same folder the catalog is stored in and stores it in a folder called Lightroom Settings. Then, they all get backed up and are easy to find should you ever switch computers, copy your catalog elsewhere, or want to give anyone your presets.


Import Using Lightroom Rather Than Finder or Explorer
Okay, so I do this because I want fewer steps than having to import to the destination drive and then have to go in and add them in Lightroom. That's just an extra step that doesn't need to happen, and it saves me time and effort. I choose my source on the left.

Choose Copy at the top.

Then, the destination and options are on the right. For the import options, I choose Minimal in file handling (I prefer to get the images in quickly and then only build 1:1 previews for the ones I'm going to edit. Select Don't import suspected duplicates for obvious reasons. At this point, I don't make a second copy, and I only use collections manually, so don't include them here.

I choose not to rename my files here (they are actually renamed on the way out of the catalog for the client's benefit, and I rename them then with my company name and the original file number).

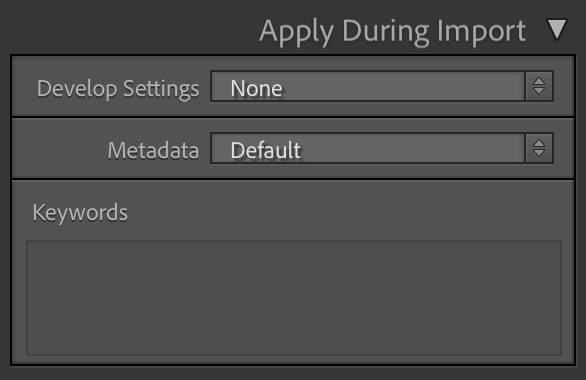
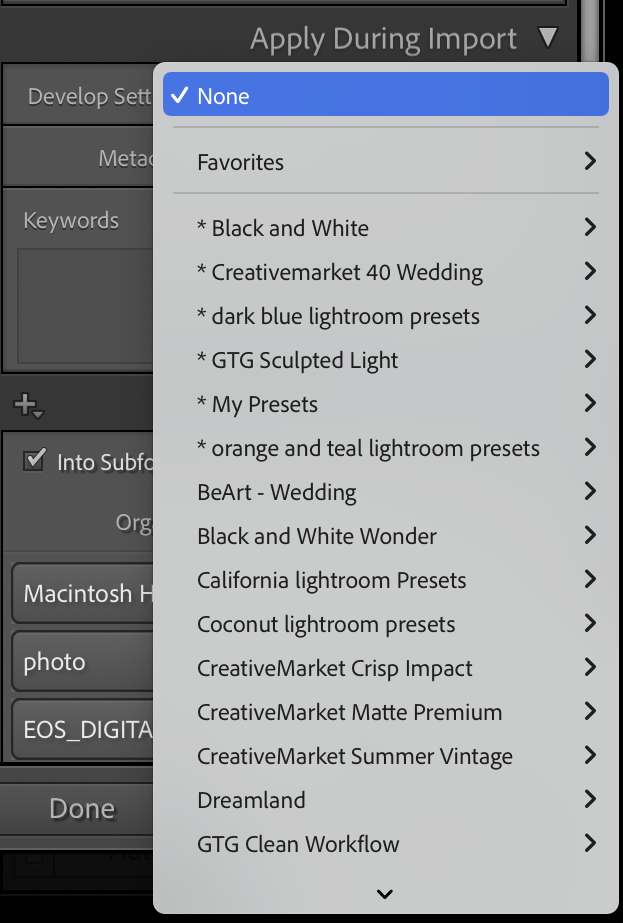
Apply during import is used to add my default metadata in there, keywords (generalized to start with, e.g location, type, and anything that is key to finding the image, like the client's name). I choose a preset I've written myself that gives lens correction and straightening and apply that during the import process.

I finally choose the storage location (in this case, my NAS called "photo"), where the images will reside under the folder Weddings/Engagement Shoots/2023 and the couple's name.

Clicking Import then imports all the images, catalogs them, provides keywords, and organizes them on my storage drive.
Synchronize Your Folders Regularly
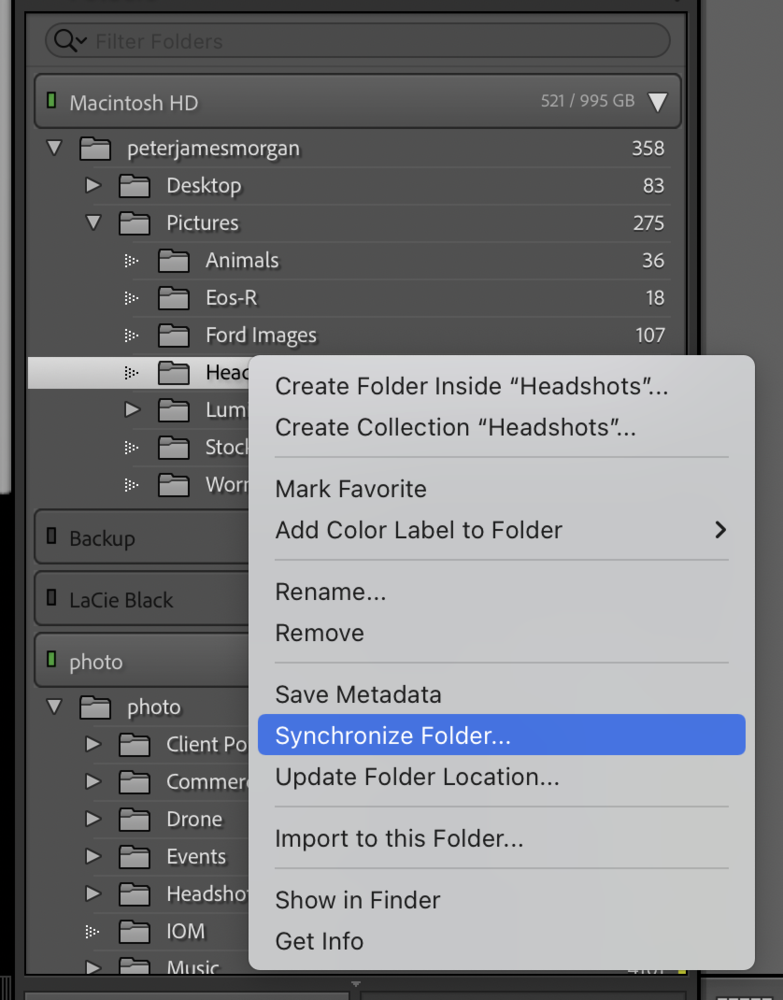
If you're in a situation where you have images stored on old drives and you want to see what's on there without having to wade through tons of file-level folders figuring out what's what, then the Synchronize command in Lightroom is just what you are looking for. Plug in the drive that you want it to index or choose the location where you want to index on the left. Remember, if you can't see it, you can use the Show Parent Folder command by right-clicking on a folder, and it'll show the top-level folder above the one you're currently looking at.

You can then right-click on the top-level folder and choose Synchronize, and it will start to import images that exist on the drive but aren't yet indexed by Lightroom while leaving them safely in the originally stored location.

The Synchronize command might take a while and show a message like this below if you've not done this before or have lots of images not indexed by Lightroom.

You'll normally want to choose to remove missing photos from the catalog too, as it'll then delete previews of images you've previously deleted off the drive. Then, just let it run by hitting Synchronize. Eventually, it'll show everything on the folder or drive. Remember to keep the computer switched on whilst this task is in the process of being completed. It can't run while it's sleeping or shut off.

Optimize Your Catalog.
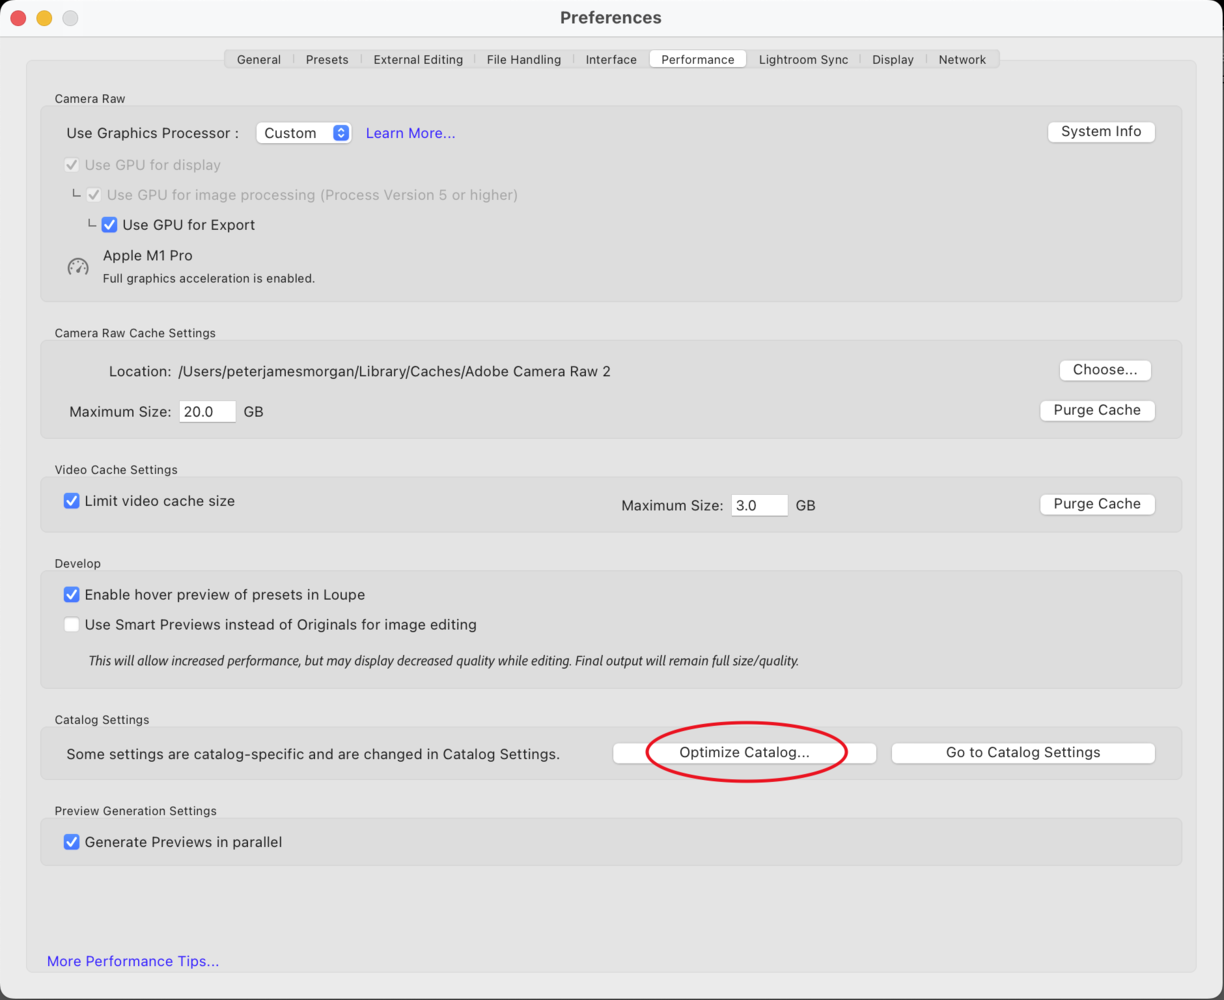
This is normally done when the catalog backs up, but if your catalog is taking a long time to start or isn't performing as expected, then this is a good thing to do. Start by going into Lightroom Preferences then into Performance and click Optimize Catalog in the options.

Delete Your Previews Files if They Get Too Big
Lightroom is meant to clear down the preview files every 30 days, but doesn't always do a great job of this. If you've edited multiple different galleries in the last 30 days, your previews file can get very large, and if you're only working on a small drive, then it's something to be aware of. Remember, you can always regenerate previews just for the folders and images you want to see, and the images always export with all the adjustments done, whether the preview file is there or not. Close Lightroom and manually go to the folder where the catalog is stored, then delete only the previews file.

Hopefully, these tips will keep Lightroom working for you and your files in a clear and concise order. Remember, it's better to start with a single clean catalog and bring all the old catalogs into it using the import from another catalog command, then synchronize all the folders.

Thanks for reading. Please feel free to share your experiences. I do my best to read and respond to all the comments.


Useful tips. As an amateur Lightroom user, I thank you.
And thank you for making this an article and not a 20 minute video :-)
My pleasure Steve.
Nice article Peter - I come from a technical background where hierarchical organisation and asset management is a big deal, so when I looked at DAM systems (pre-lightroom) I took those learnings with me.
What I consider to be some of the most important things with keywords is the use of hierarchy and understanding what is a controlled vocabulary. I've seen some photographers just pepper keywords like they were "Insta ganstas", instead of categorising their keywords and using synonyms. Perhaps you'd like to write an article on keyword hygiene?
I'll put it on my to do list Jon. Keywords are a strange thing in that you can overuse them and not find what you want but a good archival system means I get what I want pretty quickly.