

When editing in Lightroom Classic, it's normal to edit as quickly as possible in order to share your finished photograph online, but by doing that you run the risk of missing out on some hugely powerful settings that can save yourself a lot of time and headaches further down the line.
I've decided to round up the six most overlooked Lightroom settings that I find photographers and image editors miss, simply because they want to get on with the editing. That may be because they're pressed for time but by missing out these valuable steps now, they're only slowing things down in the future. Use these six features though and you're going to be flying through your edits much quicker and more confidently than you were before. So let's get started with step one.
1. Fine-Tune Your Import Settings
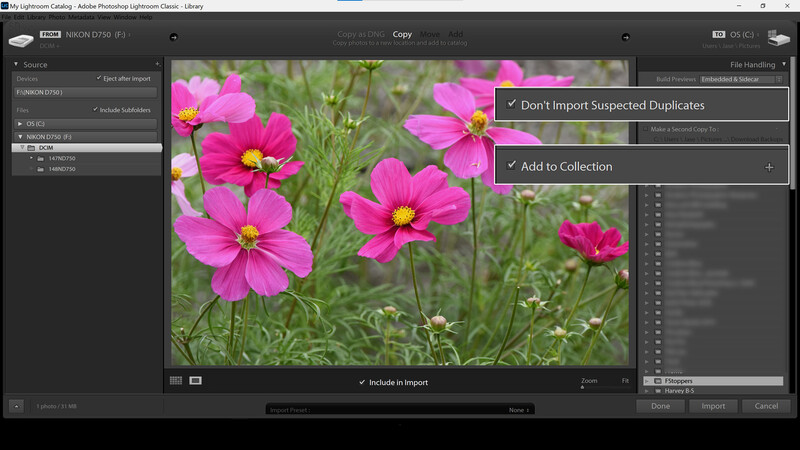
In order to save some space on your computer storage, the first import setting you should make is to select the button "Don't Import Suspected Duplicates" and in the grid view you'll see the photos that may have already been imported to Lightroom grayed out. If there aren't any grayed out and they all have ticks then the images will continue to import once you hit the Import button. By doing this Lightroom Classic will purposefully not import images that may already be in your Library.
Another good habit to get into is to import your images to a Collection. Tick the box "Add to Collection" and it'll open up a submenu under which you can choose a pre-existing Collection, or make a new one. This helps with the categorization and organization of your files long-term. After all, a few months from now, and several hundred photos later, you probably won't remember the exact date you took the shot and might have to scroll through your entire catalog just to find one image.
2. Add Keyword Metadata
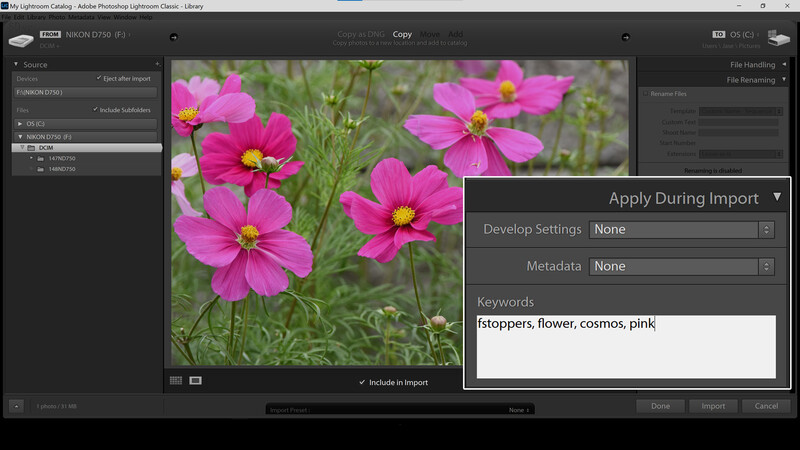
If you haven't been doing this so far in Lightroom Classic, then you can thank me later. Underneath the "Apply During Import" tab you can add Keywords that are attached to the image file. I strongly recommend you put as many relevant keywords in here as possible for each and every photo you import.
You don't have to go typing them in for each shot, either. If you have a series of photos of flowers you can sync up the Keywords for all of those photos. Then when you come to search for them later, even if you haven't added the photos to a Collection, you'll be able to search your catalog for the keyword and immediately scan through the shots until you find the right one.
3. Create Smart Collections
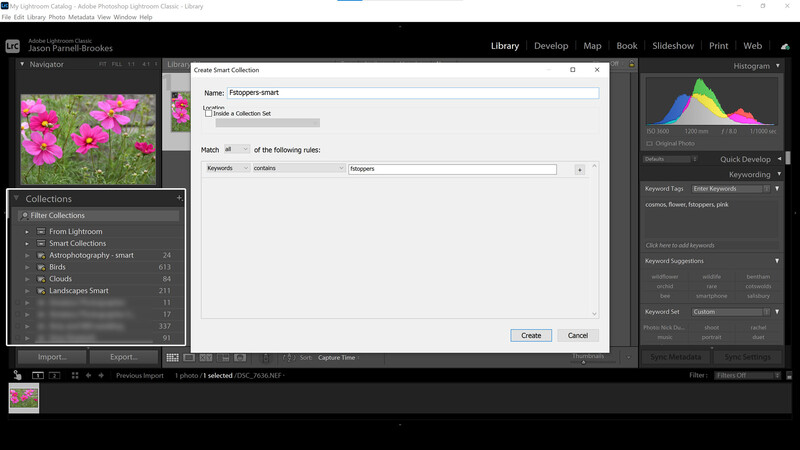
When I first learned about Smart Collections my catalog organization changed overnight. Smart Collections are the same as regular Collections in that they hold a selection of photos but are organized via rules that you set. Basically, you can tell the Smart Collection which rule to follow and it will automatically import to the Collection following your instructions.
Smart Collections can save a load of time because Lightroom will literally organize your photos for you. It's easy, too. Create them within the Library module or do it on the import window. Make a new Smart Collection and give it a rule, or multiple rules. Here I've told my Smart Collection to include images with the Keyword "fstoppers". Now any images imported with the Keyword "fstoppers" will appear in this Smart Collection without me having to do anything but input the Keywords at the import stage.
I should highlight that Collections (whether smart or not) are arbitrary pointer folders which allow you to recall sets of images that are stored on your storage device, they don't actually contain the original file. That means you can have one photo in several Collections without taking up more space on your hard drive.
4. Don't Overlook Color Profiles
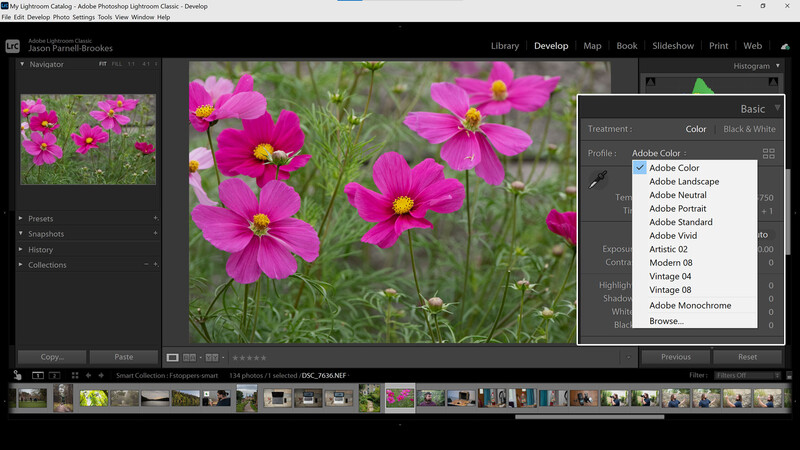
When editing your photos in the Develop module it's easy to get stuck in and head straight to the exposure and color options to begin the editing process but you mustn't overlook the Color Profiles option right at the top of the Basic panel. From here, you can choose from a variety of preset Color Profiles and also choose from loads more using the Browse... button.
These profile variations change the tone of a photograph so much that it'll dramatically change what edits you make in the subsequent editing panels, so adjust this one first. If you want to see how much this affects images, check out step one on my Milky Way article here.
5. Enable Lens Corrections
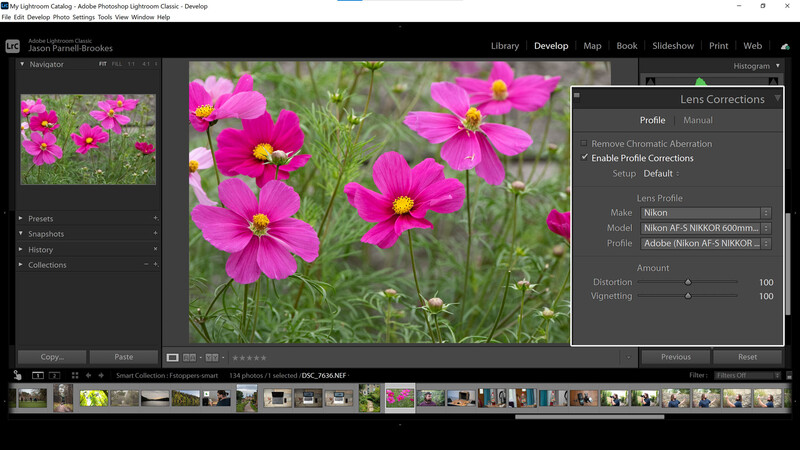
This one is tucked away down in the bottom panels of the Develop module and I'll forgive you if you haven't spotted it before. The Lens Corrections panel provides you with options for adjusting the optical characteristics of an image based on which piece of kit you shot it on. The Enable Profile Corrections button, when ticked, will apply a preset edit that is specifically designed to counteract the optical characteristics of your lens and camera body. This takes into account pincushion or barrel distortion, as well as vignetting around the edge of the frame.
Occasionally, Lightroom will have a hard time finding the right metadata to automatically pull up the camera and lens info, so you might have to manually select the Make, Model, and Profile yourself. Either way, it's a great way to standardize images for full editing. Though be aware that some lenses are desirable because of their optical characteristics like distortion and vignetting, so you might not want to apply it to every shot you take.
6. Make Custom Export Settings
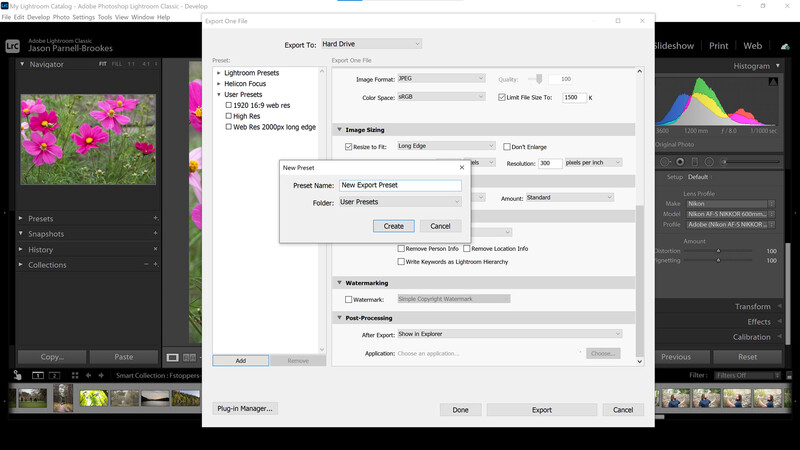
Just as importing and organizing your photos will save you time, so will saving custom export settings. I've made a few options for my various export media - some for web use, some optimized for desktop viewing, and others destined for print. To get this window to appear just go to the Export button or use keyboard shortcut Ctrl, Shift + E (Cmd, Shift + E on a Mac). Then to the left of the window that appears click "Add" to create your own export preset. Have a think about the ways you most commonly use images out of Lightroom such as social media, for web use, or to store them as high resolution backups. Then apply the relevant output settings to match.
There you have it, six simple steps that I find many photographers and image editors overlook, or simply aren't aware of. Hopefully, there are some steps here that will help you save time and a lot of frustration further down the line. They're good habits to get into and will only make things simpler for you in the long term.
Lead image by Wallace Chuck via Pexels


Join the Fstoppers community for free
-
Post comments and join in the discussions
-
Browse the site ad-free
-
Share your work and get featured in the community
-
Compete in the photo contests for fun and prizes
1 Comment
Thank you Jason for the excellent article. I am sure most of the experts on fstoppers already know these settings but for us intermediate folks this article is golden. We know enough about editing to totally mess up our photos but not enough to edit them correctly so articles like yours are very welcome. Thanks again! Kevin