
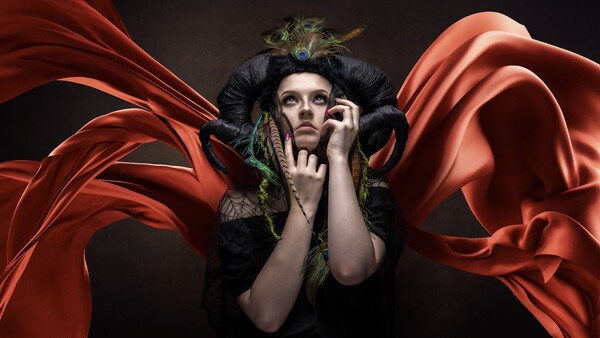
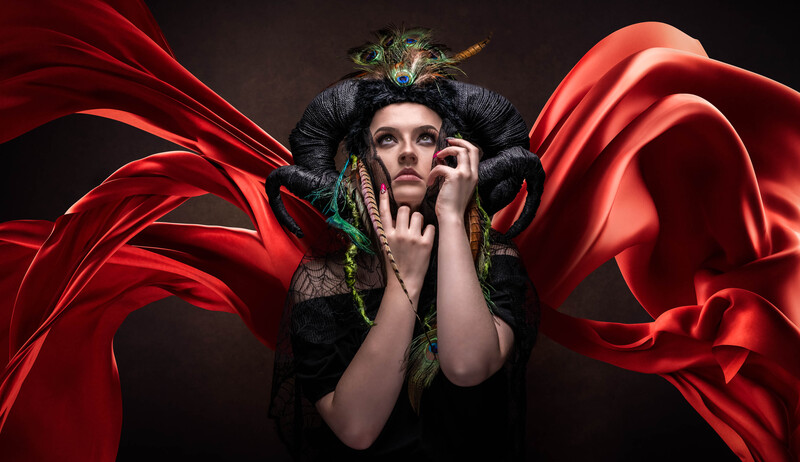
High-end retouching is normally done in Photoshop, so can similar edits be achieved in Lightroom without ever leaving the software? The following tutorial is based upon the tips and techniques provided in lesson 19 of Mastering Adobe Lightroom by Pye Jirsa and is only part of the 49 lessons available in the tutorial.
Packed with lots of great tips, techniques, and processes, the tutorial will provide newcomers and seasoned users with valuable information for their workflows.
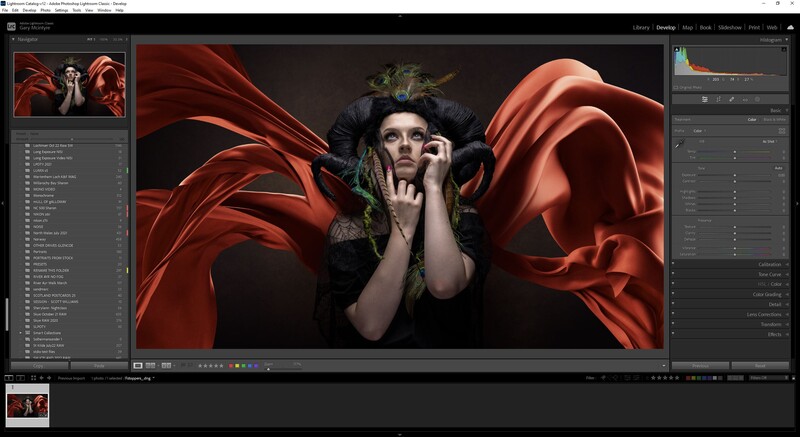
User Interface
Setting up and streamlining Lightroom's user interface to your working preferences is quite an intuitive process and is designed to enable you to work best on whatever screen size you are using. If you are a seasoned user, you will more than likely have set it up to suit your preferences for editing. However, if you are a relatively new user, here are a few points that you might want to note for future reference, both in terms of using the software and adjusting the layout to your preference.
Shortcut Keys
In time, remembering shortcut keys becomes second nature, but where do you learn them? In all of the Adobe software, the shortcut keys are shown on the right of the command or action you are about to take. Usually, if no indication appears on the right, a shortcut is not available for that action, but that isn't always the case.
Editing Panel
Adjustments to any of the sliders in the editing panel can be made by moving them or once you have selected a slider, by pressing the +/- keys to make small, incremental adjustments. These can also be reset to zero very quickly by either double-clicking on the title to the left of the slider or by double-clicking on the slider's arrow. One of my favorite setups for the panels is the Solo Mode, which when selected, collapses all other panels except for the one you are currently using. When you move on to another panel, that one expands and the last one collapses. I find this very useful when editing on a laptop with a smaller screen.
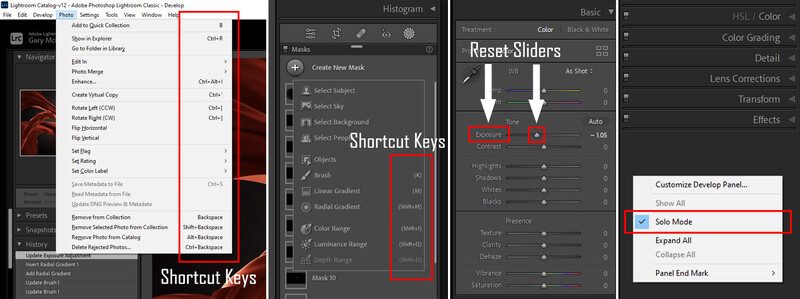
Panel Shortcuts and Layout Options
All screen sizes are different, and you can customize your panels to suit your working preference.
- F5: Hides the Identity Plate
- F6: Hides the Film Strip
- F7: Hides the left panel
- F8" Hides all right [anel
- Shift + Tab: Returns all panels to the main viewing window

The panels can also be hidden via the small gray arrows at each panel's outer edge and are scalable. If you hover over the inner edge of each panel, an arrow indicating the direction of scale will appear. This is useful for your working preferences.

Viewing Your Edits
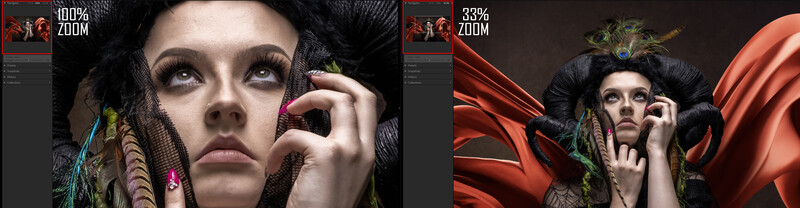
How you actually view your edits when working will also have a great impact on your final image, so it's good practice to always zoom back to see the bigger picture when working. For finer edits and details, I often work at 100% zoom and then zoom back to full view to check the edit. With larger areas, I'll work around 33% and again zoom back out to the full screen to check.
Your working zoom is an important consideration to make, especially depending on where your image is being displayed. On social media sites, you'll probably find that working full screen is more than adequate, but for larger areas and prints, zooming in and out during your editing process will allow for more precise editing.
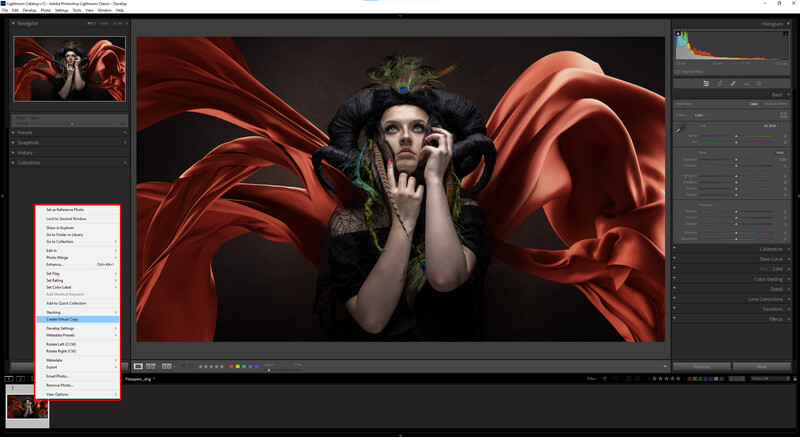
Creating a Virtual Copy
Creating a virtual copy of your image will allow you to make edits of varying degrees to see what edit you like the best. I find this very useful when trying different percentages of edits, as you can compare them once complete to see which one you prefer. Comparing them this way is very helpful, especially with saturation and contrast. To create a virtual copy, highlight your image and click Ctrl/Cmd +'.
Clean Up Using Clone Stamp
A few steps you should consider before your main edit should be the clean-up and balancing of your image via the basic editing panel. For this edit, I opted to use the Clone Stamp healing brush, as it provided the finish I was after to remove a few milk spots. The other options available for cleanup in Lightroom include the eraser and the spot-healing brush, and all are very effective in their results. I wanted to retain the skin texture in this edit, so I settled upon the clone stamp after experimenting with the other two.
Basic Edits
Before starting the finer editing, it makes sense to provide balance to your image in terms of exposure, contrast, shadows, and highlights, as this will provide you with a good base for your image to refine further. Due to the headdress details in this image, I opted to reduce the texture slightly and increase the clarity so that I could work with it later on in the image. Each image will be different, of course, but it's good to have an idea of what way you want your edits to go when starting out.
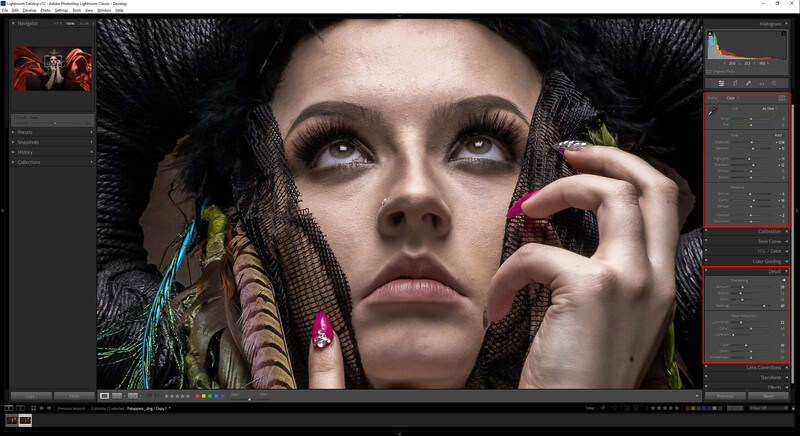
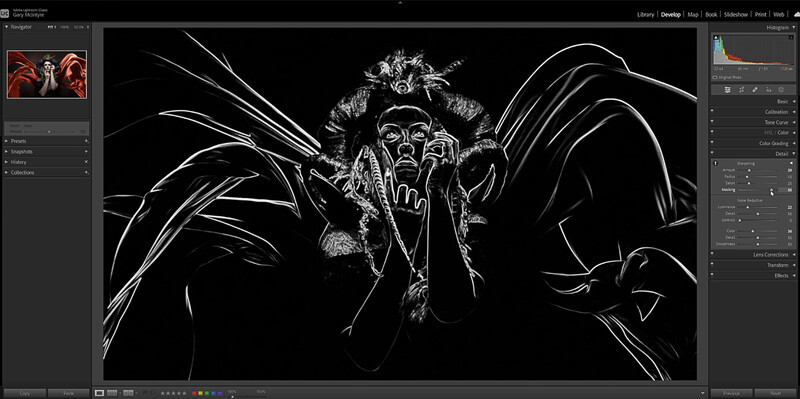
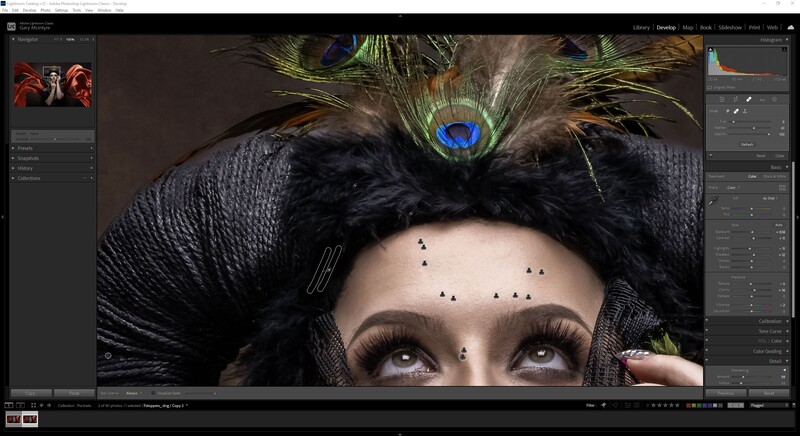
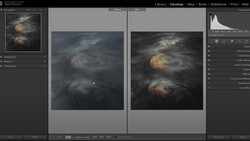
For the finer details in the image, I set the sharpening amount. As this is a color image and we can see sharpening more acutely in monotone, I held down the Alt key while adjusting the sharpening slider. Then, while holding down the Alt key again, I pushed the masking slider so that only the details I wanted to be sharpened were affected. If you don't use the details masking slider, the sharpening amount is applied globally to the entire image instead of to the areas that you wish as you can see in the image below. Noise reduction of the luminance and color can also be adjusted at this point should you require it for your image.
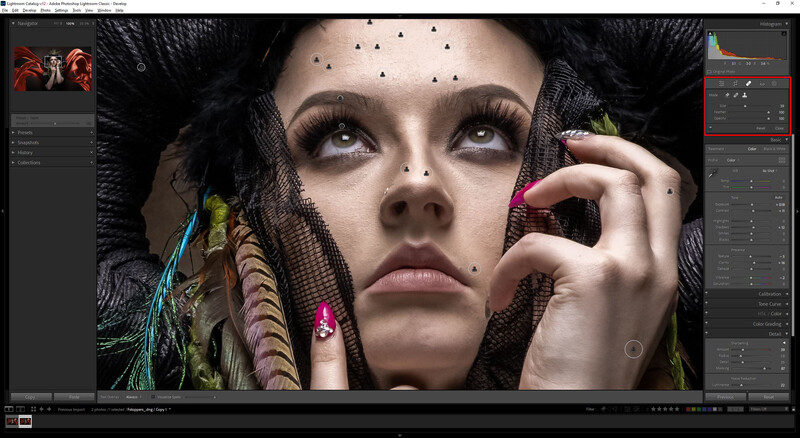
Portrait Masks
With the latest update in Adobe Lightroom, masking has become easier for any user, especially when editing portraits. If you select the masking function, Lightroom's algorithm detects the presence of any people in your image and provides an option to create either a single mask for an entire person or create seven separate masks based on features; hair, eye sclera, pupils, face skin, body skin, eyebrows, and lips. This also works for multiple people in an image and is a very useful timesaving feature.
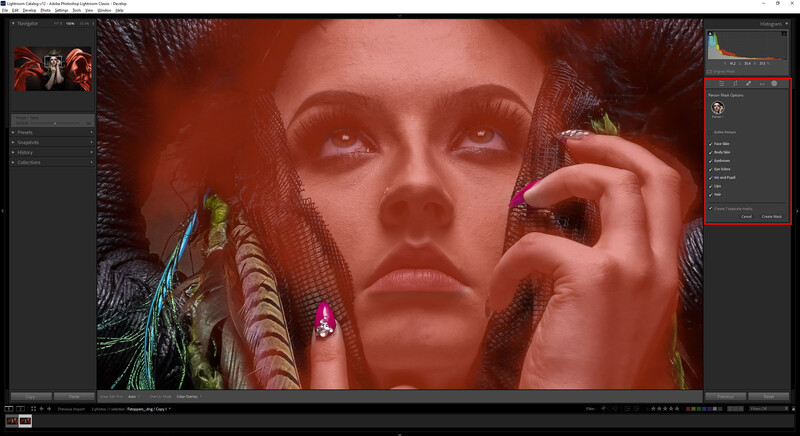
Before I start this edit, I am creating these as a base for tweaks should I decide I need them later. This, however, can be done at any point before or after your main editing.
Soften the Skin
If you were working in Photoshop, more than likely, you would use frequency separation or a similar method to achieve a soften skin effect while retaining the texture of the skin. As this edit will be done entirely in Lightroom, there are a few ways to achieve a similar effect. One of those allowing for greater control is by using brushes.
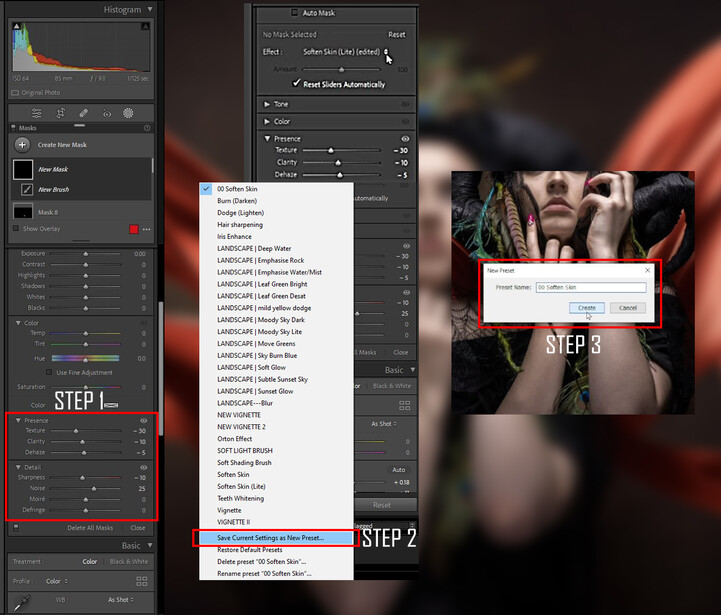
Lightroom comes with an array of default brushes to allow you to edit your images, but when you want to get the exact qualities that you are looking for in a brush, you also have the ability to create your own. Following Pye's settings for his video, I created a soften skin brush and saved it to my brush library.
Step 1: Make the adjustments that you require for your brush.
Step 2: Click on the arrows of the brush selection and select Save Current Settings as New Preset.
Step 3: Name your preset.
It's as simple as that to create a library of brushes for yourself. How you name these brushes determines where they sit in your library, as they are in alphabetical and numerical order, so if you are creating these, it would be good practice to collate them together in order of your editing preferences. If you would like a full set of professional predesigned brushes as created and used by Pye, you can purchase a set here.
For this edit, I wanted to retain the texture of the skin yet soften areas slightly, and with the soften skin brush settings, it did exactly that. Working at 33% zoom, I was able to best determine how the brush will affect the image overall and not be detrimental to the skin by working closely without seeing the bigger picture. Normally, I wouldn't paint as much of the face as I have for this edit, but as I didn't want too much disparity between the face and the arms to achieve the effect I was after, I brushed in more than I would normally.

For this image, I had a certain look I wanted for the skin on the arms, so I removed the freckles and painted quite liberally on the arms, avoiding the hairs as best as possible and allowing the feather of the brush to blend those areas. Removing freckles is not something that I would normally do, as they are a permanent part of a person, unlike milk spots. I wanted a minimal, unreal, silky look to the arms, so the soften skin brush created using Pye's settings achieved what I was after.

When you use a brush or mask with your applied settings, the effect of this can be increased or decreased quite simply by selecting the brush used and while holding Alt drag your mouse left or right to increase or decrease the effect, or you can use the effect slider in the panel.
Eyes
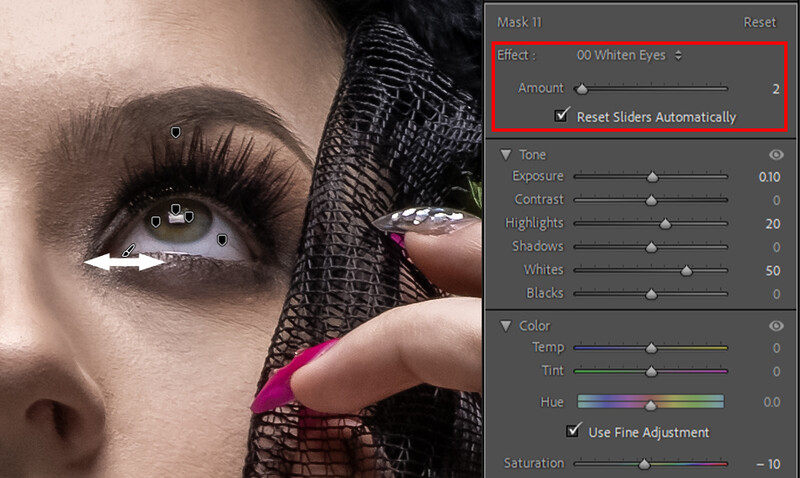
Whitening of the eyes can be overdone, and that's something you should try to avoid, as you want them to look natural. Although Lightroom now has the sclera mask feature, you may prefer to work manually when creating your masks. That's where the brush can be very useful once more.
I created and saved a brush based on Pye's eye-whitening settings and painted over the whites of the eyes, ensuring Auto Mask was turned off, as this can cause slight anomalies if left on, especially when working on features. Normally, you would think that an increase in exposure would be the answer here, but to get a better result, it was only the highlights, whites, and saturation that were adjusted. The saturation was decreased slightly to help reduce any redness in the sclera and any arteries that were visible without desaturating them entirely.
Even working with a smaller brush, the feathering would lightly touch the pupils and around the edges of the eyes, which I needed to remove. So ,with the brush still selected, I simply held down the Alt key, which activates the eraser brush and painted around the areas I didn't want to whiten.
As you can see in the image above, those particular settings overemphasized the whites of the eyes, so to adjust it was a simple case of using the effects slider to lower the opacity of the effect until it worked better with the image. Alternatively, you can activate the brush icon, hold down the Alt key, and move your mouse left and right to lower or increase the effect amount.
The final touch to the eyes is to gently enhance the catchlights via a new brush mask and only paint on the catchlights, as this will make them pop. For this, I used a small brush with the settings of Exposure -20, Highlights +40, Shadows +40, Whites +15, Blacks +10, Texture -10, Clarity +15, and Vibrance -5. I then saved those settings in my brush library for future edits.
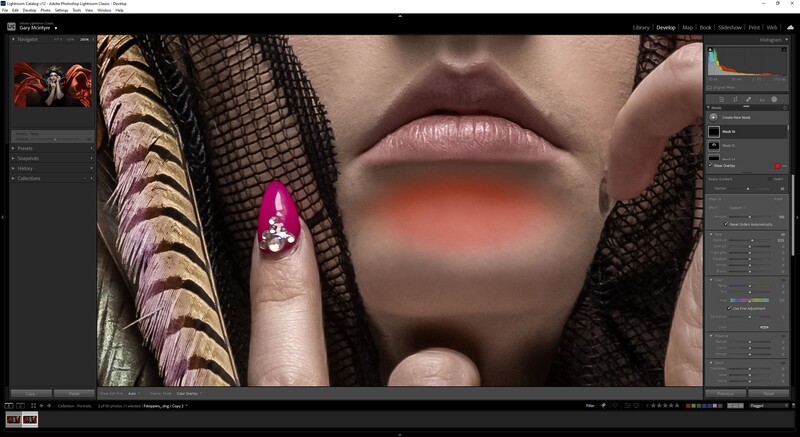
Lips
For the final part of the features edit, I was looking to increase the gloss of the lips. Again, I copied Pye's brush settings, saved them to my library, and painted over the lips, increasing the effect amount to what I was happiest with for this image.
Removing Flyaways and Artifacts
Usually, before shooting, you would clean up any flyaway hairs or artifacts that you know will show in the edit and create more work for you in post. Sometimes, you do miss them, and although Photoshop generally does a better job of cleaning these up, the Healing tool inside Lightroom can provide really good results. I was fortunate with this shoot in that the headdress covered the hair. However, there were some small artifacts in the faux fur at the front that I had missed.
Using a larger brush can sometimes create anomalies that are visible in your image, so for flyaway hairs and smaller areas, it's best to use a small brush, as more often than not, the results are good. Remember, even when working with a small brush, the results can be slightly off, so if you are not happy with the results, you can move the selected area slightly until you are satisfied.
Clothing and Details
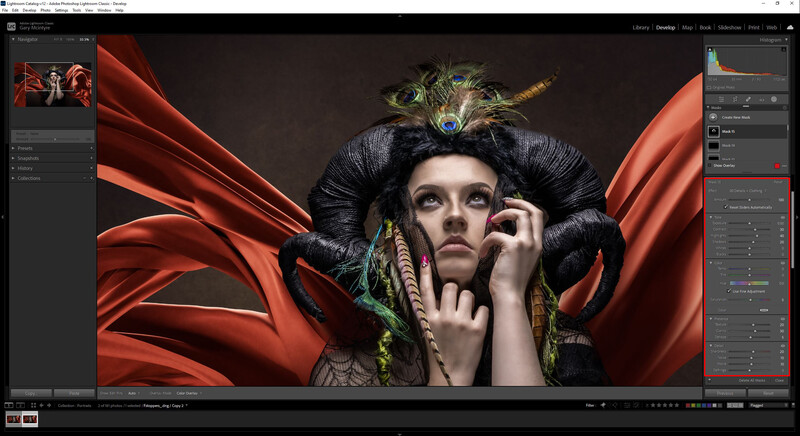
With the features and skin now completed, it's time to move on to the details of the headdress, which I wanted to emphasize and complement the skin edits that preceded it. With a new brush mask created and the settings dialed in and saved as a new preset, I set about painting over the headdress and feathers, adjusting the brush size depending on the area I was working on.
Using the same brush and this time with Auto Mask enabled, I painted over some of the capes in the background, focusing more on the areas with highlights. Doing this helped give a punch to the overall look and provide some balance for the highlights on the face.
Finishing Touches
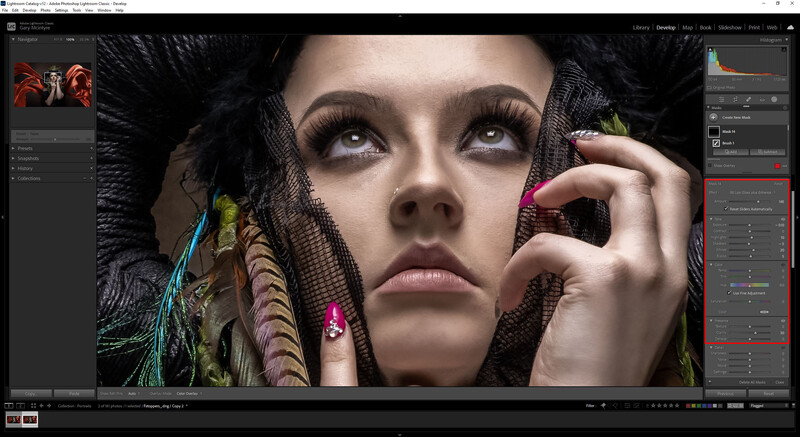
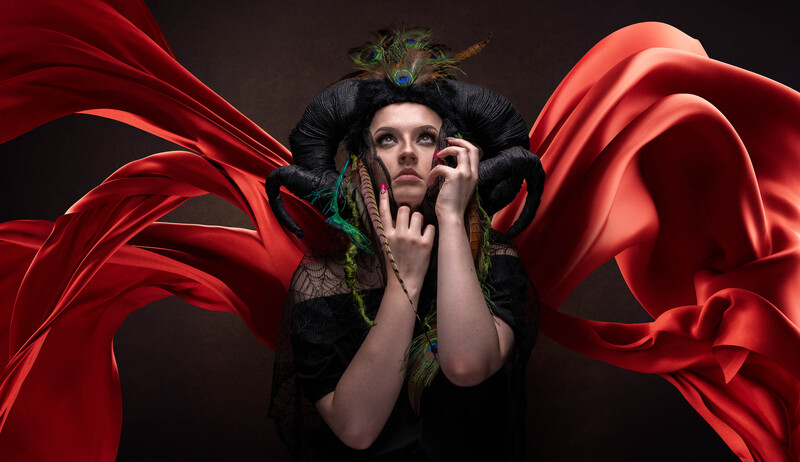
Now, it was time to look over the image to see if anything needed to be tweaked to bring the image together and help balance it out. In this case, there was an unevenness on the chin that I was drawn to. I achieved an adjustment by adding a radial mask and simply lifting the exposure slightly, which evened it out. I had also decreased the texture slider slightly, but this had a detrimental effect on the skin texture in this area, so I reset the slider. Adding a slight vignette to the image via an inverted radial mask helped focus the viewer more on the subject..
Once the edits had been completed, it was time to create a few more virtual copies to allow me to compare the images before settling on the final edit. The desaturated look and the black and white both really appealed to me, but I finally settled on my working edit, as it provided the look I envisaged before I edited.
Final Thoughts
Considering that the entire edit was done in Lightroom, I am more than happy with the outcome. The versatility of the software now means that you can edit an entire portrait without ever heading over into Photoshop, which for some can be a little daunting until they become comfortable with it.
This entire edit was completed by following lesson 19 from the Mastering Adobe Lightroom tutorial by Pye Jirsa, and this is only one of the valuable editing techniques and tips that can be found within the download, which also includes:
- 10+ Hours of Videos
- 49 Lessons
- 147 Exercise Files
- Full Lightroom Workflow
- Mobile Shooting and Editing
- Professional Lightroom Presets
If you are new to Lightroom editing, this tutorial is a fantastic starting point that will rapidly increase your editing skills, speed, and understanding of the entire process. Even if you are a seasoned editor, there is a lot of valuable information that can be gathered, so it's well worth checking out.


Join the Fstoppers community for free
-
Post comments and join in the discussions
-
Browse the site ad-free
-
Share your work and get featured in the community
-
Compete in the photo contests for fun and prizes
4 Comments
What a brilliant and detailed article. This must have taken forever! I watched the Pye Class also. It was interesting. Lightroom has come a LONG way indeed! I still don't think the clone features and the skin features are good enough for client delivery, do you? I love your shot and how you retouched the fabric.
Many thanks, Michelle, really appreciated. I'm with you on that one as I still prefer Photoshop for cleaning as you have more control. I think Lightroom will aim to improve the clone and skin but ye it certainly has come a long way!
"Stellar" is all I can say. well-thought-through article with excellent details, worthy of sharing with others.
I've been doing more in LR since the latest updates and agree with you, though some things are in fact faster, if not better, in PS but that's solely based on preferences.
Kudos!
Really appreciated Glen, glad you enjoyed the article. Yes, Photoshop still has the edge and at times a more controllable one for end results, but Lightroom is getting there isn't it? Thanks for reading.