
It’s a mystery as to why Lightroom doesn’t offer a quick and easy way to add borders to images when exporting files. However, there is a simple solution.
While Lightroom’s export dialogue does grant you a large amount of control, the option to add a simple border to your files is notably missing. Anyone wanting to achieve this classic look is typically forced into one of two routes: The first option is Photoshop, which offers automation through Actions and Droplets, but adds multiple steps to what should be achievable within a few clicks.
Avoiding the Print Module
The second option is to dive into Lightroom’s dreaded Print module and start navigating the random panels before deciphering the difference between a Picture Package and a Custom Package. After that, there’s the fun of calculating the dimensions of your resulting file. Being a print module and with paper in mind, Lightroom only gives you options to set inches, centimeters, picas, points, and pixels per inch — there’s no quick way of setting the resulting image size in pixels. You can do some math, but as soon as you use a photo that’s a different ratio, you’ll need to start over.
Step Forward, LR/Mogrify 2
Given that I like having a border on my images when posting to Instagram Stories and to Twitter, it was frustrating that Adobe hasn’t thought to add a simple “add border” option to its Export dialogue. Fortunately, there’s a plugin that does exactly that: LR/Mogrify 2, created by Timothy Armes, a software engineer based in France. Window users will have to first install ImageMagick, a free bitmap converter, but beyond that, it’s simply a matter of downloading the plugin and telling Lightroom where to find it.
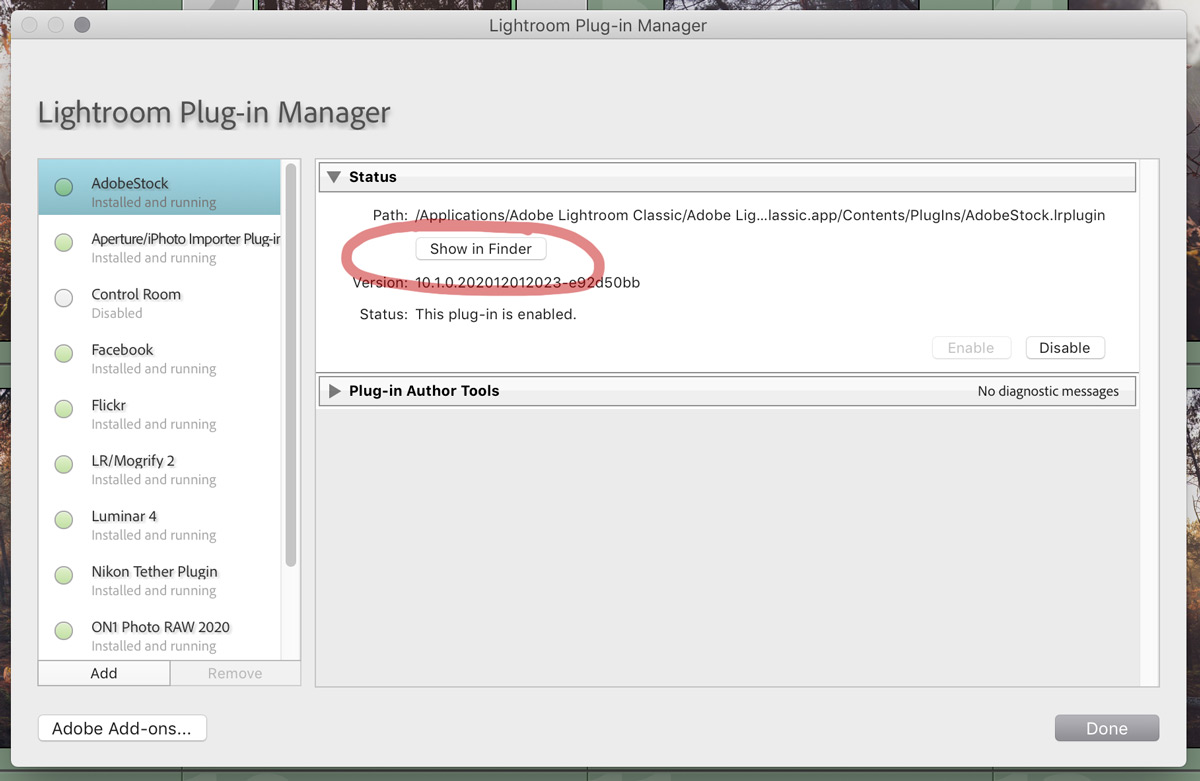
I suggest copying the plugin to your machine’s plugins folder, as installing a plugin does not prompt Lightroom to copy it there automatically, and it’s best to keep them all in one place. To find the right folder, choose “File” and then “Plugin Manager.” Then, click on any plugin on the left and under “Status,” you will find a button marked “Show in Finder.”
After you’ve copied the LR/Mogrify 2 plugin, hit “Add,” and tell Lightroom the location.
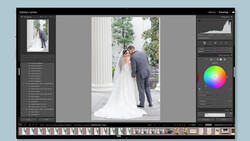
Once installed, a new section will be added to Lightroom's Export dialog box. LR/Mogrify 2 does more than add external borders; some of them are similar to existing Lightroom functionality, such as sharpening adding a graphical watermark and file compression. Others include the ability to add text annotations, a background canvas, and inner borders.
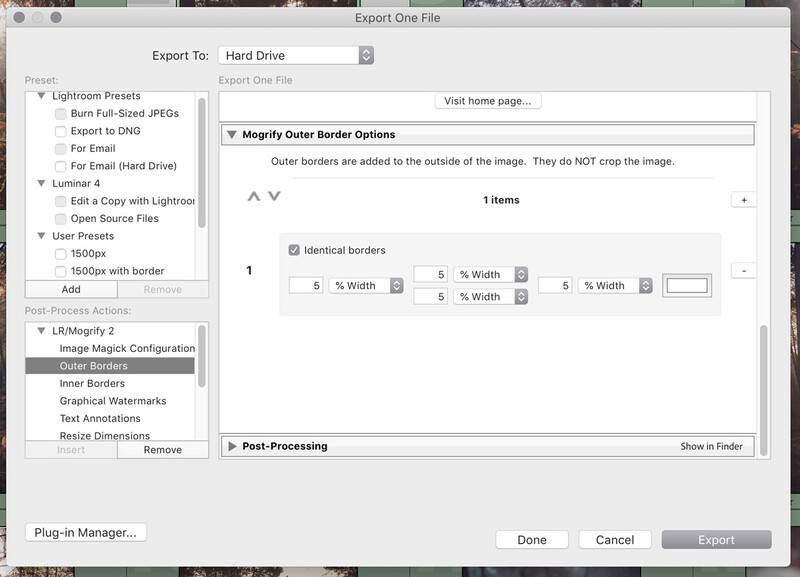
Adding Outer Borders
Select "Outer Borders" from the list in the bottom left and then "Insert" just below it to add it to Lightroom's list of export variables. To add a border, hit the plus symbol. LR/Mogrify allows you to add as many as you like should you for some reason want to create a series of multicolored borders.
LR/Mogrify 2 will add Outer Borders based on the image dimensions defined in the Export dialog. You can do some math (either adding pixels or calculating percentages) to figure out your final file size.
Should you wish, LR/Mogrify 2 allows you to resize an image with the borders, overriding the settings in Lightroom's native "Image Sizing" section of the Export dialog. Generously, you have 13 different resizing algorithms from which to choose.
As with Lightroom’s own variables, any formulas you create can be saved as a preset.
It's Free, Pretty Much
All of this functionality is available for free unless you want to export more than 10 images at a time. Beyond that, the author requests a small donation for his time in exchange for a serial number, and I'd encourage you to put your hand in your pocket if you find this plugin useful. Keep in mind that updates to Lightroom might break the functionality of the plugin until Armes has time to tweak his code.
LR/Mogrify 2 is listed in the Help section of Adobe's website and can be downloaded from Photographers Toolbox.
If you'd like to learn how to use Adobe Lightroom more efficiently on any device, make sure to check out our Mastering Adobe Lightroom course with Pye Jirsa. The content Pye covers will appeal to every level of photographer and will save you an incredible amount of time on your image editing. Save 15% by using "ARTICLE" at checkout.


Join the Fstoppers community for free
-
Post comments and join in the discussions
-
Browse the site ad-free
-
Share your work and get featured in the community
-
Compete in the photo contests for fun and prizes
15 Comments
LR/Mogrify 2 is absolutely fantastic, I've been using it for years. Well worth the donation.
Or you can scale the image in the transform panel for a quick white border, no?
You can do that in photoshop, but we are talking about Lightroom :) The plugin means you can add that border to a single image, or to hundreds of images on export, and you can scale it so that (in most cases) the aspect ratio and the orientation (landscape or portrait) doesn't matter.
The transform panel is in Lightroom.
That seems to work very nicely. Much easier. However, it only works for the native aspect ratio of the photo. At least when I tried it, the scale is applied to the original photo, independent of the crop, so a cropped photo doesn't end up with a uniform border. But for an uncropped photo, it works nicely. Is there a way to change the background color to change the color of the border?
So you need to install external software to avoid doing it with on board tools? Hmm....sounds more like advertising.
WARNING DOES NOT WORK WITH BIG SUR. I upgraded to Mogrify 5.1 after some years of use as was nagging to update. Then made another donation only to find it will not run giving "“magick” cannot be opened because the developer cannot be verified". I have emailed Tim Arnes twice but had not reply.....
Me too Glyn - also no reply... I'm running a Mac too but I read that 'apparently' "magick" is not required (only for PCs) - most frustrating...
Fstoppers. Puts up article about a mom plunging 80 meters taking a selfie. Later, inexplicably, puts up article with photos of a person performing risky parkour moves.
what if i tell you that i can make a LR preset for borders instead of using third party software? 🤯?😂😂
Please do tell how 👍
Or try this via print module: https://lenscraft.co.uk/photo-editing-tutorials/tutorial-add-an-image-b…
LR preset: https://www.digitalcameraworld.com/tutorials/lightroom-tutorial-24-how-…
Thanks so much for sharing this...
was super amused to see my coment from 2020 here but in 2025 i came up with something way better https://vmoldo.gumroad.com/l/borders?layout=profile
There is another Lightroom plugin that has much more options for frames, there is a tutorial here: https://www.youtube.com/watch?v=soYmD3hxKoc (the audio is in Spanish, but you can get autogenerated captions).
It does not generate watermarks, but they are now generated by lightroom as it is.