
You're set to capture something amazing with your camera, but where should you begin? Without a clear process, it's easy to rush, overlook details, or end up with photos that miss the mark. Let’s outline a simple, repeatable approach to help you slow down, capture more, and make each shot count.
I wish I had known earlier in my photographic journey how important it is to have a process for creating images. It goes beyond simply having and executing an idea; planning, equipment, observation, and many other factors contribute to image-making. A structured approach can enhance your photography's creativity, efficiency, and consistency. Primarily, having a repeatable process that is easy to follow and replicate every time you're behind the camera increases your chances of success! You won’t be fumbling around trying to remember everything you need to consider, inherently forgetting key aspects of the process, which raises the chances of failure. Over the years, I’ve learned crucial lessons that have made a real difference in my shooting success in the field. Below are the insights and techniques that have helped me capture stronger, more intentional images.

Slow Down and Observe
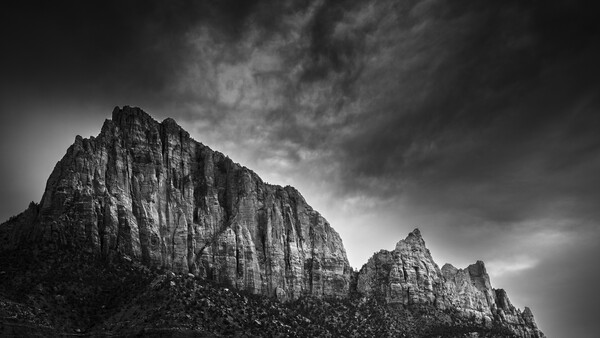
When something catches your eye, you want to grab the camera and capture the scene right away. But could you take a moment to soak it all in? We often miss interesting elements or lighting in a photograph by grabbing the camera immediately and starting to shoot. Use this time to study light, composition, unique angles, and storytelling elements to help create a more visually appealing image. Pay attention to small details—textures, reflections, and movement—that could enhance your shot. Take the time to slow down! Just because my Nikon Z8 takes 120 frames per second does not mean I need to shoot that landscape at 120 fps! Speed will only kill your creativity, and you’ll find yourself chasing the next photograph, only to come home and realize you're unhappy with the images you created.

Work the Composition
Just because you visualized the best composition right out of the gate doesn’t mean you have. I have often thought this was the case and focused only on the composition I thought was the best, only to find that if I had spent more time thinking creatively, I actually missed the best composition. Composition is straightforward, but we often overlook this aspect of the process. Here are a few things to consider when "working the scene":
- Experiment with perspectives: Shoot high, low, or from unexpected angles.
- Back to the basics: Trying to create images with the golden ratio, multiple subjects, or balancing negative and positive space in an image can become very complicated. Go back to the basics—leading lines, the rule of thirds, symmetry, and contrast are straightforward and effective compositional techniques.
- Distractions: Keep an eye on the edges of your frame. You can easily miss things sticking into the frame. Be more aware of the edges and make sure there are no distractions like poles or objects directly behind your subject. I often see images with a very bright light source or another element that is not the subject. Bright spots attract the viewer's eye and may direct attention elsewhere!

Master the Light
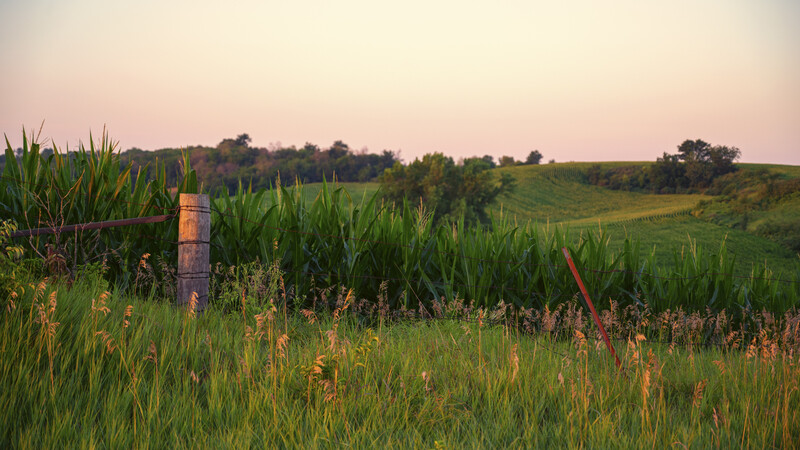
Any great photo begins with one thing: great light! Pay attention to the quality and direction of the light. Is it harsh, soft, or diffused? Understanding the quality and direction of light reveals many things and helps you create images with depth and emotion. Knowing the light’s direction and source will guide both you and your camera’s position. Sometimes, slightly adjusting the camera’s position is needed to create a more striking image. Adjust your exposure to fit your scene and story, and watch your histogram.
I like to slightly underexpose my photos, and I have a different outlook on exposure than most. Some may disagree, but that might be another article for another time!
Fine-Tune Camera Settings
Set the correct aperture, shutter speed, and ISO for the image you want to create. Take your time and thoughtfully consider each setting, as they all play a crucial role in your image and its exposure. Don’t just select a combination to achieve correct exposure—think about the camera mode you’ll use. You don’t need to shoot in manual all the time. There, I said it! Modes like aperture and shutter priority can produce the same images as manual mode. Every exposure mode has a time and place; remember, work smarter, not harder.
Many photographers set and forget metering modes, but remember, there is more than one metering mode, and they all have their time and place. I know photographers who exclusively use spot metering because it fits their process, and they create some of the greatest photographs! If you don’t fully understand your camera’s metering modes, open your manual or fire up Google and do some research!
Multiple Shots With Intention
Capture variations of photographs—different focal lengths, compositions, and lighting conditions. You more than likely have a bag full of lenses, use them! I don’t know how many times I have heard “ I only use _________ lens.” Then, they told me about this photo they had missed or couldn’t take. They wouldn’t have missed the shot if they had only used other lenses. I have never understood why some photographers will die on the hill proclaiming the only lens they will ever use is a 35mm or 50mm. If that works for you, then great, but don’t be mad if you miss a shot because that was not the correct focal length for the image at hand. I’ll get off my soap box now! Remember, each tool has a purpose, and there is no one-size-fits-all solution for every problem you encounter!
I also like to experiment with the camera’s image area or aspect ratio. Many times, I switch between 3:2, 1:1, and 16:9, as it allows me to think differently about composition! Experimenting with exposure is also valuable. Who says you can’t overexpose or underexpose your images? I often bracket my exposure in high-contrast scenes, giving me more options during editing. Remember to take a mix of wide, mid, and close-up shots—this helps tell a story and ensures a good flow of images.

Review and Adjust in the Field
Always review your shots on the back of the camera while shooting! Taking the time to check your images can help catch and correct mistakes on the spot. I have made this mistake before, and I’m not immune to it!
Here are a few things I check after shooting a series of images:
- Zoom in on the LCD and check sharpness and exposure.
- Check for “blown out” or overexposed (too bright) areas.
- Look for distractions or compositional issues.
- Reposition and reframe if necessary.
- Return at another time if the light isn’t right.
Final Thoughts
Every shot presents an opportunity to refine your approach to the image-making process. Trust your instincts, but challenge yourself constantly—if you feel uncomfortable, that’s part of your learning. The best photos don’t just come from a camera; they come from you and how you experience the moment behind it!
If you rush, you’ll end up with hurried images. Take your time, and your images will be created with intention. Viewers will notice the thought you’ve put into them, and you will find more meaning in your work.
Sit down and pull out a pen and paper. Write down the steps you take while creating images and see if there are areas for improvement or additional steps you can include. What steps do you take almost every time you make an image? Let me know in the comments below!
Join the Fstoppers community for free
-
Post comments and join in the discussions
-
Browse the site ad-free
-
Share your work and get featured in the community
-
Compete in the photo contests for fun and prizes
No comments yet