
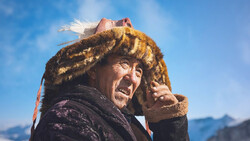
You may have heard you should shoot in raw, but why use a format that's bulkier and takes more work? Let's explore the benefits.
File format may sound technical, but it affects how your images look and how much editing power you have. You’ve probably seen names like JPEG, PNG, and raw. These are simply different ways your camera or computer packages the data that forms an image. When you snap a photo, your camera’s sensor collects information about the light bouncing around the scene. This information has to be stored in a file. The type of file determines how much of that data is kept, how it’s compressed, and how it’s displayed.
Your camera likely offers a setting to choose JPEG, raw, or both. JPEG files are small, convenient, and recognized by every software program you can think of. They’re built for quick sharing, and the world of social media is built around them. PNG files are also recognized widely, although you might see them more for graphics or logos than for everyday photos. Raw is different. It contains every last bit of data from your camera’s sensor. When you compare raw and JPEG, the basic difference is how much information the file saves and how it saves it.
JPEG is a compressed format. It’s like a sealed package that can’t be expanded to its original state once it’s finalized. Some image data is lost forever to reduce file size. The upside is that you get smaller files, which means you can store more images on your card or hard drive. The downside is that some details are thrown away in the process. This means less flexibility when you want to adjust things like exposure or color.
A raw file is like having uncut footage from a movie set. It’s large because it holds all the details the sensor recorded. This is why a raw file might be two, three, or even four times larger than a JPEG. You get all the depth in shadows, highlights, and midtones. When you open a raw file in an editing program, you’re seeing more than just a picture. You’re seeing a data trove that can be molded.
Raw is sometimes misunderstood because the file appears flat or bland when you first open it. That initial dullness puts off many people who expect a vibrant, ready-to-share image. This raw file, though, is a goldmine for post-processing. When you edit a raw file, you have more leeway before the image breaks down and looks messy. The color data is richer. The highlights and shadows contain more detail. You can bring out subtle textures or save an underexposed area without introducing nasty color banding or noise artifacts.
A compressed JPEG can’t match that. Once you try to brighten a shadow in a JPEG, you might find that the details are already gone or that the area turns into a noisy, blotchy mess. If your highlights blow out on a JPEG, you probably can’t bring them back. When you work with raw, you have better odds of recovering those details.
This difference is important if you’re developing a personal style. You may want to create a moody look with deep shadows. Or you might like bright, airy scenes. With raw, you have more control. You won’t run into harsh limitations that come from irreversible data compression.
Exploring the Advantages
Raw is like having access to all your recipe ingredients, while JPEG is a cake that’s already baked. Once you bake a cake, you can’t easily change the flavor. You might add icing or toppings, but the fundamental taste is set. Raw, on the other hand, is a big pile of fresh ingredients. You can decide how much sugar or spice you want long after leaving the grocery store.
Because a raw file preserves the entire range of color and tonal data, you can shift exposure more gracefully. If an image is slightly overexposed, you often have a chance to rescue those bright areas without losing detail. If it’s underexposed, you might lift the shadows without introducing glaring artifacts. This flexibility is powerful if you’re working in tricky lighting. Scenes like bright sunsets, concerts, or backlit portraits benefit from that extra dynamic range.
Editing raw files also makes color adjustments more precise. When you shoot in JPEG, the camera commits to a color profile. Raw stores color data in a more neutral form. You decide later if you want cooler tones or warmer tones. This freedom fosters a sense of creative exploration. You can experiment with saturation, vibrance, and hue. You can push colors gently or go bold. Raw won’t punish you with harsh banding or posterization as quickly as a compressed format might.
Sharpening and noise reduction also work better when you start with raw. Noise is that grainy or speckled look in darker areas or high-ISO images. Because raw keeps more detail, you can apply noise reduction with a more refined touch. The same goes for sharpening edges. You can bring out textures in a detailed subject without the file falling apart from too much manipulation.
Some people think raw is overkill, but you’ll see the difference when you make your first big print or serious edit. Those extra bits of data become valuable. Larger prints reveal the fine details that might have been lost in compression. Big edits reveal the hidden data in shadows or highlights. If you’ve ever been frustrated that your JPEG image couldn’t handle one more tweak, raw is a lifeline.
Beyond technical control, raw encourages a mindset of experimentation. When you see that you can salvage an image that was a bit off in exposure, it becomes less stressful to shoot in difficult conditions. This doesn’t mean you stop trying to get settings right in-camera. It means you have a safety net, and that safety net builds confidence. You start to push yourself by shooting scenes with strong contrast or challenging light, knowing you can navigate the results more easily in post-processing.
Building Confidence Through Control
You might have heard the phrase “Get it right in camera.” It’s good advice. You don’t want to rely on post-processing to fix every mistake. But reality isn’t always neat. Sometimes you’re in a hurry, or the light is changing fast. Other times, you can’t control the environment, like when shooting an event. A raw workflow grants you the wiggle room you need to adapt.
This wiggle room helps you remain calm when you’re fumbling to adjust your shutter speed or aperture. If you’re off by a third of a stop, raw may rescue the shot. If your white balance is set incorrectly, raw makes it easier to correct the color cast later. All that extra data in the file gives you second chances. Second chances encourage you to keep learning instead of getting discouraged.
Raw editing can also teach you about exposure and color theory. When you move the exposure slider and watch how the histogram shifts, you’re seeing how the sensor recorded your highlights and shadows. It’s not an abstract concept anymore. You begin to notice the interplay of light, midtones, and contrast. You might see how a tiny tweak in white balance changes the mood of your image. You may discover that reducing highlights helps maintain detail in bright clothing or reflective surfaces.
This hands-on experience will sharpen your instincts in the field. Each time you correct a mistake in post-processing, you build muscle memory for your next outing. Maybe you notice your images are consistently a bit underexposed. You start adjusting your camera settings preemptively. Maybe you notice the auto white balance skews your sunset shots too cool. You start dialing in a custom white balance. Over time, you’ll rely less on heavy edits and more on careful shooting. But it’s nice to know you can handle problems if they arise.
You also develop a clearer vision of your personal style. Experimenting with raw files helps you see the difference between subtle and extreme edits. You might like a washed-out aesthetic where highlights are bright and shadows are lifted. Or you may gravitate toward punchy contrast with deep blacks. Because raw offers broader editing headroom, you can push colors and tonal values further before they degrade. This freedom nurtures a sense of identity and expression.
Confidence grows one edit at a time. Each time you rescue a highlight or enhance a color palette, you see the tangible impact of raw’s flexibility. The more you refine your process, the more you appreciate what this format can do for you.
Software and Workflow Essentials
Editing raw files doesn’t have to be hard. There are user-friendly programs that simplify the process. Adobe Lightroom is a popular choice because of its clean interface and library system. It helps you manage large collections of images and offers built-in editing tools that work with raw files seamlessly. If you need something even more streamlined, Skylum Luminar has an interface that leans on AI-driven adjustments and presets. You can open a raw file, pick a preset that suits your vision, and fine-tune from there.
Free options exist, too. Darktable is an open-source application that offers many of the same capabilities as commercial software. Its interface can seem complex at first, but it’s powerful once you get the hang of it. RawTherapee is another free alternative that includes a variety of modules for adjusting color, tonality, noise reduction, and more. These programs might be less polished than commercial solutions, but they deliver strong raw editing features without a price tag.
Presets or automated features help you dip your toe into editing without feeling overwhelmed. Think of a preset as a starting point rather than a final look. When you apply one in Lightroom or Luminar, the program sets certain parameters for you, like contrast, color balance, and tone curves. You can then tweak these settings if you need a different mood or if you want to match your personal style. Over time, you may create your own presets based on your preferences.
Some people like to shoot raw plus JPEG. This means your camera saves both versions. The JPEG lets you see how the camera’s internal settings interpret the scene. The raw file is there if you want to push your edits further. This approach is nice if you’re still learning. You can compare how the camera processed the scene to how you might process it yourself. It also helps if you want a quick shareable file without spending time on editing.
Backup and organization become more important when working with raw. Each file is bigger, so you’ll fill your card and hard drive faster. Having a system keeps you from losing track of your work. You might store current projects on an external drive and archive older projects on another. Cloud-based storage can also help if you’re wary of hardware failures. Services like Backblaze or Google Drive can store large files, though it may take a while to upload them, depending on your internet speed.
A common workflow might look like this: you shoot raw and import the files to Lightroom. You back them up on an external drive for safety. You browse the images and pick your favorites, then apply quick presets to see if they get you close to your desired look. You refine the exposure, white balance, contrast, and color. You add finishing touches like sharpening or slight vignettes. You export final JPEGs for sharing online or printing at your local lab. You keep the original raw files for future edits in case you change your mind about the style or need a different crop.
Practical Exercises and Challenges
You can’t truly understand raw until you practice. One exercise is to shoot a series of bracketed exposures. Many cameras have a bracketing feature that captures multiple shots in quick succession, each at a different exposure. For example, you might take one shot at the metered exposure, one at -1 stop, and one at +1 stop. When you load those raw files into your editing software, you can see how each file behaves. Try raising shadows in the underexposed shot or recovering highlights in the overexposed shot. Notice how much data remains intact.
Another exercise is to pick a simple theme, like “window light portraits.” Take a few raw shots of a person near a bright window. Then, in your editor, play with the white balance to shift the warmth or coolness of the light. Adjust contrast and highlights to see how that changes the mood. Write down or type out some notes about which edits you made, how they changed the feel of the image, and how you might shoot differently next time. This journaling process creates a record of your learning. You develop the habit of thinking critically about exposure, composition, and color.
You might also set up a small thematic project, like “urban shapes and colors.” Shoot raw images of buildings, street art, and signs. Later, see how much you can enhance the vibrancy of those colors without making the image look unnatural. Or maybe you do want something surreal. Check how far you can push things before the image breaks. Write down your impressions: did the image hold up? Did you notice weird banding? That’s your clue that you’re hitting the limits of the data. Each limitation you encounter teaches you more about the relationship between data depth and editing range.
From Doubt to Delight
You may worry about the size of raw files. The jump in file size can be significant. Instead of a 5 MB JPEG, you might have a 25 MB raw file. Over time, that means more storage. Consider budgeting for an external hard drive or a cloud backup solution. Hard drives have become more affordable. A 1 TB or 2 TB external drive might be enough for your first big collection of images. You can also manage your space by deleting raw files you don’t need. If an image is out of focus or irrelevant, you can let it go. Saving every single image isn’t a requirement.
Another hesitation is the learning curve. You might open a raw file in an editor and feel lost when faced with sliders for exposure, contrast, clarity, highlights, shadows, white balance, and more. Start small. Move one slider at a time and see the effect. Watch some quick tutorials on YouTube. Pay attention to what each control does to the overall image. You don’t have to memorize every function right away. Tools like auto-exposure or auto-white balance can help you see a baseline. You can tweak from there.
Some people worry that raw editing is time-consuming. If you’re just starting, you can keep it simple by using presets or the program’s auto feature. Spend a minute or two on each image to fine-tune things. Over time, you’ll find shortcuts and develop a workflow that feels natural. You might batch-edit a whole series by applying a preset to everything, then adjusting only the standout shots. If your end goal is social media sharing or small prints, you don’t need to reinvent the wheel with every file.
Storage costs and editing complexity can be managed with planning. You don’t need to keep every raw file forever. You can prioritize. You also don’t need to read a massive technical manual to start editing. A gradual, step-by-step approach works. Over time, this systematic approach eliminates those hurdles and keeps your process organized.
Why Raw Helps Develop Personal Style
Shooting in raw opens up creative doors. You get to shape the final image in more subtle ways. If you’re exploring a certain look—maybe low-saturation, slightly cool-toned images—raw offers the latitude to dial in those tones precisely without turning your image into a washed-out mess. If you’re into bold, saturated colors, raw lets you push vibrance and clarity further while preserving details. These choices define your style.
Raw also pushes you to notice light and color in a deeper way. When you correct white balance in your editing software, you’re training your eye to see the color cast in various lighting conditions. When you adjust tonal curves, you learn how the distribution of shadows, midtones, and highlights affects mood. These small steps add up. You become more aware of your decisions. You learn the language of visual expression. That awareness is part of what sets you apart.
You start to make deliberate choices about color. Maybe you like warm tones in your highlights and a cooler cast in your shadows. Maybe you prefer everything to be neutral. You might crave contrast or prefer a softer pastel range. Because raw grants more freedom, you can fine-tune each part of the image. Over time, these consistent choices form a recognizable pattern that can become your signature.
The journey from raw file to final image is an ongoing lesson in photography’s fundamentals. You see how dynamic range, exposure, and color theory come together. You see how your lens choice impacts the look, whether you’re using a wide angle or a telephoto. You notice how small changes in composition can be emphasized or de-emphasized through editing. You build intuition for what to prioritize at the moment you press the shutter.
You also gain a calm confidence in tackling challenging environments. Harsh midday sun, dim interiors, neon-lit streets at night—these become manageable scenarios because you know you can massage the raw data later. This doesn’t mean you aim for sloppy technique. It means you can handle surprises. That security frees you to experiment more. Experimentation fuels growth.
The difference between a casual snap and an image shaped by your style is often in the editing. Raw files offer the best foundation for that shaping. You aren’t stuck with a compressed file that has limited flexibility. You’re working with something that maintains the nuance of the original scene. That nuance is where art finds its footing.
Embracing the Transition to Raw
Shooting raw doesn’t require fancy gear. Even entry-level cameras offer raw options, whether it’s a Canon Rebel series or a Nikon D3500. Mirrorless systems from Sony, Fuji, Canon, Nikon, and others also let you record raw. Professional cameras do too. All of them provide raw files that you can process. The sensor size matters less than your willingness to engage with the process.
If you’re used to JPEG, try switching to raw plus JPEG for a few weeks. Compare your JPEG edits to what you can achieve with the raw file. See if you notice differences in color detail, highlight recovery, or noise handling. Notice if you feel more in control or more overwhelmed. If it’s the latter, you can rely on your JPEG for quick sharing and only edit the raw when you have time to explore. If you feel that extra control in raw is worth the larger file size, you might switch to raw-only as you gain confidence.
Give yourself a small daily or weekly assignment. Maybe you edit one image per day from raw. Keep notes about what you learned. Did you recover details in a bright sky? Did you adjust the white balance for a warmer tone in a sunrise shot? Did you discover that you prefer a gentle contrast curve instead of a heavy one? Writing this down cements your understanding. It also gives you a record of your progress.
Overcoming Common Hurdles
You might run into compatibility issues if you’re using older software that doesn’t support your camera’s raw format. This can happen when you buy a brand-new model like the Sony a7R V, but your editing software hasn’t updated yet. Many programs release updates to support new cameras, so keep an eye out for updates. Or use a free converter like Adobe DNG Converter, which can transform your raw files into a more universal DNG format.
Another hurdle is performance. Editing raw files can strain older computers, especially if you’re pushing large-resolution images. This isn’t a dealbreaker, but you might experience slower previews or longer export times. You can address this by working with smaller previews or upgrading your RAM if possible. Alternatively, you can sort your images first, then only edit the ones you truly love.
Color calibration is another aspect that some people overlook. If your monitor isn’t calibrated, you might be making exposure or color decisions based on an inaccurate display. You don’t need the most expensive calibration device. Even a budget-friendly solution can help ensure you see a consistent color output. This becomes more important if you plan to print or share your work in professional contexts.
Don’t let these hurdles discourage you. They’re common growing pains when you move toward a more intentional workflow. If anything, they reinforce that raw editing is a skill that goes beyond just pushing buttons. It’s a craft that teaches you how to see light, control color, and present images in a way that matches your creative goals.
Practical Tips for Raw Editing
When you open a raw file, keep an eye on the histogram. If it’s bunched up to the left, your image might be underexposed. If it’s slammed to the right, it might be overexposed. You can tweak the exposure slider first to bring the histogram to a balanced distribution if that’s what the image needs. Then look at highlights, shadows, whites, and blacks. These controls let you individually shape different tonal regions.
White balance is often best addressed early in your workflow. Adjust it until the colors match how you remember the scene or until they achieve the mood you want. You can also use auto white balance as a baseline, then refine it. Small changes in white balance can dramatically shift the emotion of an image. Cooler tones can feel distant or moody, while warmer tones can feel inviting or comforting.
Contrast helps define the relationship between bright and dark areas. Increasing it can add drama. Decreasing it can soften the look. Clarity and texture sliders often boost midtone contrast or bring out detail in surfaces. Use them sparingly. Too much clarity can make skin look harsh and unnatural. Too little can make the image appear hazy.
Color sliders let you target specific hues. You can make grass greener without affecting the rest of the scene, or shift the sky to a more cyan tone if it looks too purple. Vibrance and saturation affect overall color intensity but in different ways. Saturation pushes every color equally, which can lead to garish results if you’re not careful. Vibrance pushes only the more muted tones, leaving already-saturated colors mostly alone. This can help maintain a natural balance.
Lastly, look at sharpness and noise reduction. Raw files typically come out of the camera less sharpened than JPEGs. Apply moderate sharpening, watching edges and details. Noise reduction is crucial at higher ISOs. Strike a balance between smoothing out noise and preserving detail. Over-smoothing can lead to a plastic-looking image.
Save your file or export it. If you’re sharing on social media, you’ll export a JPEG at a reasonable resolution. If you plan on printing, you might export a higher-resolution TIFF or JPEG. Keep the raw file as your digital negative. If you ever want a different look, you can start from scratch without losing original data.
Broadening Your Perspective
The world of raw editing is vast. Some people combine multiple raw files into high dynamic range images (HDR). Others use stitching techniques to create panoramas. Some dive into advanced color grading for cinematic effects. Each of these techniques hinges on having enough data in the source file. Raw is your ticket to that data.
If you decide to explore advanced software, programs like Capture One Pro offer features tailored for certain camera brands, along with advanced tethering and color controls. Affinity Photo can handle raw edits alongside layered pixel editing. Photoshop remains a powerful tool for composite work or retouching, though you might still start with Adobe Camera Raw or Lightroom for basic adjustments. Whichever program you choose, the raw concept remains the same—maximum data for maximum control.
Developing a personal editing style often includes making presets or “looks” that you return to. If you prefer a consistent style across your images, set up a preset that encapsulates your favorite color shifts, contrast settings, and tone curves. Apply it to a group of shots for a cohesive portfolio. Then refine it per image if needed. This helps speed up your workflow and cements the aesthetic you’re aiming for.
When you look at images from well-known people, you’ll notice a distinct tonal quality or mood. Some shot on film, but the principle of controlling the image’s tonal range and color is timeless. With raw, you’re adopting a similar mindset. You decide how bright the highlights go, how dark the shadows get, and where the color balance lands. You mold each image to match your vision.
Ongoing Learning
Don’t be intimidated by the idea that editing raw files requires a steep learning curve. The best way to learn is by doing. Take one or two images each day and edit them. Try different sliders, see what they do, and note what you like or dislike. Watch tutorials on YouTube or read short articles, but always apply the tips with your own files. That hands-on repetition cements the concepts in a way passive consumption never will.
Understand how your camera’s metering modes affect exposure. Learn how to adjust your white balance presets if you’re shooting under tricky lighting. Explore shooting in manual mode if you feel ready. The more you understand about how your camera captures raw data, the more confident you become in using it. This synergy of knowledge and practice leads to real growth.
Experiment with different lenses if you can. A wide angle lens captures a broader field of view, which might emphasize certain colors or textures. A 50mm or longer lens might compress perspective. This changes how your images look before you even begin editing. When you then process those raw files, you’ll see how different focal lengths respond to contrast or color adjustments. You’ll also see how each lens renders sharpness and bokeh.
If your camera has different raw quality settings, experiment with those. Some models offer compressed raw or lossless compressed raw. See if the smaller file size meets your needs. Often, lossless compressed raw strikes a balance between huge file sizes and complete data retention. If you do a lot of burst shooting, you might opt for a smaller raw file so your camera doesn’t bog down. Test it out. Notice the difference in your editing.
Pivotal Step Toward a Differentiated Style
Shooting in raw isn’t just a technical choice. It’s a creative one that stands apart from everyday habits. It’s also a statement that you care about the full potential of your images. This doesn’t mean you must spend hours editing every shot. It means you have the option to shape each image on your terms. That mindset, over time, accelerates your growth and sets you apart.
You might find that raw editing leads you to a deeper appreciation of light and color. You see how slight changes in exposure transform the overall composition. You spot how a small shift in hue alters the tone of a portrait. You take note of how noise behaves and how sharpening affects textures. Each discovery fosters a sense of craftsmanship.
Raw can be your bridge between feeling limited and feeling in control. If you make a small mistake in exposure or color, you often have room to fix it. That cushion frees you to experiment more in the field. You become bolder with your camera settings. You test new angles, new lighting conditions, and unusual compositions. You do so because you know the raw file will grant you a measure of flexibility afterward.
Once you embrace raw, your personal style begins to take shape more fluidly. You might settle on a warm, glowing look or a cool, cinematic vibe. You might favor strong contrast or lean toward delicate gradients. Whatever route you choose, raw is there to support it with a stronger foundation.

The key is that raw invites you to grow through the process of learning exposure, color control, and editing decisions. Each step you take refines your eye, your technique, and your style. This is where your photography starts to stand out. By spending time with raw files, you’ll see the subtle differences that make an image resonate in a unique way. You’ll learn to harness those differences to craft images that mirror your vision.
Your path may lead you to new creative breakthroughs. You might explore surreal colors, gentle matte finishes, or high-contrast black and white conversions. You may decide to master advanced retouching or composite techniques. The foundation remains the same: raw files give you the data you need to sculpt the image without hitting the ceiling of compression artifacts. They enable the kind of detailed control that fosters artistic expression.
You’ll discover that raw isn’t an enemy of good technique. It’s a companion. You still benefit from correct exposure in the field, but raw forgives minor slips. You still pay attention to white balance, but you can refine it in post. You still work to control noise through ISO choices, but you can push that boundary when necessary. In this way, raw complements your efforts rather than replacing them.
At some point, you’ll realize that shooting in raw doesn’t feel exotic anymore. It becomes your default. You’ll have your editing workflow dialed in, your storage plan set, and your personal style evolving. You’ll look back at your early JPEG days and see how much you’ve grown. You’ll know your images are no longer constrained by compression. You’ll see the difference in the final results. You’ll sense that your approach to photography has matured as you seize the creative possibilities that raw provides.
You’ll see the most striking difference when you push yourself to craft a particular mood or effect that would be out of reach with JPEGs. You’ll see it when you make a large print or revisit an old raw file and edit it in a fresh way. You’ll feel it when you recognize that the freedom to control color, detail, and tone has become second nature. You’ll witness the transformative effect raw can have on your journey. Your images will reflect your vision more honestly. You’ll have developed a personal style that sets you apart, and you’ll keep growing in that direction as long as you stay curious.
That is the core of why raw matters. It’s a creative choice that aligns with your goal of developing a distinct voice, one that has room to mature. It’s a step that can elevate your process beyond simple point-and-shoot habits. It’s a path toward deeper engagement with the craft. And it’s within your reach the moment you decide you’re ready.


Join the Fstoppers community for free
-
Post comments and join in the discussions
-
Browse the site ad-free
-
Share your work and get featured in the community
-
Compete in the photo contests for fun and prizes
5 Comments
In my road to becoming a photographer there were three things that provided great leaps for me in image quality. #1 was learning off-camera flash which lead me to understand lighting a lot better. #2 was switching from shooting in JPEG to RAW and #3 was when I switched from DSLR to mirrorless. www.markschoenfelt.com
You’ll see the most striking difference when you push yourself to craft a particular mood or effect that would be out of reach with JPEGs.
Yes, this! I was hesitant about shooting raw but one day I kinda forced myself into it and honestly never looked back. The editing opportunities are much broader now and I use Photoworks, so nothing too sophisticated, yet I'm seeing the difference.
If it more time consuming? Yes. But is it worth it? Also yes!
I shoot raw most all of the time. But I've never shot *in* raw. That's illegal in most states if you're outdoors!
Here is where this matters to me: I am not sure where exactly it started, but the whole digital colour file format universe has pretty much standardized on ultimately this one format: No matter how many pixels you have, how you compress them (or don't) - each pixel shall have three numbers to it - that is one for red, one for green and one for blue. All formats in wide use allow for 256 values for each of these colours - from zero for "all dark, call it black" to 255 for "as bright as it gets - strong red, green or blue." A pixel with all three colours set to zero will be all black, one with all three set to 255 will be a bright white - as bright as your medium can provide. ("all black, of course is also limited to how dark a "black" can be produced in the ambient light of your surroundings.)
That's what your JPEG can carry, or your SVGA (or better) screen or your printer and the paper you use. There is a small exception with the GIF format (one of the two reasons why it is not all that popular anymore) it also allows colours made up of three values between 0 and 255, but the whole picture can only have 256 of those - so there is a - possibly serious - limit on the colour space your image can cover.
So we can only cover 256 * 256 * 256 colours in any image - that is 16,777,216 all together, if I can trust my phone ;-) and that is not such an awful lot compared to what our eyes can handle. So, in a way a lot of photography (starting with Ansel Adams' zone system) has been about rendering reality with a rather limited gamut, trying to cover as much of reality's contrast as possible. Things might ease up a bit if we could extend the range of each colour component from eight bits (256 values) to 16 bits (256 * 256 = 65536 values) resulting in 281,474,976,710,656 possible colours - maybe a bit more than what we actually need ...
Camera makers have actually implemented sensor technology that will use more than 8 bits per colour. I have read about 14 bits, but there could be other numbers around, too. Thus we will have a higher "colour resolution" in the images as captured by the camera. They can't pack all that into a standard image file, such as a JPEG, but they can keep it in a raw file, the format of which they control - originally no standards existed, but it wouldn't be totally surprising if over time a few formats became de facto "standards" (you know, like VHS or betamax, or HDVD vs. Blu Ray ...)
Whatever ... one of the advantages I see in raw formats would be the availability of a lot more colour depth in a raw image than in its equivalent JPEG, where that richness would have been reduced to the normal standard of 256 * 256 * 256 ...
As a result, there could still be a lot of rich detail in the darkest and brightest parts of an image, although we currently have no technology to bring all of that out in one rendition of our shot - for the lack of a standard format and the lack of hardware that can render this in its full richness.
But we can do one of a number of things with the right raw editing software.
One way would be to flatten the curve in the middle, losing some contrast there for the benefit of bringing out details in both the shadows and the lights.
Or we could shift the whole curve up or down a bit to correct an under- or overexposed image.
Or - and this is almost a bit like HDR, except in one picture rather than two or three, mask different areas of the image and brighten the one, darken the other and leave the middle ground alone - for instance. Nothing would stop us from applying several such operations to different parts of an image, until we have brought out everything we wanted to show.
(Come to think of it - even if I wanted to crop several motives from the same original image I could apply such tweaks differently to each section.)
Of course, I could also apply any other tweaks to my images that regular editing software allows, but while I have that extra colour depth at my disposal, I can do so at a finer gradation.
In the end, though, until someone introduces a standard 16 bit colour format across all software and hardware, I will have to fold the whole thing onto the 256 * 256 * 256 space that we can handle with our existing equipment and software.
And this is where I hand back to Alex, who says "experiment with it, see what you get, what of the results you like and ultimately never look back. (There is still the quick JPEG coming out of your device for all those who can't wait or won't be bothered ;-)
But raw files do not have an R, G, and B value for each "pixel". They have a single luminance value for each photosite a/k/a sensel a/k/a 'pixel' well. 14-bit monochrome information is not the same as 14-bit per color channel information. That's why a 16-bit RGB TIFF (with only 14-bit numbers of unique values - but there are three such values for each pixel, one 14-bit R value, one 14-bit G value, and one 14-bit B value) is so much larger than the monochrome 14-bit raw file from which it is derived, even though the larger 16-bit TIFF file contains less usable information if further editing is desired. After conversion to RGB, things such as black point, white point, and white balance are, to a degree, baked in.
Sure, each photosite has a color filter in front of it, and these filters attenuate light that is not the same wavelength more than they attenuate the wavelength for which it is most transmissive. But some of the full visible spectrum gets through each of the filters. The energy from the blue and red light that makes it through the green filter is included in the same number with the energy from green light. The energy from green light that makes it through the "red" filter (which is actually somewhere between yellow and orange, all of the cute little drawings on the internet that use the three colors of our emissive display devices notwithstanding - the three colors of the Bayer masks in our cameras are NOT the same three colors as those used by our emissive displays, nor are they the three primary colors used by our CMY(K) printing technology) is counted in the same number with the energy from longer wavelength "red" light.
When the monochromatic luminance values are demosaiced to produce color information, all three of the R,G, & B values for each pixel in the resulting image file are interpolated by comparing the luminance values of each sensel filtered with each color with the surrounding sensels filtered for the other colors. Every RGB value is synthetic. None are contained in a raw file unless you're dealing with a sensor like Foveon, which so far have been totally unusable for low light applications.