
I think it is always wise to shoot in raw. The raw file format will store the maximum amount of image information. This can even be optimized when shooting with exposure to the right to make full use of the dynamic range of the camera. Although intended for JPEG photographers, a flat picture profile can have a benefit or raw shooters also.
There are two types of photographers: the ones who shoot in JPEG and the ones who shoot in raw. Both have their own good reasons why to use the file format they prefer. I don’t believe there is an absolute right or wrong in this.
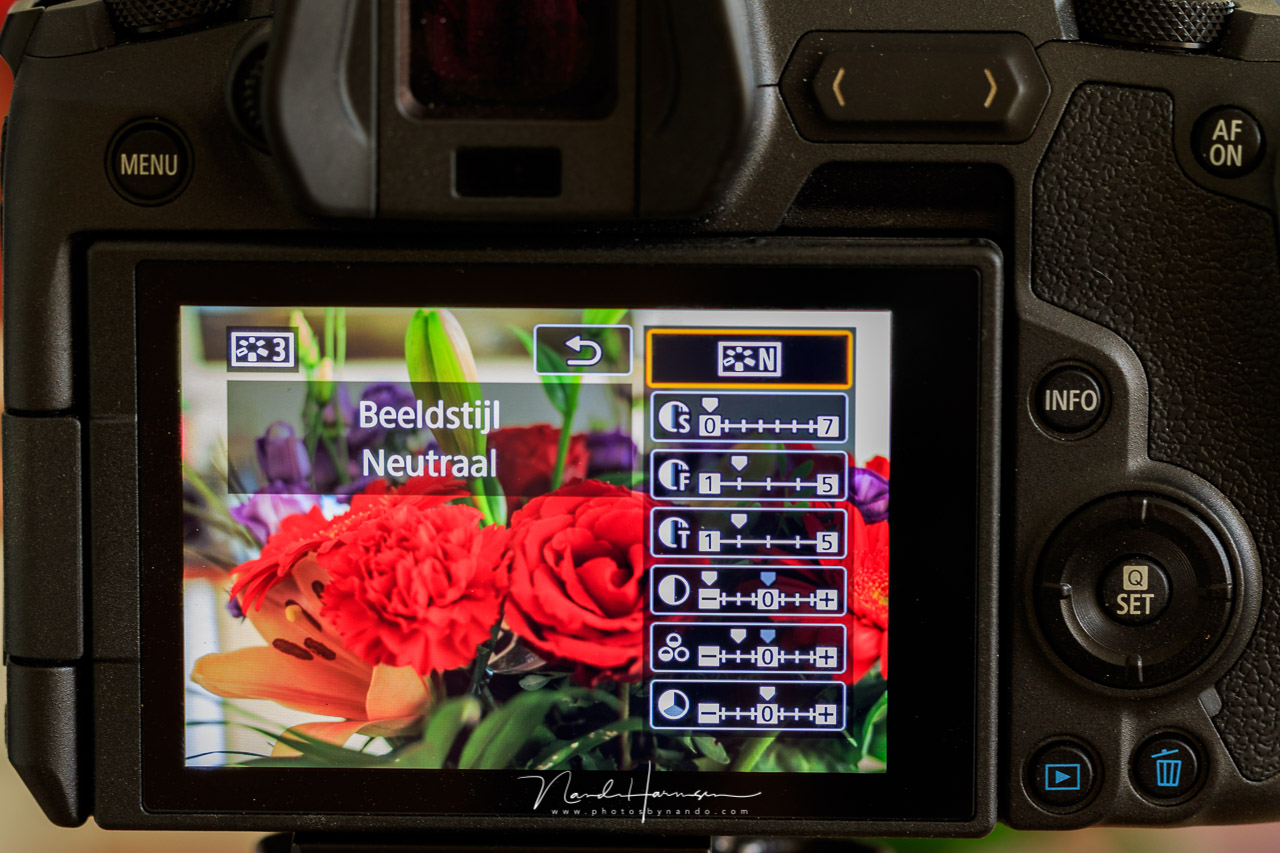
The first group, the photographers who prefer to shoot in JPEG, can give the image a certain look by using the in-camera settings for contrast, saturation, and perhaps a bunch of other settings. Embedded picture styles are also available. I use Canon as my main camera system, and it offers styles like portrait, landscape, neutral, and a couple of other styles. Third-party styles can be imported through the Canon software.
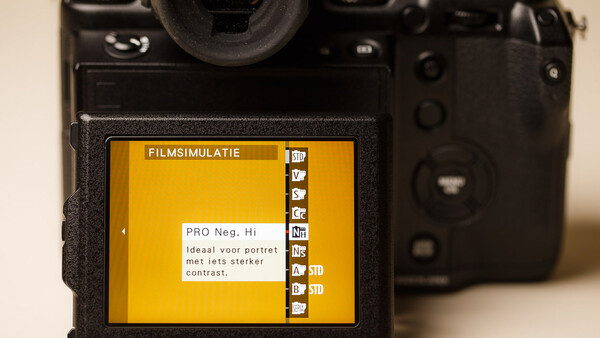
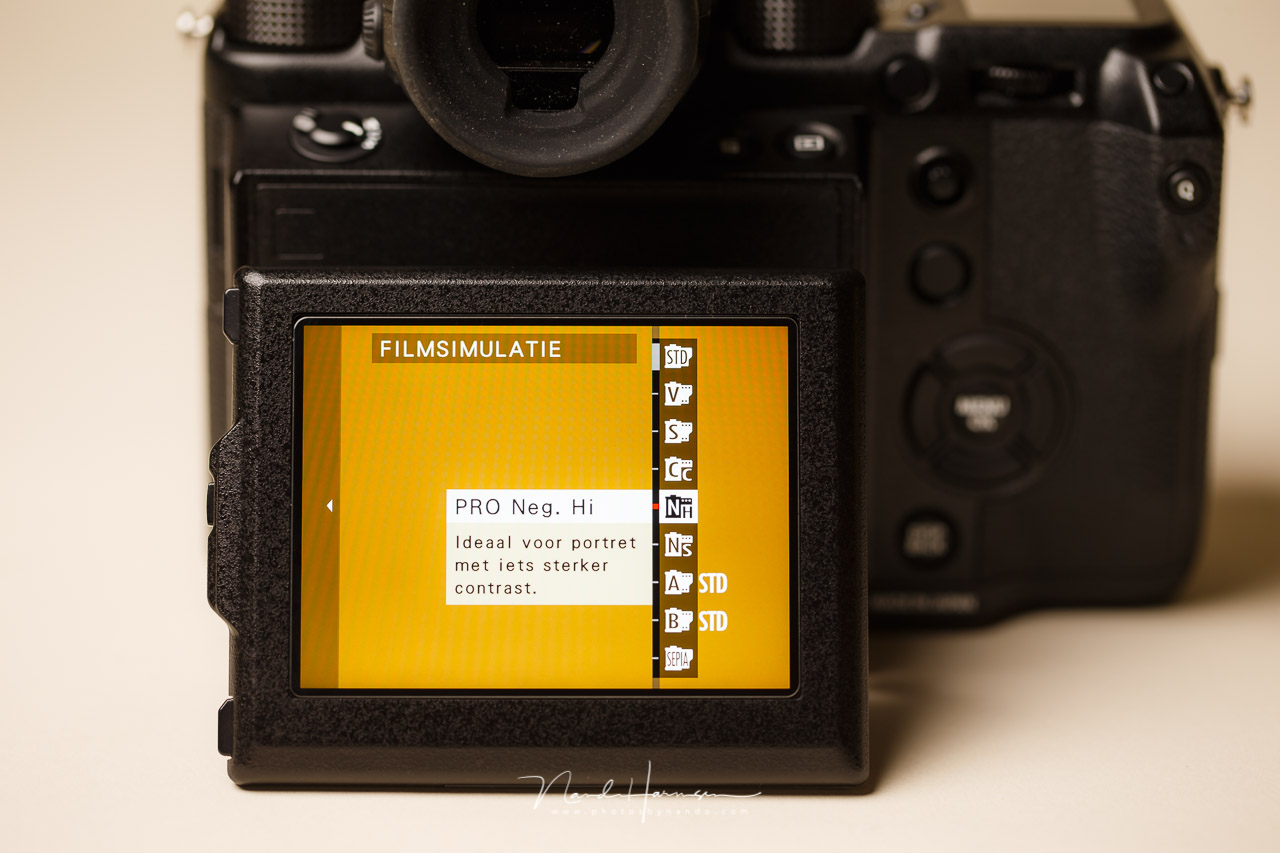
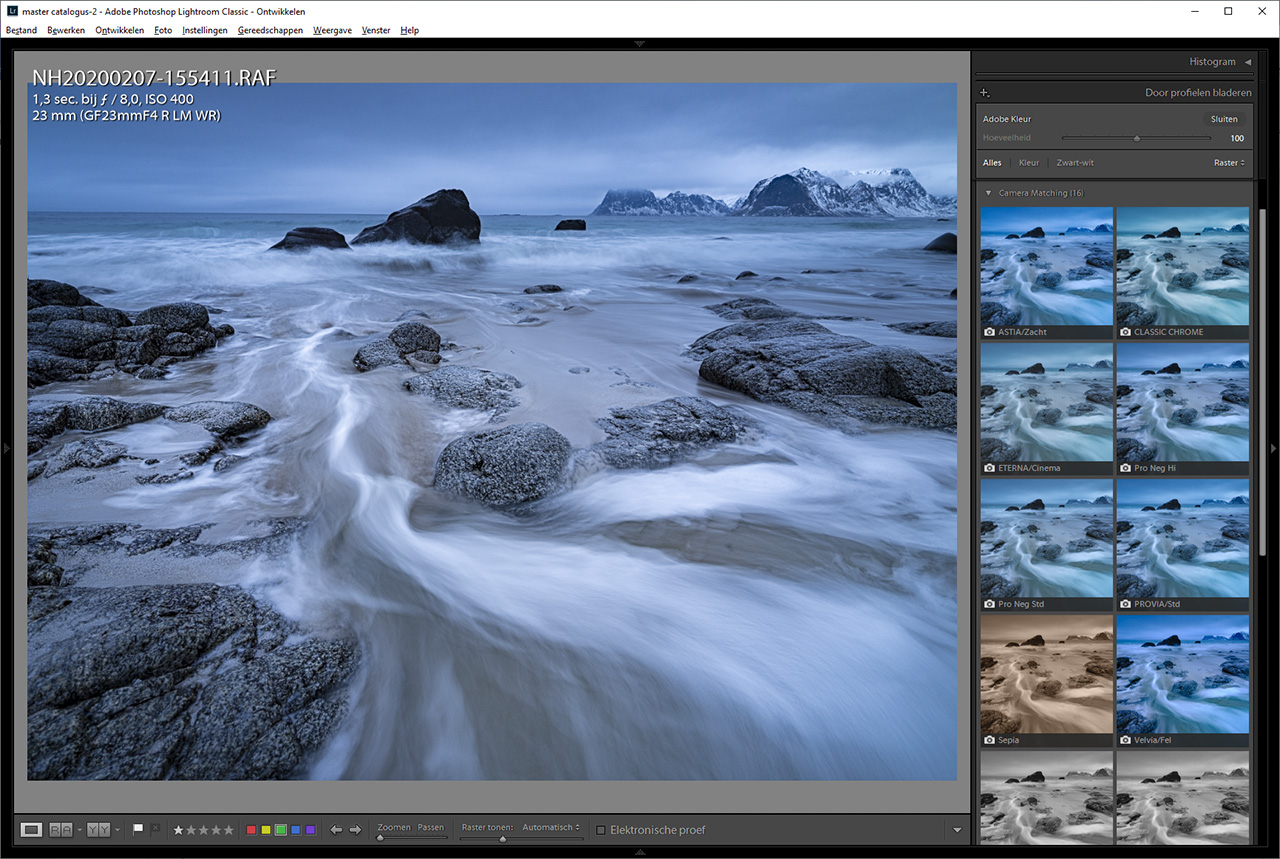
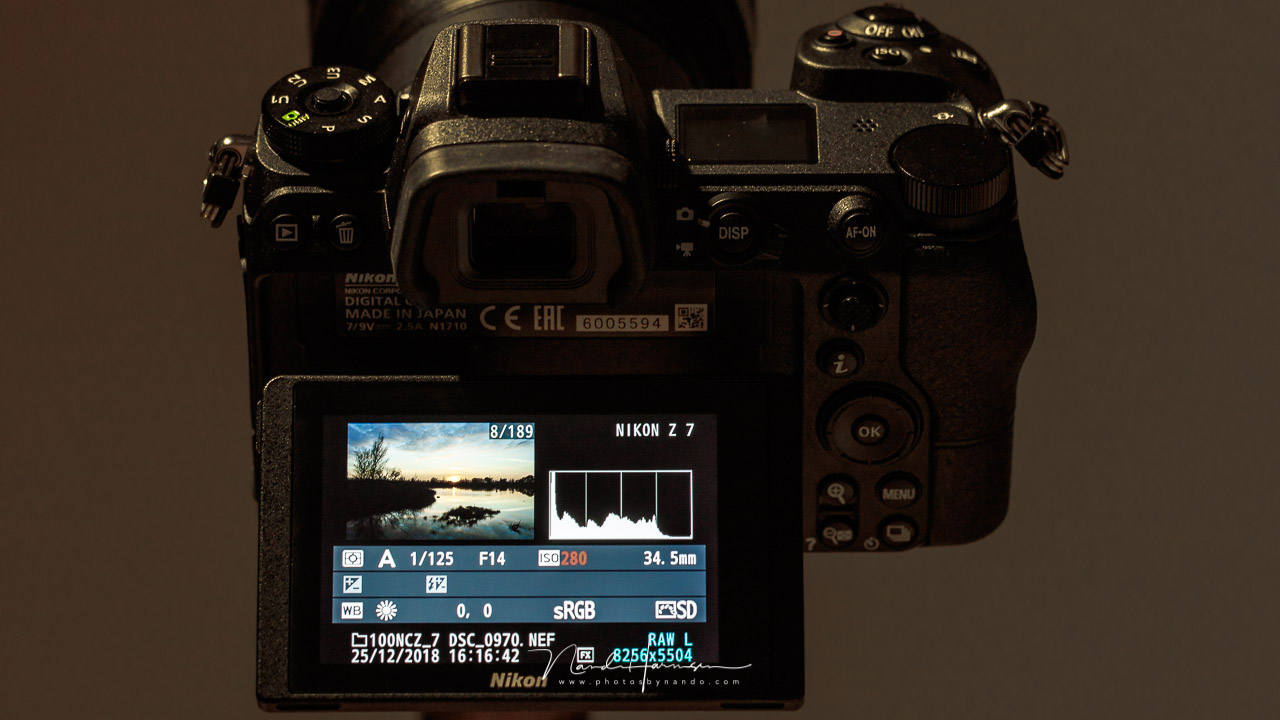
Other brands offer something similar. Some cameras have a more extensive range of picture styles, like the Nikon Z 7. Fujifilm offers a lot of picture styles also. These are the film simulations called Astia, Classic Chrome, Eterna, Velvia, and Acros. Each film simulation will give the image a certain look and feel to it. This is probably the most important reason for some photographers to shoot in JPEG. They are happy with the way the photos are being produced by the camera. And this is fine, of course. It is a very personal and conscious choice.
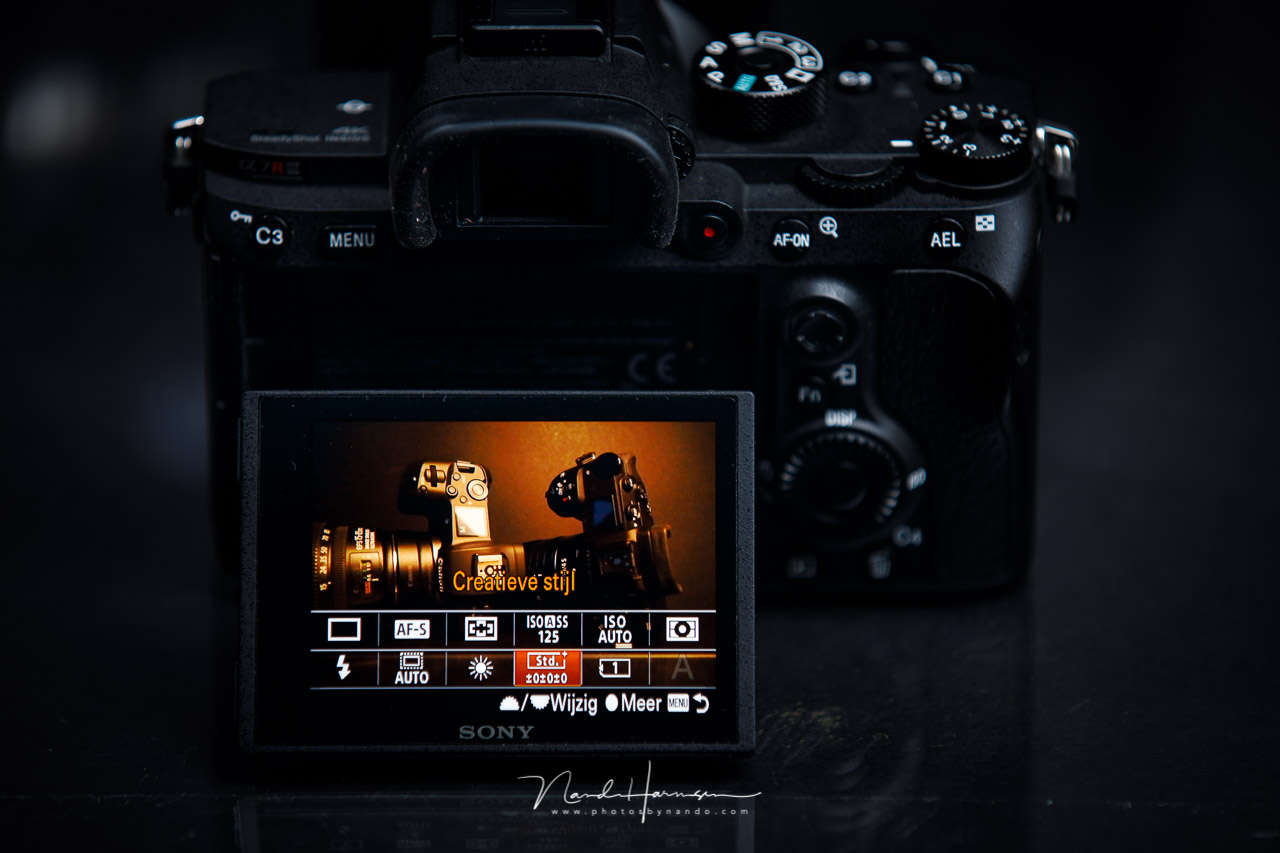
The other group is the photographers who prefer to shoot in raw file format. They want to have the maximum amount of image information at their disposal. The end result will need post-processing with software like Capture One, Lightroom, or something similar. Post-processing makes it also possible to produce a very personal look and feel completely independent of the predefined styles of the camera. Nevertheless, these raw shooters also have camera-specific film simulations and picture styles at their disposal. Software from the camera manufacturer will have the same styles available as found in the camera. But also, Lightroom offers camera-specific picture profiles.
The Downside of Using In-Camera Picture Styles
Using in-camera picture styles will have no effect on the raw images. The picture styles are only visible in the JPEG preview images, as seen on the back LCD screen. But all settings are embedded inside the raw files, so it can be retrieved in post-processing software again. Because the raw image itself is not affected, you have the option to ignore any setting that has been saved in the raw file, including the chosen picture style. Although it doesn’t affect the raw image, it can have some influence on how you perceive the image on the screen.
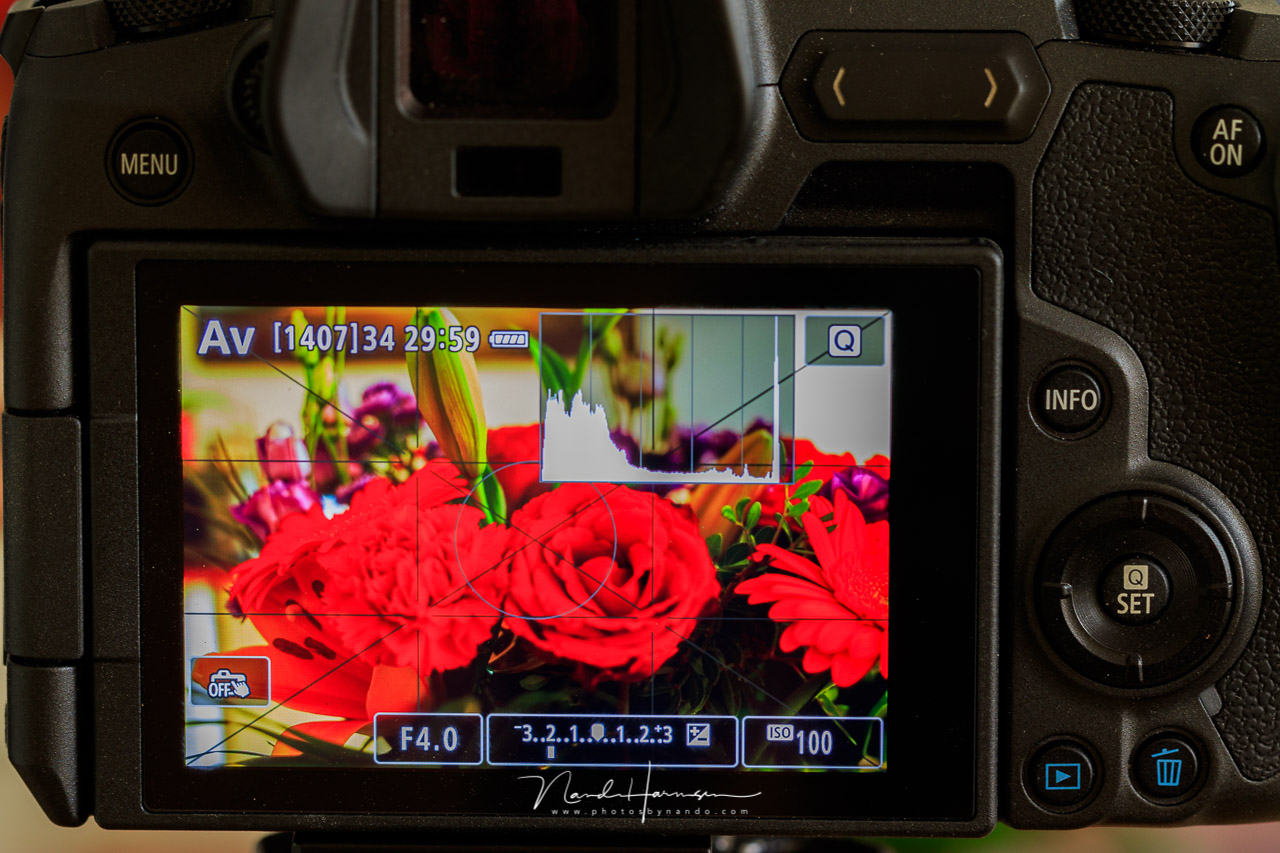
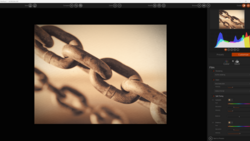
Let me give you an example. If you set a film simulation with a lot of contrast in it, certain parts of the image may become very dark or very light. In some situations, parts of the preview image can have clipped shadows or highlights. If you are not aware of this, it may set you on the wrong foot. If these images are shot in raw file format, there is a change in these clipped areas that has only occurred because of the chosen picture style. The funny thing is the chosen film simulation will also affect the histogram as shown on the LCD screen. In the worst-case scenario, compensating the exposure based on these preview images or histogram may lead to a real underexposed or overexposed image.
Perhaps this is not a problem if you have multiple images of the same subject with different exposure settings. But if you are a mirrorless camera user and you judge your exposure based on the exposure simulation as seen in the EVF, there is a chance you did not try different exposure settings. I have seen it happen a lot of times during my workshops and masterclasses.
Using In-Camera Picture Styles to Your Advantage
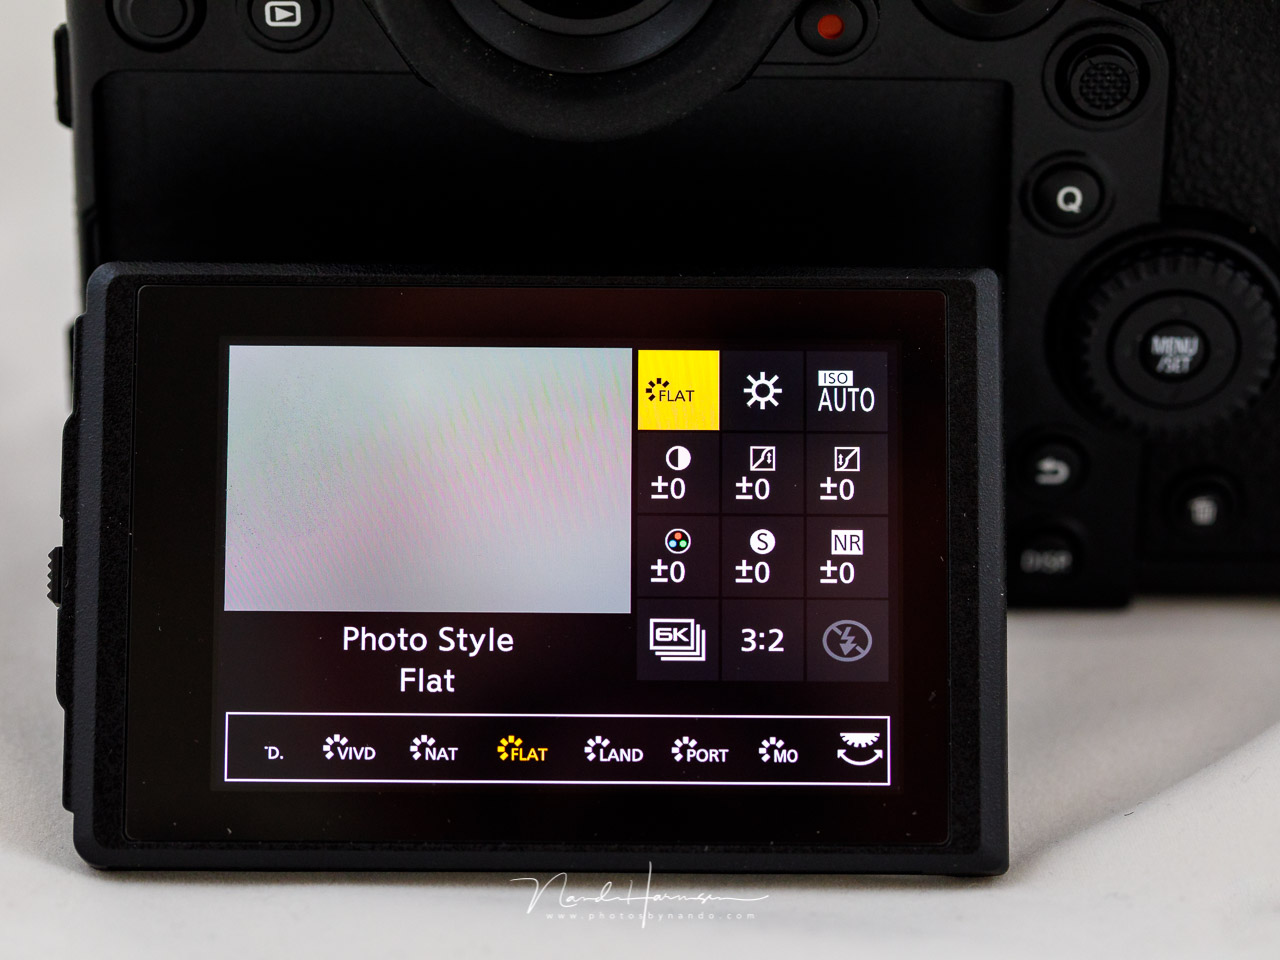
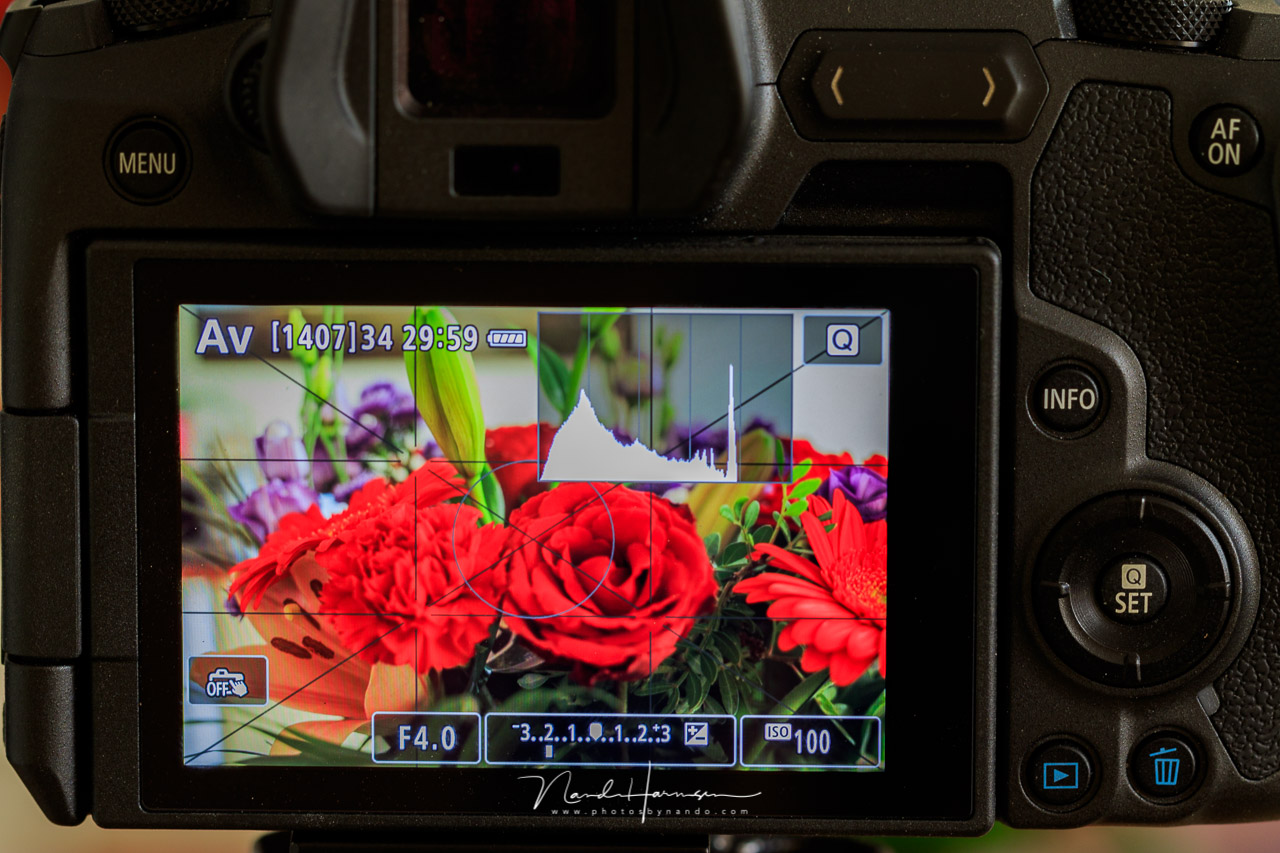
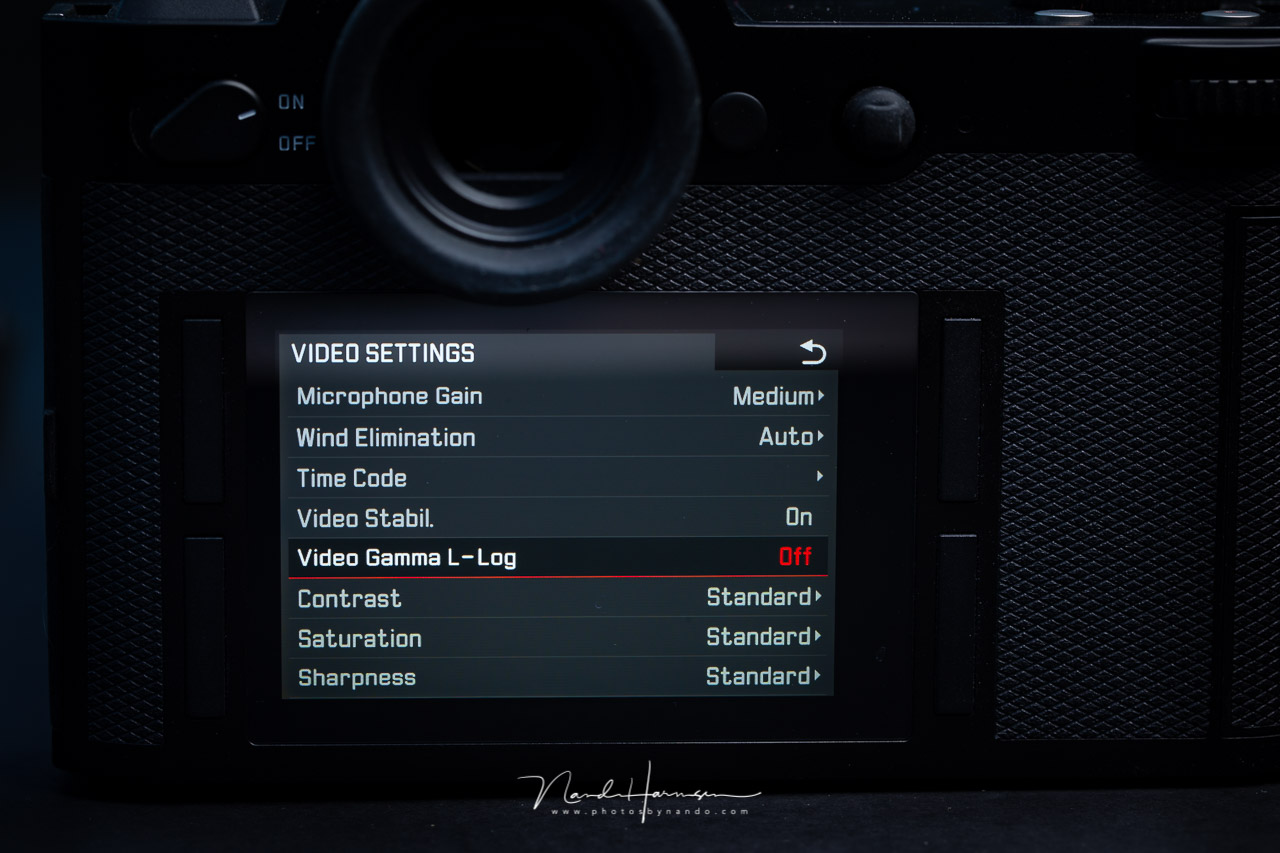
You can use the in-camera picture style to your advantage also. This is something similar to the LOG film format, as seen in different types of cameras. Among some other differences, the LOG film format will have a very flat picture style, allowing us to change the look with a LUT afterward. Why not use something similar to your photography? By making a very flat picture style, you will see a low contrast image on a screen or in the electronic viewfinder. It will be easier to check if your exposure is correct. Because the histogram is affected by the chosen picture style, using exposure to the right will become much easier also.
If you are choosing a flat image style on your camera, the image on the screen may not seem that attractive anymore. Showing the on-screen image to your fellow photographer or even a customer may not show an impressive preview anymore, but it will help you to judge the image.
Of course, using a flat picture style is only suitable for photographers who shoot in raw file format. If you are a JPEG photographer, you need to choose your exposure according to the looks on the screen, combined with the histogram readout. Exposure to the right won’t be the best choice for JPEG shooters, but picture styles or film simulations can be very helpful in acquiring a great in-camera post-processed image.
If you are using picture styles or film simulations on your camera, which style or simulation do you use and why? I would love to hear and learn about the different uses of these styles or simulations.
If you're passionate about taking your photography to the next level but aren't sure where to dive in, check out the Well-Rounded Photographer tutorial where you can learn eight different genres of photography in one place. If you purchase it now, or any of our other tutorials, you can save a 15% by using "ARTICLE" at checkout.

Join the Fstoppers community for free
-
Post comments and join in the discussions
-
Browse the site ad-free
-
Share your work and get featured in the community
-
Compete in the photo contests for fun and prizes
21 Comments
Would be real nice someday to have a raw based histogram. Only monochrome cameras have that currently.
Hi Matt, you maybe want to read the comments of Nick Rains and me right on top to the comment section.
https://fstoppers.com/education/when-should-you-underexpose-your-images…
There is some useful information about RAW histograms. I am fully with you about the raw histograms, but as Nick pointed out, without any white balance and gamma value RAW histograms do not really help. Still I'd like to have them.
Cheers! -jan
Edit: Skip the wannabe's video in the article, it is mostly nonsense.
FastRawViewer have raw histogram! https://www.fastrawviewer.com/blog/red_flowers_photography_to-see-the-r…
Thanks, Viktor. E.g. darktable (raw processor like Lightroom) almost(!) shows RAW histograms as well. Just the demosaic'ing, the raw black/white point and a white balance along with the colour input profile and colour output profile are set - but before any base curve (camera profile, gamma value) is added.
As Nick (see my post above) pointed out, we need a white balance and a gamma value. There is no way FastRawViewer can do without.
"RAW histograms" (after the necessary steps) in software are not the point here. This is about RAW histograms in cameras.
I was a dslr video shooter and learned to use Magic Lantern installed on my t3i with the (free) cinescope picture profile installed via canon’s picture profile software and a quick s-curve in camera raw (or after effects, final cut, etc). Anyway, when I stopped doing video in favor of photography, I naturally started using flat picture styles and left the cinescope style installed. Ive now installed it on my 6D and a variety of others. You can use it w/out magic lantern, too. It makes for really interesting HDR images, too,
I use "picture control" to see my shot as b&w. I think I compose a better frame that way.
I wrote a blog post about it.
https://jimhphoto.com/index.php/2020/01/21/see-it-in-bw-with-picture-co…
I wrote about it also, some time ago.
https://fstoppers.com/education/advice-shooting-black-and-white-photos-…
I used flat raw and my screen on the camera is in monochrome. When I shoot I use the histogram to expose to the right to extract every photon onto my sensor. I use the screen just for composition and luminosity. Shooting in black and white forces me to observe the lighting. If I want to see the color "I merely observe the scene without the camera involved." Everything else is in LR. I also have Fast Raw Viewer to check out the raw histograms to help cull out images while they are still on the card.
I am going to check fast raw viewer More people have mentioned it.
In theory I agree with this article. Seeing your image with a flat picture profile will allow you to more accurately make decisions about exposure. However in practice I find the opposite to be true.
The article states:
"If you are choosing a flat image style on your camera, the image on the screen may not seem that attractive anymore. Showing the on-screen image to your fellow photographer or even a customer may not show an impressive preview anymore, but it will help you to judge the image."
Why would seeing a version of the image that is less "attractive" and not how I want it to look help me "judge the image"? For over a hundred years photographers have had to rely on "previsualization" aka their imaginations to make the leap from what they are seeing through the viewfinder or ground glass to what the final print might look like. Now we finally have cameras that allow you to see the image the way it will look (almost) once it is processed. Why not take advantage?
In film production it is unheard of for the director or DP to view a monitor displaying a flat picture profile. Instead, Rec. 709 or a custom LUT is applied so the filmmakers can make decisions based on how the the look they are going for.
When you are shooting with a client, shooting tethered, you never want them to see the RAW images on the monitor, instead you apply a preset or a "look" so that the client can get a good idea of what the image is going to look like. You want the images to look as good as possible coming in so the client gets excited. You want the subject to see how good the images look so they can get excited and give their best.
Sometimes during portrait sessions I'll even set the camera to RAW + Jpeg and the picture profile to monochrome so we can all look at how beautiful the images look in B&W.
If you are worried about missing your exposure then you have lots of other good options: 1) use a lightmeter 2) look at your histogram and shoot conservatively especially if there is a lot of yellow or red on the subject 3) underexpose a little to preserve color detail in the highlights
In theory I agree with your statements.
But
Tethered shooting is only possible in studio environments or similar. Not at weddings, or that sort of situations
The same for lightmeter use. I don't have the time during weddings to use one. Perhaps for the shoot itself, but not during the ceremony and other festivities. UNderexpose is niice, but you will loose a lot of image information in the dark parts, Exposure to the right is better, if there is time to adjust.
I don't understand why you would set your camera to RAW + JPG. Inside the RAW is already a JPEG preview image present. Regardless if you shoot also JPG, the image will look with the preset you choose. I don't know if your camera can set a different profile to RAW and JPEG, but I never seen one.
I need to show images to the client. Why not? The client knows it will look even better when the end result is there. Shoot tethered only works if you have a picture profile adjusted right at the moment the image is transfered. And than again, in a controlled light situation you don't need such a flat profile anyway.
You ask me why I would find the image less attractive on the LCD screen? It is all about the color and contrast, not about the composition. That is something that can be judged no matter what camera profile is used. But the exposure, that is something different.
Again, I understand a lot of what you say, but not everyone is shooting in the controlled environments you describe. I wrote about shooting under less controlled situations.
RAW + JPEG because on the Fujifilm cameras you used to have to shoot RAW + JPEG to see the image with the picture profile. I think that's changed or maybe I was confused about that from the start haha.
As for tethered shooting, both Capture one and LR allow you to apply presets as the images come in. In fact EVERY photographer I have ever tech'ed for has demanded I do this. They'd rather be caught with their pants down than show the client a RAW image.
Most of what I wrote applies to mirrorless cameras where you are seeing the image as you shoot.
In general I don't really think the picture profiles (except B&W) are useful on DSLRs - Nikon and Canon both have excellent color in "normal" mode as long as you set the right WB. But the fuji film simulation modes are really good and i just find it gets creative juices going when what you are looking at (especially using EVF on a mirrorless camera) looks really good. It reminds me of recording music. Even if you are going to add all the effects while mixing, the musicians (especially singers) will perform better when what they are hearing in their headphones sounds good. Singers will sing differently if they can hear reverb and delay on their voice than they do when they just hear a dry signal.
Also if you are shooting at low to medium ISO, underexposing by 1/2 - full stop is not a big deal, your images will look fine; especially if you are shooting "moments" like weddings. ETR is good for landscape and still life when you have time to check your exposures and are trying to get every bit of detail out of your rig. I understand the principals of ETR and I've bracketed exposures in order to compare ETR with "normal" exposure and I really don't see any difference in noise or tonality. If anything I think you risk washing out strong colors when you ETR.
I only used tethered shooting once, during a live presentation. I did like it, but there was never a second opportunity. Perhaps because I don't have a studio. Perhaps I will try again, when the crisis is over. You made me enthousiastic about it again.
I also shoot Fujifilm, but I still use only raw images. And yes, you can see the film simulation also without jpeg activated. This is with the X100t, the GFX-50s and GFX50r, the X-Pro-2 and the GFX100. I doid not use other Fujifilm models.
I do believe these simulations are great if you are a JPEG shooter. When raw in the equasion, I rather make my own picture style in Lightroom instead of the common styles of Fujifilm. It makes it more "me", a personal style that is not out of the box. Something that people recognize, so they can say: "hey, that's a real Nando"
hahaha
;)
Still, the Fujifilm styles can be a great starting point in post.
definitely a good starting point. I've tried editing starting with a neutral profile and starting with classic chrome and the latter always just looks better to me. don't over think it jus do what looks best to you
Indeed
I'm a new convert to using a histogram and ETTR while shooting RAW in manual exposure, since my new Canon EOS R7 mirrorless can show me the histogram in the viewfinder.
I'm coming from an EOS 80D DSLR - but only switched to digital in around 2003, so I have nearly 40 years of using a Canon FT film SLR. After seeing my cameras get larger and larger after switching to DSLRs, it's refreshing to have a new camera that's actually smaller than my old FT, and being able to configure the R7 to let me set aperture on the lens and shutter speed on the top deck, I feel like I'm home. The live histogram is a more informative version of the match-needle exposure guide in the viewfinder of the FT.
I've set my picture style to Neutral and lowered the contrast setting all the way to emulate the dynamic range of RAW. (I may switch to a similarly-tweaked version of Faithful to make the camera's monitor more colorful.)
I process my RAW files in DxO PhotoLab and have created a default import preset that I like.
I've run across comments that using ETTR is only valid at base ISO - I don't see why that should be the case.
What I'd like, instead of a RAW based monitor screen would be a RAW based histogram, with an option to use it to automate ETTR. That shouldn't be hard: just read the whole screen and make sure that no part of it is overexposed.
I can't image how a raw histogram would be possible. A raw file is not an image, it has to be processed first before you can see it, and the resulting image is an in-camera jpeg. The histogram is just a visualization of the distribution of tonal values in that image.
I believe you could produce a tif file and look at the histogram of that 16 bit file. That would show an increased tonal range, although I doubt how you could distinguish 65,000+ tonal values on a 3 inch screen. The 256 tonal values of a JPEG is often difficult enough. will always be a jpeg that's embedded into the TIF file, or raw file.
A histogram is just a graph of how much of the image is at each possible brightness value. The left hand side of the graph is how much of the image is at the low brightness levels, the right hand side is how much of the image is at the high brightness levels.
There's no need to create a rendered image to create the graph, and in fact it should be much easier to create such a graph than to create even a JPEG. The screen could still show a JPEG in whatever style you choose while the histogram could be set to be independent of the screen, showing how much of the sensor is at each level.
And setting up an autoexposure mode that simply adjusts whichever leg of the exposure triangle you choose to keep the brightest area of the image from clipping would be even easier, and would give us Auto-ETTR.
I don't believe it works that way with the histogram. But I guess someone with more knowledge of translating raw sensordata into a workable image could answer that.
And for something completely different:
I started using an incident light meter in my portrait photography. While I still continue to bracket a stop over/under left over from my film days into my digital work flow, I noticed something interesting and I need help with.
With using my light meter I discovered my JPEGs are 2/3 stop over exposed to the meter and to my RAW files. Admittedly, I am that guy who shoots JPEG/RAW comb and haven't ventured into RAW processing until now.
Hasn't been an issue before because I had an exposure of the three that was spot on.
To check to see if it was in-camera processing:
I switched Photo Styles from Portrait to Standard mode and the same 2/3 stop over remains.
My question for you RAW exclusive photographers is how do you show your subjects flattering images on your camera LCD screens as in what JPEG mode do you use?
Do you have any variance in exposures between JPEG and RAW in the files?
If so, how do you compensate with out effecting RAW exposure?
My camera in this case is Panasonic Lumix S5.
Tim
I never noticed this kind of differences. I also used the Lumix S5 for a review.
The only thing I could come up with, is that the in-camera jpeg processing is responsible for that. It's only 8-bit while a raw is 14-bit. The jpeg is the end result from the processing that is managed by the manufacturers software, the raw shows a preview that is made by the post-processing software you're using. Perhaps if you use the sidecar jpeg previews as embedded in the raw file, the difference is gone.
THe preview on the LCD screen should not be dependent of the file type setting on the camera.