

This is a three-step template on how to shoot consistently good engagement photos through a structured plan involving composition, lighting, and poses.
Why Use a Structured Template to Shoot Engagement Photos?
An engagement photoshoot is a multi-faceted exercise: the bride and groom have booked you as the professional photographer for their big day, and you’re trying to break the ice, to put them at ease by getting to know them better. At the same time, you could also be trying out a new location or some new photography ideas you've been wanting to test. And these are, of course, in addition to the clients' expectations that you’re going to capture some stunning engagement photos that will sweep them off their feet, and they could potentially use some of the captured pics to design a customized save the date card. No pressure!
On the other side of the divide, there are some resources available to help an aspiring or professional wedding photographer in learning the art of posing, lighting, or the business of wedding photography. But I haven't found many guides on how to structure an engagement photo shoot. This is where I believe using (or creating your own) templates for planning your photo shoot can come in handy. Following a template does not mean that you create the same portrait over and over again. Instead, imagine building a few Lego blocks made up of repeatable tools and techniques for yourself that you can stack in different ways each time to create stunning engagement photos regardless of how the weather or your mood is behaving.
Step One: Lead With Composition
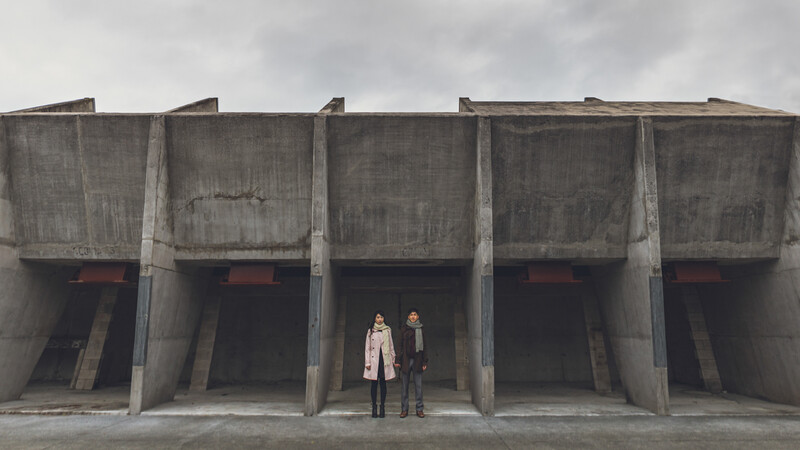
Let’s say you have a 90-minute engagement photo shoot during the golden hour in a forest that is close to a stream. The next step is to scout this location. Even if you’ve shot at this picture-perfect location before, I would recommend visiting the location once before the shoot to refresh your creative thoughts. The way I approach a shoot is to mentally divide the session into looks, where each look means a specific spot for the couple based on a hero composition. Let me give you an example. Let’s say that there is a path in this forest and the entrance to that path is beautiful with symmetrically lined trees on either side of the path. I can imagine the couple walking down this path, being romantic, and slowly getting over their nerves of a camera capturing their candid expressions. This becomes my first hero composition and thus will be the cornerstone of the first look. I will explain how I expand on this in the sections below. For now, just run with me. During my scout, I will usually aim to earmark five to seven such hero compositions and choose my top four.
Key Takeaway: Divide your photo session into looks through pre-scouted hero compositions.
Step Two: Plan Your Lighting
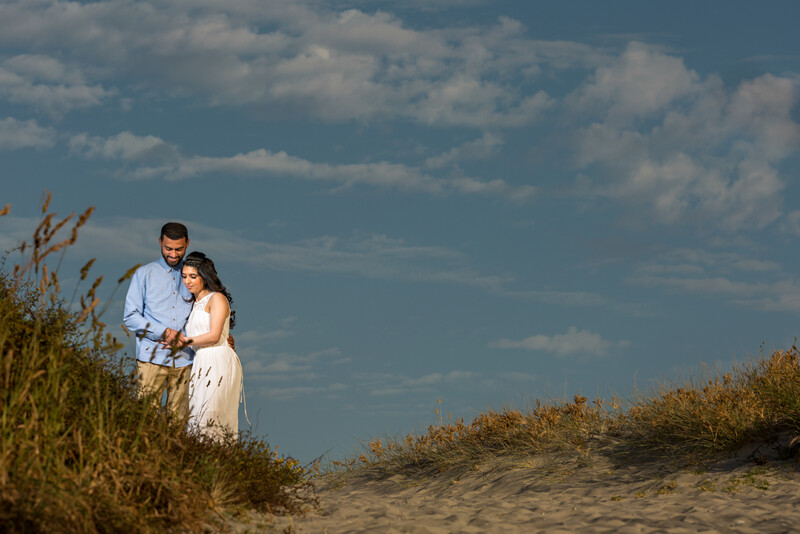
Once you’ve selected a hero composition, think about what lighting would be good for that particular look or how the natural light might behave in that particular spot at the time of your shoot. My style is comprised of a mixture of natural light shots and some strobe shots. So, I generally go for natural light for the first couples looks, followed by strobes for the next few looks. The important bit is to plan and prepare beforehand to decide which lighting setup you’re going to use for which particular look. For example, I might use natural light for the first look, a stream of golden sunlight filtering through trees for the second look, one CTO-gelled strobe mimicking sunlight for the third look and a strobe with a snoot/honeycomb grid for the last look to create a beam of light for a reflection in the stream.
Extra Tip:
-
Keep your lighting setup the same for an entire look. This way, you are simply playing with 3-5 lighting setups for the entirety of your engagement shoot
-
If you’d like to experiment with a new lighting setup during the shoot, consider planning a single experiment per shoot and execute it during the second or the third look so that in case your experiment doesn’t go to plan, you still have enough great photos to provide to the client, and you will still be ending the shoot on a high note.

Step Three: Practice Your Poses, Prompts, and Activities
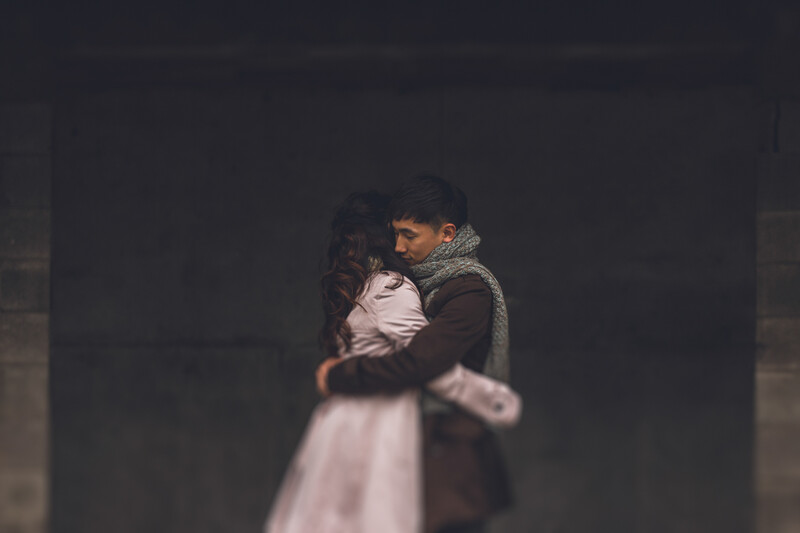
So, now you have your composition and lighting setup for each look. It’s time to flesh out your characters: the cute couple. Given the context of this article, I won’t be going into too much technical detail about how to pose couples. But, the idea here is to have a set of 10 to 15 poses, prompts, and activities that you can chop and change easily and ones that you would know like the back of your hand. Now, you need to match each look that you’ve created with one to three poses, prompts, and activities while mixing it up.
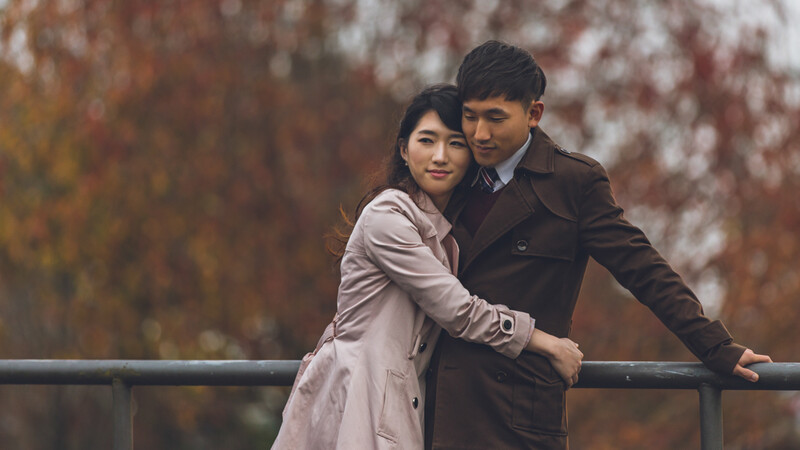
So, for example, if you’ve selected an intimate, cuddling pose for the couple for look two, the first shot might entail getting a wide shot with a light beam with a partner’s nose resting on the other’s cheekbone. For the second shot, you might prompt a slight change in the position of their arms along with your position and your focal length. So now, you have a mid-shot with a slightly different pose from a different perspective and possibly a changed background as well. It’s important to note that while doing this, you haven’t changed the couple’s location or your lighting setup. Efficient! Now, repeat this process a few more times for each look, and you can easily create four to six different shots from a single look and a minimum of 20-25 beautiful engagement photos for your clients from the shoot.


Mix It up for Consistently Good Engagement Photos
The above three steps are the base of this template for you to shoot great engagement photos and will give you a consistently good result each time. To take it up a notch, however, you must mix things up. Changing up which lighting setup you use with a particular pose, along with a revolving door of hero compositions can dramatically increase the quality and consistency of your shoots.
Mixing can also come in handy if you go through a creative block or are simply having a bad day and can’t think of any new original ideas. Although, this is not a happily ever after scenario to replace actual scouting and finding new inspirations, this three-step template on how to shoot engagement photos can also come in handy for couples shoots on the wedding day or even for portrait photography.

I hope you find this engagement photography guide helpful. Do you shoot weddings and engagements? What techniques do you use to help you get consistently good photos from engagement shoots? Share your thoughts in the comments below.


Join the Fstoppers community for free
-
Post comments and join in the discussions
-
Browse the site ad-free
-
Share your work and get featured in the community
-
Compete in the photo contests for fun and prizes
2 Comments
Plan your lighting: inserts photo of a couple literally glowing haha
What an awful bunch of photos. Poor lighting and poor composition. The next to the last one is the only one I'd even consider buying, if it were me.