
The exposure triangle is one of the most fundamental concepts any photographer needs to master to take control of their images. If you struggle to understand how it all comes together to produce a complete exposure, this article is for you.
The exposure triangle refers to the three parameters that control exposure: shutter speed, aperture, and ISO. Together, these three settings combine to produce a complete exposure; thus, it is crucial that any photographer have a mastery of both the theory behind them and their practical application. However, these settings can be a bit abstract and not particularly intuitive. So, let us discuss an analogy of how your camera interacts with light to make these concepts a bit easier to work with.
The Pipe, the Water, and the Bucket
Imagine light flowing to your camera is like water flowing through a pipe into a bucket. The photons of light are the water molecules. We can turn the flow of water on or off with a spigot at the end of the pipe. We can also choose the size of the bucket we use. We can also choose the diameter of the pipe.
Our goal is to completely fill the bucket with as pure water as possible without it overflowing (overexposing). Leaving too much of the bucket empty would be underexposing. Unfortunately, our bucket is not quite clean; it has some dirt residue on the sides that will contaminate the water once it is in the bucket.
There a number of variables in this scenario that correspond to various photographic parameters, so let’s review them. We have the spigot that turns the flow of water into the bucket on or off. We can change the diameter of the pipe. We can choose the size of the bucket we use. What we can’t control is the fact there is some dirt on the inside of the bucket or the pressure of water in the pipe.
Pressure: Available Light
The Spigot: Shutter Speed

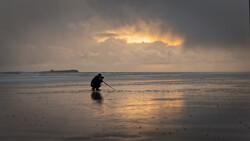
The spigot corresponds to shutter speed. As long as it is open, water (light) is flowing into the bucket. If the water pressure is high in our pipe (lots of available light), we will not have to leave the spigot open for very long to fill our bucket (short shutter speed). On the other hand, if the water pressure is low, we need to leave the spigot open for a longer time (longer shutter speed), as the flow of water (accumulation of light) will be slower.
The Pipe Diameter: Aperture
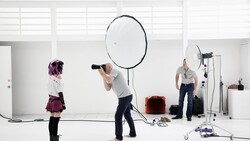
The Size of the Bucket: ISO

The size of the bucket we use corresponds to ISO. The smaller the bucket (higher ISO) is, the less water (light) it will take to fill it. A larger bucket (lower ISO) will take a longer time to fill. If we have some combination of high pressure (lots of available light), a wide pipe (wide aperture), or leaving the spigot open for a reasonably long time (longer shutter speed), we can afford to use a big bucket. On the other hand, if the pipe does not have a lot of pressure (low available light), it is narrow (narrow aperture), or we can’t leave the spigot open very long (short shutter speed), we will not be able to fill a very big bucket, so we need to resort to using a smaller bucket (high ISO).
The Dirt in the Bucket: Noise

Remember, our goal was not only to fill the bucket, but to do so with the purest water possible, meaning we want to use as big a bucket as possible to dilute the dirt (noise) as much as possible. This corresponds to the cleanest water (the lowest noise/cleanest image) possible.
Conclusion
Understanding how the three exposure parameters interact is crucial to being able to create properly balanced exposures. What is important to note is that this discussion only talked about how to create a proper exposure from a technical perspective. Each of these parameters also give you creative tradeoffs depending on their settings. For more on those, check out this article.


Join the Fstoppers community for free
-
Post comments and join in the discussions
-
Browse the site ad-free
-
Share your work and get featured in the community
-
Compete in the photo contests for fun and prizes
6 Comments
In the caption for the last photo, you mention a "very small bucket bucket".
Whoops, thank you!
Interesting analogy. Good article. Was the long nightime exposure taken with some kind of motorized mount? I would think star trails would be visible with such a long exposure. Thanx.
Thanks, Dennis! I took it on the Pentax K-1 and used its AstroTracer function for that. It uses the IBIS to shift the sensor for longer star exposures.
I use something similar. Rain barrels. The size of the barrels are the same as the size of your buckets (ISO). Different sizes of the hole in the barrel's lid is the variable aperture. How long you leave the hole open is shutter speed. Rate of rainfall is the strength of the light.
I shoot film which creates a slightly different mindset. When I load a roll of 400 iso/asa film, this part of the triangle becomes fixed. At this point, it is more of a yin yang, a duality between shutter speed and aperture. While the triangle is an effective pedagogical tool, I don't know if it might be more effective for a beginner to set the iso to a constant and explore only aperture and shutter speed as they relate to exposure. Once these are understood, the additional variable of iso can be introduced.