
Infinite view, the soothing repetitive sound of crashing waves, and probably the most romantic sunrises draw us to the sea. Where many people relax and leave their care behind, photographers start to struggle: what's the right shutter speed?
High waves, stormy sea, calm beaches: the possibilities to shoot the sea are endless. Photographs of the sea can look calm, minimalist, abstract, dramatic, colorful, or dull. The mood of your seascape photographs is influenced by the weather conditions, your location, and your composition, but also your camera settings. Especially your shutter speed can add some spice to your work.
Shutter Speed Influences Your Exposure and Composition
The exposure of our photographs is determined by three factors: aperture, ISO, and shutter speed. All of them influence the exposure, but also come with some advantages or disadvantages. ISO produces noise, aperture alters the depth of field, and shutter speed freezes or blurs your image.
Although your camera settings are often a compromise, you should choose them consciously according to the concept of your photograph — and not only to get the exposure right. Focusing on your shutter speed will inevitably push you to change one of the other settings. Especially when you want to shoot a longer shutter speed, there will also be a point when you can’t close your aperture any further and your ISO is already at its lowest point. Here, a set of neutral density (ND) filters comes in handy.
Using an ND64 (ND 1.8) and an ND1000 (ND3), I get along quite well, but an additional ND4 (ND 0.6) can be helpful if you don’t want to compensate for the shutter speed with your other settings too much. You will also need a steady tripod to fix your camera.
Shooting the Sea With a Slow Shutter Speed
There is no clear definition of what is “slow” and what is “fast” shutter speed. To me, a long shutter speed is everything that I cannot shoot handheld anymore without causing camera shake. It reaches from exposures of more than a minute until about half a second (given, I use in-body stabilization).
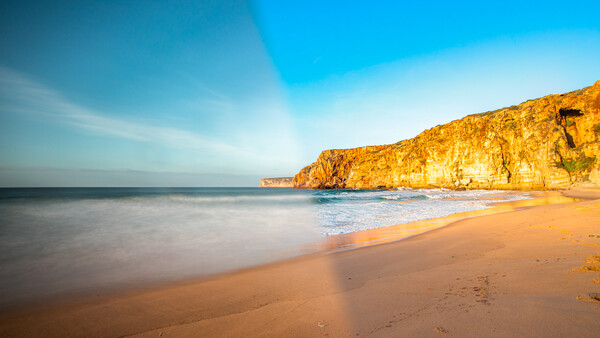
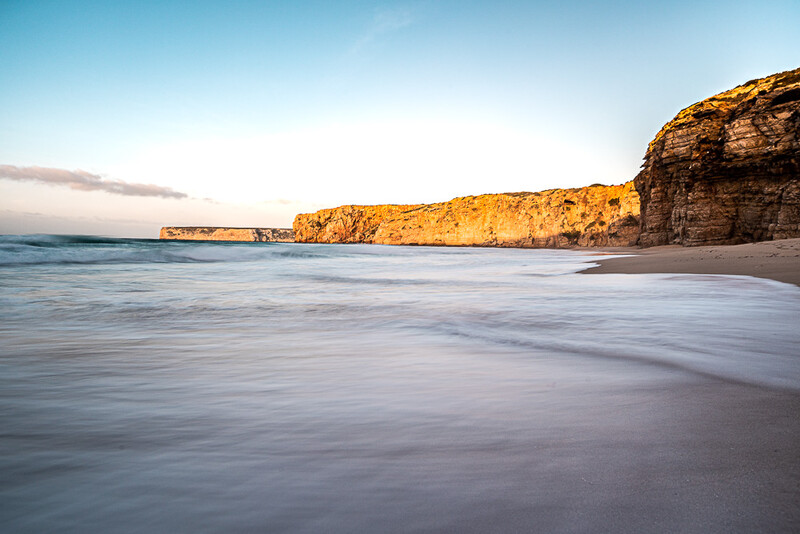
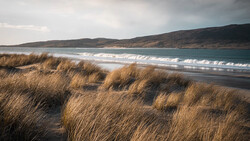
Moreover, long exposures will reveal a lot of motion in the photographs. Whatever happens from the moment you press the shutter until the curtain closes will be part of the image. Drops won’t appear as drops but lines, white foam will appear like a mess. Using an extra-long shutter speed, even the most impressive waves will disappear into a smooth, soft water surface. Below, you see a photograph from the Atlantic Ocean on a very windy day. The waves were wild and high, but you can’t see it in the 30-second exposure.
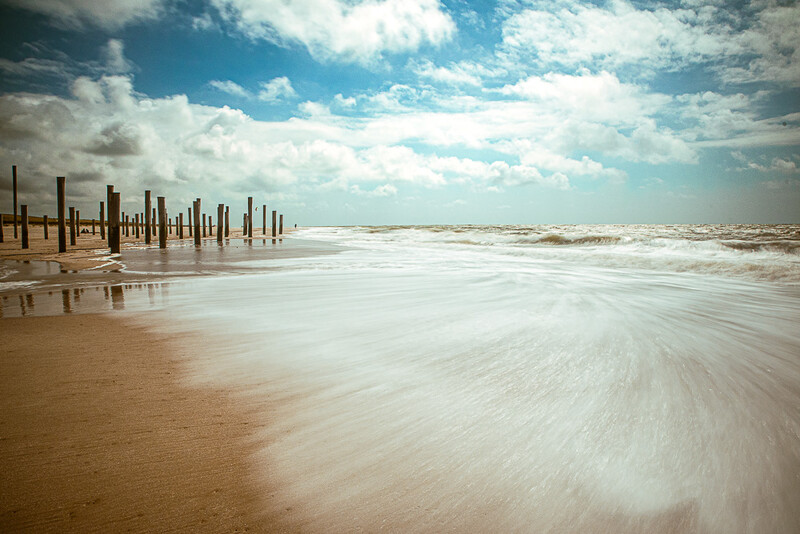
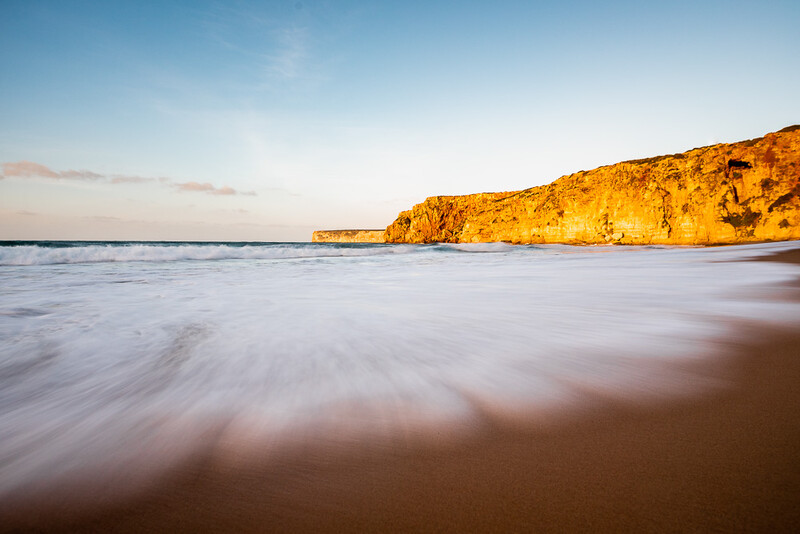
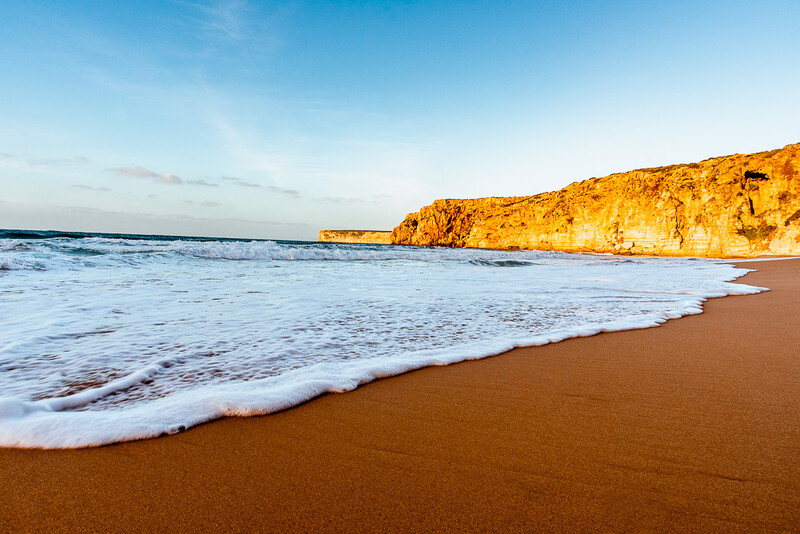
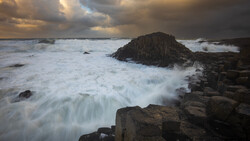
On the other hand, shutter speeds around one and four seconds have a different effect. Especially at the beach, these exposures will visualize the flow of the water. The waves’ foam appears as white lines in the photograph. Depending on your position, you can use this effect to cause leading lines or simply add some texture. The photograph below was shot at a shutter speed of two seconds. You can see the lines of a past wave flowing backwards, while another wave approaches the camera.
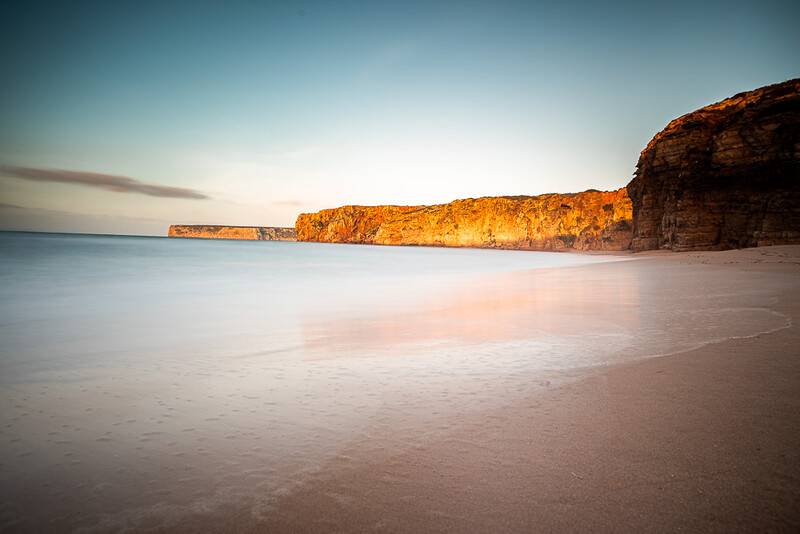
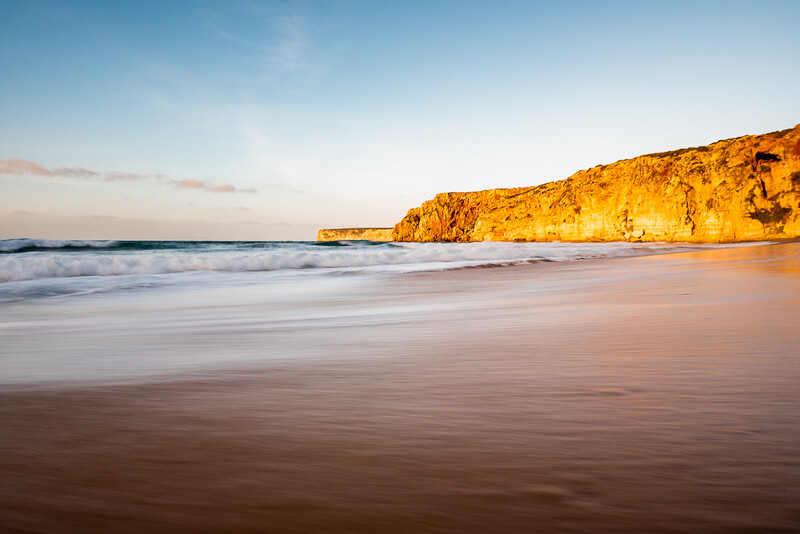
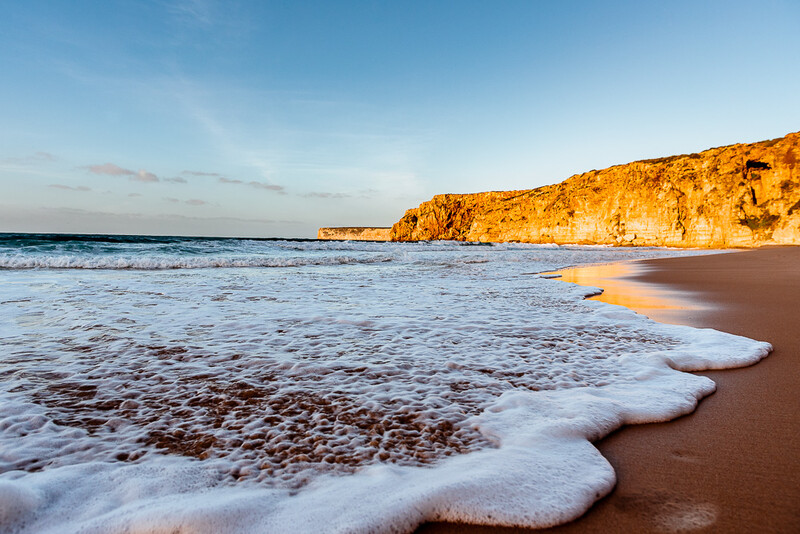
To provoke such a visual effect, you need to stand at the right place, hit the shutter at the right time, and be a bit lucky with the waves. Not all of them will appear as clear as above. I generally try to press the shutter when a wave is on its way back to the sea for two reasons. Firstly, I can predict its flow a little better and secondly, I can make sure that it won’t hit my camera too hard. Still, there is a lot of trial and error involved. The photo below was also taken at a shutter speed of two seconds but looks quite boring to me. Here, I pressed the shutter when the wave came in. And yes, I got my wet feet.
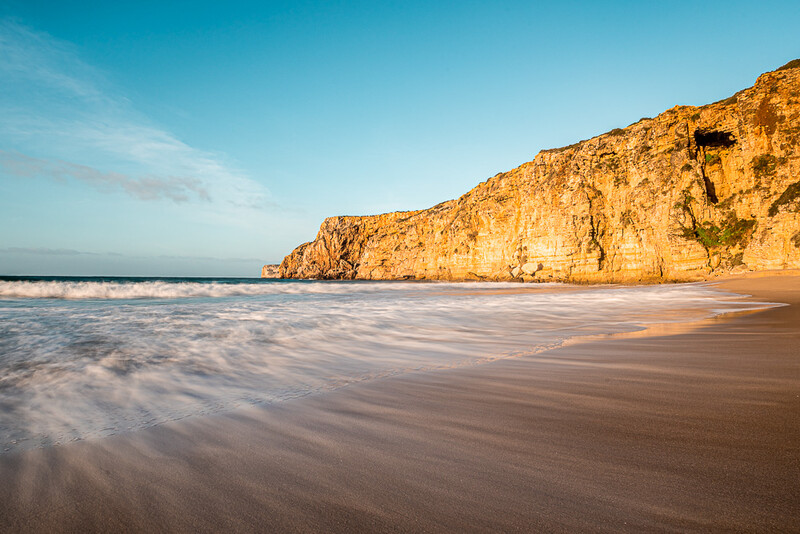
Increasing the shutter speed a little more, we will uncover more detail and still find the “water trails” in the sea. Especially with shutter speeds between half a second and two seconds, you’ll find each wave looking different from another. Depending on their speed and angle, they show more detail or motion.
Shooting the Sea With a Medium To Fast Shutter Speed
While the slow shutter speed was all about revealing motion, faster shutter speeds are about showing detail. Of course, there is always an in-between. Especially with a shutter speed between half a second and 1/50 of a second, you will see some motion and still find some detail. I don’t like these compromises too much, but depending on the circumstances, they sometimes work well, too. Here, I think they only look mediocre and don’t really add to the photograph.
When using a considerably faster shutter speed, the photograph completely changes. A shutter faster than 1/100 second starts to freeze the image. Motion starts to disappear and detail becomes visible. I’d recommend getting as close to the water as possible to capture as much of this effect as possible. The photograph below was taken with a shutter speed of 1/125 of a second.
You can see the shadow caused by the water, and you can almost imagine it rolling towards you because there are still some signs of motion. Below 1/500th of a second, a lot of it will disappear. You can even identify the single bubbles of the foam below.
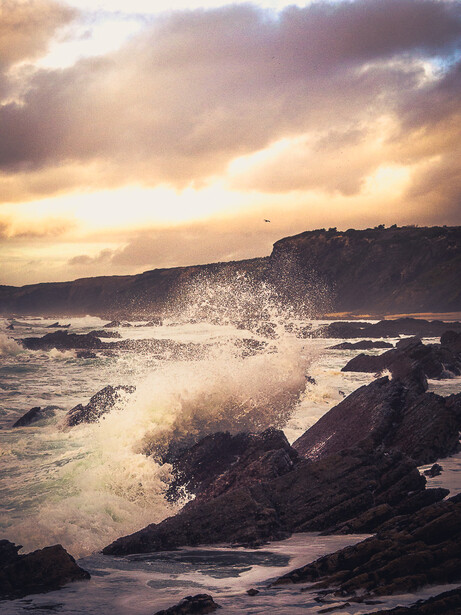
If that’s not enough for you, you can even go faster, depending on your light conditions and how much you want to push the other settings. Especially when waves are hitting rocks and splashing up high in the air, very fast shutter speeds make every water drop visible. Let’s change the sight to check that out. The photograph below was shot at a shutter speed of 1/1,600 of a second, and you can see each and every drop in the air.
The only problem with such a photograph is that the white foam of the wave is way darker than the rest of the image. Especially under bad light conditions, it’s hard to find an exposure where the splashing water isn’t overexposed while the surrounding rocks and water still show a little bit of detail, too.
Other Variables To Consider
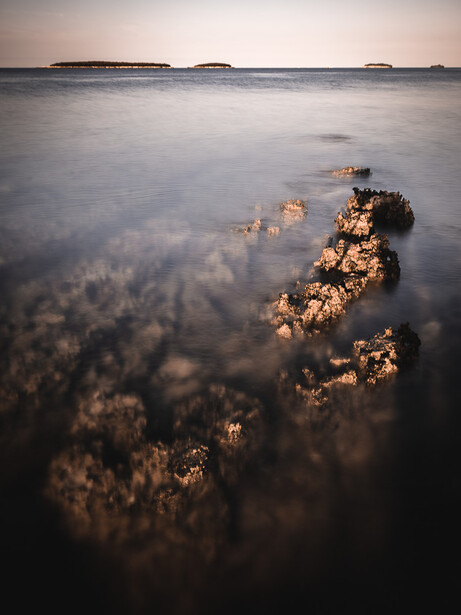
When shooting the sea and playing around with shutter speed, it’s important to not only follow the book but adapt to the situation. The faster and harder the waves come in, the longer their trails appear, the calmer the sea, the less foam and trails visible. Just as surfers do, be patient and wait for the perfect wave. Whenever there are just little waves, a longer shutter speed will also help you to completely clear the water surface and uncover what’s hidden below.
Generally, a little bit of “chimping” is no problem: it’s hard to imagine how a long exposure will look like. Review your photographs every few frames, and if you're unhappy, try to figure out what’s missing. It’s not always the settings. Shutter speed can only be the cherry on your cake made of light, composition, and colors.
And one last tip: keep an eye on your surroundings. You won’t be the first photographer who got surprised by a wave coming from the side or behind. Wet feet can quickly ruin a photo trip.

Join the Fstoppers community for free
-
Post comments and join in the discussions
-
Browse the site ad-free
-
Share your work and get featured in the community
-
Compete in the photo contests for fun and prizes
5 Comments
This study in shutter speeds is a great reference when out in the field. Taking the shot as the wave recedes is a great tip. You're right; it is a bit like surfing; patience and scanning the water for what is about to happen makes all the difference. Thanks for that. You should consider making a PDF of the above examples for people to download on their phones.
Photographing seascapes is such a great exercise even though my work has nothing to do with nature or landscapes in general. Ever since I moved to the central coast in California two years ago, I can't help myself from taking a minimal amount of gear, and a filter set out to the ocean and sharpening my skills. Almost as a palate cleanser after a big job. - Alex https://www.photosophic.com
A good, informative article. Thanks.
Great article! I struggle with speeds for urban nightscapes containing cars, and something I’ve discovered that changes things is the distance between me and the moving cars. In other words being farther away means you have to have a longer shutter to get the same trails as you’d get shooting from the sidewalk for example.
Your example photos were all framed as if shooting from right by the surf on the beach, if taken from the dunes you’d need longer speeds for the same blur, from a hotel balcony an even longer shutter.
Ultimately I need a lot more practice and experience, so meanwhile I chimp and adjust as needed.
Really nice summary of tips. Thanks for writing this and, obviously, putting a lot of effort into it. Quick question: what do you do to clean your tripod legs after a trip to the beach?
Hey Kevin,
Thanks for the nice words.I simply wipe them with a dry cloth. Once the sand inside the legs becomes unbearable, I deconstruct the legs and give them a proper treatment.