
Ever wonder how photographers capture what looks like a single moment in time, but you're not quite sure how they got it all in one shot? Join me for another day of adventuring in the San Juan mountains to find out.
Time-blending is nothing complicated in the world of photography; on the contrary, it can be quite easy. You'll find in my video how I captured multiple photos to blend but might be left wondering what I did with the photos once I got them home, but don't worry, I'll go over that process in this article. First, I just wanted to give a few requirements you'll need when photographing something you plan on blending. This applies to all types of blends like exposure blending, focus stacking, and of course blending photos taken at different times.
- You must use a tripod and do your absolute best to not move your camera when shooting.
- Lock in your aperture and don't change it for exposure. If you need to bump your ISO for some nighttime goodness, you can make it work.
- Set manual focus and don't bump your lens.
- Image stabilization turned off. This is one I skip over too many times, and it can make editing later a lot harder.
- Manually set your white balance unless you're shooting in raw (which you should be).
I highly recommend you watch my video, and if you'd like to skip right to where I capture the image used in this article, it's around 7:30.
The Edit
Now that you've taken your shots, it's time to blend them. The example I'll be using is straight from my video and will simplify this process to show you how easy it can be. Keep in mind that if you're trying to blend a photo that you took over the course of a few hours that it may be more difficult, more on that later. For now, let's get these photos into Photoshop!
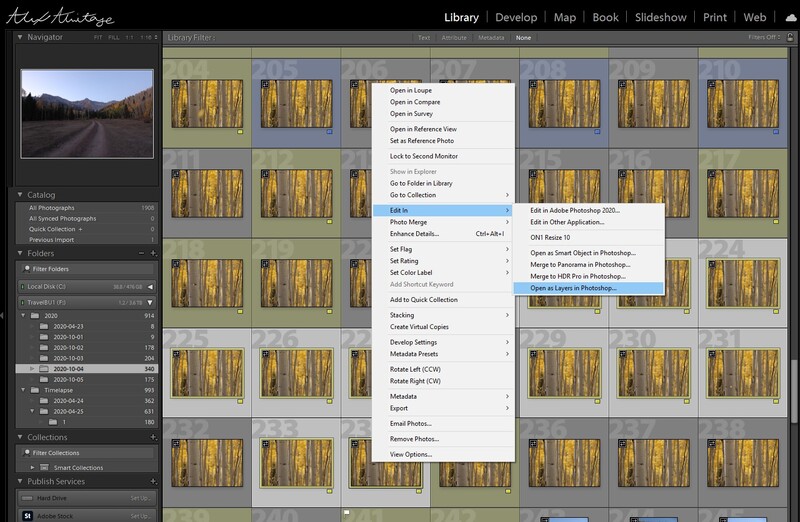
You can use whatever method you'd like to get your photos in Photoshop. For this, I will be using Lightroom, where you need to select all the photos you want to blend, then right-click > edit in > open as layers in Photoshop.
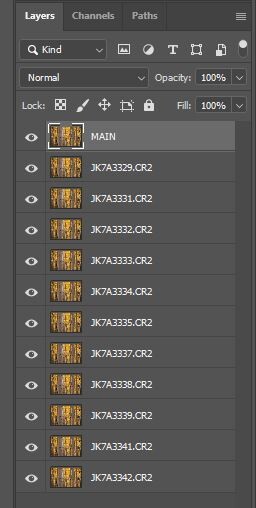
Once all your photos are open, your layer panel should look something like this. You'll want the top photo to be your "main" or base photo. For me, this was the photo with the most amount of leaves already in it; however, for you, it might be your foreground photo or the photo with the best lighting on your stationary subjects.
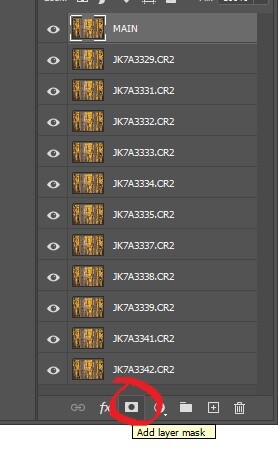
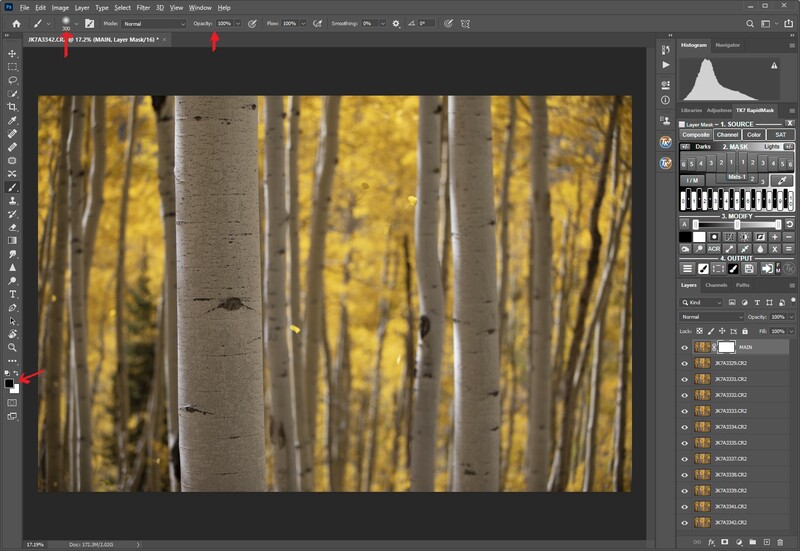
In the next step, you'll add a layer mask to your main image and start blending your photos! Once you add your layer mask, make sure you have your brush selected with black as the foreground color, then set hardness to 0, opacity to 100, and size your brush depending on what you are blending; in my case, it's leaves, so I'm going to size according to those.

Next, you'll want to hide/show your main layer to find whatever it may be that you are blending into the main image; in my case, it will be the leaves from each photo. Now that you've located what you are blending, simply paint that spot with black (be sure your layer mask is selected) to reveal the photo behind it!
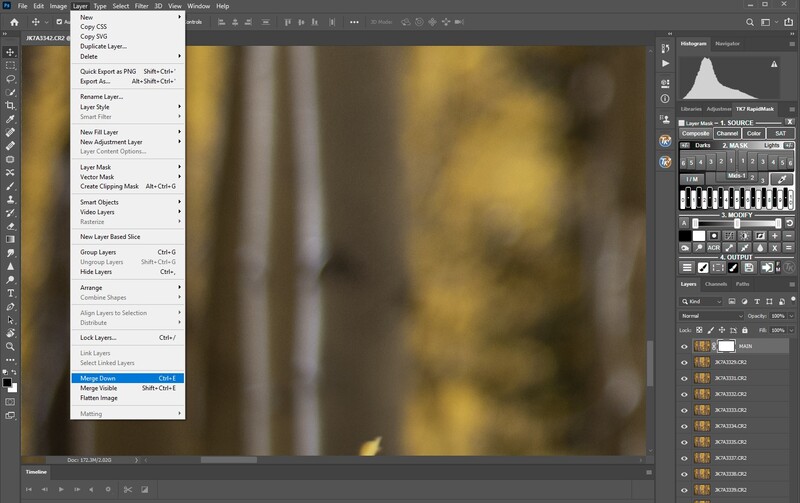
The last step is once you are done blending those two layers, you will flatten or merge them to start using your next layer. To do this, make sure your top or main image is selected and go to layer > merge down, or you can simply use the shortcut "Cntrl + E"
Now, just repeat these steps until you're done blending all of your images!
Final Image and Conclusion

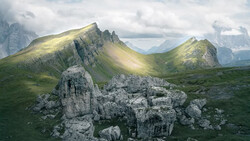
This is a blend of roughly 10-15 moments in time. As much as I would have loved to capture something like this in one photo, it's just not possible. I personally think this represents the moment and atmosphere I was in better than a single frame could evoke. There's always the debate on photo manipulation, blending, or "Photoshopping" images to enhance them. I won't dive into that discussion in this post, but to me, this is a tasteful way to showcase what the falling leaves in that aspen grove felt like.
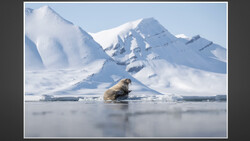
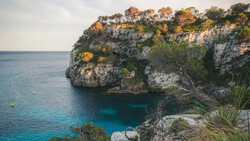
Another thing to keep in mind creatively is blending can be used with hours of separation between photos. Sometimes, you want that golden sunset light on the mountain valley but also want those red clouds that happen half an hour later; you can do that with time blending. You can even capture the Milky Way and wait another two hours for the moonlight to illuminate your foreground as I did with the photo below!
I'd love to hear what everyone thinks and welcome any feedback on this quick tutorial or my video! As always, thanks for watching and reading.
If you love travel and photography, consider checking out our Photographing the World Series with Elia Locardi where we go to some of the most beautiful locations in the world and teach the process of creating world class landscape images. Save 15% by using "ARTICLE" at checkout.

Join the Fstoppers community for free
-
Post comments and join in the discussions
-
Browse the site ad-free
-
Share your work and get featured in the community
-
Compete in the photo contests for fun and prizes
No comments yet