
A popular photo trend we’ve all seen on Instagram is to bring back the vintage look. People’s love of a good nostalgia trip means they go looking for interesting ways to add old and dated character to their images.
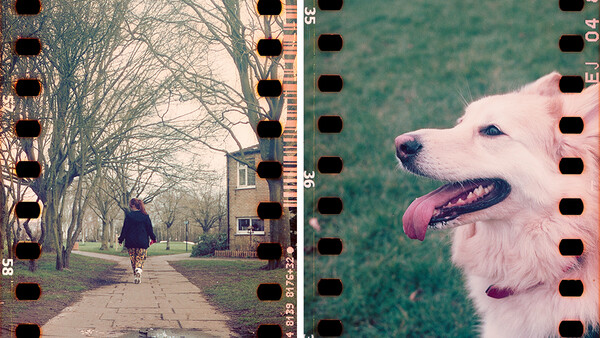
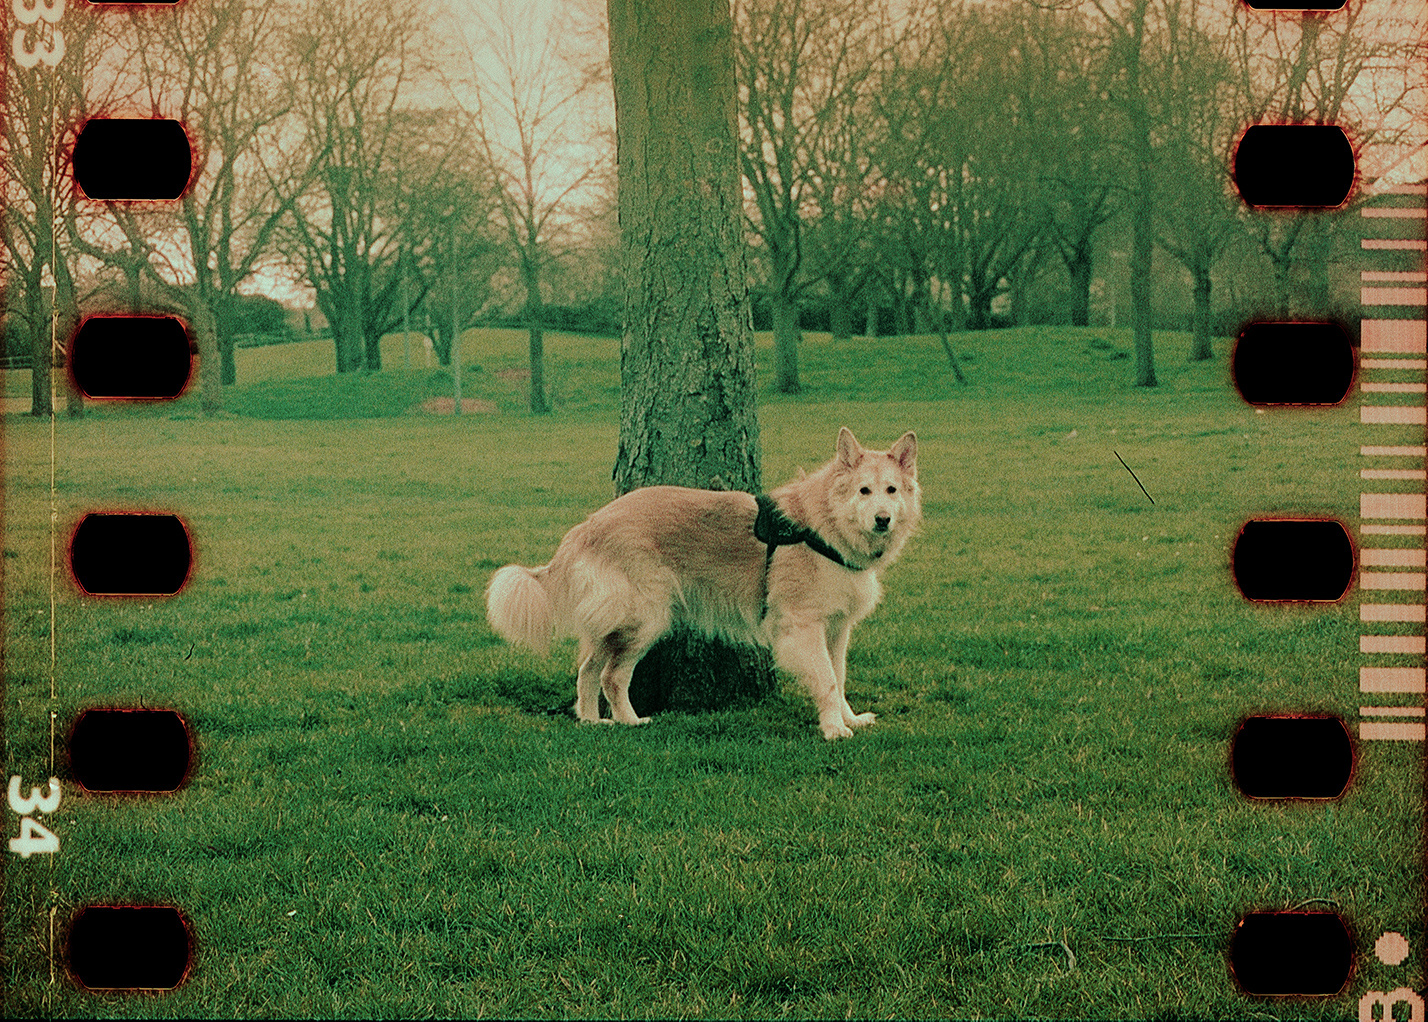
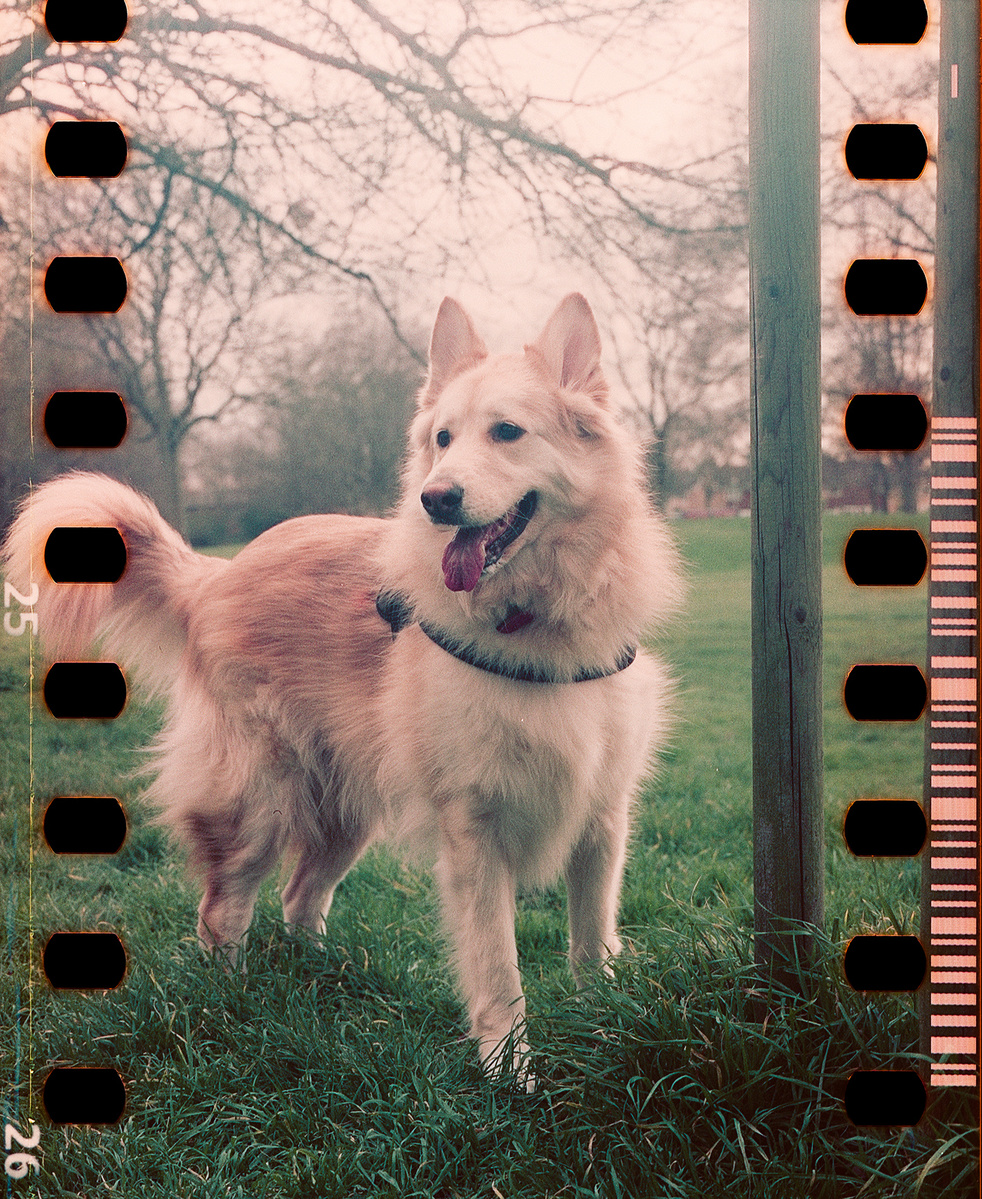
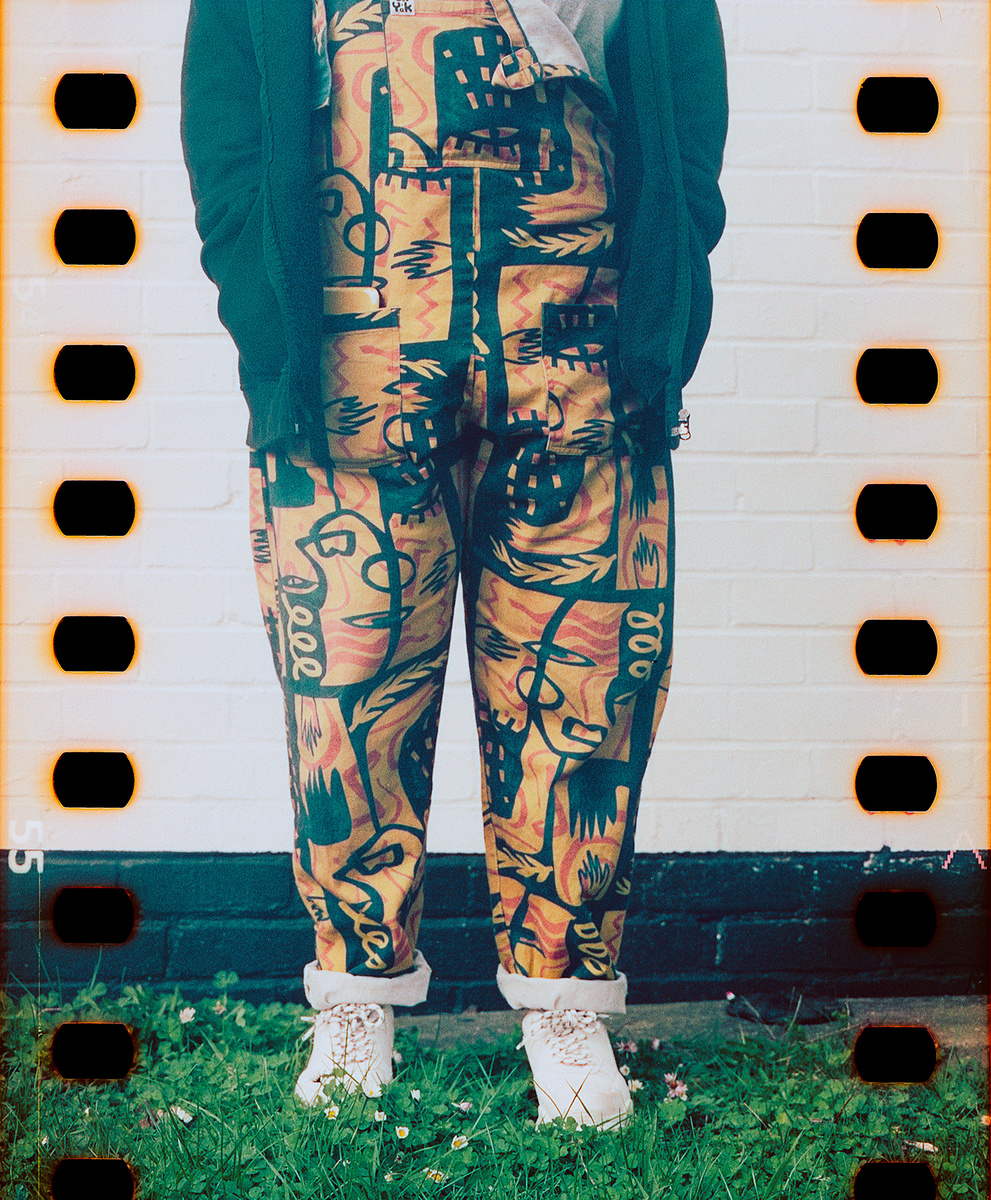
One of the more popular of these trends is to add fake sprocket holes onto the sides of an image. These holes are used in 35mm film stock in order for the camera to advance the film after each photo. They’re not normally seen in photos, but recently photographers have been including them intentionally. Now, there are ways of achieving this look digitally by adding a filter or downloading an app that does it automatically for you. Yes, that’s all well and good for some people, but what if you want to do it for real? I would certainly prefer to do it for real and... I did! In this article, I will walk you through exactly how I did it.
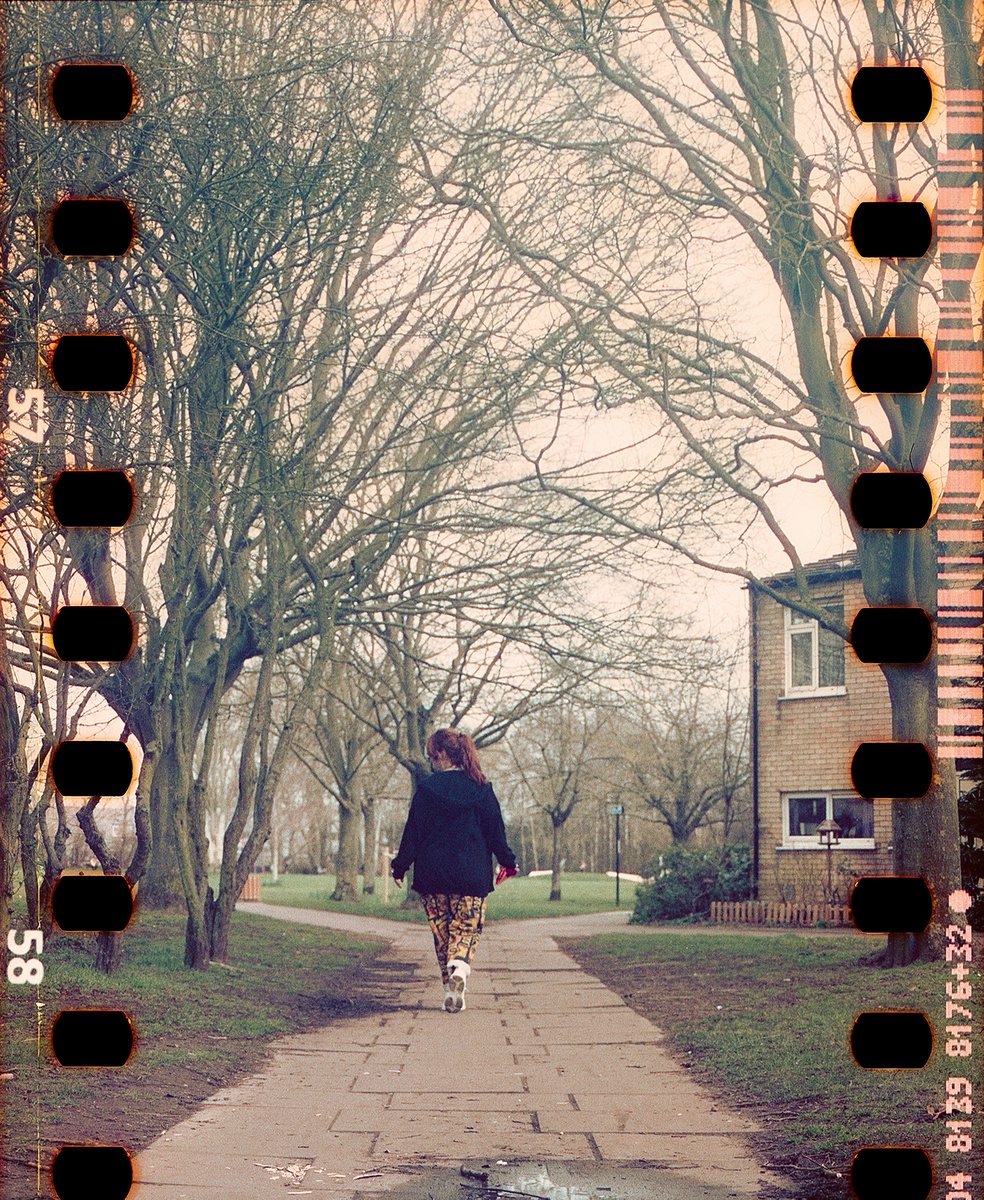
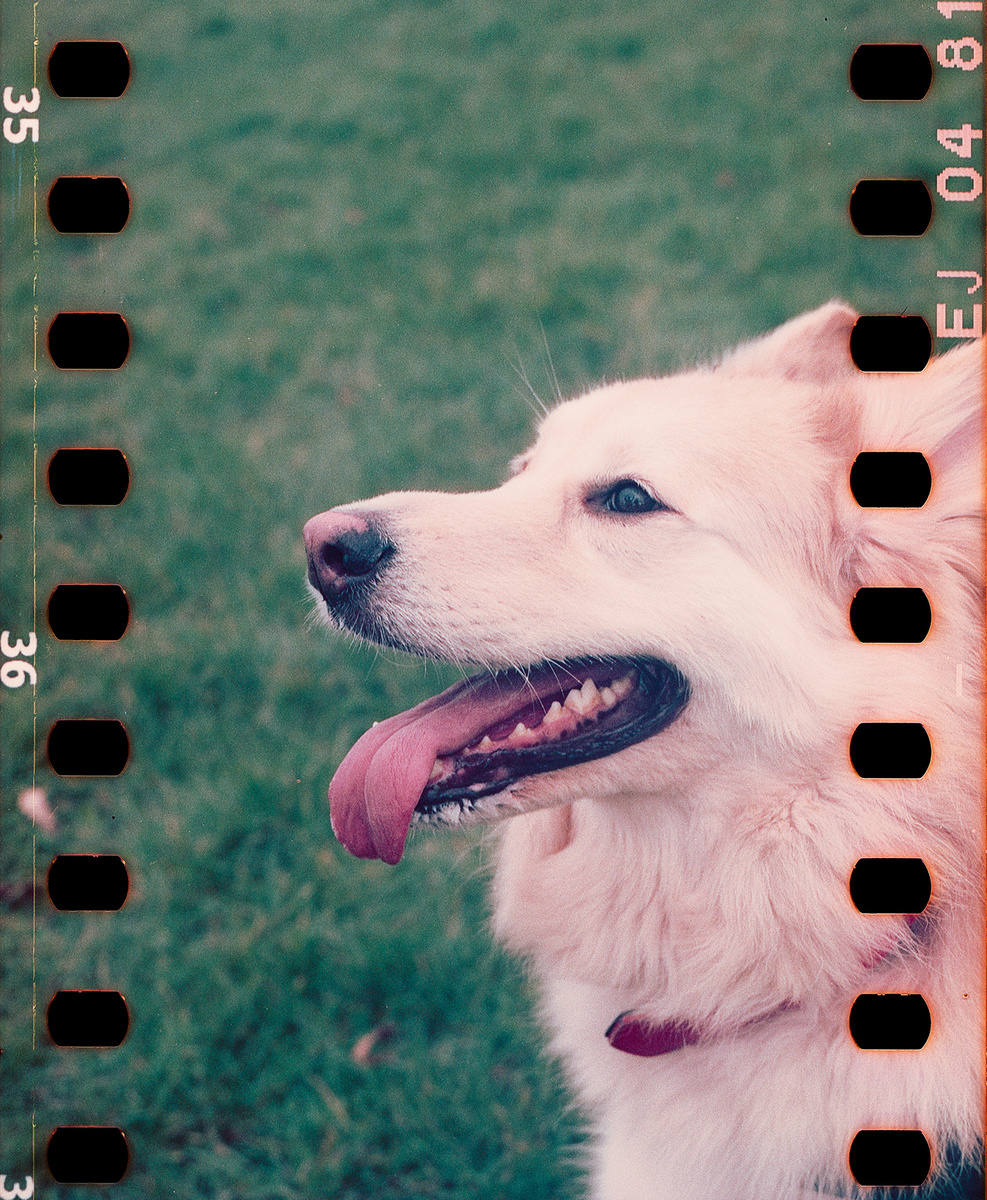
This works by running a roll of 35mm film through a 120 film camera. The larger exposure area allows for the entire width of the film to be visible. The whole surface of 35mm film is photosensitive, therefore you can shoot beyond the holes and get a larger image. Along the side, you will also see the brands info. In this case, it’s Cinestill 800T. This leads to some interesting visual artefacts baked into the image.
What You Will Need:
- 120 Film Camera
- 35mm to 120 Adapter
- Roll of Preferred 35mm Film
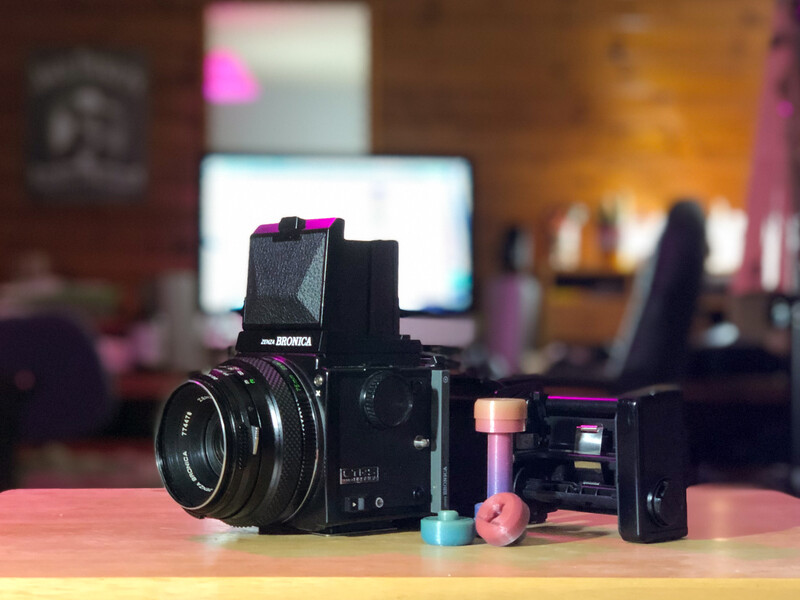
The camera that I used was the Bronica ETRS. This is an old camera from the ’80s that shoots 6 x 4.5cm images. There are other 120 cameras out there that will also work, so do not worry if you have a different brand or model. The second thing you will need is a 35mm to 120 adapter. This will allow you to load the film into the camera to be able to shoot as normal. Thankfully, these adapters are incredibly affordable due to their basic design and can even be 3D printed at home. Lastly, grab a roll of any 35mm film that you want. In these examples, I used Cinestill 800T, however, another strong option for color photography is Kodak Portra 400.
To load the film, the first thing you will need to do is attach the adapter parts to your film of choice. This is very easy and straightforward to do. They attach only one way, so there are no other ways of messing it up. Once you’ve done this, you can begin to load the film into the camera as if it was a normal reel of 120 film. Advance it forward and you’re ready to shoot! Yours may be different, but the Bronica ETRS loads vertically, which means all of my images came out in the portrait. It is possible, however, to shoot in landscape as well. Cameras like the Mamiya RB67 have a larger exposure area and a rotating film back, which means you can achieve beautiful panoramic images in either orientation.
Time To Shoot
When it comes to shooting there is some guesswork involved. Framing images is rather different from normal as you have to mentally crop your viewfinder to cater to the smaller piece of film. Adding to that, you have to imagine where the sprocket holes will be and then frame your shot accordingly. It’s difficult to be precise and know exactly what you’re getting with this method, but for some people, that’s part of the fun.
This method does reduce the number of shots you can take. You already have to ruin a good portion of the start of the roll in order to load, which does seem wasteful, and of course, you can no longer take 36 shots as per standard. Instead, the amounts will be decided by your camera. The Bronica shoots 15, however, I managed to sneak in an extra couple of shots manually. I did this by engaging the double exposure mode. Here I was able to trigger the shutter, dis-engage double exposure mode, and then advance the film forward. After shooting the two bonus photos, the film would not advance any further. This was the only true way to know when I reached the end, so I encourage you to be careful when advancing to avoid breaking anything.
Unloading the film was also a challenge. This was far trickier to do than normal unloading, mainly because you have to do it in the dark. 120 cameras spool film in a different way to 35mm. As you shoot, it gets advanced onto a new spool. However, 35mm film is intended to be re-wound back into the original spool casing. To do this, go into a dark room or use a changing bag. Take the film out of the camera and manually wind the film back until it’s safe from light. You can use the adapter piece to do this, or do what I did - if you have an actual 35mm camera, use its winding mechanism.
Scanning Your Film
I received my film after a couple of days from my local lab and began scanning. Just like the previous steps, this method of shooting makes everything trickier, and scanning is no exception. Typically, scanners come with holders that make it easy to align the film and make it lay flat. These, however, have borders that cover up the sprocket holes, only revealing the center portion of the film. To scan the whole width of the negative, I had to lay the film directly onto the scanner glass. Using small coins I weighted the corners in an attempt to flatten the negative as much as possible. This was a very fiddly process, but after some trial and error, I got there. I scanned with the Epson V600 using SilverFast 8.
Why Shoot Film? Digital is Easier...
When it comes to sprocket photography there are a lot of interesting quirks that come with the process. It takes a fair amount of guesswork and you don’t always know exactly what you will get. The markings on the side will be different for every photo that you take and the holes will be in slightly different places. To shoot this style you must embrace the fact that each image will differ. I think there’s something beautiful about the marking being unique, never exactly the same.
Sprocket photography certainly takes some time and money to do. Some may ask why not just add holes digitally? Well, you absolutely can. However, I found the process quite satisfying and the fact that the artefacts were real and baked into the image added some rewarding characteristics. If you don’t have any of the equipment listed, the folks at Lomography have made a camera specifically for this purpose. The Sprocket Rocket is an alternative that shoots panoramic images and it’s very affordable.


Join the Fstoppers community for free
-
Post comments and join in the discussions
-
Browse the site ad-free
-
Share your work and get featured in the community
-
Compete in the photo contests for fun and prizes
22 Comments
Side effect, it’s also the closest thing to an Xpan that most of us will come into contact with too!
Very true! A poor man's Xpan, if you will haha.
I don't see how can somebody be called "poor man" because he puts a 35mm film inside his true 6 x 6 Hasselblad instead of a Xpan one...
That's not "for real" at all. So, why would someone want to display obviously fake sprocket holes?
I remember back in the day of film (circa 1970) some photographers ground out their negative carries so that the edges of the sprocket holes showed in their prints. That proved they had not cropped the image at all and the full 24x36mm was on the print. Of course, then the carrier didn't hold the film quite as flat, so the image was less sharp at the edges...but veracity has, I guess, its price.
Hi Kirk! Thank you for your comment. I answer this question in the first two paragraphs :) Have a great day!
There is a solution for the film to be flat: a pressure plate with perforations connected to a fan that aspire the film against the pressure plate to keep the film flat. Some large format camera backs have this system.
Or if it’s for Instagram, just use an app. 😱 Unfold has a template with film holes.
I’ll probably be struck down by lightning now.
Thank you for the App suggestion! I'll give it a look :)
You do know that 35mm images are framed inside the sprocket holes right?
exactly, why is the image bleeding across the film edge?
Hi Indy and Peter! Thank you for your comments. If you refer to the 3rd paragraph in the article, you will see the answer you're looking for :)
Some people shoot 35mm film in their medium format cameras for fun. In that case the images will be on the whole film.
Sometimes there are no choices, some types of films are not available in 120 format. See my post below.
Looks terrible and fake. Why would anyone do like that to a picture?
... to accuse Kodak of making holes in their films...
How can I do this with Gimp ?
Here’s a link to a 35mm to 120 adapter:
https://www.googleadservices.com/pagead/aclk?sa=L&ai=DChcSEwihm_vaoeDvA…
I googled it, and sprocket hole photography is a thing. ¯\_ (ツ)_/¯
I can't cast shade as I used to make Polaroid transfers...
And soon there will be an app to add bad focus, off colour, tilted horizons and shadows cast by the photographer to a perfectly good scene. Oh yeah, that already happens without an app.
Looks like a few in the comments have sprocket holes in their brain... April fooled again ;)
EIR in a Fujica GL690, without any adapter, except that I add a piece of paper from a 120 film to avoid losing film during loading...
Perforation is a waste of film. If Kodak had the option to sell the films unperforated, it would be possible to shot image near 6 x 4.5 medium format from 35mm film. Unfortunately, EIR films were never released in 120 format. and 70mm infrared arochrome rolls have been discontinued despite groups of infared photographs that were willing to pay thousand of dollars to buy the minimum order of a whole box.
With slide films the perforations appear white instead of black