
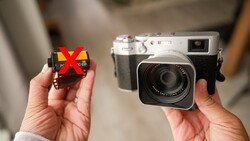
For the longest time, digitizing film was both the best and worst part of being a film photographer. In walks pixl-latr, and the world of digitization is forever different.
Let us start with a very simple question: “why would you digitize your own film and not have a lab do it?” It is, after all, a very good question. Most local labs will digitize your 35mm film without typically charging you too much (usually only a couple to a few dollars); however, most local labs charge considerably more for digitizing medium format and large format film. In addition, the results of local labs tend to be lackluster and, in my opinion, usually only good enough for a proper 4x6 print. There are bigger labs with access to famously great scanners (e.g. Fuji Frontier, Fuji Noritsu, etc.), which, truth be told, are better than anything you would get at home. In addition, there are drum scanners, which are widely considered the best of the best. Though these options can produce amazing results, they are not without their price tags. They are notoriously large and cost at least $5,000 for something that would be quite old and no longer easily or possibly serviceable. Lastly, and perhaps most importantly, no one in any lab will take as much care as you would to ensure your scans are as good as they can be and in the style you want.
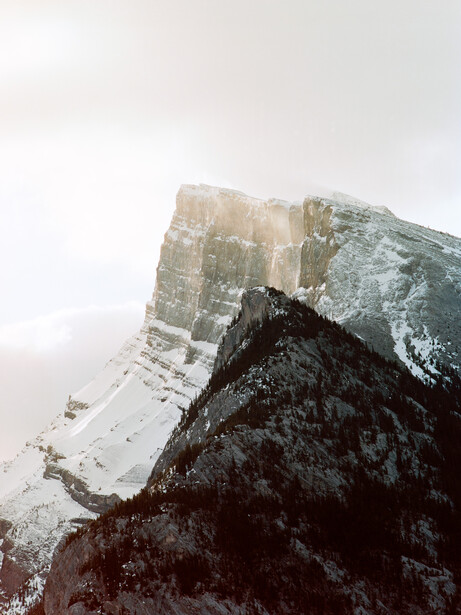
An example from a 6x4.5 negative made on Kodak Portra 160.
For years, I strived to achieve the best results in digitizing my film, trying method after method. After a while of sending my film out to a big lab in California and also using my local lab in Charleston, I grew a bit frustrated with the results I was getting and decided to get a flatbed scanner. I toyed around with the idea of getting the Epson V800 (which is no longer available), but at the end of the day, I ended up going with and staying with my Epson V600 for several years. Though the Epson V600 has increased in price over the years, it is still an affordable $250 and produces some great results. Last I checked, I had surpassed 2,500 scanned frames with the V600 and was working my way towards 3,000. When you consider just how little I have paid per frame at that point, it is clear that the scanner has paid for itself several times over. With this said, even though I have had several rolls of film to digitize, I have not actually used the Epson since last year. There is only so much I can take when it comes to sitting next to the scanner and computer for hours on end. In an effort to avoid the time spent in front of the scanner (which can easily be an hour per roll of 35mm), I have tried digitizing my film using my Sony a7R II. However, it required constructing masks for my light table, which were a giant pain, and ultimately, the results were frustratingly not much better unless the film was already nice and flat.
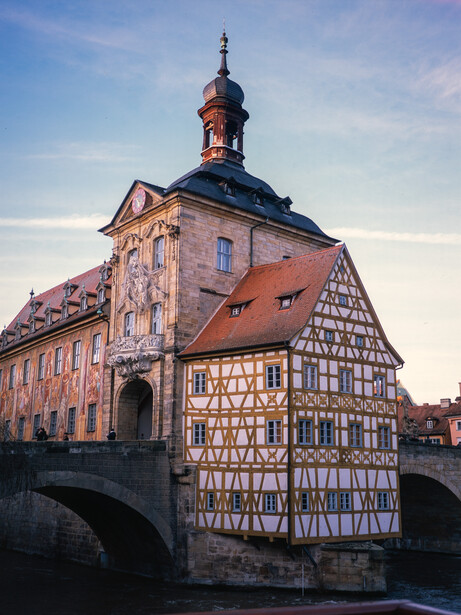
An example from a 6x4.5 color positive made on Fujichrome Provia 100F.
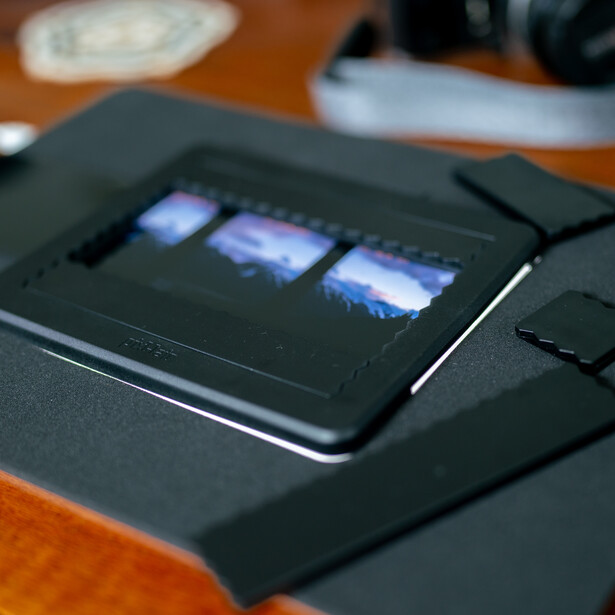
It is here, at the intersection of saving time, holding the film nice and flat, and getting the quality of my Sony paired with a beautiful macro lens that the pixl-latr really shines. So, without any further delay, let’s get into the specifics about the pixl-latr. The pixl-later can help you digitize your 35mm, 120, and 4x5 film (note: the Epson v600 cannot scan 4x5) for around $50 pre-shipping. The company got started via a Kickstarter back in the summer of 2018 and has been on the market for non-Kickstarter purchases for a little over a year (since March 2020). In that time, they have gained quite a footing among the film community.
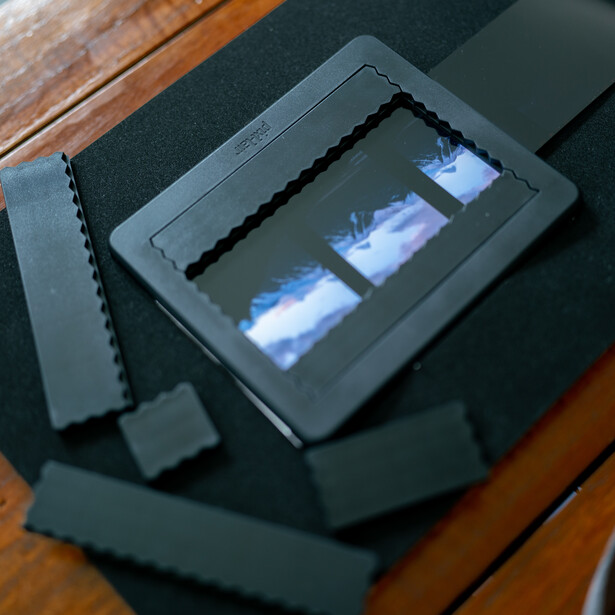
Build Quality
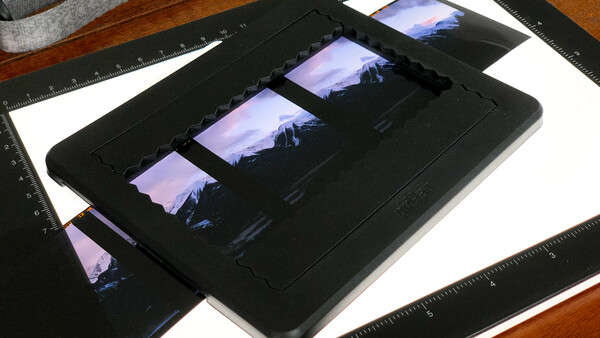
To be completely honest, I wasn’t actually sure what to expect in terms of build quality, but I have been genuinely impressed. It is constructed of a nice, heavy-duty plastic, and the parts all fit together snugly but not so much so that they are difficult to take apart to rearrange the pieces to change the film format. They offer an additional mask to go around the pixl-latr that is made of a nice and pliable foam.

An example from a 6x4.5 color positive made on Fujichrome Provia 100F.
What I Like
- The price. The pixl-latr is wonderfully affordable at $55.
- Film format options. Being able to handle 35mm, medium format, and 4x5 puts it above the abilities of the Epson V600.
- Adaptability. The pixl-latr website has a tab entitled “3D printable parts” where you can buy additional accessories and, in some cases, get free downloadable 3D printer files (e.g. an insert for 35mm slides, gates for holding 35mm film in a way that exposes the sprockets, etc.)
- Ease of use. It’s not at all difficult to sort out how to use the pixl-latr.
- Speed. It took only a few minutes (between 5-10 min) to digitize a roll of 35mm film compared with over an hour on a flatbed.
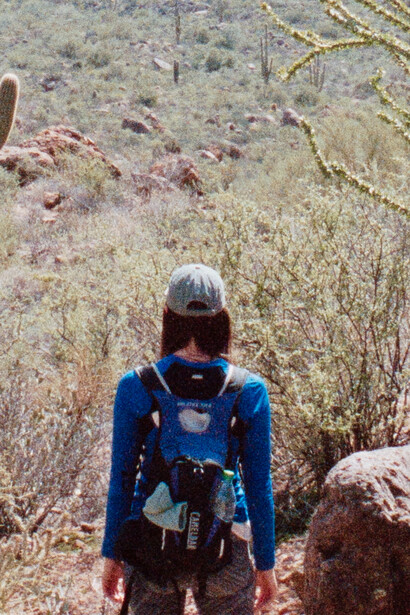
An example from a 35mm negative made on Kodak Portra 800.
What I Don’t Like
- I wish there was some material on the slits on both sides of the pixl-later to ensure the film would not get scratched. Please note that none of my films ended up damaged, but with film, it's something I'm almost always worried about.
Similar Alternatives
Epson V600 (cost: $250): As you know, I think the Epson V600 is a solid machine and it has served me well for years (review can be found here). The downsides are that it does not allow you to scan 4x5 and takes a long time to scan a roll of 35mm film. In addition, though it has a maximum resolution of 6,400 DPI, the optics hold it back quite a bit, and it’s difficult to notice any improvement in resolution beyond 2,400 or 3,600 DPI. The only edge the V600 has on the pixl-latr is the ability to scan with digital ICE.
Epson V850 (cost: $1,150): The V850 tends to get scans with higher resolution compared with the V600 and it can scan 4x5. Given that the cost is nearly six times that of the v600 and more than 20 times the cost of the pixl-latr, I cannot recommend the V850.
Plustek OpticFilm 8100 (cost: $350): As evidenced by Kyle McDougall’s video, the Plustek produces nice, high-resolution scans, but it only works for 35mm, so its utility is pretty limited if you shoot any medium format or large format.
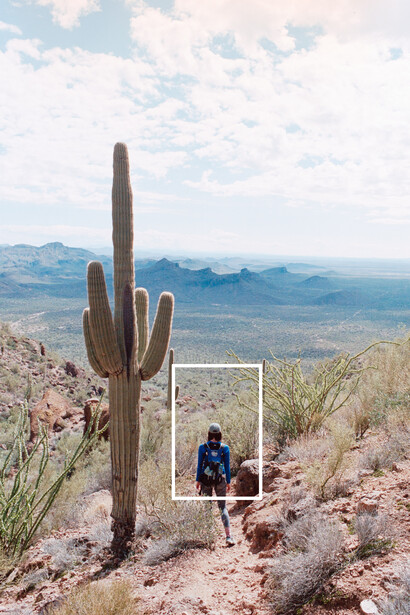
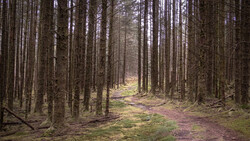
An example from a 35mm negative made on Portra 400. These results far surpass anything I was ever able to get on the Epson both in terms of resolution and dynamic range.
Final Thoughts
For any photographer that shoots film but has access to a decent digital camera with a nice and sharp lens, the pixl-latr is the way to go. Though it is not necessary, you can pair the pixl-latr with a nice light table; new, they can be had for $130, and on the used market, you may even be able to get one for free. In addition, a good macro would take your results to the next level. For the Sony system, the Sony 90mm f/2.8 G OSS is a fantastic choice, albeit an expensive one. For something less expensive, vintage macro lenses can offer tremendous quality at a fraction of the price. With that said, I have found that vintage macro lenses don't always have particularly nice coatings, so it would be important to pick up the additional mask to go around the pixl-latr to ensure consistently high-quality results. Lastly, while I use and am happy with using my tripod for holding my camera, you may want to use a copy stand. If this is the case, you can follow this article from the pixl-later website with details of using a homemade copy stand.
If you're passionate about taking your photography to the next level but aren't sure where to dive in, check out the Well-Rounded Photographer tutorial where you can learn eight different genres of photography in one place. If you purchase it now, or any of our other tutorials, you can save a 15% by using "ARTICLE" at checkout.


Join the Fstoppers community for free
-
Post comments and join in the discussions
-
Browse the site ad-free
-
Share your work and get featured in the community
-
Compete in the photo contests for fun and prizes
20 Comments
It's nice to see a product like this that isn't insanely overpriced. This encourages me to get into digitizing at home vs. having the lab do it
Once you start digitizing your own work, you won't go back. As I mentioned above, compared with doing it yourself, no lab will take as much interest getting the best results possible.
What process do you use to color reverse the negatives you digitize with the Sony?
Negative Lab Pro. It's what I used with the Epson too. I did about 1-2 dozen side by side comparisons at the time I first got NLP and found that in all but one instance, NLP produced better results. So far, I can honestly say I think the results are even better out of the Sony.
“The downsides are that it [Epson V600] does not allow you to scan 4x5”
Try to take two scans of the 4x5” frame (right and left parts) then join the two parts into one with your photo editing software. You can put thin marks in the film borders to help you.
I tried that once and only once. It was on a sheet of Ektar and for the life of me, I could not get the two halves to merge together seamlessly - the colors just wouldn't match. I tried to make sure that the Epson scanned the halves the same way but alas... Perhaps it would work better with B&W film.
I used parts of my old enlarger to make my digitizing setup. The column serves as copy stand and a glass negative carrier holds the film. A Nikon 60 mm f:2.8 AF Micro-Nikkor D lens can get sharp grain out to the extreme edges of a 35 mm Tri-X negative. The Nikon 55 mm f:3.5 Micro-Nikkor AI isn't sharp enough to do this. My question is, does the pixl-latr hold the film flat enough to get sharp grain across the whole film?
In my experience, yes, it does. In the most extreme cases of my film curling, the film holders for my Epson would do their best but I would still get enough curl to mess with the sharpness since those film holders only grab onto a little bit at the top and bottom of the film and only a little bit at the outside edges of 6 frames. The pixl-latr, however, got a nice hold of the film on all sides making even the curliest of my film flat.
I'll never understand why someone is using a camera with a Bayer or X-Trans grid to digitise film instead of a scanner which generates true RGB values fo each and every pixel.
It may depend on the scanner. I have a number of Nikon Coolscan slide scans that I was happy with and I recently tried copying the slides with my Canon. I'm using an APO-Rodagon lens and I honestly can't tell which is better. Of course a drum scanner would give better results but that is too costly and time consuming for any kind of volume.
I made my own slide copier from wood using a traditional plastic film and slide holder to actually hold the negatives themselves. I only use 35mm but the same idea could be used for larger film stock. It is very easy to use now - I can get through a box of slides in perhaps 5 minutes as everything is preset, including focus. I use flash as my light source, bounced off a white card, which allows me to use f8 or so for the aperture giving me a bit more depth of field to cope with slight bends in the film.
I explained how to make it in this article: https://backyardsilver.com/diy-35mm-slide-and-negative-copying/
Steve
I bought one of these from the Kickstarter campaign as an inexpensive way to digitise my old 35mm negatives from my teenage years. (I wasn’t very good back then, but there’s some happy memories). I managed to get satisfactory result using my iPad Pro as a light source and an extension tube with my eos m5 and 18-55mm kit lens, along with a cheap eBay copy stand.
I’m quite surprised however that as an original Kickstarter customer I wasn’t notified about the 1.3 update and foam surround.
Ah crap, I'm really sorry about that Greg! If you would like the Mask A4 and 1.3 upgrade, just drop us an email hello@pixl-latr.com and I will sort you out with a hefty discount code.
Can we use it with 127 films?
Yes, very soon, we will have a 3d printable/printed slot in adapter that works for 127
Thanks, James, I'm really please to read - and see - that you got on with it so well!
The V850 is really excellent, yes it's expensive, but so is a good 1:1 macro lens, light box, copy stand etc. I used the DSLR scanning method for years but it's such a pain with so many things to go wrong and variables to control. I get way better and more consistent results now from using dedicated scanners (also have a PlusTek 8200 that is also great). I wish I'd bought a V850 years ago honestly, it would have saved so much faff and time. Btw If you're dragging your negs through anything I guarantee you are scratching them, I found I'd added a lot of scratches to my negs using enlarger carriers because they were never intended for having film dragged through them frame by frame. These scratches don't necessarily show up that clearly with a diffuse light source, but if you're using a non diffuse light (e.g. condenser enlarger) you will see them so be warned.
The V850 usually goes on sale for the holidays, and can be had for much less than $1150. I think I got mine for around $800. I do use it to scan other things, though, so for me it's been worth it.
I’ve found that the issue of film flatness can be easily, quickly, & almost universally solved by focus stacking. Bodies & high quality macro lenses that support automatic focus stacking make the process even easier.
I’ve also gone completely over to using a well diffused speed-light instead of a continuous light source. Doing so removes any residual small vibrations that may be present in your rig.
Tom M