
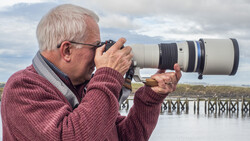
Light is the cornerstone of photography. Without it, there are no images, and in landscape photography, the light's quality, direction, and intensity can make or break a shot. As a landscape photographer, understanding how light works is key to capturing the beauty and drama of nature. Over time, I’ve realized that mastering light is among the most crucial skills a landscape photographer can hone. Looking back, there are insights about light I wish I’d known earlier—knowledge that would have significantly boosted the quality of my early work.
The Importance of Light in Landscape Photography
Light defines the mood, texture, and depth of a landscape, transforming ordinary scenes into something special. The interaction of light with landscape elements—illuminating some areas while casting shadows on others—creates the contrast and dimension that make an image compelling.
In my early photography days, I often felt disappointed with my images, even in beautiful locations. The issue wasn’t the scenery; it was my lack of understanding of how to work with light. It took practice and a fair number of missed opportunities to realize that light is the most critical factor in landscape photography.
Golden Hour
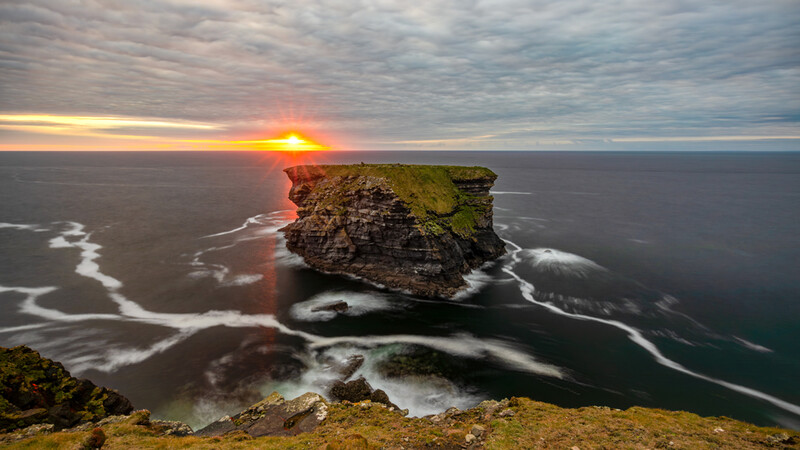
The golden hour, occurring shortly after sunrise and before sunset, is a magical time for landscape photography. During these periods, the sun is low, casting warm, soft light that bathes the landscape in a golden hue. The long shadows during the golden hour add depth and texture, making the scene appear more three-dimensional.
In the beginning, I would shoot throughout the day, thinking that the bright midday sun would yield the best images. However, I quickly learned that the harsh light of midday often results in flat, uninspiring photos with deep shadows and blown-out highlights. It wasn’t until I started waking up early and staying out late to shoot during the golden hour that my images began to achieve a more professional quality. The warm tones and soft shadows of the golden hour bring out the best in a landscape, creating a mood and atmosphere difficult to replicate at other times of the day.
Blue Hour
The blue hour is the twilight period just before sunrise and after sunset when the sun is below the horizon, yet the sky remains illuminated. The light during the blue hour is soft and diffused, with a bluish tint that creates a calm, serene mood in images.
Early in my career, I would pack up as soon as the sun dipped below the horizon, missing out on the blue hour’s opportunities. It wasn’t until I started experimenting with longer exposures during this time that I discovered the blue hour’s beauty. The cool tones of the blue hour contrast beautifully with the warm tones of artificial lights, making it an excellent time for capturing cityscapes and coastal scenes.
The Direction of Light
The direction of light hitting your subject profoundly impacts the final image. Understanding front light, side light, and backlight helps you position yourself relative to the light source and your subject.
- Front Light: When light comes from behind you and shines directly onto your subject, it’s called front lighting. Front light can bring out colors and details but often results in flat images with little depth or texture. I find front light works best when emphasizing color and clarity without much concern for shadow and depth.
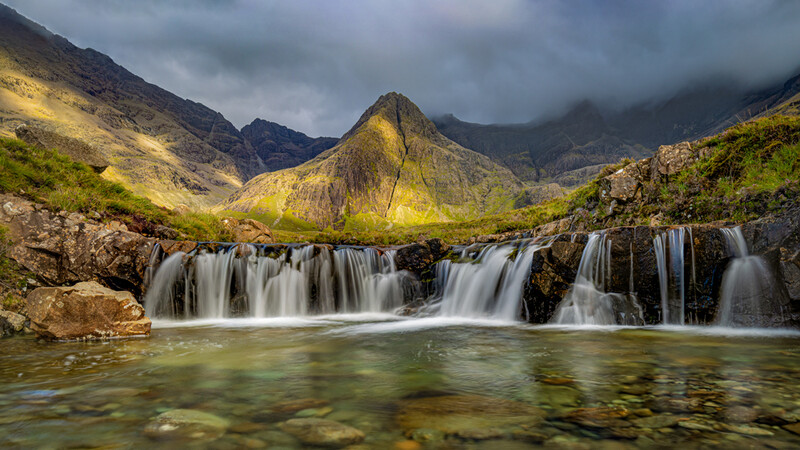
- Side Light: Side lighting occurs when the light comes from the side of your subject. This type of lighting is ideal for creating depth, texture, and contrast. Shadows cast by side lighting add dimension, highlighting the terrain's contours and shapes. Side lighting is particularly effective in mountainous or hilly areas, where the interplay of light and shadow on the peaks and valleys creates a dramatic and visually striking image.
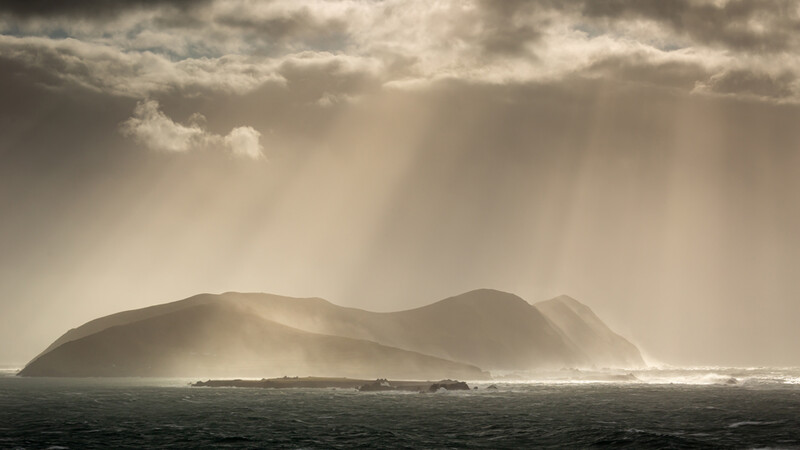
- Backlight: Backlighting happens when the light source is behind your subject, shining towards the camera. Backlighting can be tricky, often resulting in silhouettes and blown-out highlights. However, when used correctly, backlighting can create stunning effects, like sunbursts, rim lighting, and silhouettes. I’ve learned to embrace backlighting to create a mood or atmosphere, such as shooting into the sun during the golden hour for a glowing, ethereal effect.
 The Role of Weather in Lighting
Weather conditions significantly affect the quality and character of light in landscape photography. Different weather produces different types of light, each with unique qualities and challenges.
- Clear Skies: On cloudless days, light is strong and direct, with little diffusion. While this can create vibrant, high-contrast images, it can also result in harsh shadows and blown-out highlights. Clear skies are best for shooting during the golden hour when the low sun angle softens the light and reduces contrast.
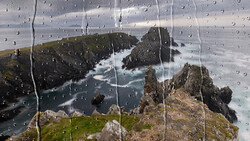
- Cloudy Skies: Overcast skies act as a natural diffuser, softening the light and reducing contrast. While some photographers avoid shooting on cloudy days, I’ve come to appreciate the soft, even light that overcast conditions provide. This light is excellent for capturing details and textures without harsh shadows and bright highlights. Cloudy skies also create a moodier atmosphere, perfect for certain landscapes.
- Stormy Weather: Stormy weather can produce some of the most dramatic light in landscape photography. The contrast between dark storm clouds and sunlight breaking through can create a powerful image. Shooting in stormy weather requires patience and bravery, but the rewards are often worth the effort.
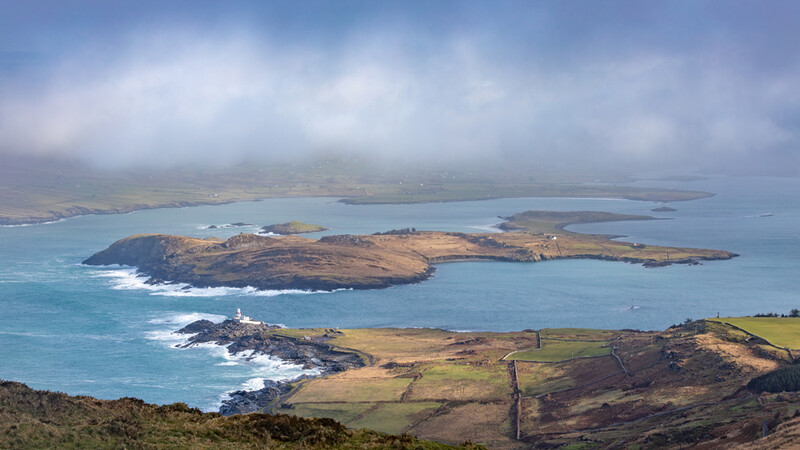
- Fog and Mist: Fog and mist can transform a landscape into a mystical, otherworldly scene. Diffused light in foggy conditions creates a soft, ethereal atmosphere, with reduced visibility giving a sense of depth and mystery. I’ve learned to embrace foggy mornings, especially in forests and along coastlines, where the mist can add calmness and serenity to the scene.
 The Role of Post-Processing in Enhancing Light
Post-processing plays a crucial role in enhancing light in images. While capturing the best light possible in-camera is essential, post-processing allows you to refine and accentuate light to create the desired mood and atmosphere.
- Adjusting Exposure: Exposure adjustments can help bring out details in the highlights and shadows, ensuring balanced and even light distribution across the image. Slight exposure adjustments can significantly impact the image's overall mood.
- Dodging and Burning: Dodging (lightening) and burning (darkening) are powerful techniques for selectively adjusting the light in your image. These techniques can draw attention to specific areas, enhance contrast, and add depth.
- White Balance Adjustments: Adjusting white balance significantly impacts the image's color and mood. A warmer white balance can enhance the golden tones of a sunrise or sunset, while a cooler white balance can emphasize the blue tones of the blue hour.
- Enhancing Highlights and Shadows: Enhancing highlights and shadows can add depth and contrast, making the light feel more dynamic and three-dimensional.
 What I Wish I Knew Earlier
Reflecting on my landscape photography journey, several key lessons about light would have been invaluable to know from the start:
- The Power of Golden Hour: I used to think any time of day was suitable for shooting landscapes. Learning the importance of golden hour light transformed the quality of my images.
- The Potential of Blue Hour: I often overlooked the blue hour, packing up too soon. Discovering the potential of blue hour light opened up new possibilities.
- The Impact of Weather on Light: I used to avoid shooting in cloudy or stormy weather, thinking it would lead to dull images. I now understand that different weather conditions offer unique lighting opportunities.
- The Role of Post-Processing: Early on, I underestimated the importance of post-processing in enhancing light.
 Conclusion
Mastering light is the key to creating dramatic and compelling landscape photographs. Whether working with the warm light of the golden hour, the diffused light of an overcast day, or the dramatic light of a stormy sky, light quality and direction bring your images to life. By learning to see and use light effectively, you can transform ordinary scenes into extraordinary images that captivate and inspire. Like any skill, mastering light takes time, practice, and experimentation, but the rewards are well worth the effort.
How has understanding light influenced your photography? Why not share some stories or images below?


Join the Fstoppers community for free
-
Post comments and join in the discussions
-
Browse the site ad-free
-
Share your work and get featured in the community
-
Compete in the photo contests for fun and prizes
2 Comments
I am always impressed with Darren Spoonley and his ability to find a image during the bad weather and most always with thick cloud cover that no matter he is out there not inside somewhere else. His ability to see something in a landscape area and having the tool on hand to capture what he see's in his mind's eye. I live in Florida USA and all is very flat but I do travel to mountains every ones in a while and knowing before hand what to look for helps my camera eye.
As far as light wants I find getting out at breakfast earlier before the rise in blue hour doing bracketed 5 at +/- 2EV that put together you get a image with stars above and a foreground bright with dark sides of things normally captured dark but after combined are lit and with sharpness. But you are on site for the golden hour and it is only and hour that you will have to be there before hand. Next it is feeding time for critters and birds lit from the sun side show colors. The same but in reverse at sunset time.
All happens at meal times but great times for most all people are inside some where. I have a great wife that understands these times where i will bring breakfast (later) and I will fix something or have a meal early or have something after.
The main point is the bracketing of your captures for you get 3 or 5 image to play with or merge, It only takes a few seconds to get that many of a time of day and place that the light will never be the same again in most cases.
An example back in 2015 and learning to do milky way with little info I tried a +/- 1 but got each image with dead and hot pixels and HDR programs where kind of bad back then but going back to the images years later doing HDR got an image so clean and sharp and the colors of the MW's yin and yang and sky were perfect without a lot of slider movement.
Another time I was having a anniversary dinner an saw a sunset out side through the windows and waiting for the meal I took a shot at +/- 5 EV like a inside landscape.
But a cloudy daylight day capture spotted while driving and stopping beside the road. Cloudy days are great for colors but is very hard to get texture of the clouds above due to brightness of them and having to lower the main EV to -5 to reduce the highlights I did a hand held 3 at +/- 2EV I got a bright foreground and great texture of clouds, but like knowing never again will I be there ever again I had 3 images and not just one to play with.
Another at sunset with colors all over with eyes I did my normal sunset bracketing hand held of 3 at +/- 2EV for a capture of shrimp boats. after merging one slider of dehaze brought out the deep blue in the sky I saw but only one image had but the foreground was bad the combo did it.
All just info and if your camera has IBIS and lens with OSS/IS you do not need to walk around with a tripod at the ready.
Thanks a lot! Perhaps because we have mostly cloudy conditions here it why I’ve no real choice :-) it’s a rare day that we get a cloudless day in Ireland ! You’re absolutely right about getting out and be there early ! If you’re not in the mix after all then there’s no chance of success ! Thanks for your comment and images too