
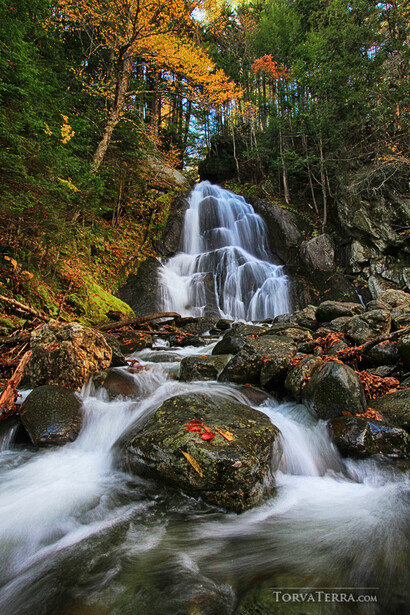
My favorite season is about to hit the Northern hemisphere, autumn. With its riotous color and vibrancy, the forests of autumn transform into a landscape and nature photographers' playground. Here are my tips for planning your ultimate fall color adventure.
Go at the Right Time
When photographing fall color, timing is of the essence. If you go too early, you just have green leaves, too late, and the trees are brown and bare. Autumn hits each region and location at different times. Even in one forest, elevation changes or bodies of water can affect the timing of when the leaves will change. I calculate the timing of fall color each year in the areas that I visit based on experience from prior years, rainfall, and temperatures leading up to autumn. For a first-timer, it is best to just average the timing based on previous years as there is a slight margin of error. If you don’t hit the perfect peak, there will still be plenty of colors.
For your first go at estimating the best fall color timing, check online (Instagram, Facebook, Flickr, 500px, etc.) and search keywords or hashtags for your intended locations to see the exact dates when others in prior years found the color at its best. You can also Google search the location and just look up the fall color estimator chart. These are graphics put out by local organizations and forestry groups, but be warned that they are broad estimates and can be very off for specific photography locations. It is best to hone in on your exact locations and look at the photos from previous years. For my favorite fall color destinations of New England in the United States, the very end of September into mid-October is the timeframe in which to look. Also, each state and area has a different specific peak timing which lasts only a few days to a week. While it might be a hassle, planning your bookings ahead through research rather than just guessing can mean the difference between photographing glorious color or showing up to brown, dead-looking trees.
There are a lot of factors if you want to calculate the perfect peak timing, but you are on nature’s schedule. If a bad storm comes through, it can knock down a bunch of leaves. Be flexible and roam a bit. If the color is sketchy in one small area, explore a bit farther south or at a lower elevation. When the color turns, it isn’t all at the same exact time or place; don’t be discouraged if your planning is slightly off. Just adapt and keep moving to find more color nearby.
Alternatively, if you have the flexibility of being able to plan at the very last minute you can also check ski resort webcams for forest conditions, check hashtags again on social media, or check the location's social media page for exactly what the color looks like and just go right then. Many state parks and national forests post regular updates about the fall color conditions in autumn, as it is a huge source of pride and tourist attraction for them each year. The downside to waiting for the last minute is that hotels and campsites may be completely booked out. However, if you live close by or want to risk it, you can just wait for the perfect color and weather to go on your fall color adventure.
To summarize, when planning your fall color trip in advance, check previous years and average the dates. If you have a wide range, err on the side of going slightly earlier rather than later in case of storms. It is better to see a mix of colorful and green leaves than to go too late and see brown leaves and bare trees.
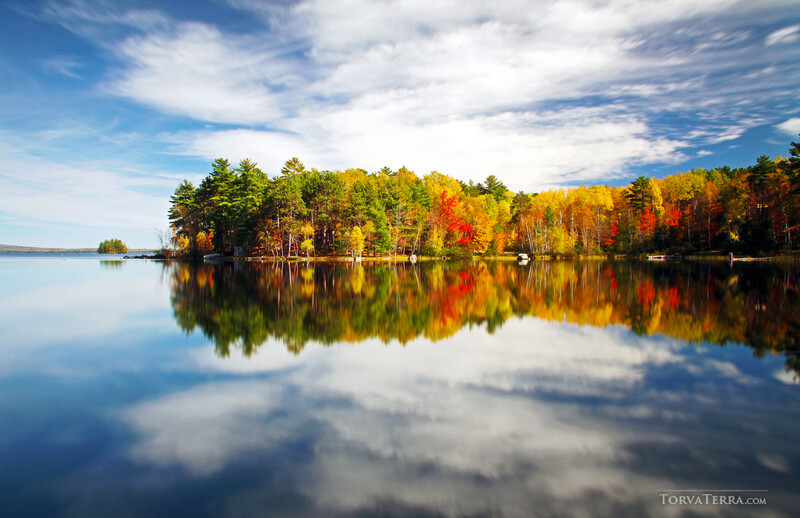
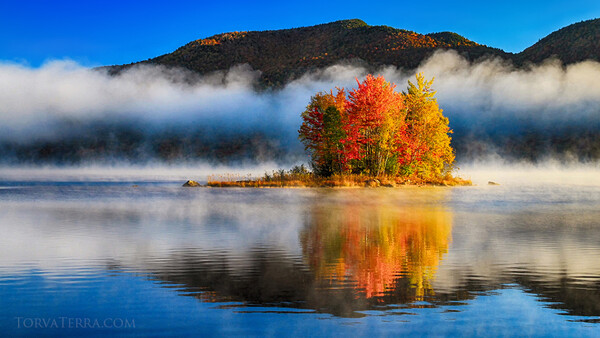
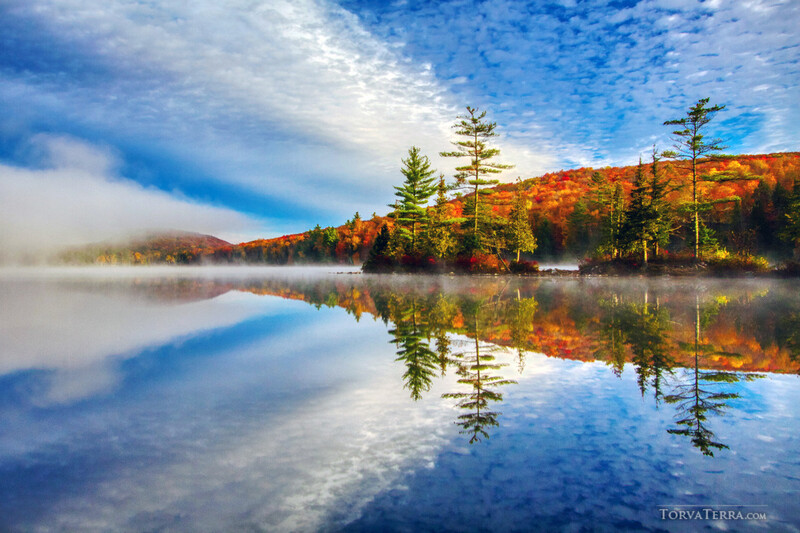
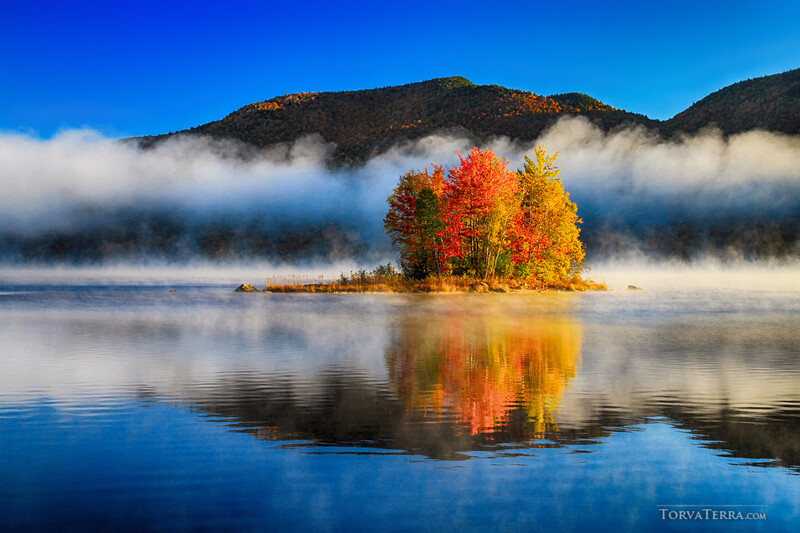
One last aspect to note is that timing also means the time of day. I won’t harp on this one too much, as I am sure you have heard of golden hour a thousand times. However, I will give you a better tip. In autumn, when the temperature drops at night, so often does the wind. In the morning, as the sun rises and begins to heat things up, fog and mist often form over the water and wet low-lying areas. Even if the mist doesn’t form, water surfaces without that wind will have the best reflections. If you want to get fall color reflection shots, go at sunrise. You can check the forecast to confirm the wind hour by hour and see how still the morning will be. If your fall color spot has a lake or pond, go 30-45 minutes before sunrise and wait for the show. Watching the sunrise over a cool, misty lake is the best way to enjoy fall color.
Understand the Trees for the Best Rainbow Effect
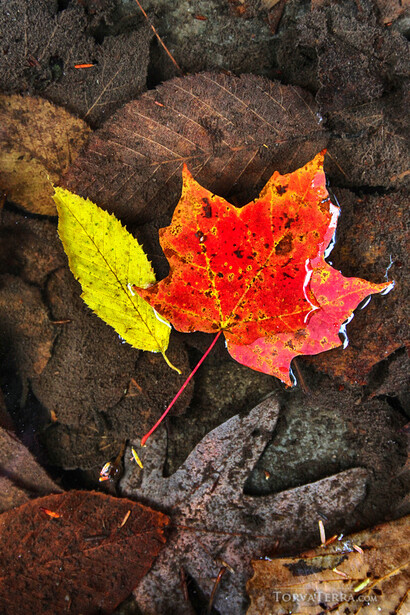
Part of the fun of fall color is how gorgeous and vibrant the trees become. An overlooked factor for many photographers however is the understanding that different trees turn different colors and how to use that to your advantage. Color theory is an important part of photography and can help you create stronger and more colorful compositions or conversely to focus on specific hues for same on same tonal studies. In plain terms, you can focus your fall color trip on the type of scene you want to see by understanding the flora of the regions.
In autumn, when the trees turn, different species take on a completely new look. Aspen, ash, American elm, birch, sycamore, yellow poplar (tulip tree), and some maples, oaks, and more turn brilliant yellows in autumn. The aspen trees in particular are famous for their golden color. So, if you dream of seeing trees dripping in gold, you would want to head to the Rocky Mountains. There are quite a few places in Colorado, United States, and Alberta, Canada that are iconic for aspens.
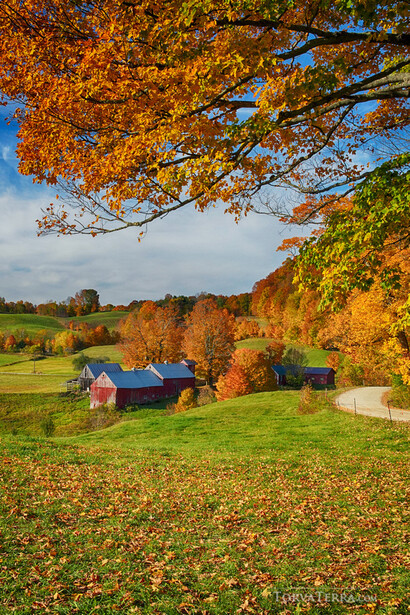
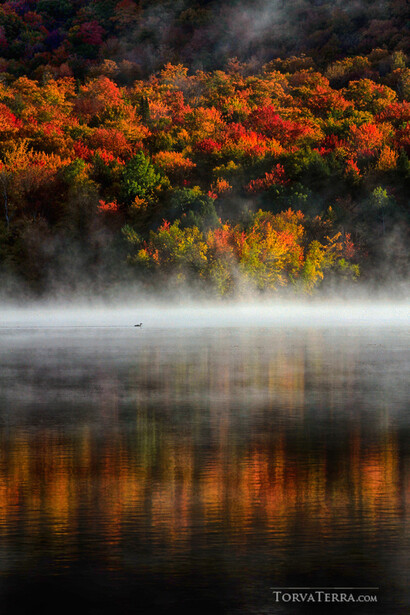
If your style and eye are drawn to bright pops of color instead, you will want forests with more diverse tree species that mix together to create that visual autumn feast. This is what draws me to New England in the United States every year to bask in the fall color. This region has a unique temperature zone and geographic habitat that allows multiple different species of trees to coexist. In my experience, the best reds I have ever seen are in New England. The area is famous for its red sugar maples. In autumn, when they turn, it is like a kaleidoscope of color, with those vibrant reds as the star of the show.
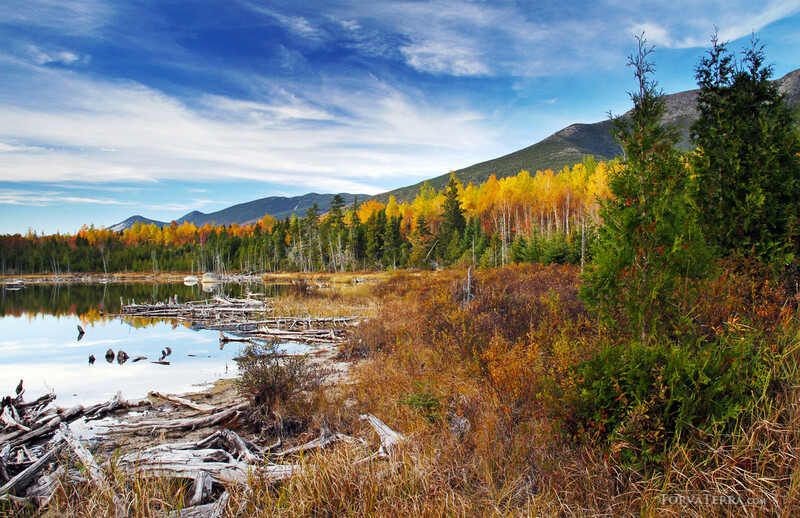
In the United States, you can get a decent color range on the East coast, from the Appalachian Mountains of Maine all the way down to the Smoky Mountains of North Carolina and Tennessee. There are iconic road trips to explore fall colors like Skyline Drive in Virginia’s Blue Ridge and the Shenandoah Mountains, Kancamagus Highway in New Hampshire, Green Mountain Byway in Vermont, Rangeley Lakes Scenic Byway in Maine, and so many more. The best part is that each area is invested in its fall color and the forest and park systems are a great resource. They have routes with scenic lookout spots, fall color hotlines, maps, itineraries, and more for you to browse on their websites.
Gear to Help You Make the Best of Your Trip
Other than my basic kit of camera and accessories, there are three tools that I find invaluable for my fall color trips, the first of which is a combo: my circular polarizer (CP) and tripod. I am often shocked when I find out how many photographers don’t own a circular polarizer, do not know what they do, or haven’t even heard of one. I know that some of you will read this and think it is silly, but I get so many comments from folks asking about circular polarizing filters that I have to mention them for anyone who needs to know.
Circular polarizing filters are a game-changer for landscape photography, full stop. They act like sunglasses for your camera. When you use this filter, it cuts the glare off reflective surfaces of your photos. While most people only associate this with water and then only use the filter for waterfall or lake images, that is a mistake. The polarizer can boost the color in the sky by cutting through the haze, bring out greens in foliage and color from all plants by reducing that glare on their surface, and yes, cut the glare off the water, making the colors darker and objects in the water more visible. Leaves are shiny, and when you twist on your polarizer and activate it, the color will pop in a way that you can’t replicate with post-processing. With the circular polarizing on fall color, you are cutting through foliage glare to record that fine detail and vibrancy data to your image file. It makes a big difference.
If you are one of those people who mostly photograph nature images and keeps a UV filter on your lens for protection, swap that for a circular polarizer right now. It is a circular rotating filter. If you don’t need it at any moment, twist it and the effect goes away. Then when you need it, twist the filter back around to activate the magic.
The tripod part of the combo is a trouble spot. I know. Tripods are annoying, and you don’t want to carry the thing around. It is so easy to just stand there, take your photo, and move on. But this is fall color, and let me tell you something, the leaves are not perfectly still. Even a slight breeze, and the branches are swaying. If you want to tack-sharp images you need to slow down and take the time to set up your tripod. If you are looking at me funny, let's compromise. For the regular touristy photos, just take them as you walk by, but for the really breathtaking spots, bust out the tripod, slow down, and stay in one place, notice any distractions and adjust your composition, wait for the clouds to move into the frame or out of it, and explore different perspectives or angles. Really invest in the good locations that are worth a more critical eye, and use of all of the tools at your disposal.
The last thing that I use to help me get the best fall color photos is the PhotoPills app on my phone. I use this to calculate sunrise and sunset times. I also use it to see if the peak fall color time that I calculated will line up with a full moon, milky way, or meteor shower. This year, I have a new moon during one of my fall colors trips and a meteor shower just after that. So, if the forecast keeps the clouds away, I can hope for fall color, Milky Way, and a meteor shower all in the same trip.
By using the PhotoPills Night AR mode, I can even plan out the exact compositions in advance to see if everything lines up with precision. There is also a Planner map view to check it on a bird’s eye view and an exposure calculator to help me decide if I want a single sharp image or to use interval shooting and get star trails. I will probably do both! I was able to plan a few exact spots with compositions for this year, and if the clouds stay away, I have everything set up. I just need to go, set up my camera, and push the button.
Go With a Group
If the idea of planning out your trip seems overwhelming, you can always join a fall color photo tour or workshop instead. These are great for people who just want to take photos and not worry about the logistics. They are also beneficial if you need a helping hand with how to photograph the fall color and make the best setting and composition choices for each location. In addition to learning from a professional, you will also have the benefit of being with peers to make friends a enjoy nature’s show together.
To find a group to join, you can check if you have a local camera club that does outings, look up workshops in the area you want to see, or even post online and grab some of your friends for a trip.
As a professional photography guide, I look forward to teaching fall color workshops every year. I find that they are an invaluable resource for so many people for different reasons. Ultimately, many join my trips for my knowledge of hidden off-the-beaten-path locations and my experience with the areas where I photograph. I take people both to places that aren’t in the guidebooks and the iconic popular spots for the full experience. In whatever way you choose to enjoy the fall color, whether on a workshop, your own road trip, or just a local park nearby, don’t let that camera collect dust this autumn. I hope that my tips were helpful and you can get out there and create some new photographs and memories this fall.
For more information about Kate’s workshops, you can see the full list of trips on her website www.TorvaTerra.com.


Join the Fstoppers community for free
-
Post comments and join in the discussions
-
Browse the site ad-free
-
Share your work and get featured in the community
-
Compete in the photo contests for fun and prizes
6 Comments
I like this article. It makes you want to discover the beautiful autumn with your camera. Thank you Kate, some good tips here.
Perhaps a comment on polarising filters: If you use them with very wide lenses, you have to expect colour gradients from light to dark in the sky, depending on the direction, if the air is relatively humid.
Edit: Great photos, vivid colours.
Thank you Jan for taking a few moments from your day to let me know that you enjoyed my article. :)
Your comment on sky gradients when using filters on extra wide lenses is spot on. I mostly notice a gradient in relation to the light, darker parts of the sky away from the sun become richer in tone and the effect is much less in bright areas. Therefore you do get a pronounced gradient when your sky already has one. Looking out my window now for example the area of sky by the sun is light blue and the area opposite from the sun is darker blue. Using a polarizing filter makes that gradient much more contrasted and obvious. This can be fixed in post. When I fix sky gradients I try to leave the effect looking natural by dodging or burning rather than just selecting the entire sky and making it flat.
Another note about any filters is that better quality filters are less likely to add any color cast. Some cheap filters will add a purple or other color cast to your images. This can be also fixed in LR or PS but adds an extra step to your post processing.
Yes, I think around 20mm the problems begin to get severe sometimes. In the mountains higher up the sky can turn very dark. This is because the reflected light changes its plane of polarization over the entire angle. There is nothing you can do about this (except in post). I enjoy your articles. They are well written.
Kate loved the article and learned some new things for my fall photo shoot. I certainly agree about your added comment about cheap CP filters. I learned that from experience. Definitely worth spending the extra upfront.
Hi John. It is so nice to hear that you learned a few things from my article to apply to your fall color adventures. About the filters, it is definitely worth investing in good ones to avoid any color casts or other quality issues. As a nature and travel photographer, I keep my CP filter on my wide angle lens and rarely take it off. Cheers! :)
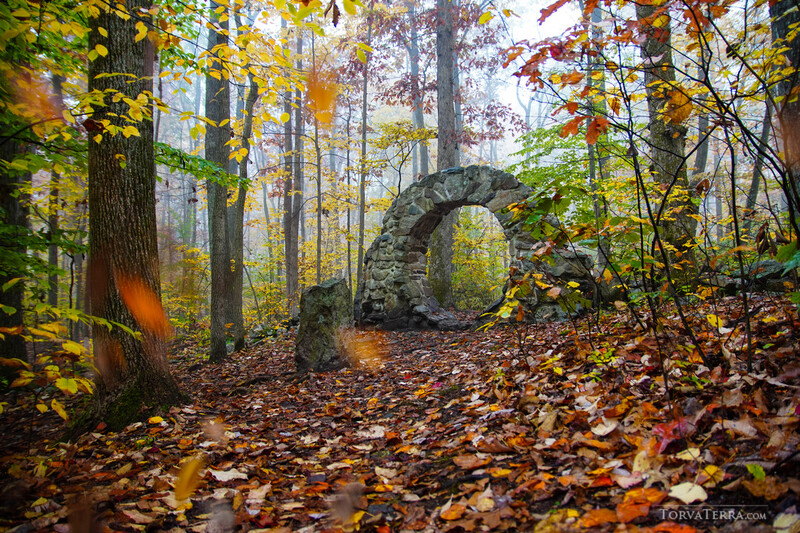
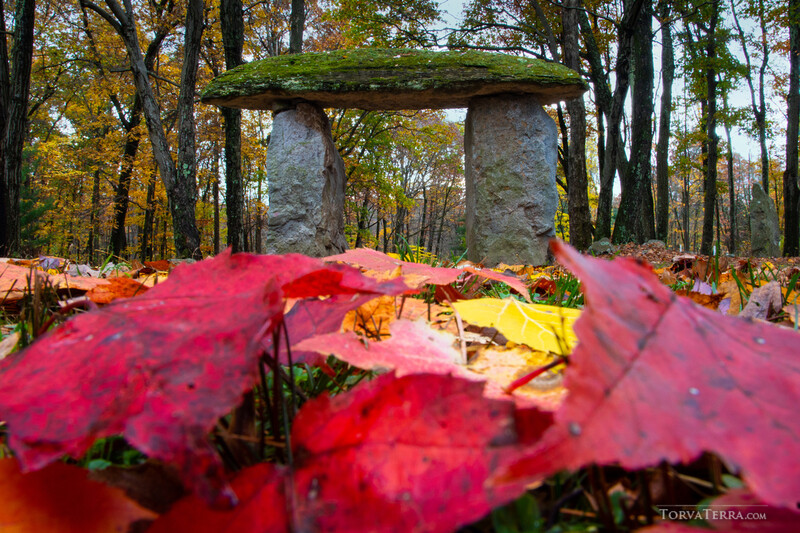
I thought that must be Columcille in your first photo then confirmed with Thor's gate :-)