
While at the recent Sony Kando Trip, I had the pleasure of participating in some wedding-themed sessions alongside Sara France, Taylor Jackson, and Benj Haisch. Because Sony Kando Trip normally has a bunch of models available for sessions but rarely has any high-end wedding attire, Sara was kind enough to get some amazing dresses on loan from a local gown shop called The Dress Bride. And because this dress shop was kind enough to lend us numerous dresses, we ended up doing around seven different sessions over the two full days. This is in addition to the classes, announcements, activities, and meals. Needless to say, we had our hands full.
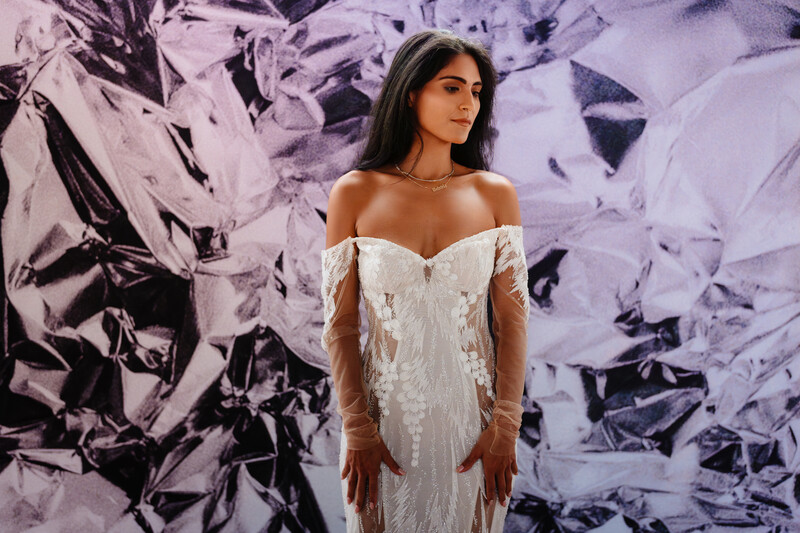
For one of the sessions that we had planned, there was not a model available for us to use. Thankfully, one of the photographers in attendance volunteered to help us out. Turns out, Gabriela is not only an amazing photographer (and she was part of launching the new Sony 85mm f1.4 GM II lens) but she is also an actual model and was not simply playing one just for us. This made things a bit easier for us since it cut down on a lot of the posing and directing that goes along with a normal bridal session.
This brings us to the actual image you are here to learn about. When I first shared this online, I asked people how many lights they thought I had used. When I asked, I showed the natural light version, the final version, and I mentioned that I did not add any color in post-production. With that, most people guessed two to three lights, but there were some guesses as high as seven lights. Though, if you have been following me for long, then you probably know it's pretty rare for me to use more than a single light. So I did have a few people say that it looked like three lights, but because it's me, they guessed one light, which is the correct answer. So how did I pull this off?
The first trick here can be found in the backdrop. The backdrop that was used is one I had never really seen before. It's called a pillowcase backdrop, and it's essentially a frame that holds a stretched-out extra-large pillowcase. On one side is a backdrop design, with a different design on the other side. In one of the previous sessions, I was using the other side of the drop, which is a mixture of a bunch of colored blotches. When I was using it, I noticed that the material of the drop was similar to regular fabric. This means that it's a bit translucent.
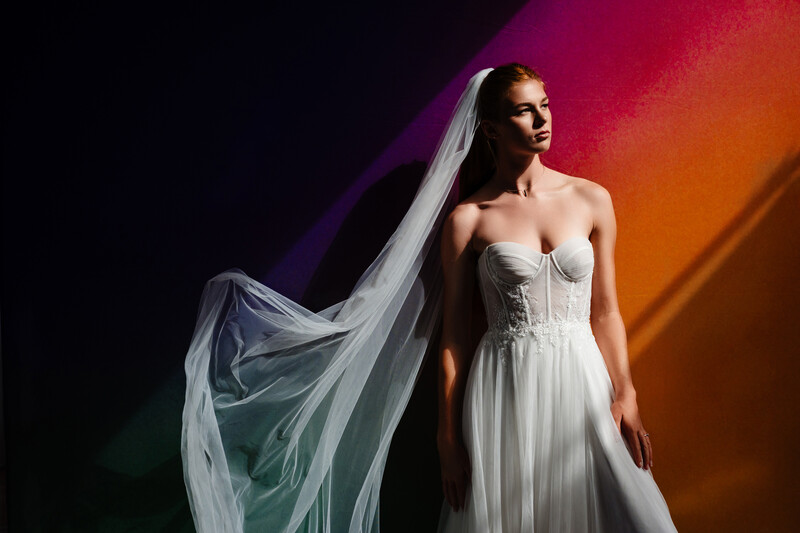
This gave me the idea that I could fire a light into the backdrop in order to make the opposite side glow a bit. Doing this would also cause the color from one side to be essentially transferred to the opposite side. So given the natural light version below that shows basically a black-and-white pattern (though you can see a hint of the color bleeding through from the natural light), what I would get is this same pattern, but with the color from the opposite side in combination with a bit of glow. Taking an image at a lower exposure than the natural light would also let more of the color be visible as well since the color is more saturated on darker elements.
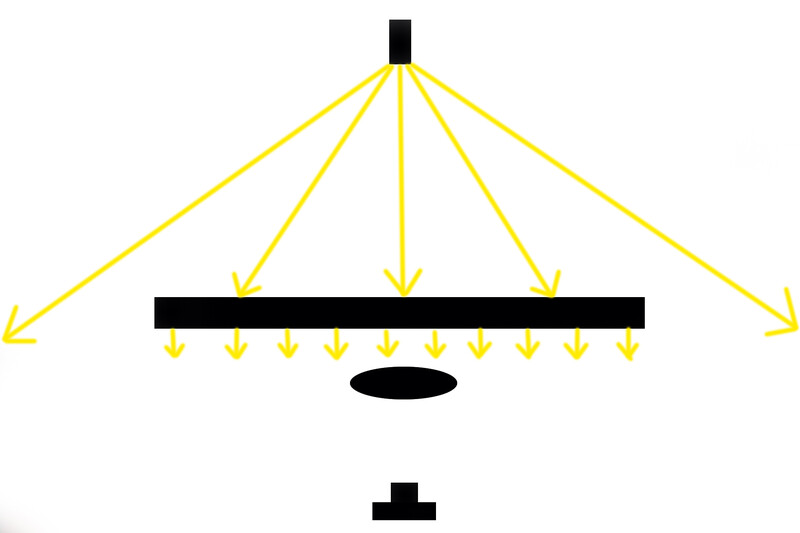
From here, if you take a look at the top-down view, we have one Profoto B10x behind the subject and backdrop. I'm also taking the image at a much lower exposure than the ambient image you saw above. So normally, this would cause the model to simply be a silhouette against this now glowing backdrop. And this is where trick number two comes into play. Because the backdrop is eating up a good amount of power since the light has to travel through two pieces of backdrop cloth, there is a good amount of power from the light that is spreading to the sides of the backdrop.
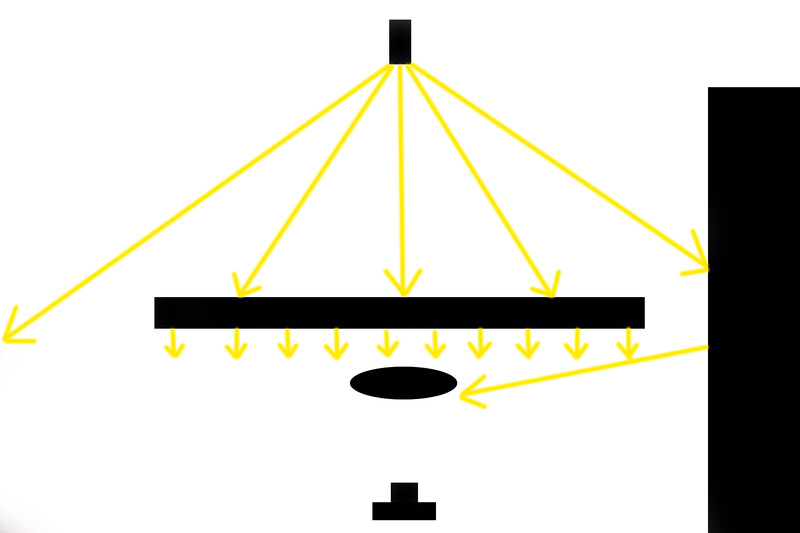
With this in mind, I intentionally set the backdrop up against a white wall. This white wall acts as a reflector, and the wall has a coat of paint that is a bit glossy, giving it a bit more reflectiveness than a traditional bounce reflector. So with this, all I had to do was place Gabriela in a spot where she could catch this bounced light at a good angle. If she was too close to the backdrop, then the backdrop would block the bounced light. If she was too far away from the drop, then the bounced light would rim light her instead of lighting her face.
With this setup, plus the trick of the hidden colored backdrop, we can have a single light completely change the look and feel of what's possible compared to simply using natural light.
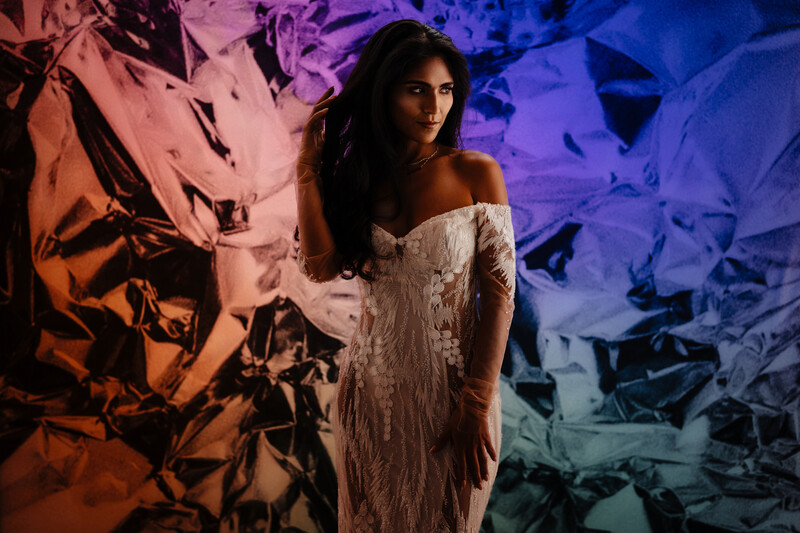
Closing things out, it's important to mention that I photographed this with the Sony a9 III and its global shutter. This allows me to reduce ambient light much more easily when paired with flash than traditional sensors. Had I used another camera, this image would not have been possible unless I used a much larger and more powerful flash. Even then, the tricks outlined in this post would still need to be used if you wished to only use a single light. Even though using two lights would have given me more control and made things overall easier, that would have required me to have multiple lights on me and ready to use. It would have also required more setup time that we simply did not have, which is why I like to use just a single light. Because most real wedding days don't have a lot of time available to take portraits and work through creative ideas, I simply have to work with what I have as quickly as possible. In the end, this image, from setup to final click, took about one minute. The final settings were ISO 250, f/1.8, and 1/8,000th of a second. The lens I used was the Sony 50mm f/1.2 GM.


Join the Fstoppers community for free
-
Post comments and join in the discussions
-
Browse the site ad-free
-
Share your work and get featured in the community
-
Compete in the photo contests for fun and prizes
No comments yet