Lightroom’s newest update introduces Adaptive Profiles, a tool that changes how you can approach editing. Instead of applying a standard profile, these profiles intelligently adjust to your image, giving you a different kind of automatic enhancement. If you rely on auto settings, this could be an alternative worth exploring.
Coming to you from Matt Kloskowski, this insightful video breaks down the February 2025 update to Lightroom Classic and Lightroom. Adaptive Profiles, previously available in Adobe Camera Raw, are now integrated into both versions of Lightroom. These profiles act as a dynamic starting point, adjusting color, contrast, and tonal details in ways traditional profiles couldn’t. They interact more directly with highlights and shadows, creating a more balanced result. If you use Adaptive Profiles, you shouldn’t use the standard Auto setting, as Adobe recommends against combining them.
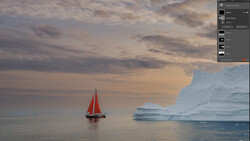
Kloskowski demonstrates how these profiles enhance contrast, depth, and definition, particularly in areas like clouds and foliage. Unlike traditional profiles, which primarily adjust color, these affect the overall tonal structure of an image. If you have an HDR-capable monitor, you’ll see even greater benefits. The video also covers Lightroom’s enhanced backup management system, allowing you to view, delete, and organize backups without searching through folders. Regularly deleting old backups can free up significant storage space.
The update also brings improved tethering support for Sony, Nikon, and Canon users, letting you set focus points and adjust focus areas directly within Lightroom. Performance enhancements help maintain speed even when working with complex masks and adjustments. If you’ve noticed slowdowns when adding multiple masks, updating Lightroom should help. The cloud-based version now includes the same Adaptive Profiles as Lightroom Classic. A new dual monitor mode is also available, something many users have requested. Additionally, the Compare View feature now allows true side-by-side before-and-after comparisons, rather than just overlaying changes. Check out the video above for the full rundown from Kloskowski.


Join the Fstoppers community for free
-
Post comments and join in the discussions
-
Browse the site ad-free
-
Share your work and get featured in the community
-
Compete in the photo contests for fun and prizes
1 Comment
First Great information for all about all new info! A pet peeve of mine is about the camera profiles behind the four little squares to the right that photographers of YouTube and other sites ignore. The profiles are of the camera that you select on your camera when capturing a jpeg also BUT this will add a starting point from your camera style. Yes it is Adobes best guess as to these profiles for as I know (maybe wrong) camera makers keep the settings to themselves and on top of that a photographer can adjust the settings to the profiles in camera. I find the profiles a great start to a RAW image like when capturing say a night Astro Milky Way most times Portrait gets rid of the dark areas blues and most times give the Yin and Yang colors of Pegasus best.
I say all of this but with the new Profiles under the Adobe button and at the bottom of that selection I really do not see it in the light of day as the saying goes! All the pros sell or give away their sections that are over to the left that I see in some videos are many presets they dream up for editing and which is faster scrolling over a long list or just doing yourself?
I guess the pro's need all for a fast edit of many photos but for me a hobbyist it is the editing that gives the joy as well as getting out and capturing.
As a note today I find photos captured by relatives way younger just capture in auto and those using their phone that also is auto and basically auto selecting of a profile! I have no problem with that for people are like back in the film days or early point and shoot days just processing film or taking a SD card to get prints made. But like your camera as those options as well a video and all you paid for so really no big deal.
Next that HDR button, I got really upset that yes my monitor was HDR but just HDR10 and my computer was HDR but you have to have an HDR 1000 or more on a certified list. Yes you can edit in the HDR and see where it is a above the 255 all the way up to 500 and then export an image with HDR but no one can see the HDR image unless they have a Certified HDR monitor. The biggest thing is you can not print an HDR edited image due to the fact the 255 to 500 is brighter than paper white so are some going down the rabbit hole where like video also is just for monitors.
It is like the next problem will not be water but electricity for that is all we are using to see and share anything and everything to all.
Today we really do not need to worry about a nuclear bomb hit but what you learn in the military is a bast in the upper atmosphere can destroy all electric and electrical transmissions. So save your film cameras and learn a way to develop or paint on cave walls again!!!!