
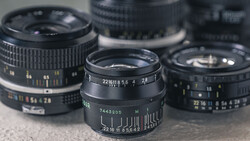
Leica is a company that is synonymous with premium quality at a premium cost in the photography industry. So when Leica co-engineered their second-generation dual-lens camera with Huawei and placed it on the affordable $599 Mate 9 smartphone, I was eager to try it out.
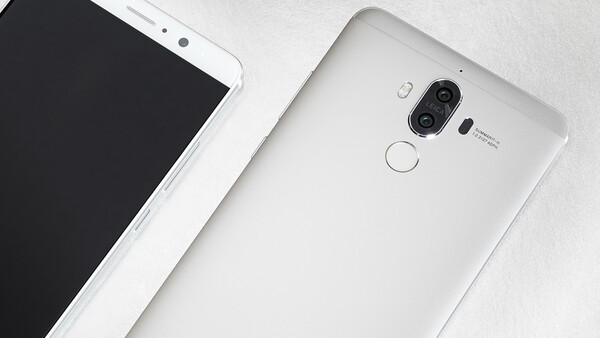
The Mate 9 features a 5.9-inch display with very thin bezels, especially coming from an iPhone. The edges are rounded and the backside of the phone has a slight curve to it. The rear cameras are located at the upper middle of the device and protrudes slightly. This flat, centered protrusion helps stabilize the curved phone a bit while using it as it lays on a desk. The device weighs 6.7 ounces (190 grams) which is nearly identical to an iPhone 7 Plus and almost an ounce heavier than the Google Pixel XL.
A quick rundown of the specifications of the Mate 9 shows it comes with 64 GB of memory (expandable by a Micro SD slot), 4 GB RAM, a Kirin 960 processor, a Full HD 1920x1080 display (373 PPI), and a 4,000 mAh battery that lasted me all day and then some and charges up in about 20 minutes via USB-C connector. The rear cameras use two individual Leica Summarit f/2.2 lenses and have a 12-megapixel RGB sensor on bottom and a 20-megapixel monochrome sensor on top. The Mate 9 can shoot 4K video in the H.265 codec and has optical image stabilization built in. On the front side of the device theres an 8-megapixel camera that uses an f/1.9 lens.
Camera Controls
Like many Android smartphones, there is a fingerprint scanner on the backside of the device. While this is primarily used to unlock the phone without tapping in a password, it can also be set up to take a photo or start recording video by placing a finger on it (Note: the finger placed here in the Camera app doesn’t need to be a registered finger for unlocking the device). I like using this shutter button for vertical photos because it’s the most comfortable way to securely grasp the large phone and my index finger is naturally near that area.
On the right side of the device there’s the volume up and volume down buttons and the power button. In regular photo mode, the volume buttons can be programmed to either take a photo or adjust focus manually. In video mode, the volume buttons can either start recording, adjust focus, or zoom. The focus and zoom adjustments while recording are a bit jumpy and not totally smooth, so I wouldn’t recommend using them in a creative cinematic sense.
There are also some other special shutter trigger options such as “ultra snapshot” which allows users to double press the volume down button while the device is locked and the Mate 9 will automatically open up the camera and take a photo as fast as possible, “touch to capture” which will make the entire display a shutter button, “capture smiles” which detects a person smiling in frame and takes a photo, and a timer that can be set to 2, 5, or 10 seconds.
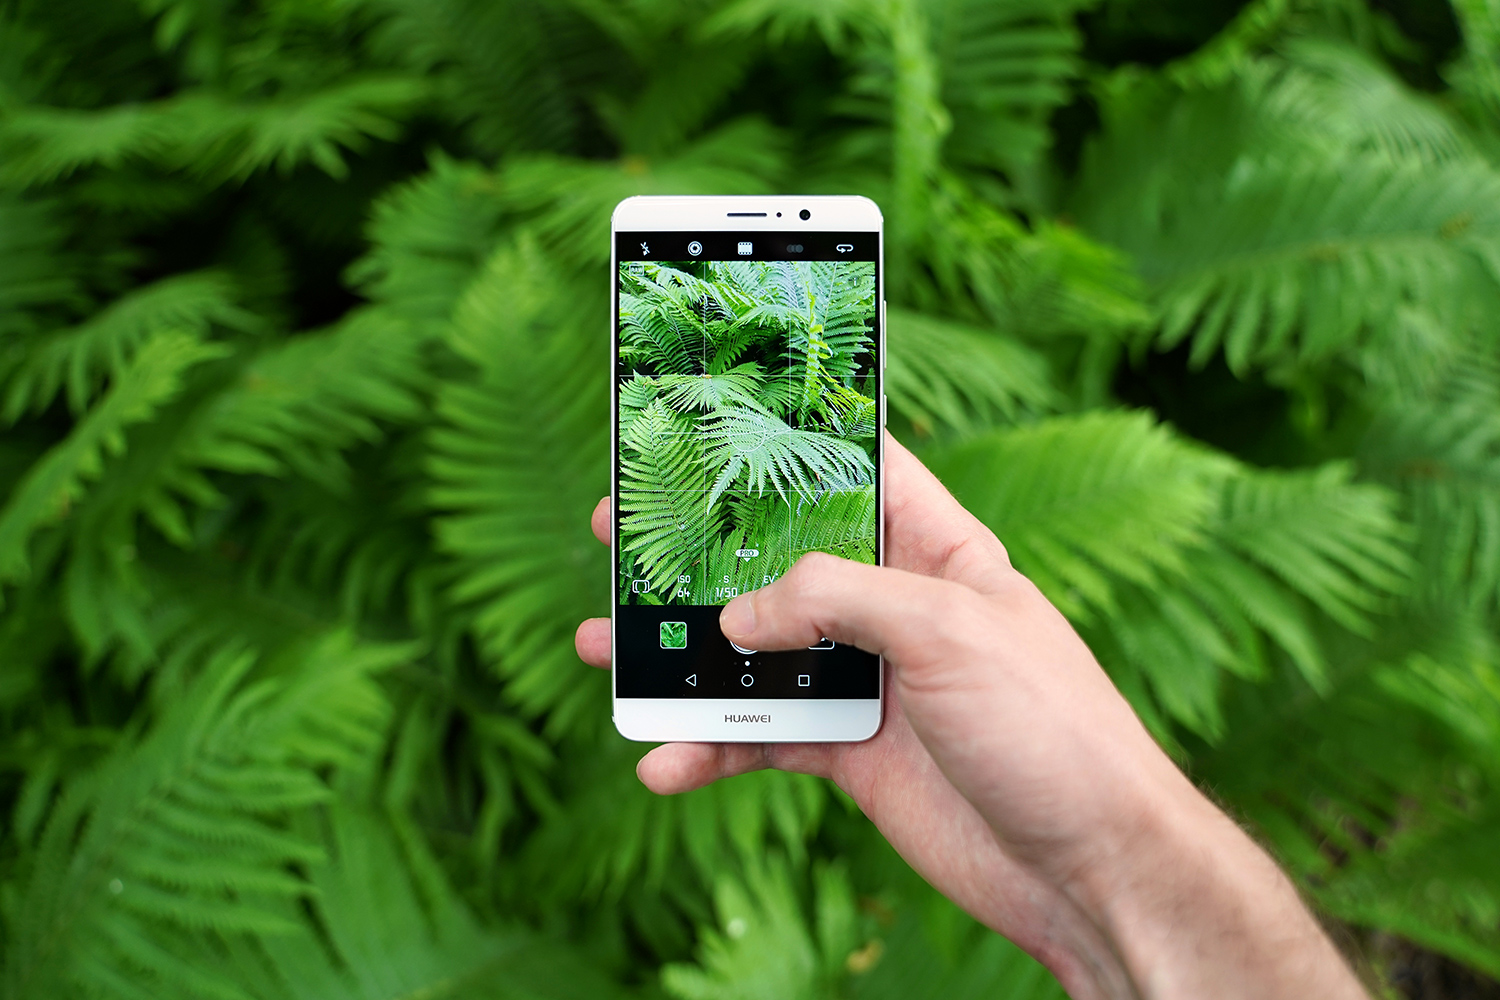
Interface and Settings
The camera app interface looks familiar to any other popular smartphone’s camera apps. The top toolbar has a few settings for flash, wide aperture mode, color, filters, and the front/rear camera toggle. On the bottom there’s a quick-look button to see images that were recently shot, the shutter button, and the video mode toggle. Swiping to the right presents a screen full of camera modes such as Monochrome, HDR, Panorama, Light painting, Slow-mo, Time-lapse, and more. Swiping to the left is for the settings menu which are particular to the camera mode you are in. One of the more important features of the Mate 9 is the ability to enter Pro mode by swiping up in the camera app. Using Pro mode will give users DNG raw capture plus options to manually set metering mode (matrix, center-weighted, or spot), ISO (50–3,200), shutter speed (30s to 1/4,000s), EV (–4 to +4), autofocus mode (AF-C, AF-S, MF), and white balance (including custom option). There’s also auto modes for ISO, shutter speed, and white balance.
The Mate 9 uses phase detect and laser autofocus. The autofocus tracking mode actually works much better than I thought it would being a smartphone. It even remembers objects that temporarily get hidden in frame and will pick it up again.
Outside of Pro mode shooting JPEG only (DNG raw files can only be captured in Pro mode), the Mate 9 can shoot at about 12fps in a 100-shot burst.
Wide Aperture mode is the Mate 9’s solution to getting software-produced shallow depth of field effects. I’m surprised with how well the out of focus elements are handled here, and there’s obviously more going on than just using a gaussian blur as evident by the specular orbs it creates. Sometimes the effect didn’t play along nicely and I got a messy “cutout” for the object I wanted in focus. In the Gallery app, users can reposition the focal point or adjust the f-stop emulation from f/0.95 to f/16. Playing around with the focus point at times can refine the object selection for better results.
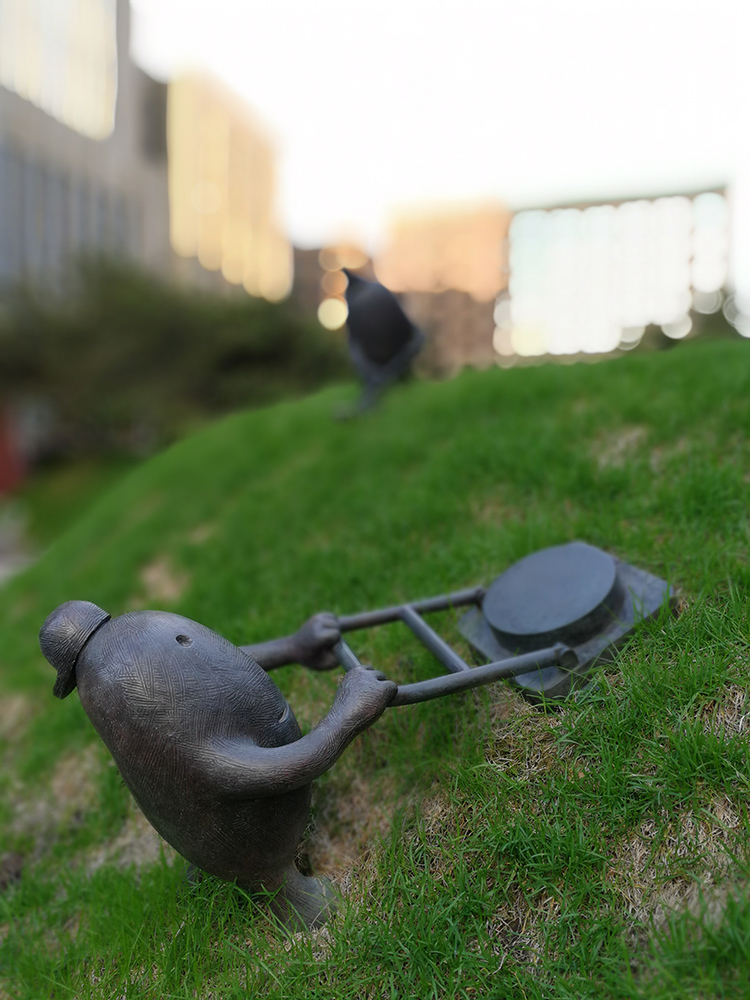
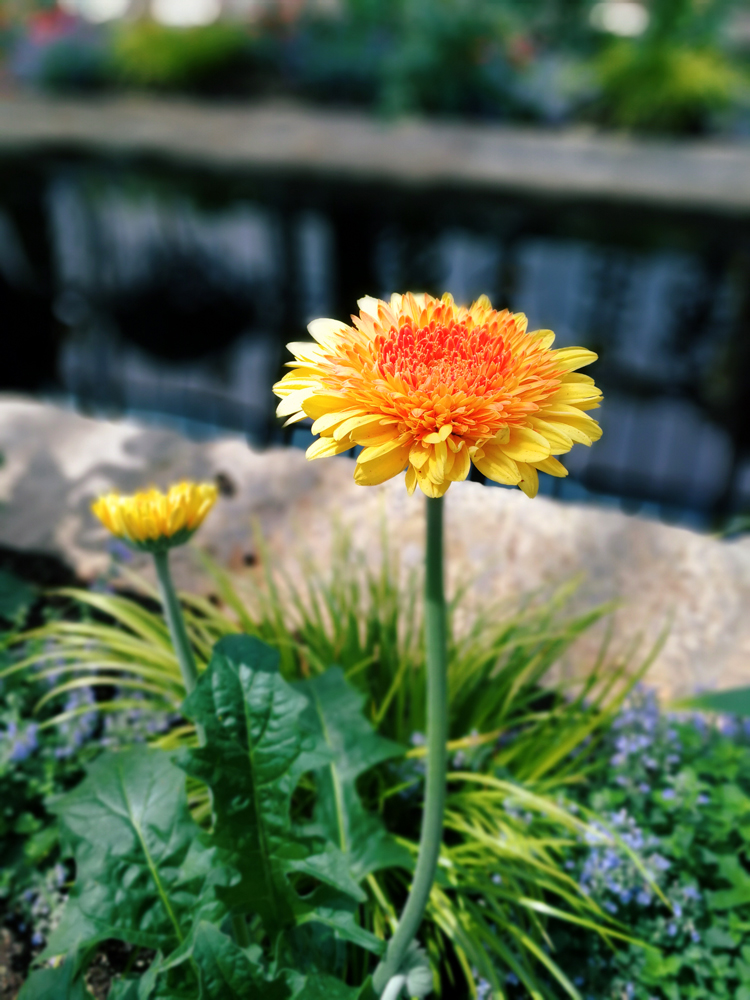

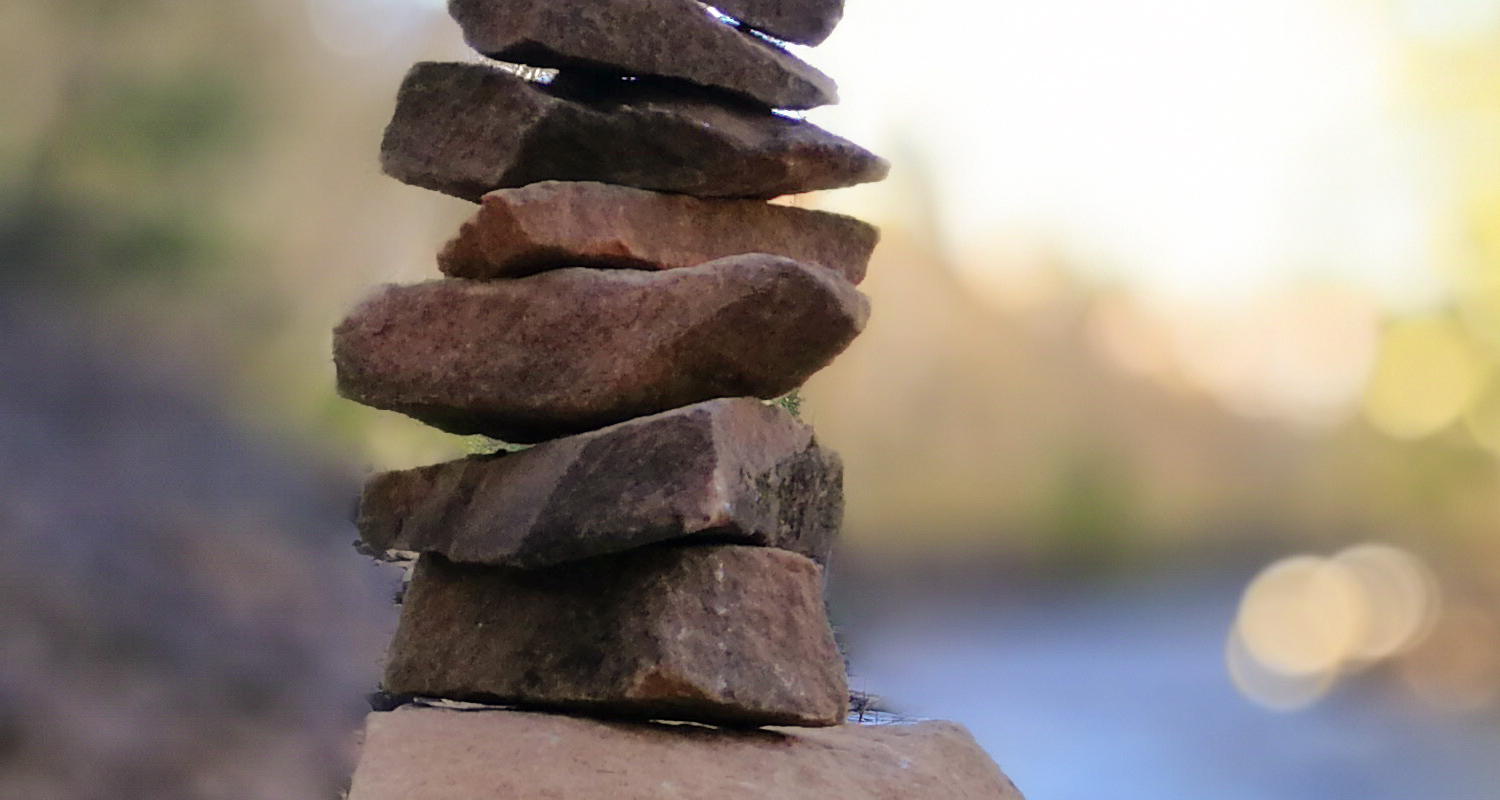
Image Quality
The camera can capture 12-megapixel DNG raw files and 20-megapixel JPEG files. Unfortunately, it’s not possible to shoot 20-megapixel raw files from the monochrome sensor even with Monochrome and Pro modes both enabled. The Mate 9 makes the situation more confusing by reporting its resolution in the settings panel as 20 megapixels with raw capture enabled, but that is only in regards to the JPEG images.
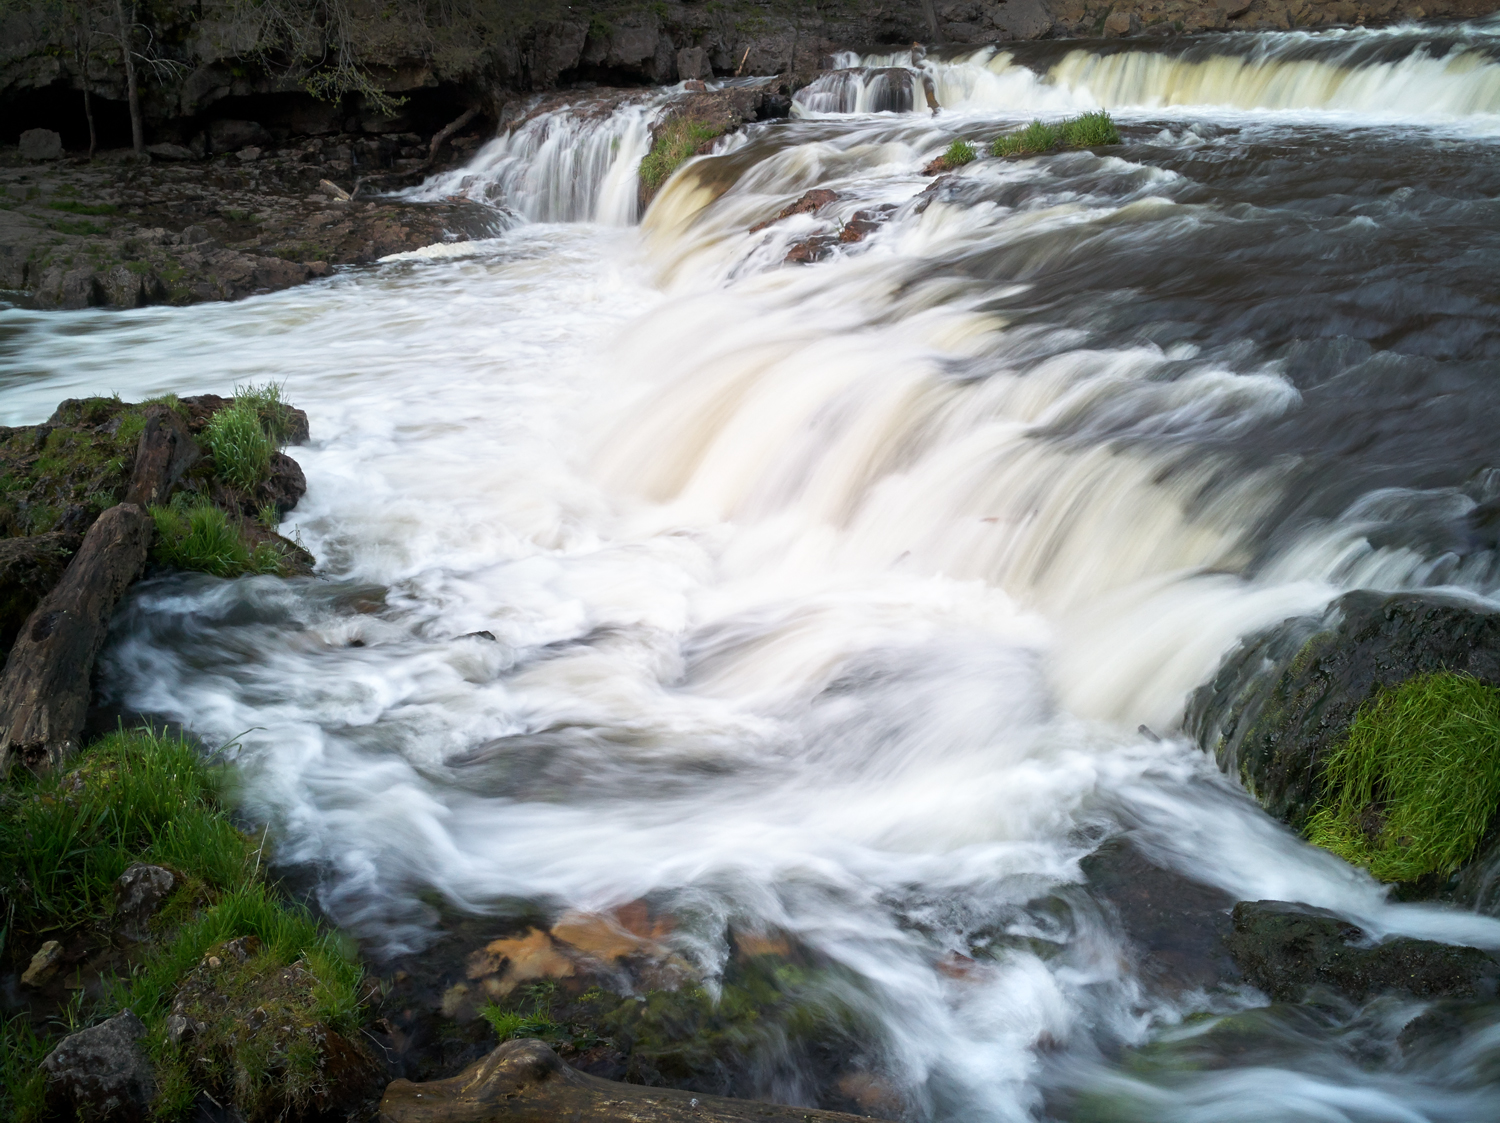
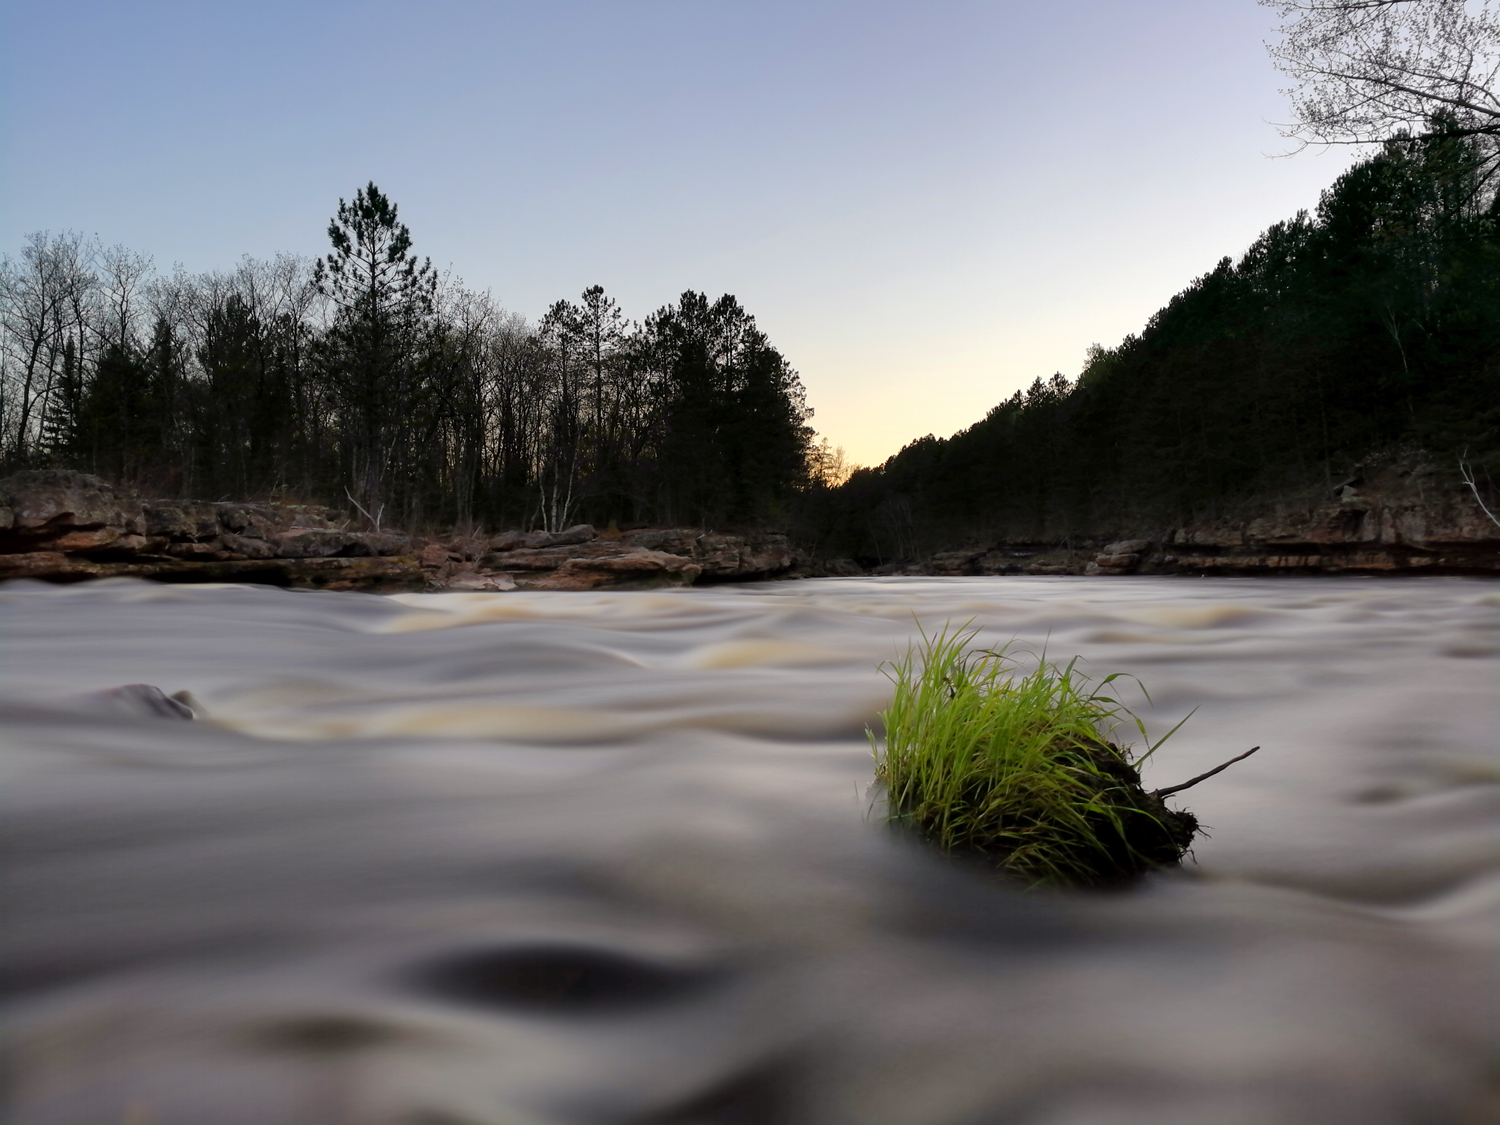
One of the interesting things that Huawei does with their dual-lens design is use the two sensors in harmony to output higher quality images. The monochrome sensor captures the fine details with no recorded color information and reduces the amount of noise in the image, while the RGB sensor focuses on recording accurate colors. The smartphone then merges the data from these two sensors which presumably results in a color photo of better quality. The Mate 9 can resolve some very dim lighting environments, although it’s at the expected cost of increased noise and lower contrast. I’d imagine it would be far worse without the BSI imaging sensor and dual lenses.
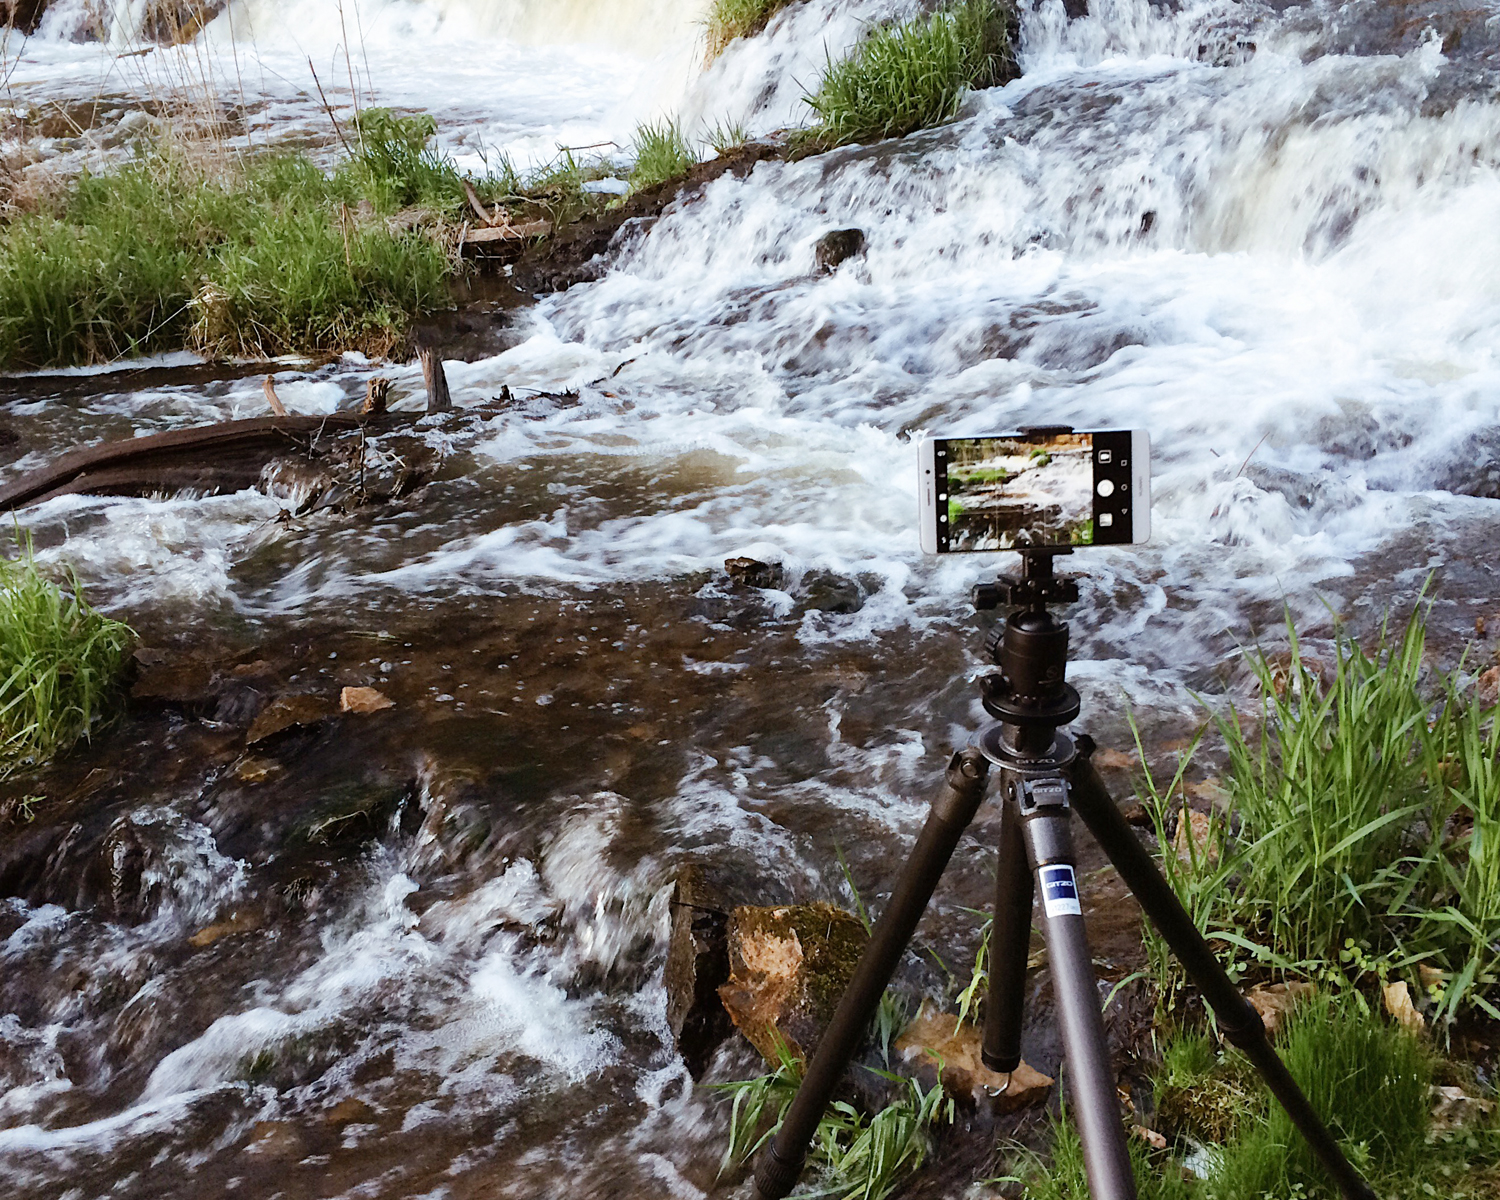
The raw files I get from the Mate 9 are prime for editing. There’s a good amount of data recorded in these files and I’m able to push and pull colors, shadows, and highlights to nearly the same degree I would with my mirrorless cameras. Raw images may need a little bit of tweaking in post-processing to remove the vignetting (25% on the light falloff slider in Capture One Pro does the trick). There’s also color fringing in high contrast areas that can be dealt with in post.
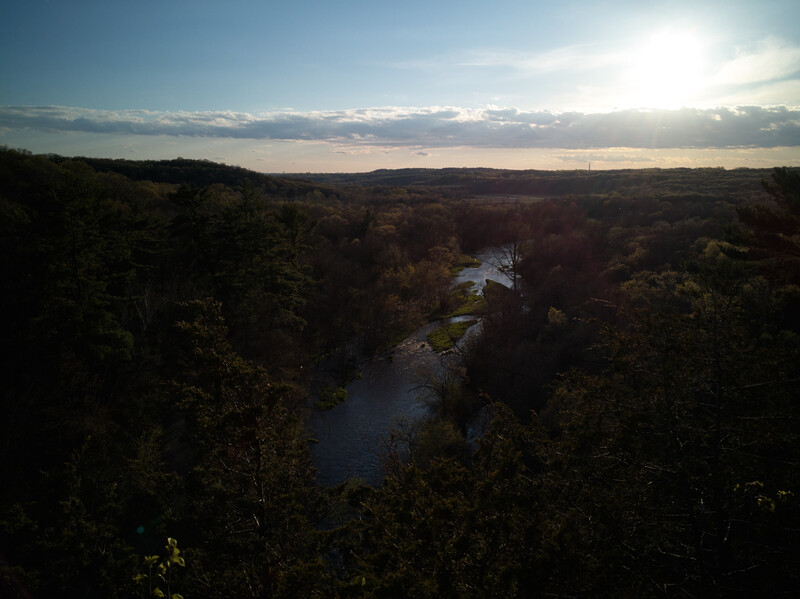
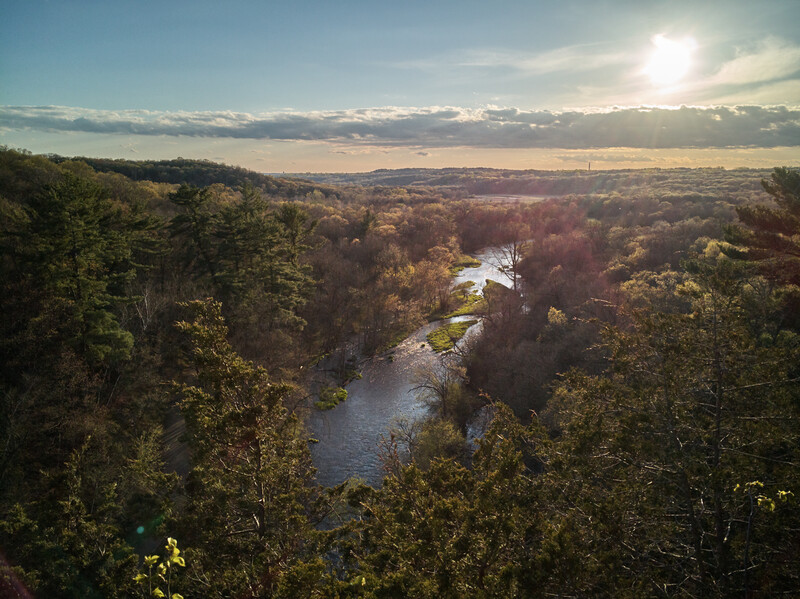
Above: Pulling the Highlights and Shadows sliders to full power to show the amount of recovery possible.
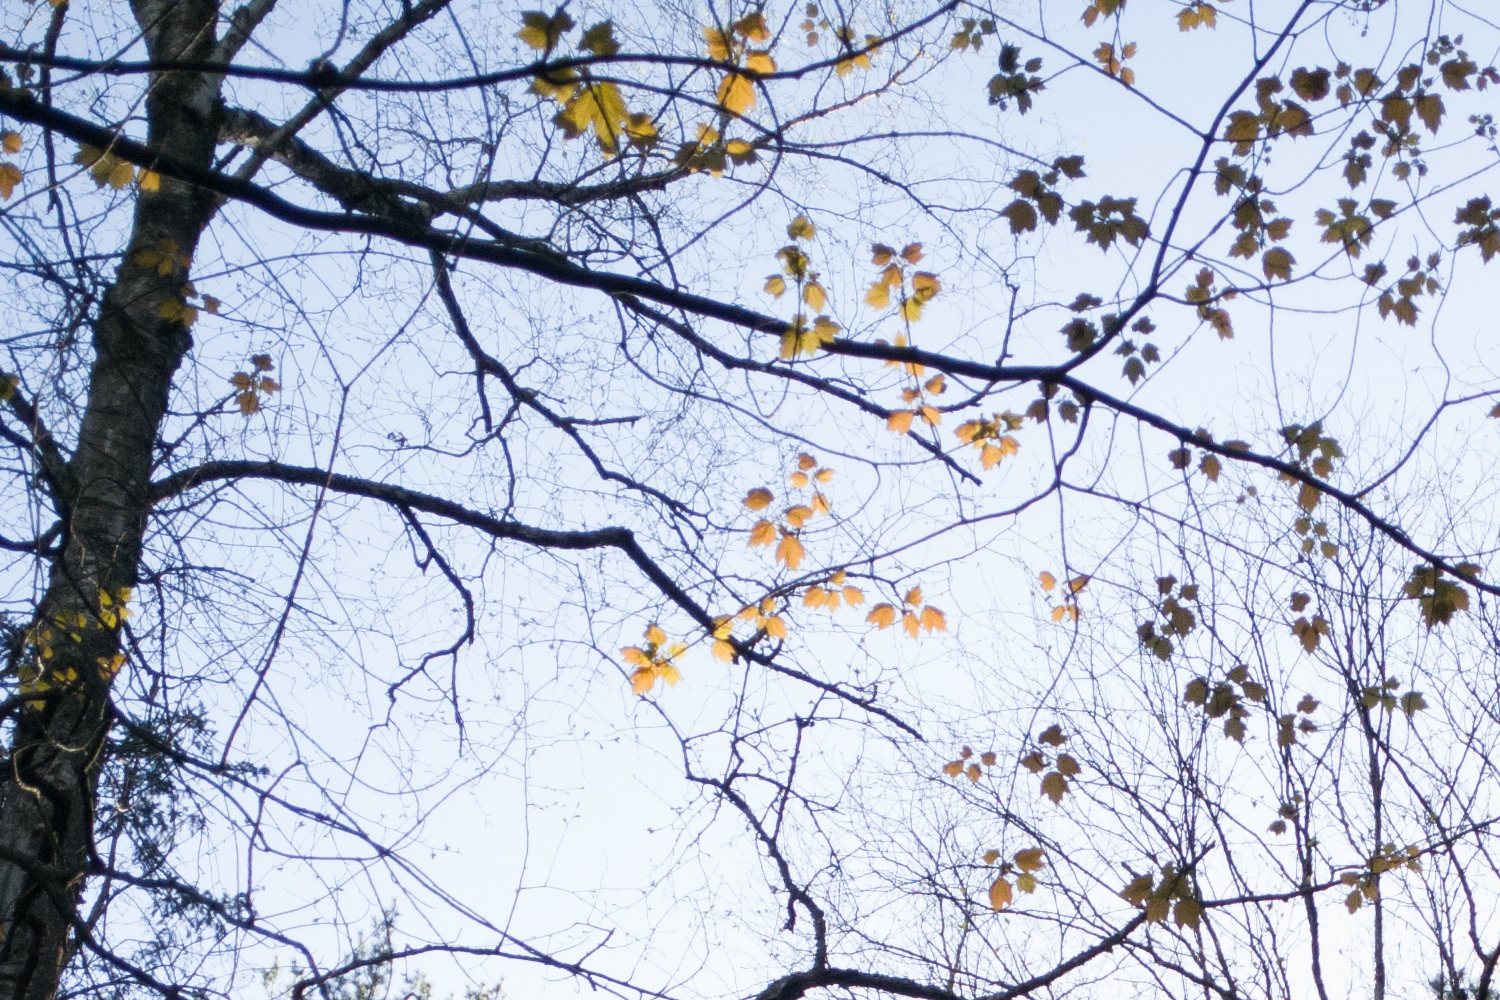
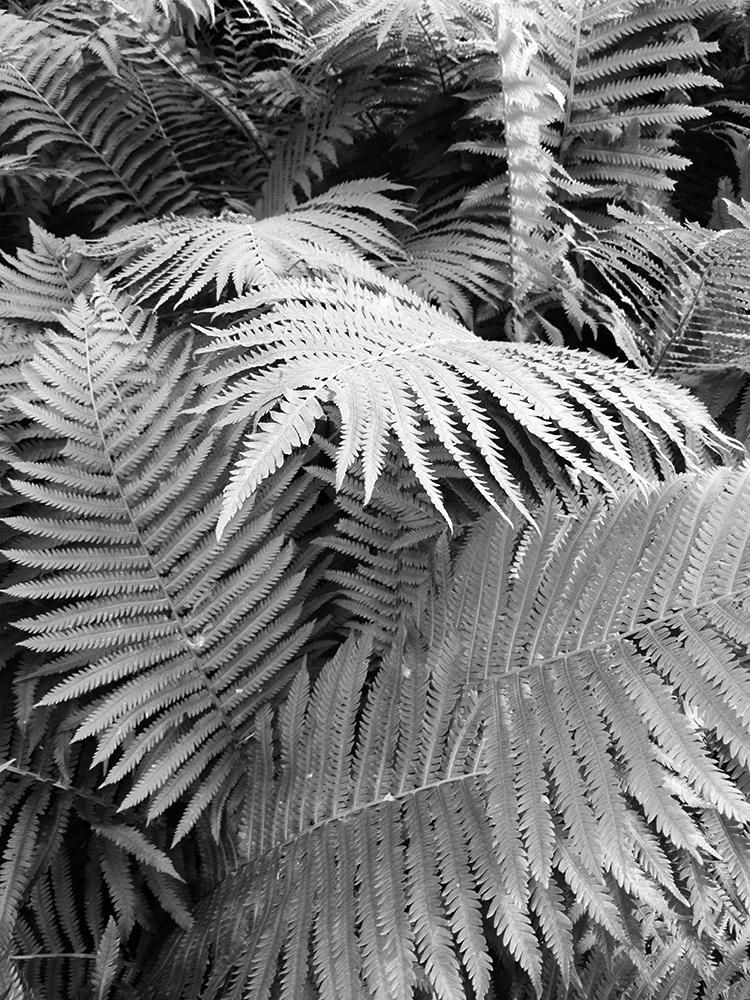
When the smartphone is set to Monochrome mode, the RGB sensor is disabled and what is captured is straight from the 20-megapixel monochrome camera. The images in this mode are actually really nice, and more than anything else this is where I feel the Leica influence. The tonality is just awesome and I wouldn’t blame anyone if they just shot in Monochrome mode all the time.
Video
The Mate 9 can record 3840x2160 4K video as MP4 h.265 encoded files. For casual video shooters like myself (and probably many that are shooting with a smartphone versus a video camera), there’s a bit more complexity in doing anything with these files on a Mac. A program like Handbrake is needed to convert the h.265 files to h.264 so that they are watchable in Finder and basic video editing programs like iMovie can import them. In the fall, this will probably be a moot point as the upcoming MacOS High Sierra is going to bring h.265 native support to the operating system.
The overall video quality looks fairly good. There’s some shortcomings with the dynamic range, so skies tend to quickly become blown out white if you are exposing for low midtones or shaded areas on a sunny day. Scenes look crisp and white balance and colors appear accurate. Autofocus works fast but it would have been great to see the follow focus feature from the stills side make its way to video mode. The optical stabilization is evident in reducing vibrations, but there’s room to improve in this area across the board for smartphones.
https://www.youtube.com/watch?v=2Zq6C5Dcp-g
The Huawei Mate 9 can be ordered now for $599.99 and comes carrier unlocked in either Space Gray or Moonlight Silver.


Join the Fstoppers community for free
-
Post comments and join in the discussions
-
Browse the site ad-free
-
Share your work and get featured in the community
-
Compete in the photo contests for fun and prizes
4 Comments
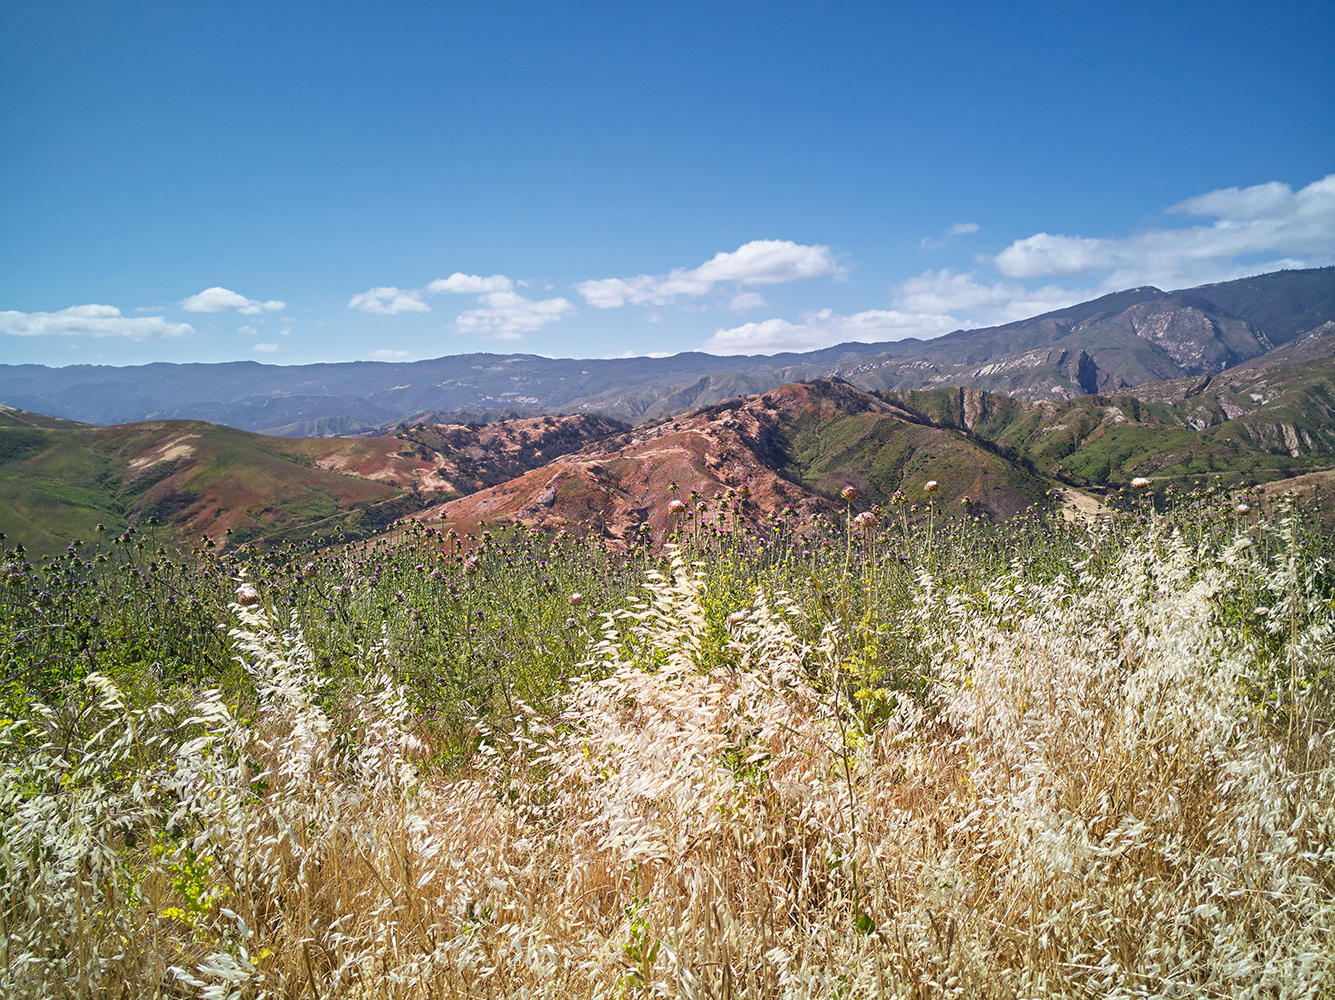
I have the P10 Plus which has a camera that is a slight tech update on the Mate 9. Just like you I must admit that the overall shot quality of the camera phone is surprisingly good. Especially the black&white mode is incredible in the tonalities as you also point out. The attached shot is a handheld shot of Petronas Twin Towers done at night using the B&W mode. Also, I find the night mode where multiple exposures (I believe it does 20) are merged into one is astonishing and a very easy way of getting high quality night shots if you have a tripod
How has portrait mode been working for you? I really wanted to buy the P10 plus, but using it in-store the portrait mode software was glitchy and the depth of field effect never worked properly around hair . So, I decided to just wait for the OnePlus 5
I'm impressed with how much detail was recovered in that before/after shot
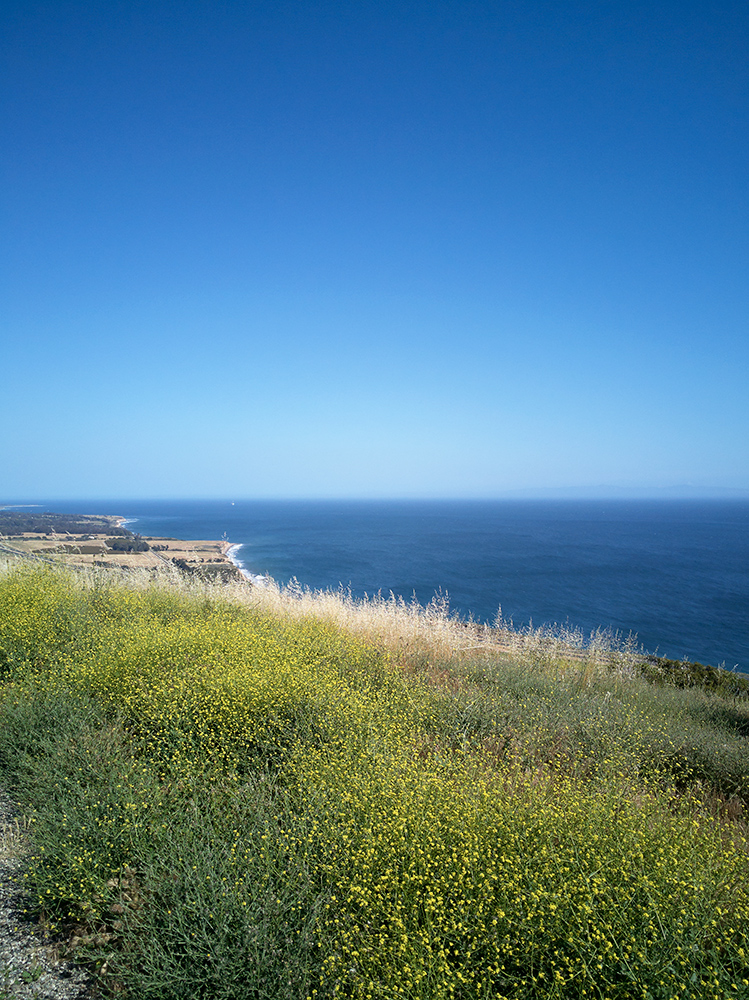
Serendipity! I've been looking for a new phone and just am not sure what to get, but this article most definitely puts this on the list to check out. Great pictures with the phone, I think the second from the last is my fav.