
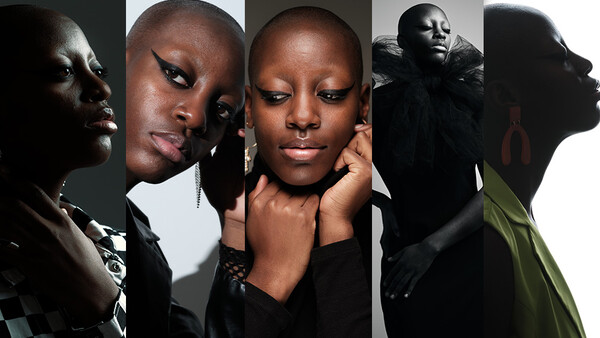
When just starting out, It's easy to think that we need more gear, different gear, or just one more modifier that will let us achieve our goals. I challenged myself to try and shoot five different looks in my humble home studio with a single modifier and light to show just a few ideas of what you can do with them.
The Gear
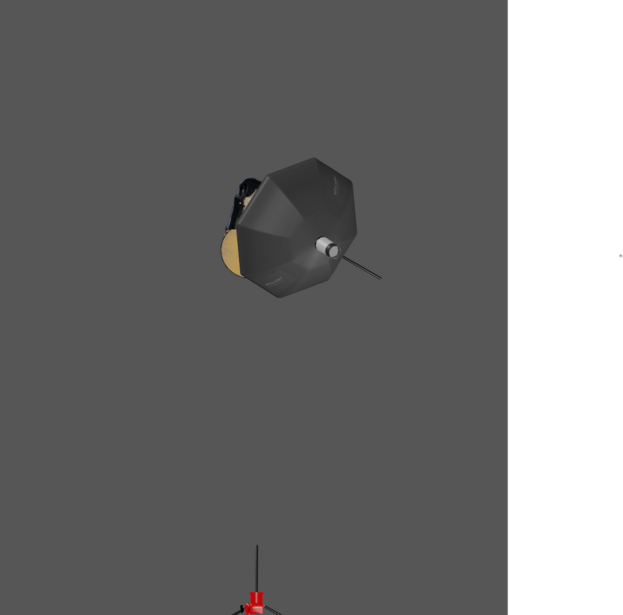
All five of these shots were done with the Fujifilm X-T3, the Cactus RF60x, a large Octabox (the cheapest I could find), and the V6ii to trigger the speed light. For lenses, I changed around between three: the 56mm f/1.2, the 90mm f/2, and the 200mm f/2, which I am working on a review of. I only used a reflector in one of these shots, and that was purely due to me being in a mood for lots of contrast the day of the shoot. If I wanted to add some fill, instead of adding a second light, I could have just added a bounce card or reflector opposite the one light I did use to fill in some shadows.
One thing I don't want you to take away from this article is: "I just need an octabox to take better photos." You can get shots almost exactly like these with an umbrella or almost any other sort of softbox-type modifier. Now, let's begin.
Shot #1
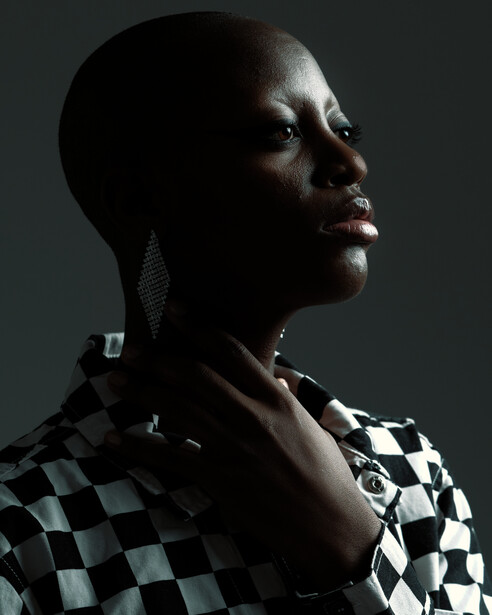
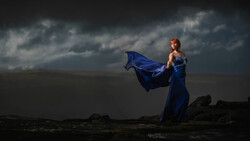
I don't shoot much black and white, but for this first shot, it just felt right to shoot without color. This setup is probably the easiest setup for any sort of lighting modifier. Place the light high up, at 45 degrees down toward your subject and 45 degrees to the side of your subject. I then had my model, Tiana, turn her body away from the light and twist towards it to add some shape to her body. I also had a grid on the light to reduce spill and light bouncing all around the room, as I wanted a whole lot of contrast, but this could be achieved by shooting in a larger space or simply pointing the modifier more away from the model.

A light setup like this, with or without fill, gives you beautiful Rembrandt-like light falling onto your subject and is a must when it comes to trying to master off-camera flash. It's easy to set up and allows you to concentrate on posing your model and directing them, concentrating on your emotion rather than the lighting.
Shot #2
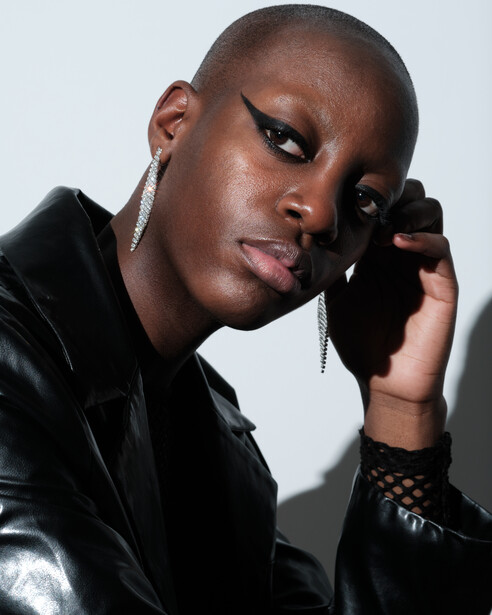
Okay, technically, this isn't five looks with with one modifier, as this second setup uses no modifier. I wanted some nice, hard light for this second shot, and to do that, I had to rip off the Octabox and place the light as far camera left and behind me as my studio would allow me to get a nice, sharp, defined shadow. I had the model sit down for this shot and lean forward onto her knees and combined that with the hard light to give the shot some fashion edge. The chair was a little ugly, so instead of going wider and showing it off, I went in tight to hide it.
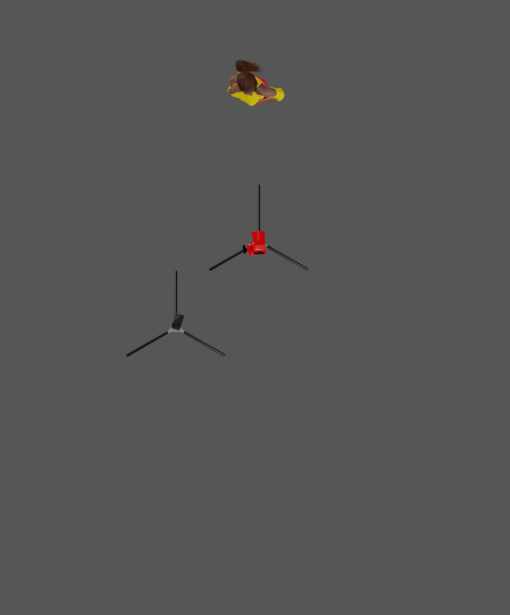
Shot #3
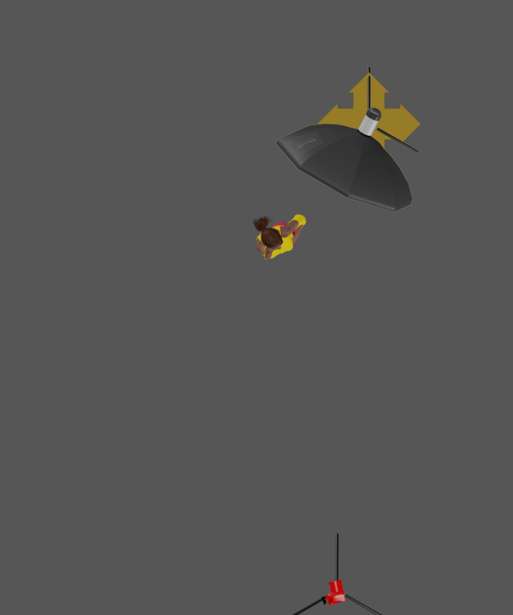
As you can see in the lighting diagram, the light was set more in front of her than behind her, and this was for three key reasons:
- Simply to ensure that the the light was not in the shot behind her.
- To prevent spill on the white wall behind her making sure that I got the dark gray there as well.
- By placing most of the light in front of Tiana, I allowed more of it to wrap around her — allowing us to see both eyes and not get a totally backlit shot.
Shot #4
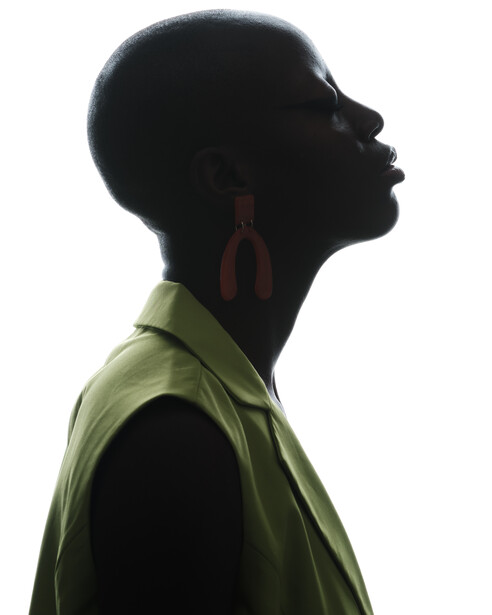
Speaking of small changes, this shot was done with just the octabox placed directly behind my model, firing straight into the lens again, just moving the light from off-center of the model to directly behind them. The octa had both layers of diffusion in it, so the light beautifully wrapped around her, not just giving a harsh silhouette. To aid this effect, I also had her stand directly in front of the softbox, so that the light was as close to her as possible. I wanted the white to be overexposed, so I was sure to blast the softbox with light so I didn't have any hotspots; in fact, out of all of the images, this one had the least amount of post-production work. If I had powered the speedlight down a bit, I would have gotten a hotspot, which in some ways could be a desirable effect, but not for where my brain was that day.
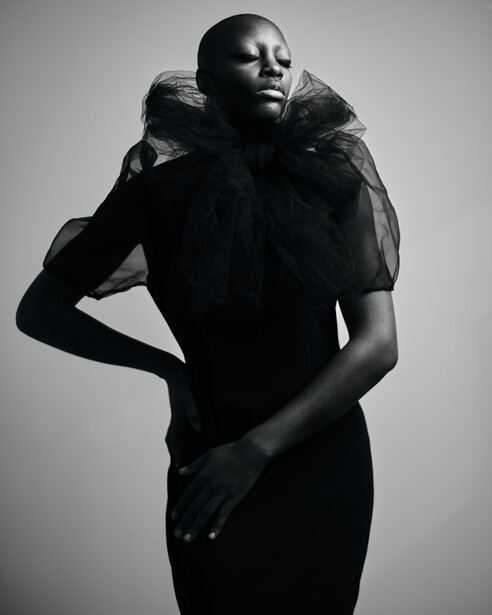
Shot #5
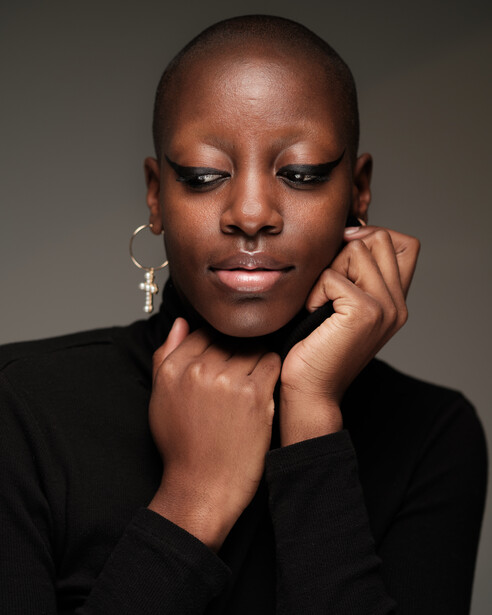
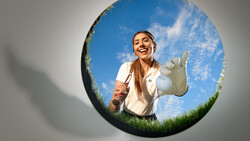
For our final shot, I wanted to blend a beauty shot and a headshot — somewhere right in the middle. To do this, I used a light almost directly above Tiana, with a bounce below.
This is the only shot of the day where I used a bounce; it's somewhat hard to see in the 2D lighting diagram here, but I had my single light above, in front of, and slightly to the right of my subject, angled towards her. I didn't want the light to be directly overhead, as then, the shadow under her nose would be too harsh for me. I added a bounce underneath her, which was just on her lap to fill in the shadows and soften the look.
Conclusion
As you can see, it's incredibly simple to get a vast variety of lighting styles and setups with just a single light and modifier. While I used the Cactus RF60x, really, any light would work here. The exact gear doesn't matter so much as the placement and combination of it with your own ingenuity.
Have you used any of these setups yourself? I'd love to see them in the comments below!


10 Comments
Outstanding. Thank you.
Thank you for the kind words!
Speedlights are often overlooked. They are great in a studio environment because they're so light and easy to move around. They also work well in many instances in conjunction with larger studio strobes, too.
Your examples are great. I also suggest watching some Frank Doorhof videos on using speedlights. It's amazing what can be done with a single speedlight.
I recently did a big national campaign with just speedlights and if I had anything more powerful, it would have blown out the practicals. I adore speedlights
Great works, keen to know what is the 3D simulator you were using. Thanks.
Set.A.Light. 3D It's super powerful and not just used for lighting diagrams
Out of curiosity, what was the editing process for #1? To get zero light on the body but light the backdrop that evenly, especially with the gradient starting in the center, looks like a 2nd light hitting the backdrop (or a complete background swap in Photoshop). Not criticizing, but it doesn't seem to match the description of "1 light at 45 / 45".
I could have described that one a bit better, yu're right, but she was quite close to the wall to ensure spill
Thank you for demonstrating the power of one light. I started out with just one because that's all I could afford, but as I kept working in studio I realized the simplicity and beauty of working with one light source. It feels much more natural than trying to balance a bunch of competing sources.
Great article! The stuff my mentor can produce with a single umbrella and a piece of foamcore makes me feel pathetic when I look at my gear collection....