

While tilt-shift lenses are most commonly associated with architectural and landscape work, they offer some seriously underrated creative potential in wedding photography, especially when it comes to portraits and environmental storytelling.
If you're looking to add a fresh visual twist to your wedding work, it’s worth digging into how these lenses function and seeing what makes them unique. That said, tilt-shift lenses aren’t exactly plug-and-play. The manual focus and the shifting planes of focus make them better suited for photographers who like to experiment or otherwise work with a second shooter. But when mastered, they can help you create unique wedding images without relying on post-processing gimmicks.
Let’s dive into what tilt-shift lenses are, how they work, and how to start creatively using tilt-shift lenses for wedding photography.
What Is a Tilt-Shift Lens?
At its core, a tilt-shift lens gives you two powerful functions: tilt, which changes the angle of the plane of focus, and shift, which moves the lens parallel to the sensor to control perspective distortion.

The tilt function lets you do things like isolate your subject with razor-thin slices of focus (think dreamy, selective blur). You can also use this function to bring more of the scene into focus without stopping down too much. The shift function, on the other hand, is more commonly used for correcting vertical distortion in architecture. By combining both tilt and shift, you can craft portraits that play with focus and perspective in ways that standard lenses simply can’t. This dual adjustment adds a surreal feel that can transform an ordinary location into something unexpected.
Most tilt-shift lenses are manual focus only, and they usually lack autofocus or stabilization features, so they require a slower, more intentional workflow. But that’s part of their charm. In addition, you can find tilt-shift lenses in a variety of focal lengths, including 17mm, 24mm, 50mm, 90mm, and 135mm, among others.
Tip 1: Practice Ahead of Time
If you’ve just added a tilt-shift lens to your kit, do not break it out for the first time on a wedding day. There's a learning curve when it comes to controlling your plane of focus and getting sharp images quickly.
Practice with the lens on styled shoots, engagement sessions, or even personal work. Pay close attention to how tilting affects your focus and how shifting changes your composition. You'll need to get a feel for how much tilt creates a dramatic vs. subtle effect and learn where your sweet spot is for sharpness.
Even if you’re experienced with tilt-shift, consider limiting its use during high-stakes moments like the first kiss or a fast-paced ceremony. Use it where you can take your time, such as bridal portraits, venue details, or creative couple shots. And if you’re shooting solo, be sure to cover the same moment with a conventional lens as a safety net. Ideally, though, you’d shoot with a second shooter if using this lens to capture important moments.
Tip 2: Use Live View to Dial It In

When working with a tilt-shift lens, looking through your viewfinder is not really the best option. You'll be better served using your camera’s Live View mode so that you can preview the focus plane and blur in real time.
Bonus: If you’re shooting on a mirrorless body with focus peaking enabled, you’ll get even more visual feedback about where your focus is landing.
Tip 3: Zero In With Selective Focus
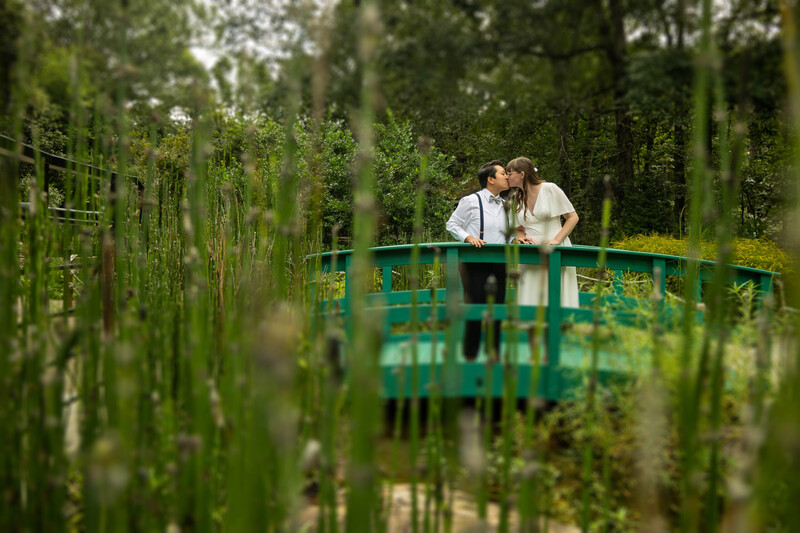
One of the most popular uses of the tilt function is selective focus. This is where you tilt the lens to create a narrow “slice” of focus across the frame, letting the rest fall into a soft blur. Unlike a shallow depth of field shot with a fast lens, this slice can fall diagonally, vertically, or horizontally depending on how you tilt.

This is a great way to guide your viewer’s eye, especially in environments where the background may be cluttered or distracting. It can give your portraits a surreal, almost miniature-like look—or a dreamy, editorial feel.
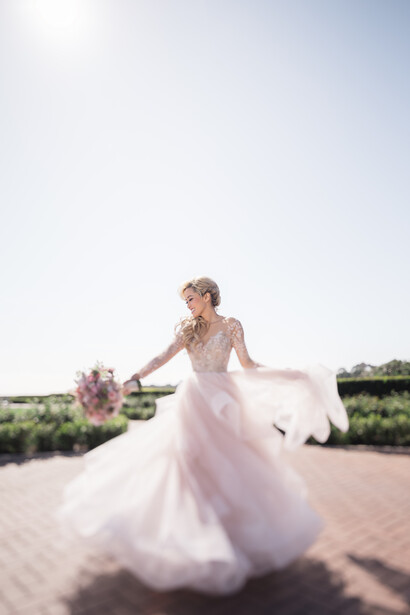
Try using this effect during bridal portraits. Want to focus on the bride’s face while the bouquet and veil fade into blur? Tilt.
Tip 4: Tilt for Multiple Focus Planes
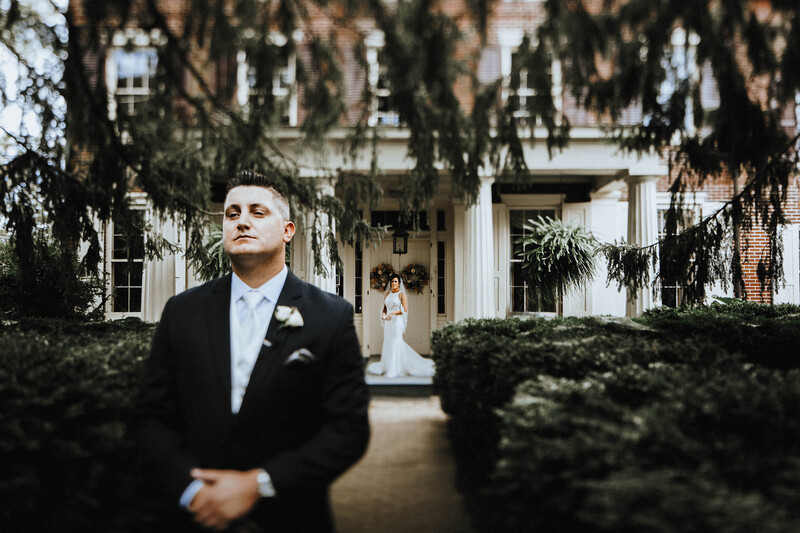
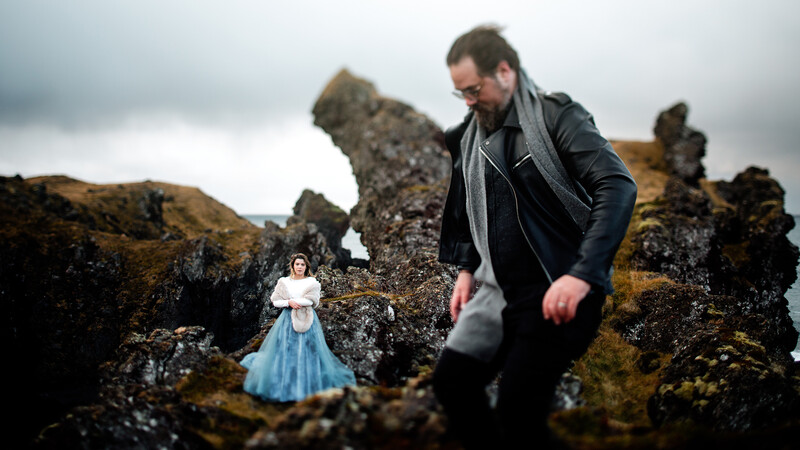
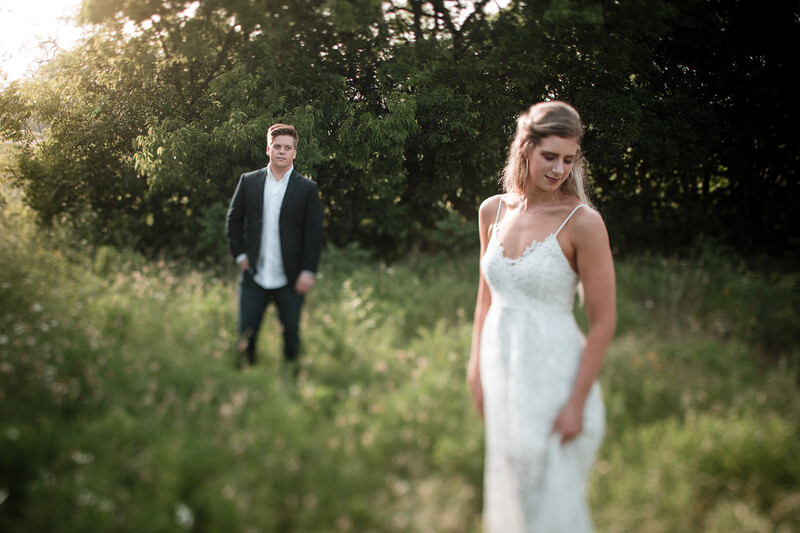
Tilt-shift isn’t just about blur—it can also help you maximize focus creatively in portraits. By tilting the lens forward (or backward), you can align your plane of focus with the plane of your subject. This comes in handy when you're photographing a couple standing at an angle, or when the bride’s face and bouquet are at different focal distances.
This technique lets you keep more of the image in focus without stopping down to f/11 or higher. It's particularly helpful in low light, where you want to maintain a wider aperture for light gathering but still want both subjects to be sharp.
For those who need to hear it, this isn’t something you can replicate easily in post. Even if you tried to fake it with selective sharpening or blurring, you’d need to shoot everything tack sharp first, and you’d lose the depth and subtlety that tilt-shift can deliver in-camera.
Tip 5: Think Beyond Portraits and Use It for Storytelling

Tilt-shift lenses aren’t just for the couple. Use them for details, flat lays, venue shots, and other storytelling moments throughout the day.
For example:
-
Tilt to draw the eye to the rings in a detail shot, letting the rest of the scene fade softly around them, as illustrated in the image above. Most tilt-shift lenses have a minimum focusing distance of 8–16 inches, so you can get in close and still maintain sharp focus.
-
Use selective focus to highlight the groom’s shoes on a messy floor, isolating the visual story in a scene that would otherwise look chaotic.
-
Shoot wide ceremony shots with a touch of shift to maintain vertical lines, giving your compositions a cleaner, more balanced look.
-
Try shifting for architectural venue shots when symmetry and clean lines matter (think cathedrals, modern ballrooms, or staircases).
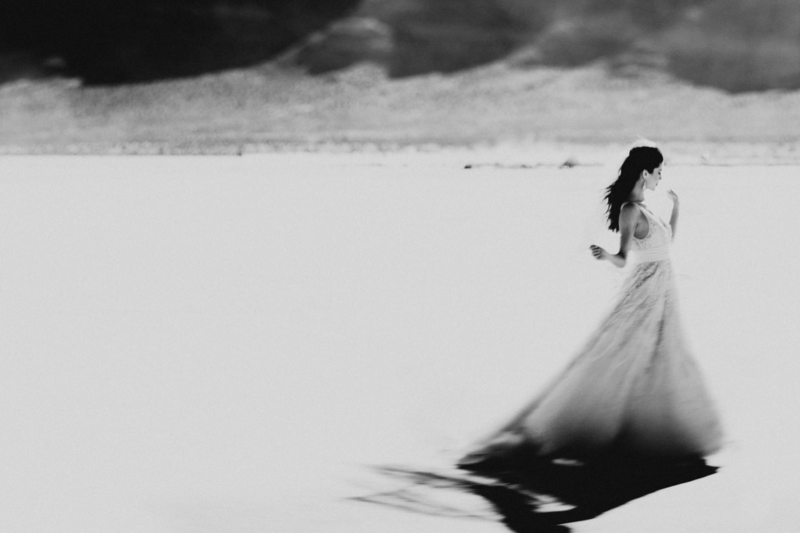
And don’t be afraid to play with abstraction. A slightly over-tilted lens can turn a scene into a surreal, dreamlike visual. This is a powerful way to distinguish your portfolio. Again, your clients will love it!
Bonus Tips for Success When Capturing Tilt-Shift Lens Wedding Portraits
Here are some bonus tips for ensuring your attempts to use a tilt-shift lens to capture wedding portraits are successful:
-
Micro Adjustments: Because you’re working slower and more deliberately, take a couple of shots of each scene. Slight micro adjustments in tilt or focus can drastically change the result.
-
Tripods: Use a tripod for static scenes. While not always feasible in weddings, it’s helpful for flat lays or venue shots where precision is key.
-
Reference Markers: Mark your lens’ neutral position. It’s easy to forget where the “zero” tilt or shift setting is. Some photographers mark it with a bit of tape to quickly return to baseline.
-
Light Leaks: Watch for light leaks. Some older tilt-shift lenses can leak light at the seams when shifted aggressively—keep an eye on that during backlit shots.
-
Know Your Limits: Tilt-shift effects can be beautiful, but like any creative technique, overuse makes them gimmicky. Use them sparingly and intentionally.
Conclusion
A tilt-shift lens isn’t a must-have for every wedding photographer, but for those willing to master its quirks, it opens up a world of creative opportunity. Whether you're adding visual flair to bridal portraits, drawing attention to storytelling details, or capturing moments with precision and intention, this lens can help elevate your work and set your style apart. The key is to practice intentionally, use it sparingly, and always pair creative technique with solid fundamentals.
Featured Photo by Eric Talerico of Twisted Oaks Studio.


Join the Fstoppers community for free
-
Post comments and join in the discussions
-
Browse the site ad-free
-
Share your work and get featured in the community
-
Compete in the photo contests for fun and prizes
1 Comment
What a nice article with very good examples!
Thank you for that :)