Landscape photography, as an art form, has benefited from techniques such as dodging and burning long before the advent of the digital camera. There are plenty of tutorials out there, both good and bad, about what to do with your images after you snap the shutter but sometimes the simplest methods are often the most rewarding.
For those of you well versed Photoshop users, you are already aware of the Dodge and Burn tools available in the program, but you've also likely found that they don't operate quite like actual dodge and burn techniques. Dodging and burning is simply a method developed early with the use of producing photo prints in the darkroom. The idea is to manipulate the exposure to highlight, or diminish, certain aspects of the image. However, the dodge and burn tools in Photoshop seem to do a little bit more than that. It does more than just darken or brighten and there seems to be more digital adjustments that are often unwanted when the tools are used.
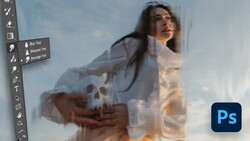
The dodge and burn tools are also only usable on raster images, and not applicable as an adjustment layer, but rather have to be applied directly to the image layer itself. This tutorial by Visual Wilderness gives some great tips for how to draw your viewer's eye to specific parts of the image and create a more aesthetically pleasing scene. Dodging and burning is one of the oldest techniques used in photography and, to this day, it is still one of the most effective ways to adjust your image for a better outcome.


Join the Fstoppers community for free
-
Post comments and join in the discussions
-
Browse the site ad-free
-
Share your work and get featured in the community
-
Compete in the photo contests for fun and prizes
No comments yet