
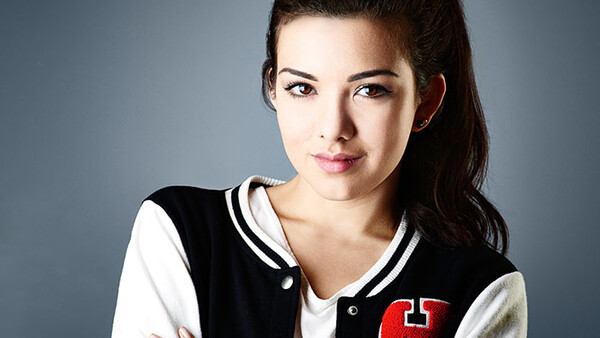
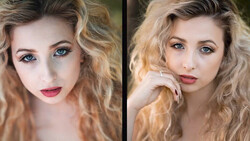
Recently, I have been experimenting with creating a sort of more intense style of headshot for certain clients who are interested in a more surreal, vibrant, look to their headshot as opposed to the more traditional headshot which is designed to to more closely emulate realistic lighting. The heavy cross-light look uses powerful lights that are positioned perpendicular to your the main light to create a strong highlight to the side of the face while living a distinctive shadow down the subject's cheek. Heavy cross-lighting can do a great job of building a sense of three dimensionality without sacrificing the soft, flattering, feel of a traditional headshot.
Note: Bear in mind this style of headshot is designed to be somewhat surreal so is not a good choice for clients who need a realistic headshot such as actors and actresses.
The Lighting Setup
The most important aspect of making this style of image work is by creating the distinctive look that the heavy cross light brings to the shot. A heavy cross-light like this differs from a normal rim light in that it is closer to the model and set to a higher power level. In my case, often a 1:1 ratio with the main-light.
I generally, use a pair of 12”x36” stripboxes as my cross-lights as they tend to give a beautiful pop to them but I will also veer towards using 24” inch square softboxes when I’m looking for a hint more softness to the cross-light.
For the main-light I use a 24”x36” rectangular softbox oriented vertically when I’m looking to create an edgy look and fall back to a 60” Octabox when I was to soften thing up a bit.
If I’m using a background light it is usually a simple bare bulb placed directly behind the model aimed so that the background is brightest directly around the model’s head.
Finally, I almost always include a round, white, reflector below the main light to provide a smidgen of fill to soften up some of the shadows.

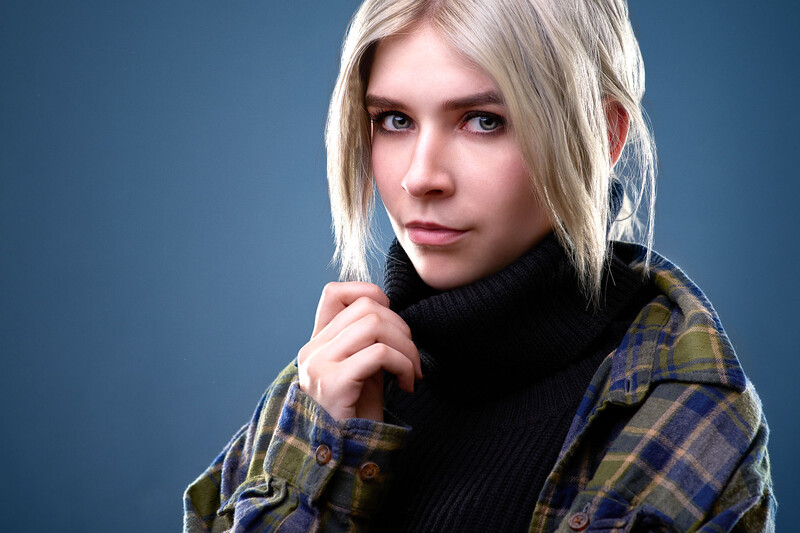
Alternative Lighting
One of the great things about this look is that you can slightly alter the light positioning in order to create alternative looks without sacrificing the style of the cross light. For example, by sliding your main-light to one side or the other you are able to create the hint of a Rembrandt look. The Rembrandt look tends to look best when you eliminate the cross-light on the same side of the face that the main-light is on.
You can also, easily, adjust the angle of your cross-lights both vertically or horizontally to slightly adjust the softness of the highlights.
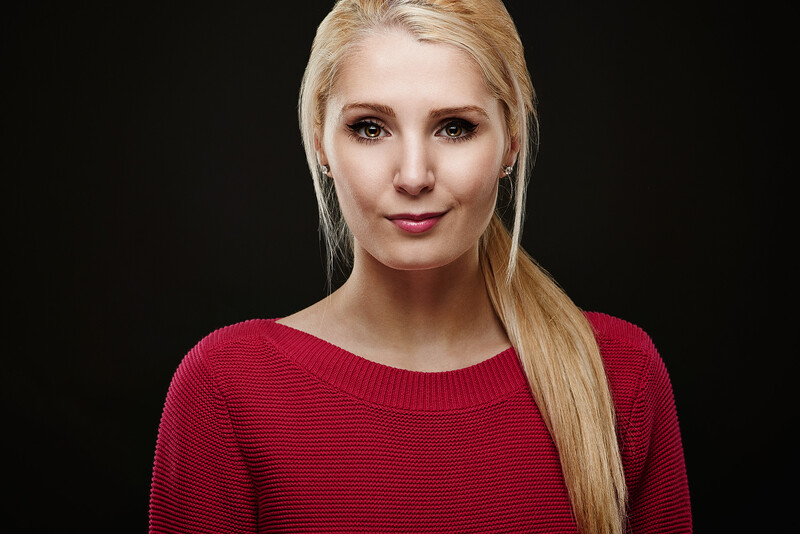
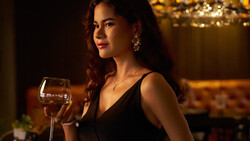
Colored Backgrounds
I started experimenting with adding color to the background when one client mentioned how they loved how they looked but found the monochrome background a bit boring. When created a vibrant background I shoot, as normal, against a grey background and color the background in Photoshop. I often choose a color that is complementary to one of the existing dominant tones in the image.
Retouching
Retouching these sorts of shots is pretty standard but I just wanted to mention that one of the potential downsides of a heavy cross-light is that it will make skin imperfections seem more severe. If you are not working with a client who has near perfect skin be prepared to address this increased severity in Photoshop.
Conclusion
By using a fairly powerful cross-light you can quickly add a very different style of look to your headshot toolbox that some clients will love! I'd love to hear about some of your favorite headshot lighting setup! Feel encouraged to share some of your work in the comments below.

23 Comments
Its good to explore unusual lighting setups. Since the industry term "headshot" only applies to models and actors where this lighting would be a very poor choice, the word ""portrait" would be a far better term for the title.
Weird, I didn't realize only models and actors got headshots done.
It's too bad I was not privy of this when the marketing director of Comcast contacted me to do headshots for the entire executive staff. I went ahead and did it. Now I feel like I've broken some sort of rule.
I'm not surprised when outsiders don't use the term right, but we should correct the use when appropriate. Hopefully the Comcast execs do know the difference between a model and router and would do the same.
ahaha! Yes! They were a fun group to work with, though.
A headshot is a form of portrait. :) It isn't exclusive to acting though. Tons of professionals need headshots these days for social media such as LinkedIn and companies often are looking to bring in photographers to shoot their entire staff. A headshot is merely a portrait featuring the subjects head/face primarily.
Actually he's correct... but being unnecessarily pedantic at this point in time.
They obviously were a must-have and became popular in entertainment, theater and Hollywood. Of course that was a time before FB, social media and massive self-promotion being necessary to get a job doing just about anything today. I suppose even a sanitary engineer and clean-up person AKA trash collector needs one.
Wiki - A head shot or headshot is a specific type of portrait (usually a photograph) that realistically demonstrates a person's appearance for branding or casting. Many head shots are promotional pictures of actors, models, authors. Headshots could be a portrait of a face or full body with a background that clearly illustrate the personality inside the person photographed.
"A head shot or headshot is a specific type of portrait (usually a photograph) that realistically demonstrates a person's appearance for branding or casting."
The other uses would fall under "branding" and satisfy this definition just fine. :)
This is one of my favorite lighting setups. I also like to do this with a clamshell up front...
thanks for the great write-up.
Care to describe a bit more about how you color your background? I've done that a bit, but mine aren't as smooth and with as nice of a gradient as yours.
Sure, it starts with effectively lighting your background so that it has the gradient already naturally in the photo. I use a dark grey backdrop for this reason as I find light grey tends to blow out too easily.
Then in photoshop I use the quick select tool to quickly select the model followed by a refine edge to make the selection precise. I then fill a layer with the color I want, apply a mask that is the inverse of the selection I just made and set the blend mode to color.
Sometimes I will also increase the tonal gradient a bit using a curves layer that has a gradient mask on it.
Finally, a quick tip to help make background gradient a bit smoother is by adding a subtle noise layer above everything once you have finished retouching. This helps prevent banding in the gradient.
Steps to do that:
-> Create new layer
-> shift-delete to fill with 50% grey
-> filter -> add noise, gaussian, monochromatic, 4-5%
-> set layer blend mode to soft light
-> adjust layer opacity until you like the look
Sweet! Thanks so much!!
Apologies for hijacking Chris's question, but I too am interested in your background setup. Could you tell me what shades of grey you opted for in the shots above? Thanks in advance, Dean.
My favourite headshot setup is with a 30" Octabox from dx.com and with a white 30" inch reflector to create a clam shell setup, the light is positioned in front of the subject with my lens just poking underneath the octabox, I'm usually holding the reflector with the other hand.
awesome work man
Wow, I think I recognize the girl in the second pic, isn't that Lauren Southern?
It is :) She has been using that photo like crazy lately to promote herself :)
I was actually just thinking how I hope someone would do an artical on retouching for dramatic lighting angles. I think that would be a good follow up to this.
Quite possibly, il think about how I can make it interesting, the retouching for these isn't really all that exciting, quick freq seperation, some dodge/burn, and thats it.
very nice.. it is different, less light to eyes unlike others have done...
The cover image reflects some of the changes discussed in the "Alternative Lighting" section. The diagram was meant to display a starting point which can then be adjusted creatively.
The lighting setup as you describe is indeed very common and very effective, and as your images demonstrates gives more of a realistic feel to them. The surreality of the look in the article is defined by the distinct shadow down one or both of the check lines with a strong highlight on either side which gives the model a slight "glowy" look that you usually wouldn't encounter in real life.
Great shots by the way! :)
Shot this last week. Not a dark background, but same lighting set up you mentioned.
Interesting technique! Not sure when I'll get a chance to use this for my usual portrait and headshot clients, but I think it'll be fun just to play around to learn the setup! Thank you!