
Have you ever wanted to create a photo book showcasing your own photography? Turning your images into a professionally finished photo book can be an impactful way to contain and present your work. This article explores options to self-publish your photography in the format of a professional-quality photo book.
All too often, the final output for our images is social media or other digital spaces, where we hope to achieve some meaningful engagement. For all the care and precision that we as photographers put into our work—not to mention the thousands of dollars we spend on our equipment—a digital output doesn’t always feel like a justified resting place. All too often, we experience photography through screens, but printing your images gives them an added layer of depth and meaning.
Seeing your work in print allows for an appreciation of the nuances of tone, color, and detail in a way that digital versions simply can’t convey. Differing textures of paper will have a huge impact on how those images are read, as we are never more in control of the viewing process than we are when images are printed. That being said, there is only so much space on the walls in your home or the homes of individuals who may buy prints from you, and so, for some photographers, another option is necessary. Even if your intended outcome is a gallery exhibition, having a printed version of your images, contained professionally, is the best way to showcase your work to curators and art industry professionals.
Whether it is destined to sit on a coffee table, a bookshelf, or serve as a thoughtful gift, a well-designed photobook isn’t just about printing your photos—it’s about creating a professionally finished product that controls the flow in which your work is viewed. A photo book completes and elevates your project, presenting the images as a cohesive story or collection.
Who Will Print My Photo Book?
The first and most obvious option for photo book printing would be professional publishing companies, including independent publishers. With this option, you would receive financial support and expert advice throughout the process. This path to publishing generally requires agency representation in order to have your completed book proposal marketed to publishing houses. Naturally, this option is available to the few, not the many, so other options will often be the route forward for the majority of photographers.
Self-Publishing
For photographers seeking a single book copy or a small print run, traditional publishing may not be the right fit, as it is not commercially viable for either the photographer or publisher. Fortunately, self-publishing offers an accessible, flexible, and affordable alternative.
Many photobooks on the market use press printing with a CMYK color space to produce affordable, mass-produced copies, making them accessible to most buyers or collectors. However, if you're aiming for a more bespoke, high-end product, investing in a product created with photographic printing throughout can elevate the quality and presentation of your images.
Creating My Own Photobook
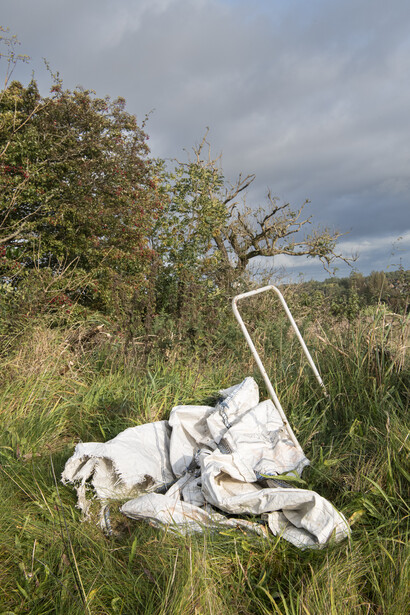
For many years now, I have been documenting fly-tipping—the illegal dumping of household or commercial waste at the side of the road among beauty spots, rural and suburban spaces in the West of Scotland. Scotland is known across the globe for its stunning scenery, yet this fly-tipping is a prevalent issue and a growing environmental concern. I have amassed quite the collection of images over the years, many of which have been sitting in digital storage unseen. I have uploaded very few of these images to my social media, as they don’t really fit with my wider practice. In terms of printing, images of fly-tipping might not be as appealing as some of the fantastic Scottish landscape photography that adorns the walls of homes and offices all over the globe, and so a photo book was the most fitting option for this collection.

There are countless photo labs that offer photo book printing, and so I was spoiled for choice. What narrowed that choice down for me was my search for a lab that offered professional C-Type photographic printing, as well as CMYK processes, so that once I designed a book, I could choose printing options based on the number of copies required or to fit a range of budgets. Both options are available through Bob Books, which is where I printed the first copy of my photo book. I have been on this company’s mailing list for a long time, since looking at options for wedding album suppliers many years ago, so I was already somewhat familiar with their product range.
The Design and Ordering Process
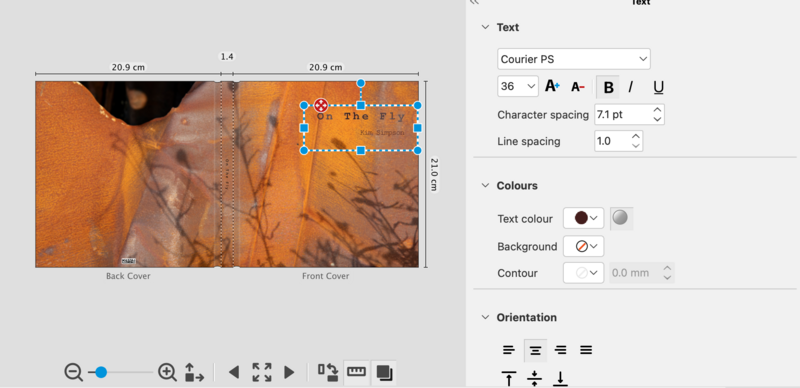
The hardest part of this whole process was the lengthy task of selecting the right images to add, and deciding how roughly many images I wanted in the book, and, of course, which order I wanted them to appear in. Once I contained key images within one narrowed down folder, designing my photo book using the Bob Designer desktop app was a straightforward and enjoyable experience, even as a first-time user. The design process began with selecting the size and orientation of my book. I chose a standard square photo book, which was ideal for showcasing my collection of images, which exist in landscape, square, and portrait orientations. In terms of paper, I opted for photographic matte paper, which uses professional chromogenic printing (C-Type) to deliver stunning image quality.
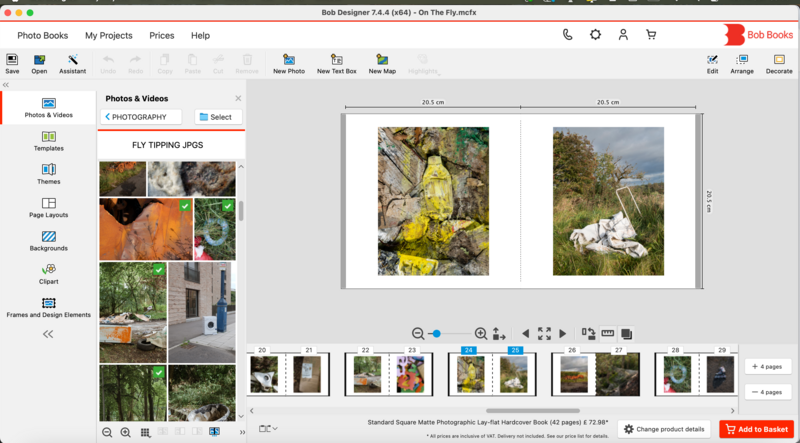
Uploading my images was simple, and I quickly moved on to the creative process of designing the book. Bob Designer offers the flexibility to either manually design pages or use pre-existing templates for image placement. This mix of control and convenience ensured that every page met my vision. Once images had been added to the design, the thumbnails were marked with a number to show how many times each image appeared in the book, which, in my case, meant I could keep track and ensure that each image only appeared once. One important consideration is that additional pages must be added in increments of four due to the assembly method of the photo books. This is something to keep in mind when planning your book’s structure and the number of images you wish to include, as you can’t just choose one or two more pages if you run out of space. I looked at this as a positive, though—something that really made me stop and think about whether extra images were essential.
While the software does provide tools for cropping and minor edits, I recommend preparing your images in terms of edits and cropping in your usual editing software beforehand for the most precise and controlled results. This ensures your final design reflects your intentions without any surprises in the printing process.
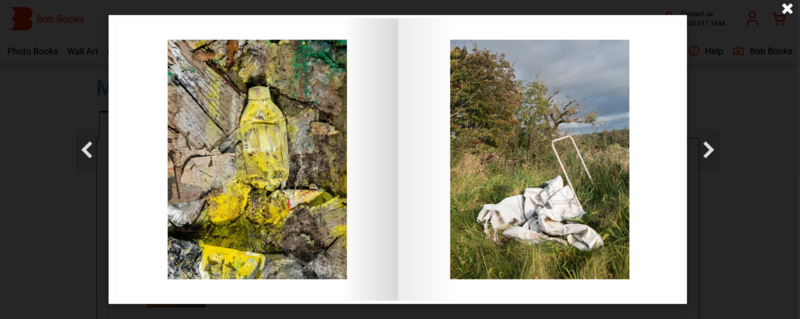
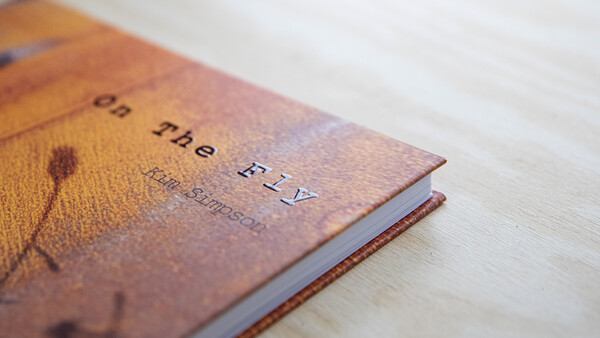
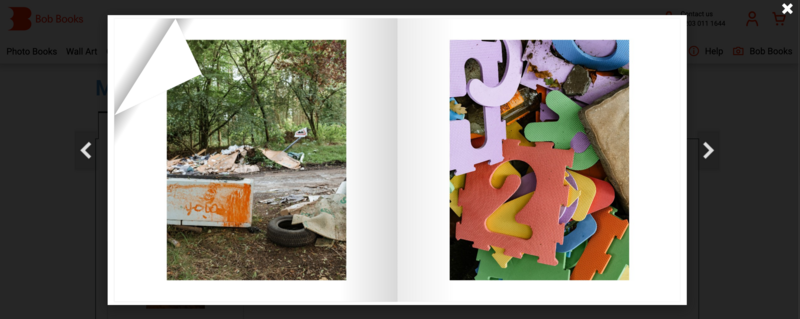
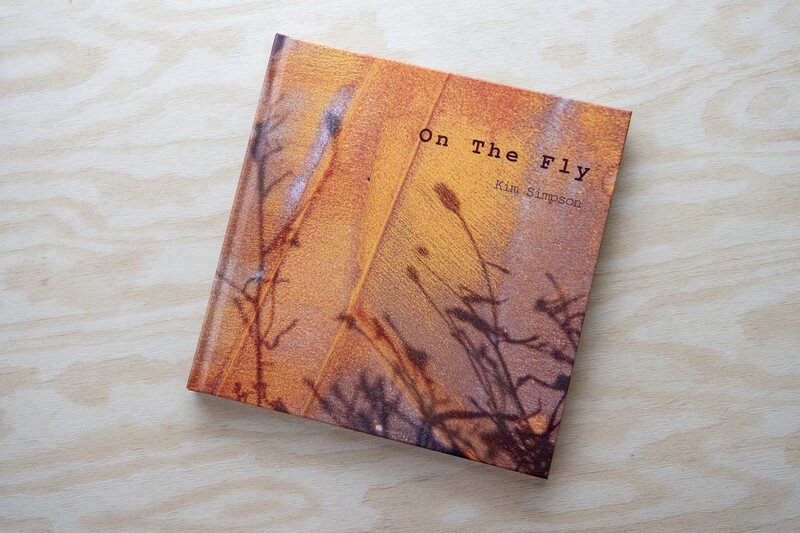
It was finally time to design the cover, and I changed my mind a few times but decided to opt for a more abstract image featuring the shadows of wildflowers against the rusty door of an abandoned car. There is plenty of negative space in this image, which allowed for a variety of options for text placement. I kept the text relatively minimal but added a gloss finish for some texture and a touch of luxury. The design software allows for effective previewing so that you can check for any errors or inconsistencies before confirming your order. In the end, my photo book design contained 42 pages, with an intro text page, an average of one image per page, and some images stretched across a full spread.
It took around 10 days to receive my photo book from Bob Books, including processing time and delivery, which would be standard for most print labs. Although I viewed the finished book on the screen a number of times before ordering, seeing it and holding it in print is a feeling that cannot be understated. I have many photo books from other photographers and artists, and it felt wonderful to hold a comparable product in my hands featuring my own work. Opening the book for the first time confirmed that the decisions I made during the design process in terms of layout and sequencing were worth all the back-and-forth that went on in my mind.
This photo book has elevated the images, given them a suitable home worthy of the importance of the message behind them, and renewed my purpose for continuing with the project. I have learned a lot through this process, and I am already thinking about the next volume!

Although this photo book was just designed for portfolio purposes, the quality of the finished product is absolutely something that is saleable, valuable, and even collectible. Who knows—I may decide to run a short edition in the future. Watch this space!
Do you have any tips or advice to share about designing a photo book or coffee table book featuring your own work? Let’s discuss in the comments.


Join the Fstoppers community for free
-
Post comments and join in the discussions
-
Browse the site ad-free
-
Share your work and get featured in the community
-
Compete in the photo contests for fun and prizes
7 Comments
I print nearly every day because I love making prints. Since I avoid the outsourcing of printing at all costs, I've often wondered how I could make a book of my own. I know there are some two-sided papers, but have yet to research what sort of relatively inexpensive "hobbyist level" equipment or technique would be required for the bindery. I would love hearing from anyone with experience in printing their own book.
Thats actually a future article I have planned, which will happen when I find the time to put a DIY book together :) Theres lots of methods out there, many of which dont require printing on 2 sides of the paper.
Interesting project! I am also planning on publishing a book. God is it hectic! I am still at least 6 months away from finalizing the layout
Great! Yes it is something which cannot be rushed.
What a fantastic project Kim, love the cover design!
Thank you Simon!
I would like to add my experience for self-publishing.
Instead of doing all the investment yourself - you can do a kickstarter campaign, creating your budget by your backers + you sell your first batch of books. Consider starting at 1000 books.
If your able to do most of the pre-work (editing/logo/design/) then you only spend on print.
Expect a coffee table book to be around 5-7 EUR/USD depending on the size.
Really interesting to check out when thinking about self-publishing. Saves a ton of costs and you can dip your toes into the market too.