
In a recently emerging search for the perfect vertical shooting tool, many brands have offered tools for better efficiency and stability. Nisi’s take on the rotating camera bracket might have some unique features to offer.
L-bracket alternatives, specifically rotating brackets, have definitely gotten popular over the past months so much so that many different brands have come up with their own version of this tool that simplifies the ergonomics of switching from horizontal to vertical orientation while mounted on a tripod. If we recall correctly, it was in December of 2022 when the brand Silence Corner launched a Kickstarter campaign for the Atoll Rotating collar. Not long after, many brands like Smallrig, Ulanzi, and Sunwayfoto followed suit. This time, let’s take a look at how popular filter brand Nisi’s Wizard camera positioning bracket fares as an option.
Are Rotating Brackets or Collars Necessary?
For the past decade or so, the L-shaped bracket has been a popular tool for various kinds of photographers for the sole purpose of being able to mount the camera onto a tripod vertically without having to tilt the head to the side. Some photographers prefer this because it keeps the weight balanced and avoids the potential risk of the camera falling from the quick-release clamp. On the other hand, some photographers prefer such a setup to keep the camera aligned with the axis of rotation of the head if ever they would shoot a panorama (without a panoramic head) thereby reducing the possibility of getting a distorted image. For others, L-brackets are just simpler to mount and add a bit more protection to some of the corners of the camera compared to the ordinary tripod base plate. Nonetheless, the use of such tools is based on the photographer’s preference and shooting style, and having more options is always better.
Build, Design, and Compatibility
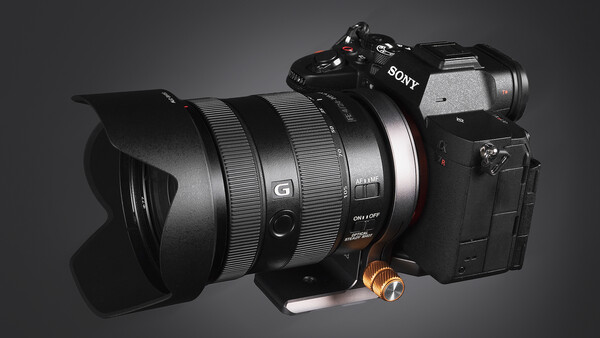
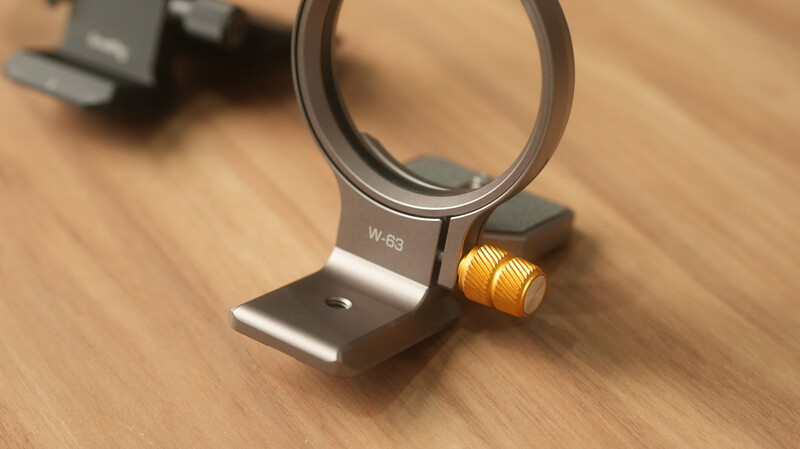
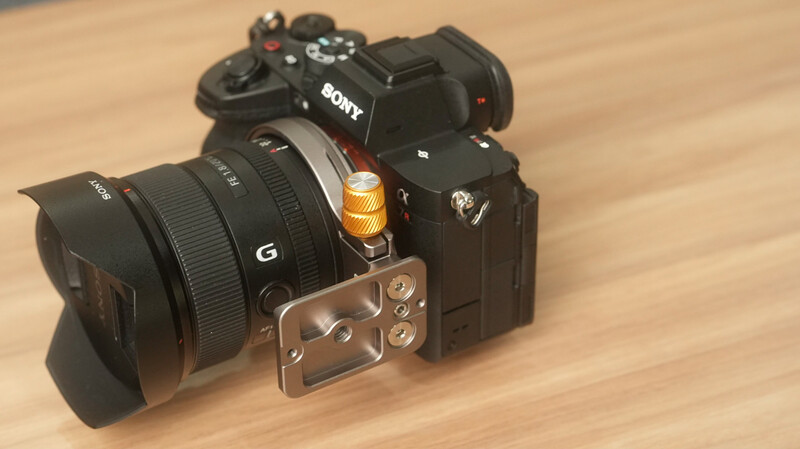
The Nisi Wizard is made up of aircraft-grade aluminum with a matte champagne silver finish and a textured orange knob. The bottom plate that mounts onto the camera covers just 5 x 4.3cm (2 x 1.7 inches) of the bottom plate avoiding any functional areas and is equipped with magnets to hold the supplied hex tool for mounting. The height level of the plate can also be adjusted by loosening the two screws hidden between articulating surfaces of the two parts. Unlike other L-brackets and rotating brackets, the Nisi Wizard does not entirely cover the bottom of the camera which lessens the overall protection offered by the bracket protecting the camera from untoward impact. On the other hand this also means generally less material and less weight.
The fact that the camera plate is not customized to specific camera bodies, the mounting screw can be adjusted forward and back, and since the height is adjustable, this makes the bracket generally more compatible with a wider range of cameras. While Nisi made this size specifically for Sony because of the lens size, generally any camera with similar or smaller-sized lenses can fit with this bracket.

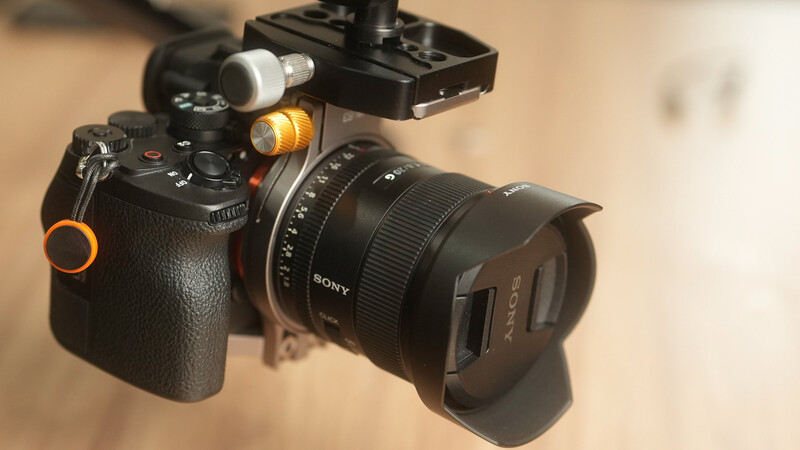
The collar itself is about 4mm thick with a depth of 2cm. Though the lens’ surface technically does not come into contact with the collar, there is a rubber lining on the inner surface of the collar which is an appreciated safety feature. At the same time, the rotating parts are generally inside the construction of the collar which means that it should not cause any damage to the lens. The collar ideally has an unlimited range of motion since it can rotate 360 degrees itself. However, there can be a limitation if the camera to be used is one that has a bulky grip on the side since it would come into contact with the rotation of the mounting plate thereby limiting the motion.
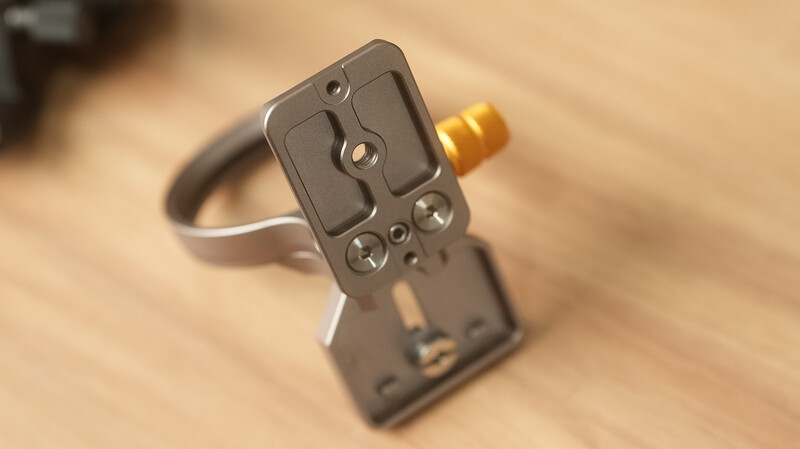
On the opposite side is the main tripod mounting plate connected to and rotates along with the collar that is arca swiss mount compatible with the mounting edges located on the sides. At the bottom is a secondary mounting thread which allows connection to other types of tripod base plates if necessary. Two screws are also visible on the bottom part that indicates that the mounting plate can be replaced with other compatible accessories if necessary.
Application and User Experience
The emergence of rotating brackets stems from the simple desire to improve the ergonomics of shooting with tripods. This becomes more significant when the photographer has to shift between shooting horizontally and vertically many times during a shoot.
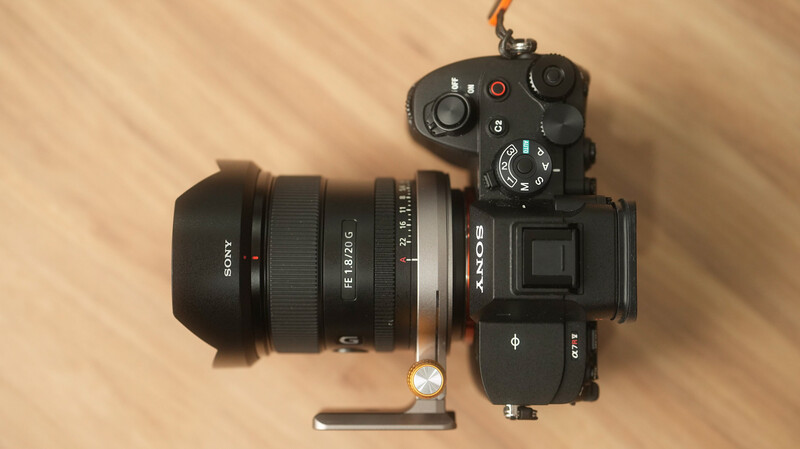
One notable aspect of the Nisi Wizard is the installation process. Rotating brackets need to be mounted onto the camera with the lens removed first since the collar tightly fits the thinnest part of the barrel. Since the Nisi Wizard is not specifically tailored to the camera body it initially has to be installed loosely then tightened after the lens has been mounted. Otherwise, the lens might not be aligned properly which would prevent it from mounting altogether. Once properly aligned and securely fastened, the bracket acts as though it is a reinforcement of the connection between the camera and lens keeping the setup stable with no propensity for camera shake. Due to the very minimal gap between the lens and the collar of the bracket, lenses with special features on the proximal part of the barrel such as USB connection ports might not be compatible.
Rotating brackets in general make it easier to do so in shooting landscapes along with the added benefit of easily positioning the camera and lens for shooting panoramas. The Nisi Wizard offers the same benefit with the addition of being able to turn 180 degrees if the camera is to be mounted onto a tripod with a horizontal or inverted center column for low-angle shots. This is applicable to virtually any kind of genre or workflow that involve shooting with tripods in general.
A significant limitation when it comes to shooting vertically would be for shooting vertical self-portraits or videos. Since most cameras can only turn counter-clockwise because of the grip getting in the way of the rotation, it would also prevent the flip-out screens from being positioned upwards for it to be visible from in front of the camera. Unless using more compact cameras with minimal or no side grips, there will be a limitation for shooting vertical self-portraits or video content.
Overall the Nisi Wizard is a good option for any kind of photographer who is looking for easier ways to change shooting orientation and camera position. The relatively more universal design offers this benefit to more users of many different brands. In addition, the unique design and colorway could be an added aesthetic benefit.
What I Liked:
- Convenient camera positioning
- Stable mounting
- Compatibility with many camera models and brands
What Can Be Improved:
- Option to shift the front plate forward to avoid the side grip


1 Comment
This rather long but the point requires a little long comment. First the device is a brilliant solution to a camera with the twisty flex LCD screen and even the L- Bracket with a slot for the screen to be used with a L-Bracket was great but limited in use. Great to have something for the A7RMV and A7SM3 screens.
What the SmallRig has that no other has is a button on it that pushes the lens release button vs the other models require you to rotate some to view the lens release button. Also this added button does not get in the way of holding the camera off the tripod. Now a little help is to get a Camera Panoramic Panning Base with stepper points for degree selections. One of the main reasons for going portrait view is to do a panorama and a panorama head has a adjustable degree stepper at the base so as to go say 15 degrees to the next shot point without having to look at the LCD screen to judge the next stop. A little picky, but at night having to look for an item that will show the next stop is a little tuff if doing over a lake or ocean on a beach. To do it with a pano head you always have to take off the L-Bracket and attach the camera plate that comes with the pano head for a portrait view orientation. What I am trying to point out is this bracket only accomplishes the going to portrait view. Yes most tripods have degree markings at the base that you can look at BUT at night doing a MW pano you have to turn on your headlamp to see them but also get close to see them or as stated view the scene on on the LCD for the next spot. With a stepper base on a pano rig you can just feel the next click so you can just snap the shot and wait say 10s then while 10s NR and then move to next click step that takes less than a sec and then take the next shot when the LCD display goes bright. This allows for a 200 deg pano in less than 1 1/2 min.. But using a pano rig you have to remove an L-Bracket mount the camera using the camera plate and after put a L-Bracket back on to set up landscape shot. But to do a run and gun to different location doing both Landscape and Portrait views and a pano in between can take a lot of time. I have also a Parallax slider for whatever lens on top of of the tripod. But to have a Stepper base everything can be done in seconds and running and gunning takes very little effort. There maybe one but just have not found one yet.
The current trend in astro MW is to use a 50mm or even a 80mm to get greater detail BUT to capture it with pano steps maybe a few left to right and some up and down rolls to get a 3 x 2 image that is a closer view like with detail a 10mm, 12mm or 14mm just can not capture. The windmill was done years ago with without a pano head and the beach with a pano head with a 12mm getting the height of the July arc without doing rolls. But sometimes just two side by side of a pano that would require a wide lens in landscape. A stepper base just makes things go faster and helps the blending to be easier.
If you have ever been to a beach with a lot of driftwood there will be 60 different places to do both landscape and panos in a night of clear skies like June, July and August can be all nighters from sunset to sunrise, I mean sometimes a lot of playing and time changing things.