
I hadn’t considered the possibility of using an external monitor with my camera, but when Neewer gave me the chance to try their touchscreen field monitor, I wondered whether it would meet a particular need of mine. Now that I have tried it, it is something I am adding to my kit bag. Here’s why.
I am pleased with the live view screen on the back of my camera. It holds its own when compared with any of its competitors. Yet, and this is true of all cameras, it’s relatively small compared to my computer screens, and this poses a problem. It's not always easy to frame the shot.
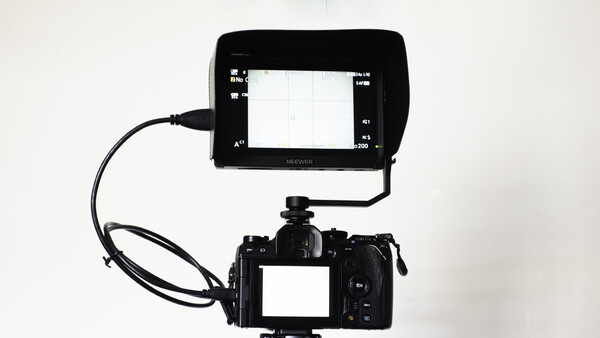
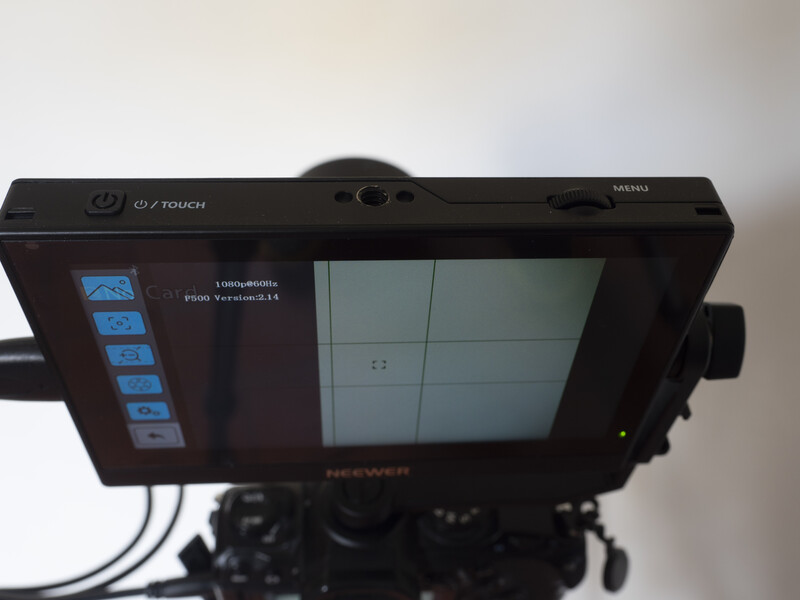
The purpose of field monitors like this Neewer F500 help address that small size. Although intended for video use, I found it equally useful for composing landscapes, especially at night when it’s even harder to see what I was photographing. A larger screen is definitely a boon.
What's in the Box?
Pleasingly, the screen arrived in a neat, recyclable cardboard box. Inside that, there’s more single-use plastic than I would like. That is an issue with many photographic companies apart from those with strong environmental credentials.
The screen is supplied with three HDMI cables: Standard HDMI to Standard HDMI, Standard HDMI to Mini HDMI, and Standard HDMI to Micro HDMI. There is also a battery and a charger. The charger is powered using a USB cable that you can plug into any charger.
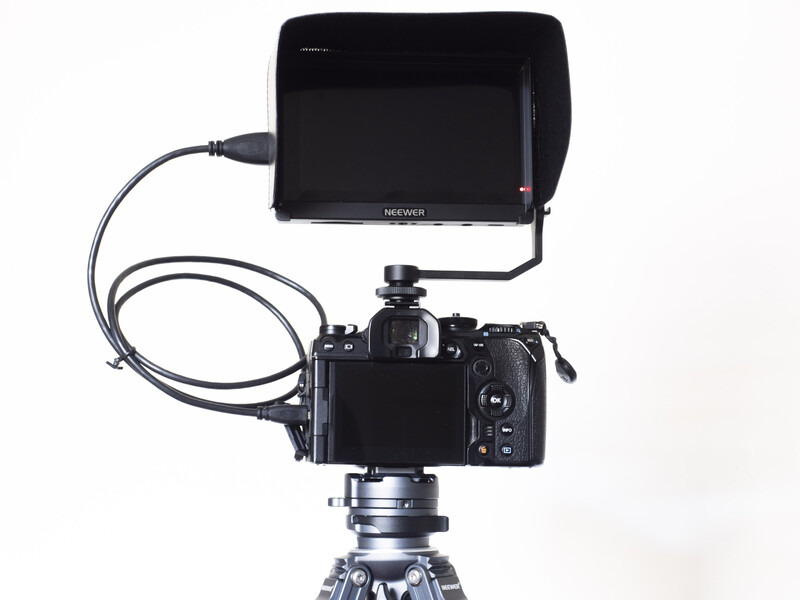
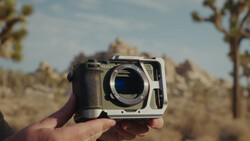
The 5.5” screen itself has the right balance between lightness and robustness. I had no qualms about attaching it to my camera. Three of its four sides have standard tripod ¼-20 threaded sockets into which the supplied, metal L-shaped bracket can be attached. That bracket has a cold shoe.
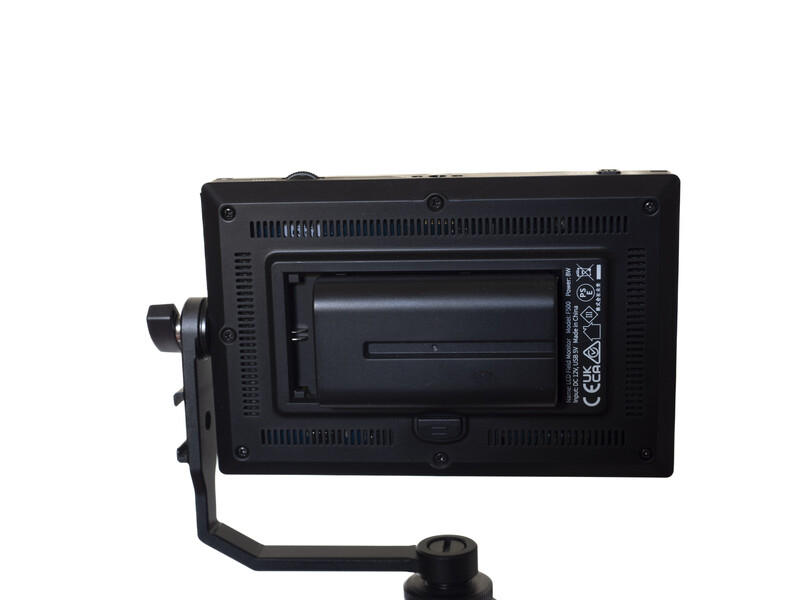
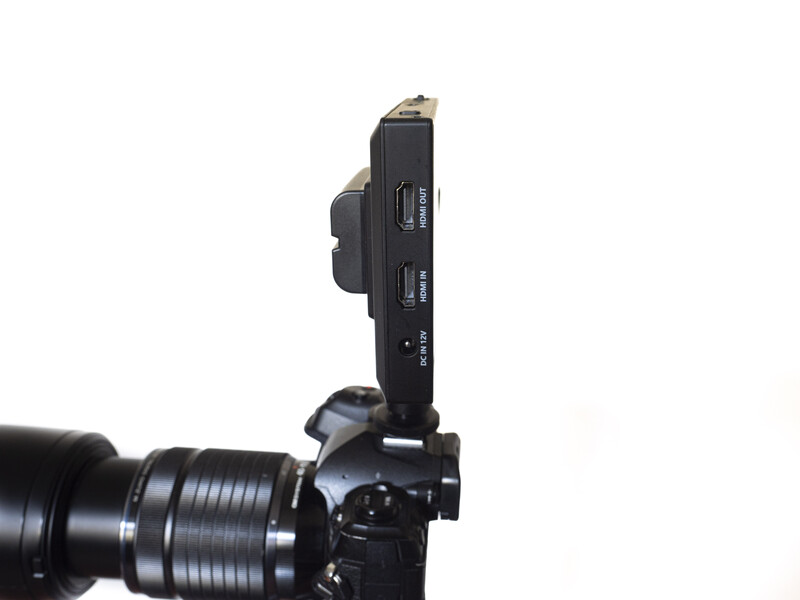
On the top of the screen is the power button and a menu dial. Meanwhile, on the left, looking from the front, are a 12V DC input power socket and HDMI input and output sockets. On the base is an SD card socket, a headphone socket, an 8.4V DC output socket, and a USB-C socket. The screen comes with a shield attached with Velcro via a removable, clip-on collar.
The supplied and widely available NP-F550 battery can be charged using the USB-C Socket on the screen or through a separate charger. Strangely, the charger has a Micro-USB port and not USB-C. The camera will also take a Canon LP-E6 battery, also widely available.
F500 in Use
Setting up the screen was a fairly simple affair; plug in the battery, attach the L-shaped bracket to the camera and screen, plug in the correct HDMI cable, press the power button, and you are ready to go.
Strangely, when the screen is turned off, there is a permanently lit red LED visible. Although this will draw very little power, it does, nonetheless, deplete the battery.
Before it arrived, I was initially a little concerned about the weight of the screen on my camera’s hot shoe, but at 0.56 lbs (256 g), it weighs less than my flash. However, the L-shaped mounting bracket also has a cold shoe, and I think I would be more inclined to start using a cage to better distribute the weight than to mount, say, a video light on that.
The metal L-shaped bracket has a thumb-locking nut that secures it to the hot shoe. Then the bracket's thumb screw holds the screen in place. Although the screen can be tilted in use, there is a definite latched position only when the screen is vertical.
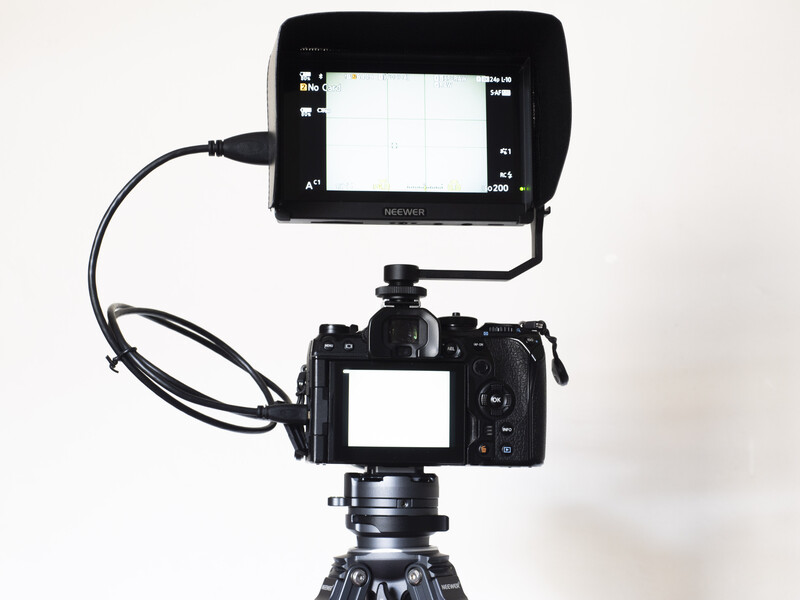
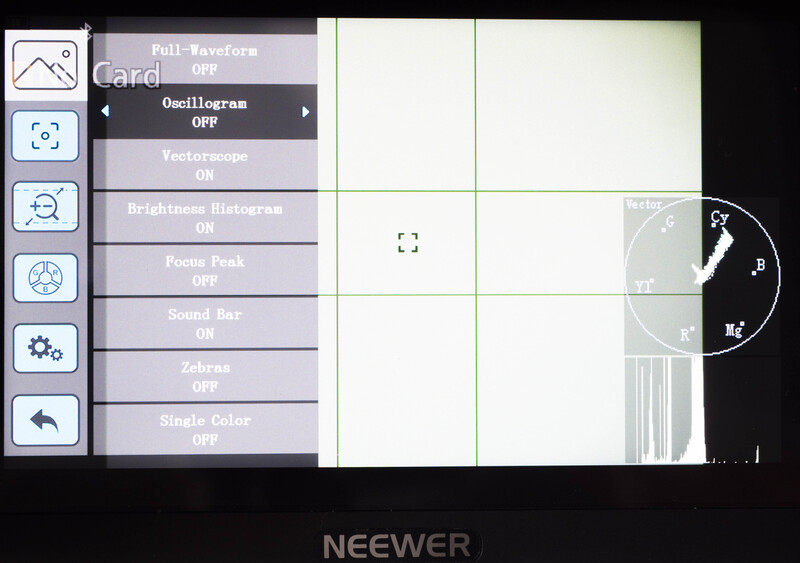
The screen has a multitude of display options accessible via the touchscreen. To start with, I turned all of these off because some of them made very little difference to me, and others, such as a histogram, focus peaking, and zebras, were available from my camera.
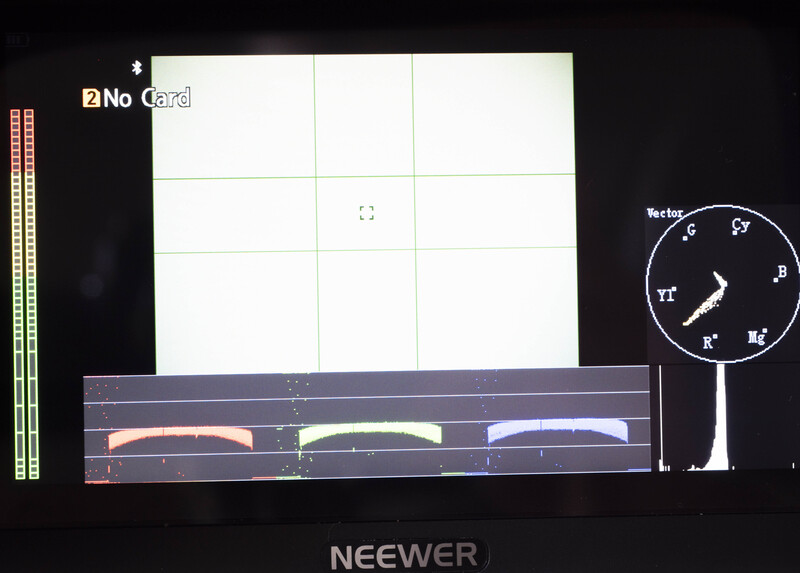
The display menu functions included Full Waveform, Oscillogram, Vectorscope, Sound Bar, Single Color (monochrome displays), False Color, Nine-Rectangle Grid, Safety Marking, Center Mark, Cropping Masks, Cropping Transparency, Marking Color, Scan Modes, Aspect, Video Width, Video Height, Deformation Mode, Auto Mirror, Magnification, Image Still, Point-to-Point, HDR, LUT Switch, LUT Settings, Import LUT, 3D LUT Color, Color Temperature, Red, Green, and Blue intensities, Backlight Brightness, Brightness, Contrast Balance, Saturation, Hue, Sharpness, Thumbwheel function, Languages, OSD (Menu) Transparency, OSD Duration, Volume, Factory Reset, and Firmware Updates.
The first few of those are graphs that give representations of what’s being displayed or heard. The Histogram and sound level bar are probably familiar to most readers. Meanwhile, others like the oscillogram, which accurately displays the brightness of the screen, and the vectorscope, which displays color distribution, may be less familiar.
So, there is a lot to learn about the device and your technical requirements will dictate which of these you will need.
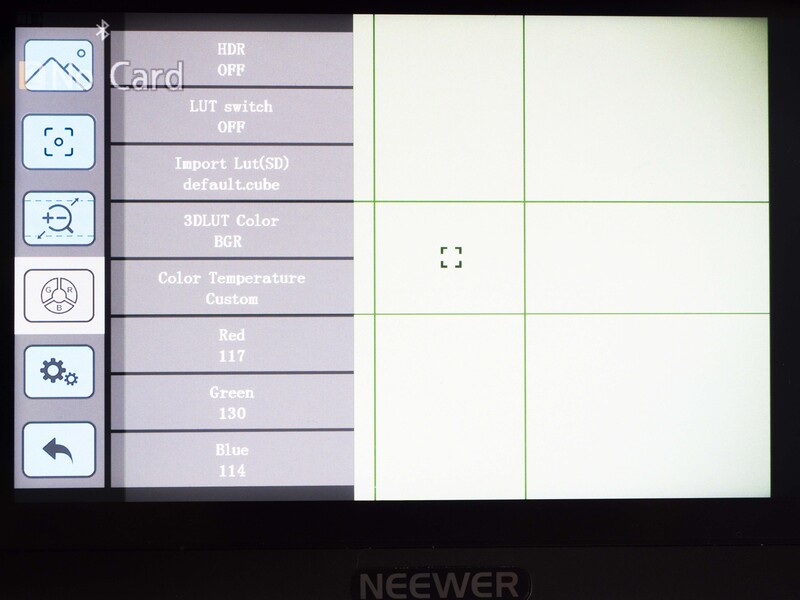
A 3D LUT function converts S-LOG-1, V-LOG-1, DJI-LOG-1, RED-LOG-1, and others into REC-709 standards. This should ensure monitoring without a color cast. It also includes the preloaded HLG 2020, HLG 709, and HLG P3 HDR LUT tables for ease of use and supports up to 25 custom 3D LUT tables. These can be uploaded using an SD card.
I don’t rely on a screen for exposure – I use the histogram – but having a brighter display helps in daylight. However, using the default settings for photography, I found on first use the screen lacked a little brightness and had a slight greenish cast, and it was easy to adjust these in the menus so the screen matched the display on my camera, which I set close to what I see in real life.
Nevertheless, even before adjustment, it was possible to see the screen in daylight, and adding the hood made it far easier to use than the live view screen on my camera, which is better than others I have tried.
A nice feature is that the screen can supply power to the camera if the camera has USB charging, using an 8.4V 1.3 mm jack output; do check compatibility with your camera though. At the same time, the screen can be powered from a power bank.
What I liked and What Could Be Improved
What I Liked
- Easy to assemble.
- The touchscreen is responsive.
- Vastly improves the live view for video and landscape photography.
- Well designed.
- Robust build quality.
- Uses common batteries that are readily available.
- Good quality accessories, such as cables.
- 5.5” display is Full HD (1920 x 1080).
- Price. At £179, it is far more affordable than some of the bigger brands and offers better quality than cheaper options.
What Could Be Improved Next Time
- The multitude of single-use plastic bags could be reduced or replaced
- A complete power-off option without the LED glowing would be useful
- The battery charger should have a USB-C socket
In Conclusion
As I mentioned before in previous articles, Neewer has upped its game when it comes to quality. They seem to target consumers with affordable gear that is close in design and build to professional-end equipment. In a camera shop, I looked at other far more expensive brands of 5.5” field monitors and the Neewer model holds its own for robustness, weight, functionality, and slimness.
For videographers, the Neewer F500 field monitor will make an enormous difference. However, this will be equally useful for low-light and nighttime landscape photography.
The Neewer F500 is currently available on Amazon at a reduced price of £145.99. B&H stocks the lower resolution 7" Neewer F100 at $99.99.

Join the Fstoppers community for free
-
Post comments and join in the discussions
-
Browse the site ad-free
-
Share your work and get featured in the community
-
Compete in the photo contests for fun and prizes
14 Comments
Large, clumsy-looking, and renders the hot shoe unusable. I need flashes in the field for my nature photography. Looks like a product in search of a need.
Video monitors are a product that are used in virtually every video production in the world. Its a product with a huge need and is an industry standard tool.
That said, I think its fairly obvious that the reviewer was sent the sample to review. It doesn't fit into a landscape workflow but he tried his best to still make it relevant. I think he did just fine, and if it ends up augmenting his workflow, that's great.
As an aside, you can mount the thing however you want, it doesn't have to be mounted in the hot shoe, that's just how the author opted to do it in this specific case. It could be mounted on a separate tripod or more commonly for people who use these sorts of tools in actual production situations the camera is set up in a cage system and the monitor is mounted on that cage.
You can put them on an L bracket to free up your hot shoe. Tripods also have screw holes for arms that hold these monitors.
Thank you for commenting, David. I guess it depends on what kind of photography you want to do as to whether you would find it useful. I found the screen extremely helpful at night, on a wet seashore, with the camera mounted on a tripod at knee height. For video, something like this is vital. However, for wildlife stills, it's probably not something you need, but it will appeal to others. In use, I didn't find it clumsy in the least.
Ryan and Bob, thanks. You both make good points. There are indeed plenty of other mounting options
Looks like a good option for video, for landscape photography it looks unnecessary and cumbersome. You like micro 4/3 because of its form factor (and for many more reasons, I know) and than you add this thing……. When I compose an image, I almost always use the viewfinder , only use the vari-angle screen for very low down shoots.
I get your point Ruud. Most of my seascapes are shot on a tripod, at a low height, and on wet sand. So I am sure you can see the advantages for me.
Is it weather sealed, I think a must for seascapes
No, but I don't know of any that are, certainly not at this price point. Then again, nor is my smartphone, which I used previously; and that would be a much more expensive loss.
It's one of the reasons I like the IP53 weather sealing of my OM-1s and Lenses. I have dropped them in the water before now, picked them up, dried them off, and carried on shooting. I've had other brand (supposedly) weather-sealed systems with autofocus moving parts that have ground to a halt because of airborne desert and beach sand. Because the screen has no moving parts, it won't suffer that way. Over time, the salt and humidity might corrode the electronics. I'll report back if that happens.
Luckily my smartphone is weather sealed, dropped it in the water half a year ago and it still works flawlessly, so I think it’s okay. Salt water can be a killer although my gear still works fine after quite a few salt water showers. The weather sealed claim seems true for my red ringed lenses
Which phone do you have? I could use one that bounces and floats! Glad to hear you had good luck with your lenses.
I have an iPhone SE 3rd gen.(IP 67 rating) The screen didn’t survive a fall on a stone edge though, so weather sealed, not bounce proof. The newer iPhones have tougher glass.
Thanks. Someone should invent a bouncing, floating, waterproof phone.
When I shot professional video from 1978-2010 I always had a "field monitor". Since I seldom needed to move after set up it was a must for the 4 hour sessions. I totally get this.
Thank you!