
One thing I've learned after being a wedding photographer for so long is that one light can go a long way.
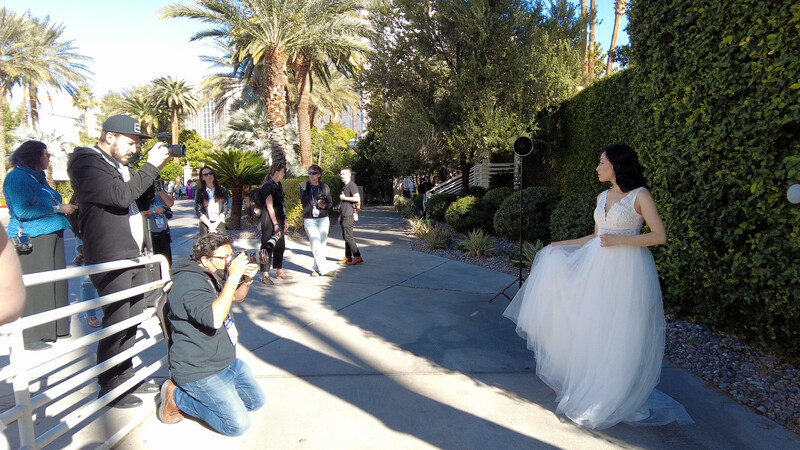
Ok, so the first thing I want to touch on is some background for the shoot. These images were taken during a photo walk that I led while teaching at WPPI in Las Vegas. WPPI is a wedding and portrait photography conference that is held each year. But because this is a photo walk, we were pretty limited on the areas we could actually take photos. And while these shoots have a crowd of students around, I actually treat each of my photo walks the same as all other sessions that I photograph. Which means I didn't have any plan for where I wanted to shoot. I also didn't do any location scouting or get an idea of what images I wanted to create beforehand. All I had was a general starting location and then we went from there. I do this because when I location scout, I find that something always goes wrong that causes me to give up on an idea I was really excited about, or I have to compromise and get an image that's not as good as when I first scouted. So instead, I prefer to be inspired by the light and location in the moment.
As for gear, I'm using my Sony a9 paired with either the Sony 24mm f1.4 GM lens or the Sony 35mm f1.4 CZ lens. For lighting, I'm using the Elinchrom FIVE attached to a C8 automatic light stand from Cheetah Stand, and in most of the images, the light also has a full CTO gel attached from Magmod.
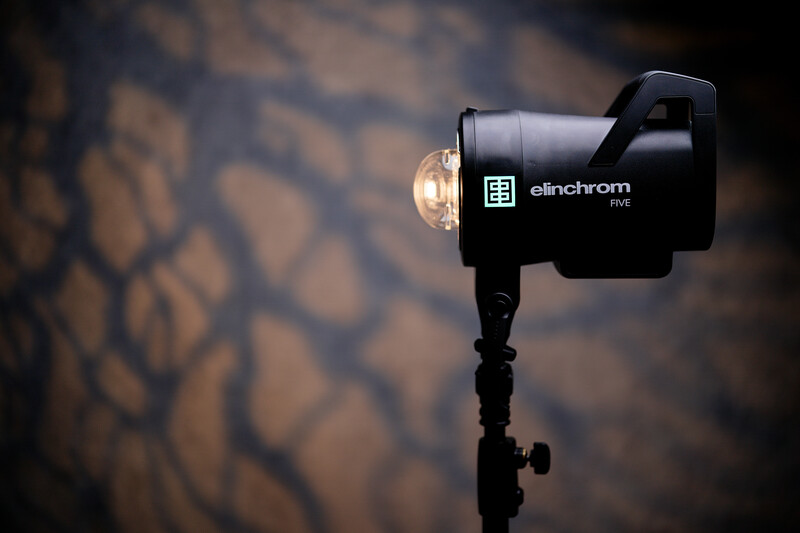
The reason I love this lighting setup is that the Elinchrom Five is pretty powerful, coming in at 522-watt seconds. So this gives me enough power to combat that desert sun while still being easy to carry around. Paired with the Cheetah Stand, It was easy to pick up and move locations without a ton of setup and teardown time. Also, for being a powerful light, the Elinchrom Five is pretty lightweight and can handle 450 full power pops on a single charge. So I knew it would last me the various shoots I had throughout the day.
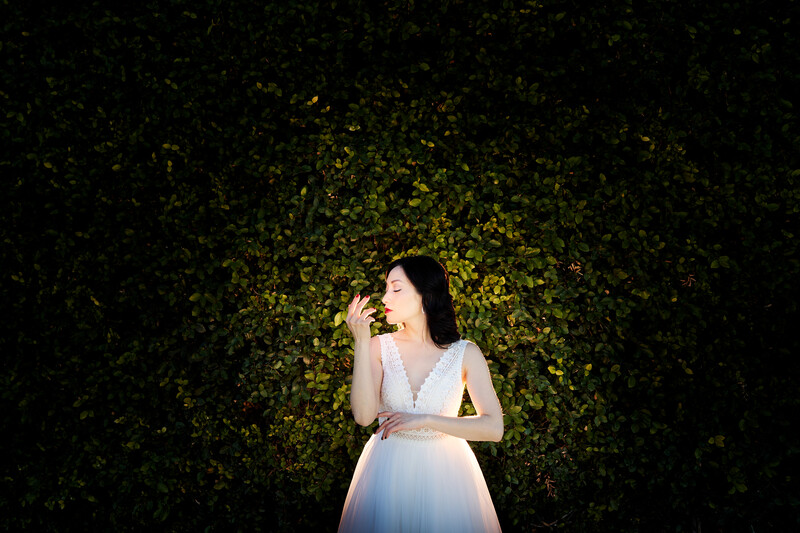
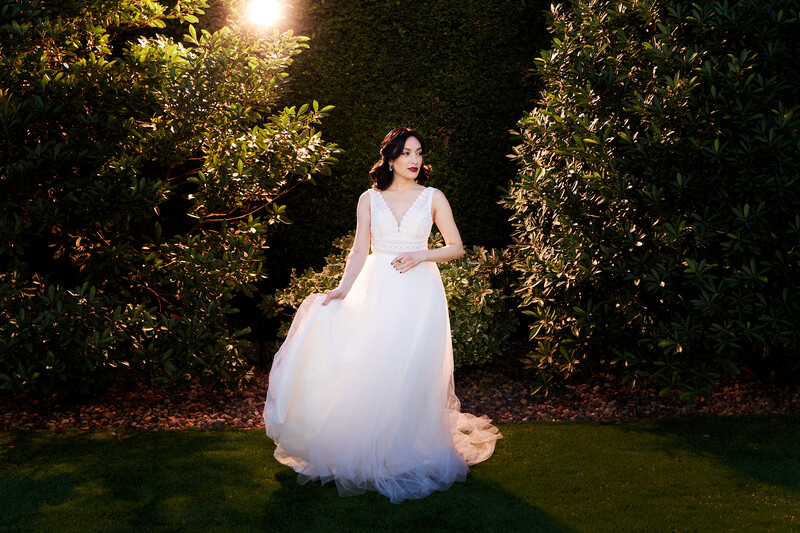
So with that, let's get into the actual session. For the first image. I really loved this wall of greenery. But the problem is that it was in the shade. And while soft light can be very pretty and easy to manage. I prefer my light to have a bit more interest. So I placed the Elinchrome Five behind the bride with the Full CTO gel attached and I pointed it away from the wall. The idea here is that the light will be doing a lot of work. First, it will be rim lighting her helping her pop off the background. Second, the light will also bounce off her white dress to simultaneously light up the background, and lastly, I had her pose with her hand up and slightly in front of her face which acts as a small reflector for the light so that some of this backlight can bounce off her hand and fill in the shadows on her face. So really, this single light is doing three different things: It's rim lighting the bride, lighting the background, and lighting her face.
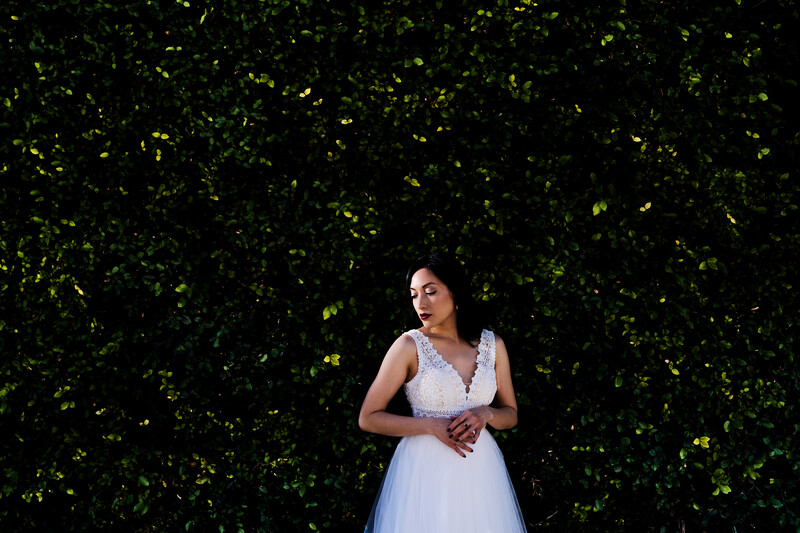
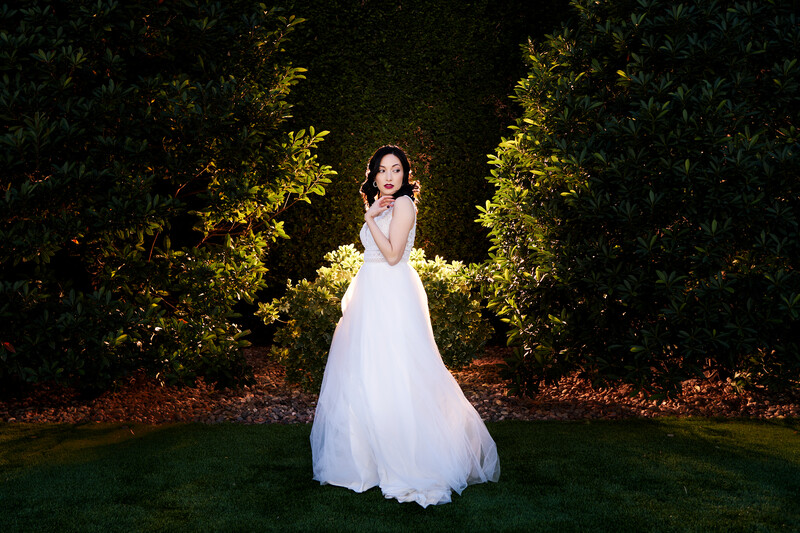
For the next image I used the exact same wall, but this time I brought my light around to directly light the bride. For the modifier, I used an Elinchrome reflector and grid combo. I placed the light slightly behind the bride and then made sure that she was posed in a way that the light could see her eye that was closest to the camera. This setup gives me a nice dramatic light on her and the grid makes sure that the light doesn't spill onto the background. Then in post-production, I cranked up the contrast only on the background in order to make the leaves really pop.
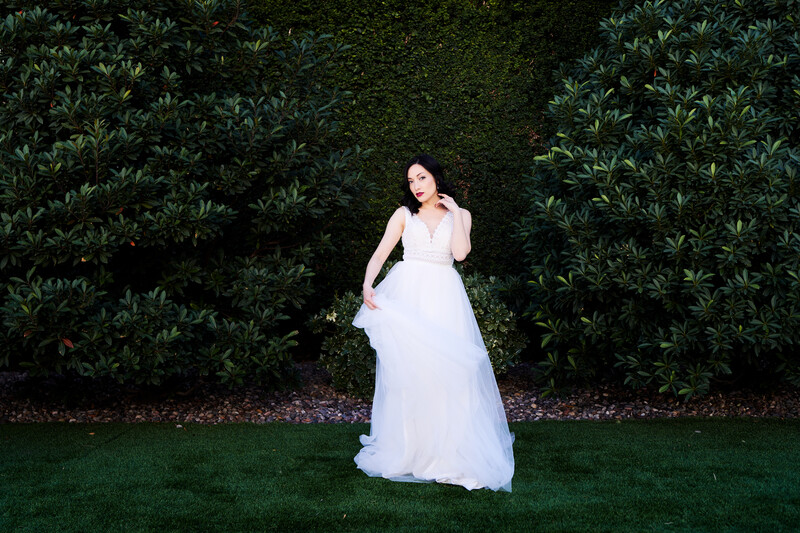
For the last image, I moved over to another area where there was a similar green wall. But this time there were two large bushes in front of the wall I could use to frame the bride between. The idea here at first was to try and recreate some sunset-style flare. The problem I ran into was that the light stand I brought wasn't tall enough for what I was going for. This made it hard to really sell the idea since the sun appears to be shining through the wall, which obviously isn't really realistic. I can try and hide this a bit by putting the flare right at the edge of the frame, but even still, I wasn't super thrilled with the results.
But, I did really like the rim light effect it gave on the leaves. So I pulled the light down and hid it behind the bride. This gave the leaves a bit more glow as well as making the frame more symmetrical. I like this version the best, but here is a natural light version as well just for reference. But what do you think? Do you like the flare version, the backlight version, or the natural light version best? Let me know in the comment!
So again, you can take an image or idea a long way with a single light and some basic understanding of how that light works. Hopefully, you got some inspiration and ideas for your next session. And if you have any questions, drop them in the comments.


Join the Fstoppers community for free
-
Post comments and join in the discussions
-
Browse the site ad-free
-
Share your work and get featured in the community
-
Compete in the photo contests for fun and prizes
No comments yet