
One of the most important parts of any good book is the first few pages which draw in the reader in. That's what getting ready photos are for a wedding day. So let's make them epic.
To start things off, when it comes to bride prep, my main goal is to let moments unfold as they naturally would. I never want my clients to look back at an image, and remember me telling them what to do or to remember me having the makeup artist hold a little makeup brush in front of their face in order to fake a moment.
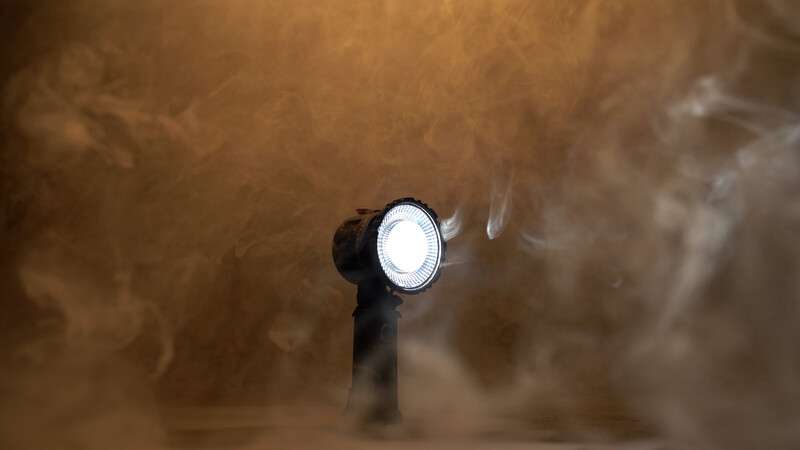
That said, I will move things around as needed. If it helps things line up to have the bride's chair moved over a couple of inches, I’ll wait for a break in what's going on, and then simply ask to move it. I also love to work with the natural light of the room as well as play around with off-camera lighting. And for getting ready images, my go-to light is the Stella Reflex S. I love it because it’s small and compact so I don't need a ton of room in what's normally a crowded and cluttered space. I also love that it can be a constant light, or I can use it in a digital burst to act like a more traditional flash. But I almost always use this light in constant mode. I really enjoy the see-what-you-get aspect of constant light, And then especially for situations like this where there is a videographer. The constant light makes it so we can both work off the light instead of me needing a setup and them needing an entirely separate setup. Which just makes the room that much cluttered and then we both have to combat the light from one another. So it's just all around easier if we can both work off a single light setup.
As for the other gear, Im shooting on the Sony a9 with either the 24mm f1.4 GM lens, the Sony 35mm f1.4 CZ lens, or the Sony 85mm f1.8 lens. And then I have my light attached to a C8 Auto Stand from Cheetah Stand. This stand is perfect for this situation because I can quickly place it into an area, even if it’s cluttered, without having to move a ton of things around to make room for it.
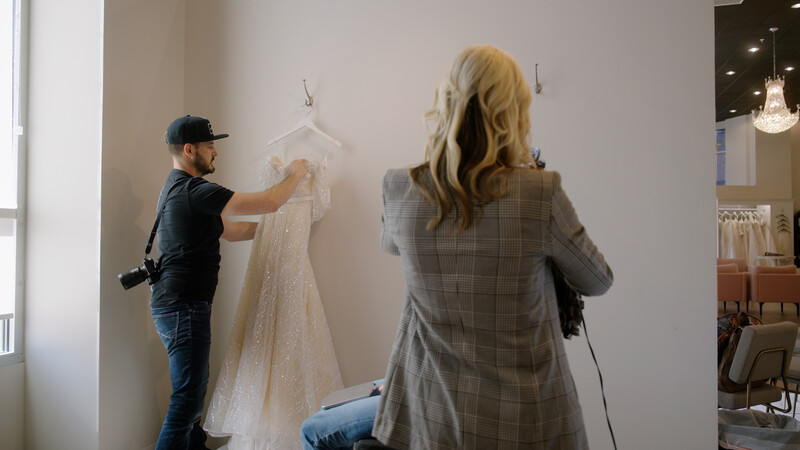
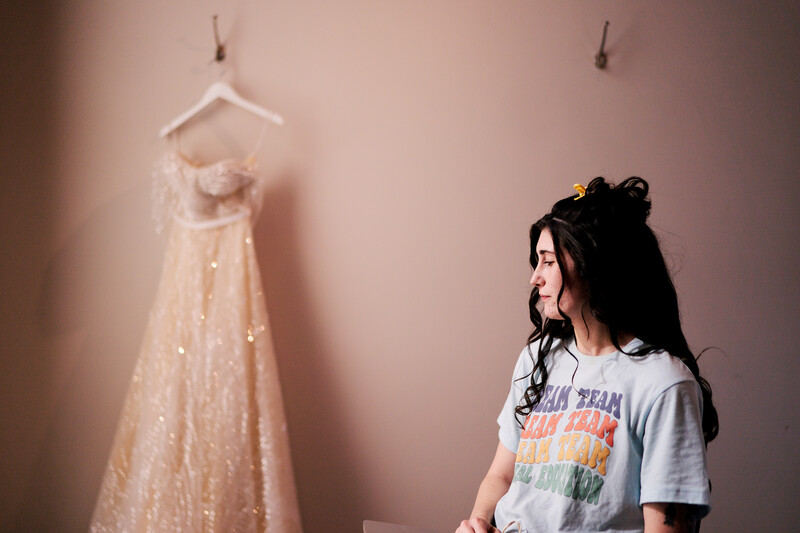
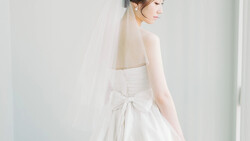
Walking into the space, the first thing I noticed was a large window and a nice blank wall. So I knew my general background was going to be the blank wall. I also noticed some hooks on the wall, so I moved the dress from the dressing area over to the wall. This helps make things not so minimalistic while also giving some context. You see her getting ready as well as the hanging wedding dress, so you instantly know pretty much what's going on.
Once I’m ready to start taking images, I try to ease my way into things. The goal isn't to start getting amazing images right out of the gate. The goal is to start getting a feel for what’s going to work and what isn't going to work. And it’s during this time that the really good images will start to present themselves. So I start by getting my light set where it might need to be and I get a natural light image as well as a lit image so I can get a really good idea of what things will look like.
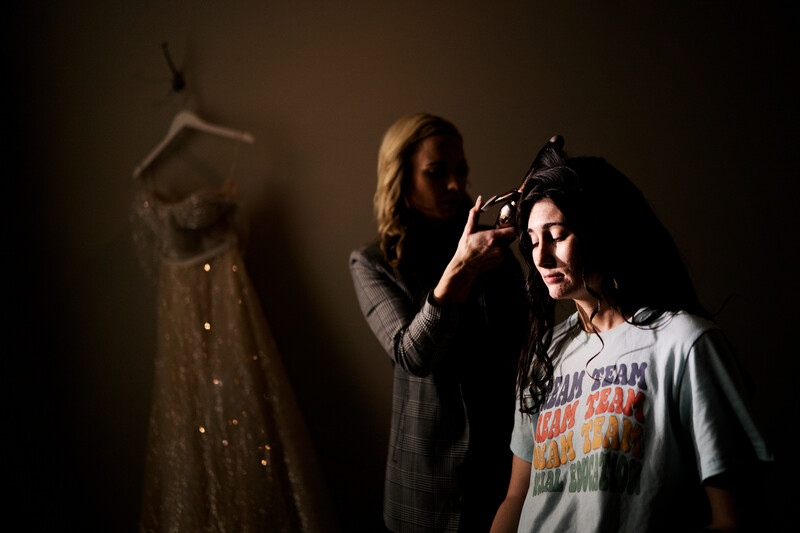
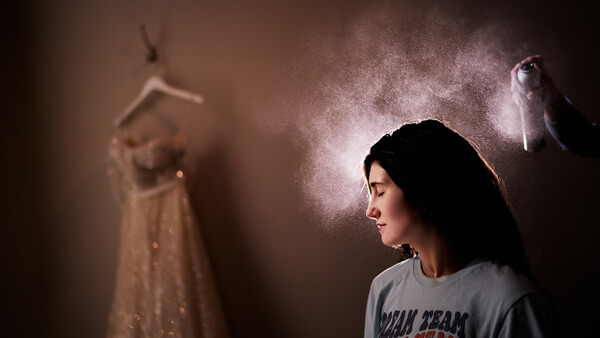
From here, one image I always try and get is the backlit hairspray image. It’s super easy to do and couples always love it. So I just ask the person doing hair and makeup if they can let me know when they are getting close to spraying the bride's hair. This allows me to have time to set up, without having to completely stage the image. It also lets me work on other ideas instead of just waiting on her to grab the hairspray. But once it’s time, I simply set my light up behind the bride and point it toward the camera. For this setup, I’m using the Reflex S paired with the Wide Optic. This gives me a nice focused beam of light so the light isn't bouncing all over the room. But it's wide enough to light up all the spray coming out of the can. For composition, I try to include the can for context, but I try not to show the actual person doing hair and makeup unless I know they are close friends or someone the bride would want to remember being there.

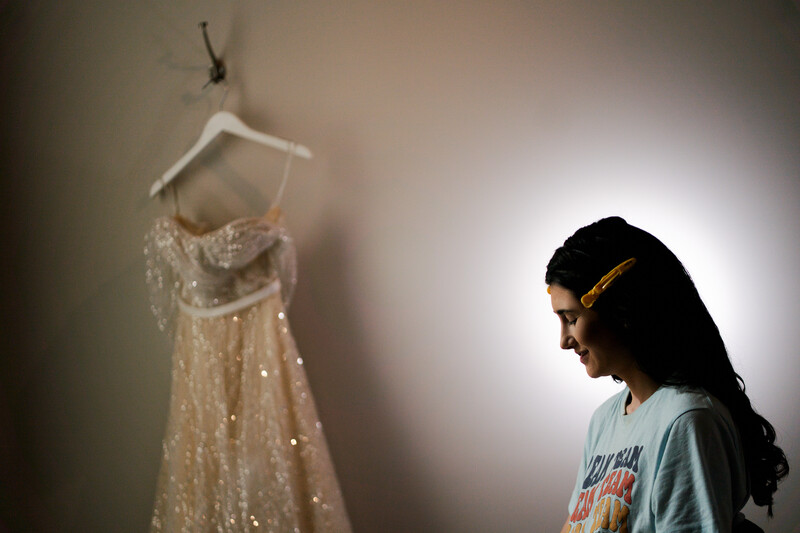
Another thing I do is to always keep an eye out for situations where I can maximize my setup time. So where the light is set up for the hairspray image, If I simply turn the light to face toward the wall, this gives me a nice glowing effect around the bride. Here I switched out the wide-angle optic for the 50-degree dome optic. This gives me a little less spread but is still wide enough to be able to frame the bride fully within the light. I also love that this optic has a nice round shape with a graduated falloff whereas some of the other optics have a harder edge to them.
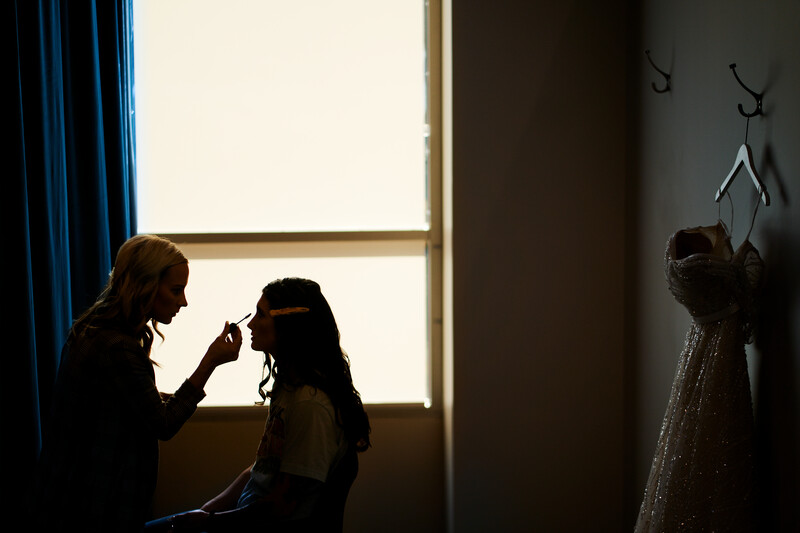
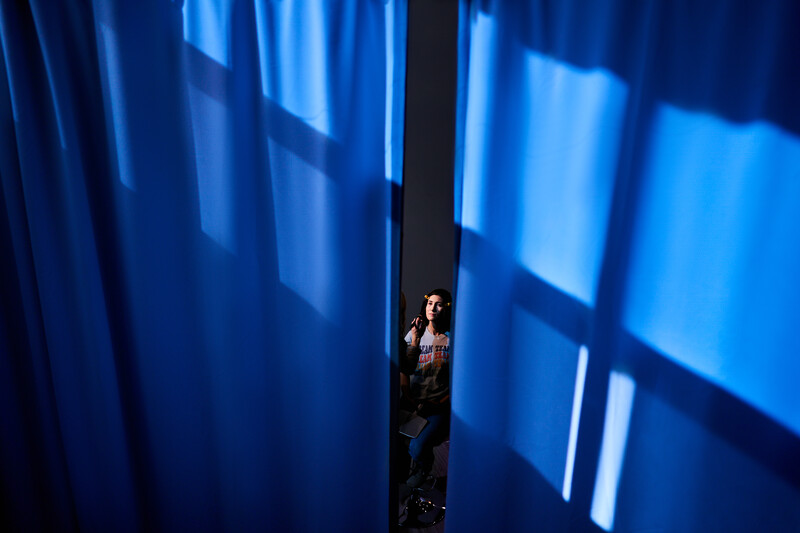
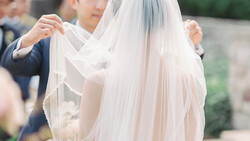
As the bride prep progresses, I start to look around for more interesting compositions. For this scene, I noticed the curtain that was part of the dressing room had a really interesting beam of light from the window on it. This reminded me of a portrait I had done a while back at a theater and so I decided to do something a little similar. With the curtain closed almost all the way, I framed the bride in the open space while lighting her with the Reflex S. But I wanted the resulting image to have a bit more pop to it, So I added a full CTO gel to the Reflex. What this does is makes the bride super orange. But when I adjust my white balance to compensate for the orange, it shifts all the natural light to a cool blue.
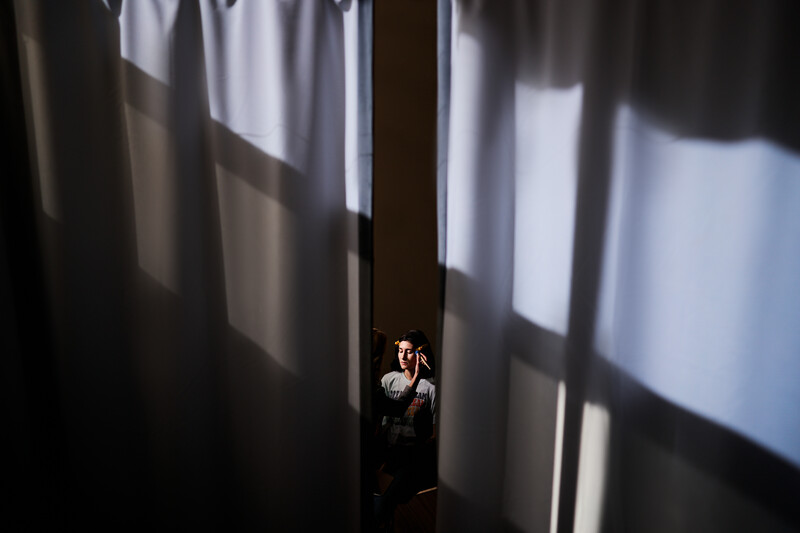
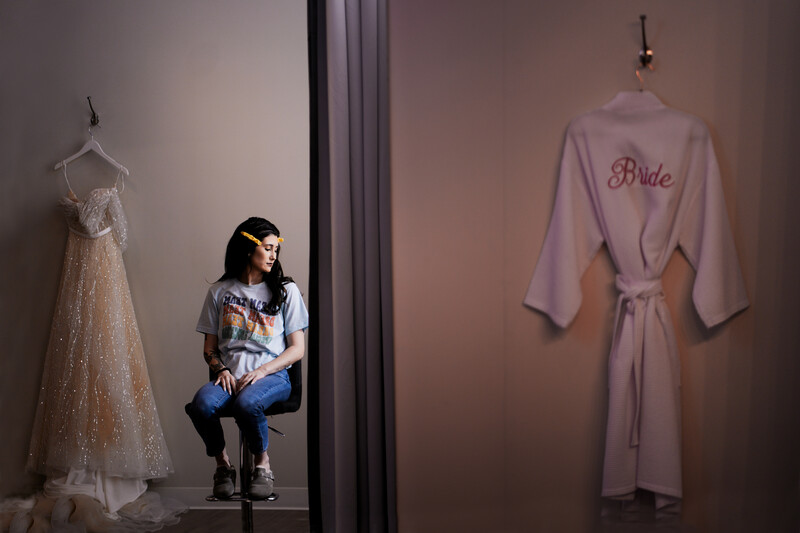
Another interesting composition I saw while taking this curtain image, was that I could see the bride through the mirror that was inside the dressing room. Hanging inside this dressing room was also a robe that said "bride". So from the right angle, I could actually get the bride, the robe that said bride, and the wedding dress all within one frame. From here I just had to wait for the bride to turn toward the window.
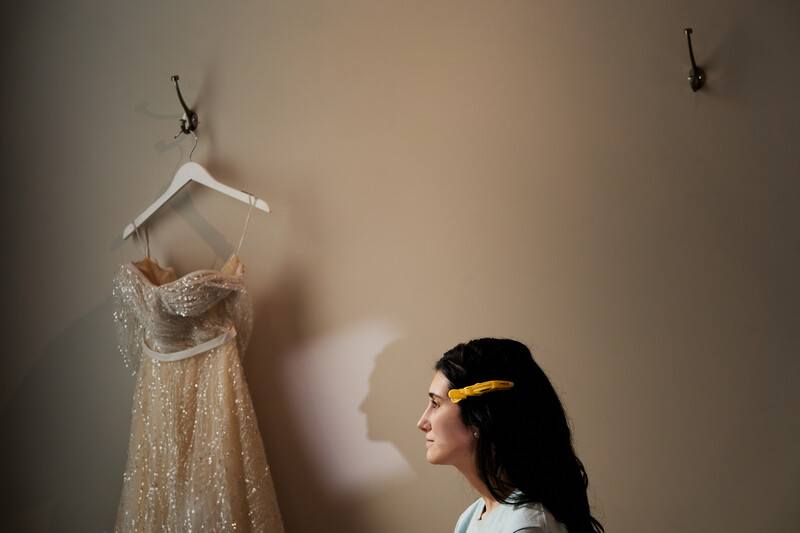
In addition to exploring compositions, I also start looking around for ways to create interesting light. This is when I noticed the makeup artist's mirror and thought that some reflected light off this mirror might give some interest. So I set the Stella Pro Reflex S up out of the frame and point it toward the direction I’d be taking photos from. From here, I just take the mirror and start moving the light around the scene to see what happens. What I saw was that from the right angle, I could use the reflection to light the bride while also projecting the shadow of her silhouette onto the wall.
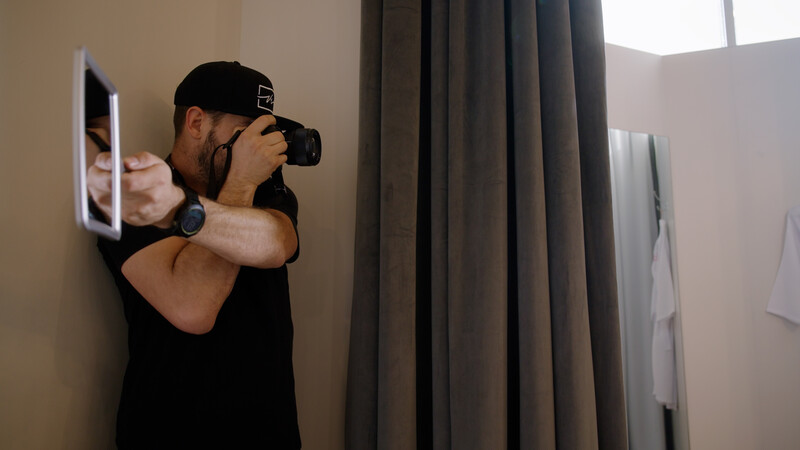
So with my camera in one hand and the mirror in the other, I can place the light right where I need it while also taking the image. This is a perfect example of where constant light is better than flash. Had I wanted to do this with flash, I'd have had to take a ton of test images just trying to get the mirror in the right position. And this is assuming I'd even had the idea in the first place since with flash, I couldn't simply just waive the mirror around to see what happen.
Ok so hopefully this gives you an idea of how I tackle the getting ready part of a wedding day as well as gives you some inspiration for your next session. If you have any questions, drop them in the comments.
Join the Fstoppers community for free
-
Post comments and join in the discussions
-
Browse the site ad-free
-
Share your work and get featured in the community
-
Compete in the photo contests for fun and prizes
1 Comment
Some great stuff in there Jason - definitely going to incorporate some of these in my next wedding!