

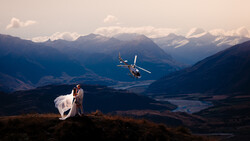
One of the hardest parts of a wedding day to take portraits is after dark. But it's also the time of day with the most potential.
While today's image is part of a bridal session, this is absolutely something I do on a real wedding day. When it comes to doing these on a wedding day, what I normally do is wait for all the traditional parts of the wedding reception to be over, and I simply leave for a few songs to try to find an idea or find a place that works for an idea I might already have in mind. Then, I get everything set up as much as I can and go back to the reception to let the couple know I’m ready wherever they are. Sometimes, they are ready right that second. Other times, it takes a few songs. The idea here is to get them a super cool and epic image without them feeling like I'm pulling them away from the fun. So, it’s just a matter of waiting until they are ready to take a break from dancing.
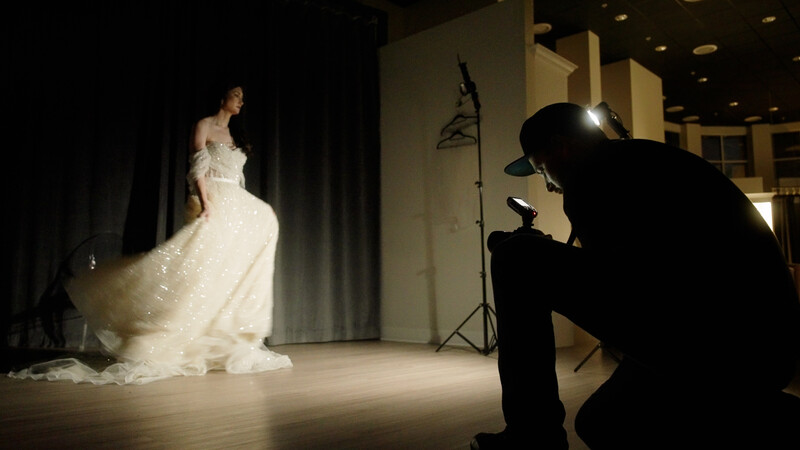
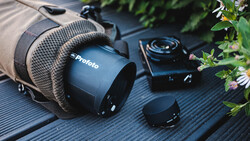
As for the gear, for this image I’m shooting on the Sony a9 paired with my 24mm f/1.4 GM lens. For lighting, I’m using two Stella Pro Reflex S lights on top of C8 automatic light stands from Cheetah Stand. The reason I love using the Reflex S is that it is a constant light that can also act like a flash with its digital burst mode. This is really important for this image because we are actually going to be using one light in constant mode and the second light in burst mode.
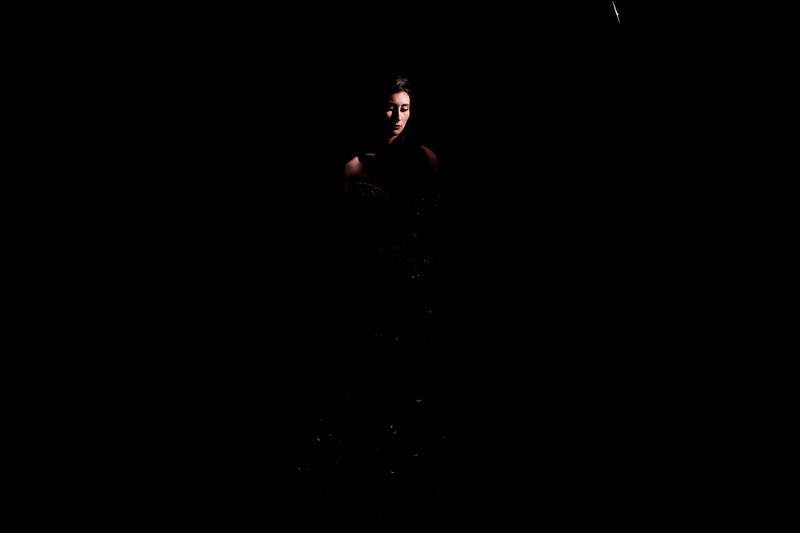
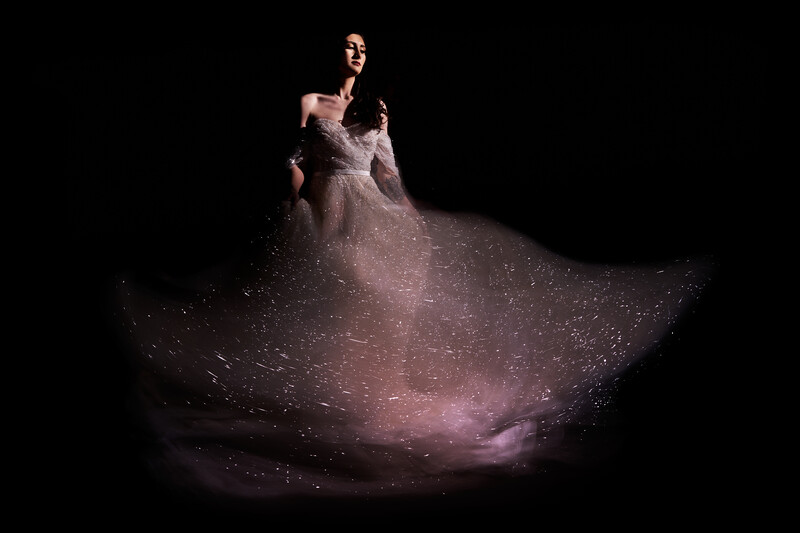
The idea here is to use a slow shutter speed in order to get some blurry motion through the frame. But with that, I don't want the bride's face to also be a blurry mess. So, I have one light set to burst mode with a spot optic attached in order to just light the bride's face. Because the light is in burst mode, the quick pop of light freezes the bride's face, even if she is moving or if the camera is moving.
The second Reflex S is going to be set to constant mode with a medium optic attached. This optic allows me to get enough spread of light in order to cover the dress. But I still have enough control so that I’m not lighting the floor or walls or letting this light spill onto the bride's face. And because I’m in constant mode, my camera's sensor will gather this light for as long as the shutter is open. So, to recap, one light is a quick pop that freezes her face. The second light is constantly on, so it gets seen the entire time the shutter is open.
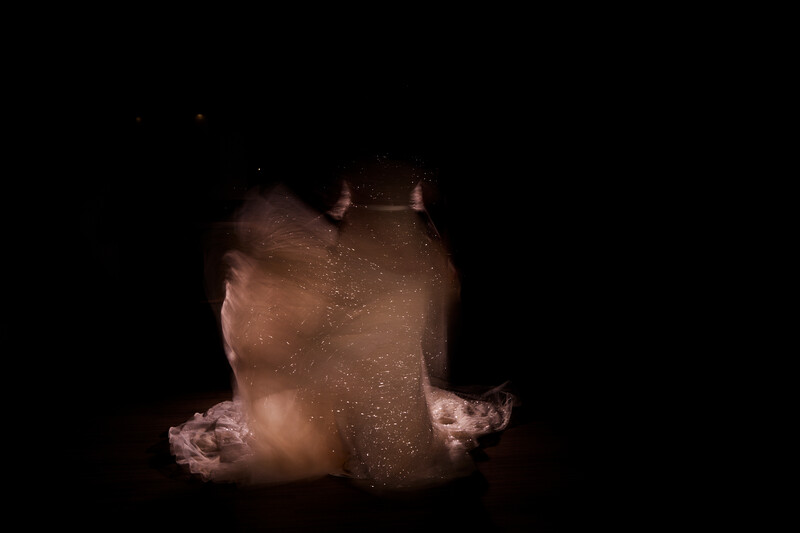
From here, I have my camera set to a .6-second shutter speed, ISO 100 and f/6.3 on the aperture. The reason I’m at f/6.3 is that I want my shutter speed to be long. And even in this pretty dark room, with this low of a shutter speed, I needed f/6.3 to fully remove any ambient light. Then, I set the power of my lights to match my camera settings. From here, I asked the bride to simply wave her dress around as I took photos. This waving motion paired with the constant lights shows a blur through the frame. But the pop of light from the other reflex S freezes the bride's face.


Join the Fstoppers community for free
-
Post comments and join in the discussions
-
Browse the site ad-free
-
Share your work and get featured in the community
-
Compete in the photo contests for fun and prizes
2 Comments
Awesome buddy! These lights seem incredible... But there will also be lots of photographers who carry an LED video light AND flash but would usually choose one. I love that you show them mixed, with great effect.
Thank you!! There are some really cool tings you can do when you mix the two together! :)