
There are a few behind the scenes videos out there that show photographers working with ice climbers, but often the climbs are right next to the road, making it convenient to bring tons of gear, power, and spend all day getting coverage. So what does it take to create those images when you're miles deep into the woods, and can only take what you can carry on your back? In this behind the scenes video, I'll show you the challenges of such a shoot.
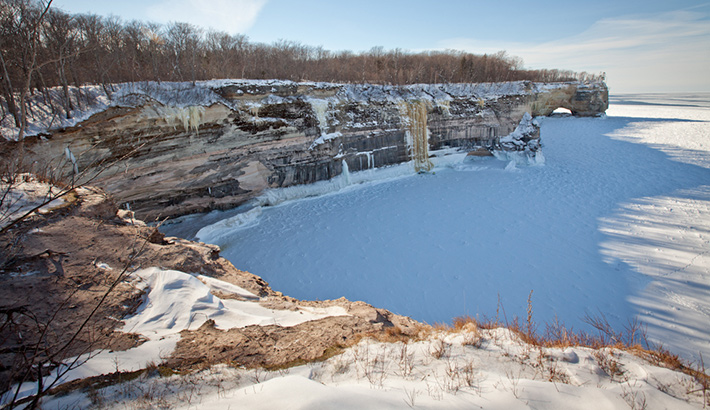
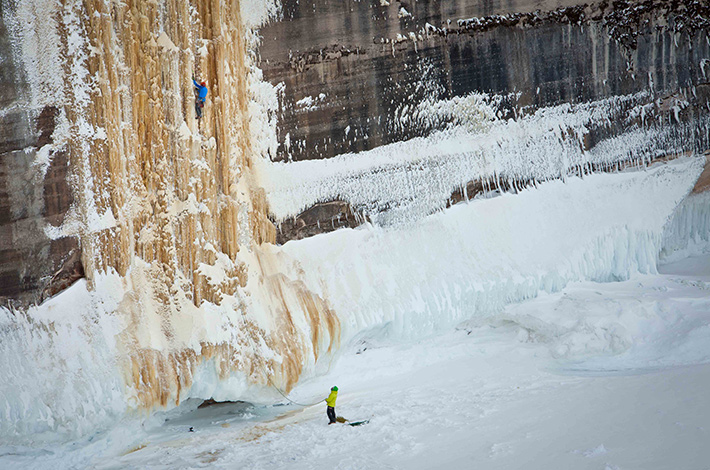
Climbers Adam Dailey and Jon Jugenheimer were in town for Michigan's annual Ice Fest, and we coordinated to head out to Pictured Rocks National Lakeshore for a climb called "HMR", a 60 meter yellow ice formation that is rarely seen, let alone climbed.
A lot of factors were working against me on this day. Temperatures ranged from below zero at night to only about 18°F during the day. 4-5 miles of snowy trails laid between us and our location, with about 1.5 miles of that being unbroken powder up to my hips. A 40lb pack included photo, video, and climbing gear. Lastly, with time to only shoot 2 climbs at the most, I had to hustle on location to get my shots.

A very cold year so far, we expected there would be some shelf ice at the base of the climb. In previous years, and in the spring, open water from Lake Superior often crashes right up against the base of the climb, making a very precarious belay area. While the shelf ice might seem stable and flat, along the shore are hidden spikes and fins that make snowmobile access almost impossible, which is why we had to ski in. I did my research by speaking with the Park Service and locals to make sure we knew the best route to get to the location. Other images of this climb existed, so I used those for reference when planning what shots I wanted to get.
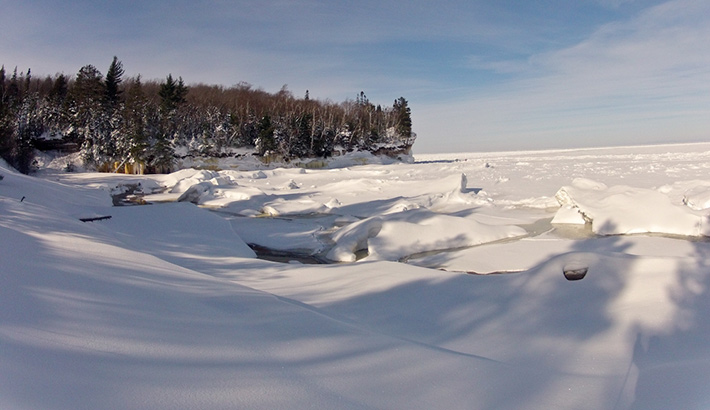
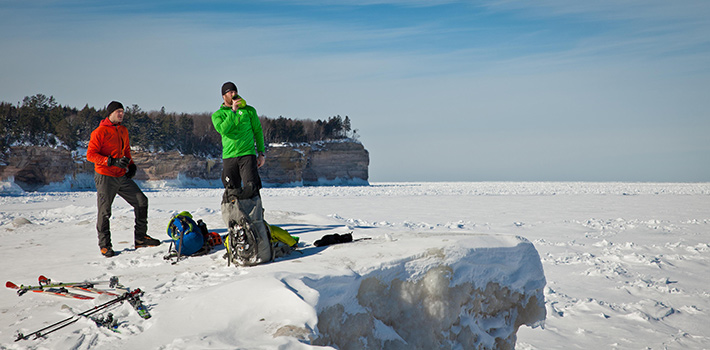
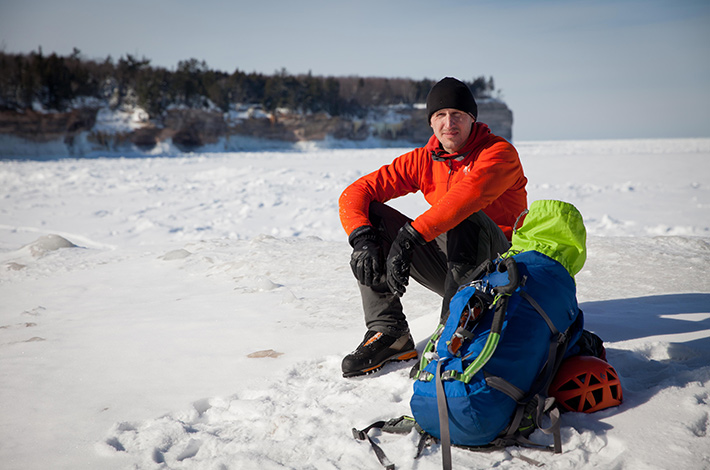
After the first few miles we stopped at the beach, and the climbers took a break to have some water and snacks. Our bodies were burning calories very quickly from the combination of cold weather and skiing. While I wanted to have a break myself, I had to get my shots before I could relax. I staged their packs and gear a bit, but posing people isn't really my style. I will ask them to take a break on a lookout or in a place with better light, but I try to shoot candidly whenever possible. To me, athletes aren't models, and I find that if you get too specific and try to pose too much, it will come across as forced and very unnatural. My direction mostly comes in the form of, "Look at the cliff over there," or "take a drink of water."
The shots from the lookout were simple enough to execute, but waiting for the climber to ascend up the climb before shooting meant waiting in the cold. Handwarmers were a must. There was another team shooting from the ground, so once we both had our shots, I packed up my kit and headed to the top of the climb, about a 10 minute hike.
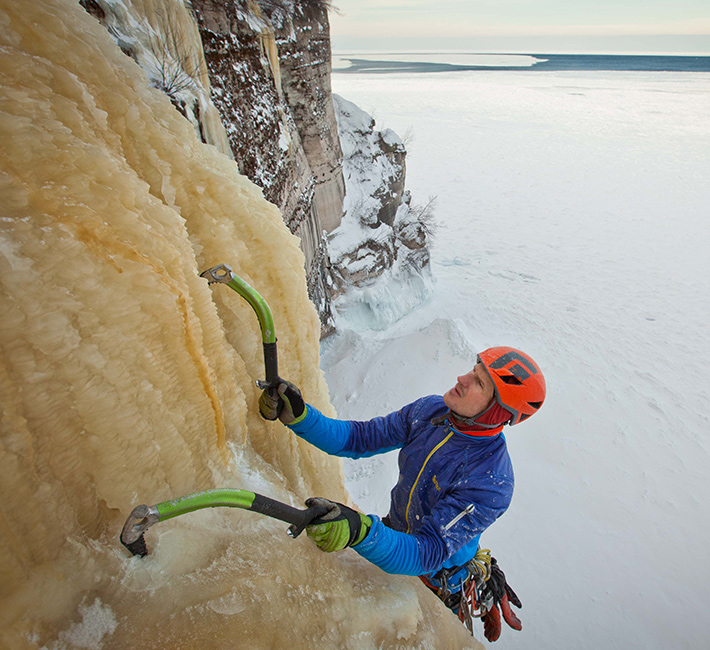
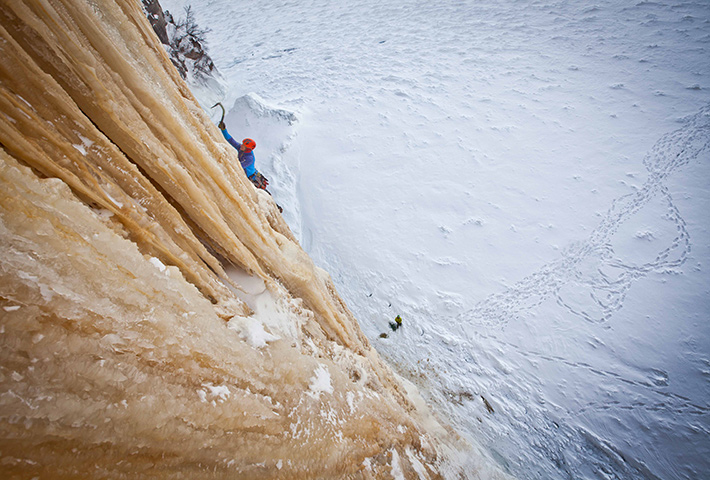
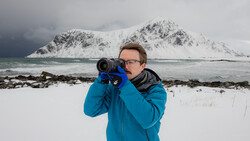
I had previously rigged an anchor with a rope ready to go, and buried it in the snow so they didn't get into any photos. I uncovered them and got suited up for rappelling as quick as I could, knowing that Adam had already been on the wall for over an hour! As noted in the video, rappelling down to a climb as large as this can be tricky to do. The anchor system for my rappel line was off to the left side, while Adam was making his way up the right side. The angle dropped me further away than I wanted, so I had fight with the rope tension to get over further.
There was still quite a bit of water flowing over the side, which got on the rope and some of my gear. This made my descending device icy, and it was rather nerve wracking to be dangling from a small rope almost 200 feet off of the ground.
By the time I was done getting my shots from above, Adam had been on the wall for over 2 hours. He never weighted himself on a screw for a break, so he undoubtedly made the longest send of that route in history. The time was around 4:30 when he made it up, so we didn't have time for Jon to take a turn himself; I was hoping to get some more top-down shots from a better angle but had to live with what I got from Adam's climb. Packing gear took about 30 minutes, and we still had to hike out, this time in the darkness. Cold winds picked up and we got moving. We made it back to the van around 8:30pm.
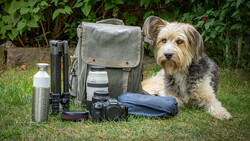
My kit included the following video and photo gear. I went back and forth over the specifics of my kit for weeks before my trip, as I wanted to keep the weight down as much as possible. Each body and lens served a specific purpose to capture preconceived shots.
Canon 5D Mark II (for stills)
Canon 60D (for video)
Canon 16-35 L II
Canon 24-70 L II
Sigma 17-50 2.8 IS
Canon 70-200 L 2.8 IS
GoPro Hero 2
Rode VideoMic Pro
Zoom H1 Audio Recorder
82mm Circular Polarizer
77mm Circular Polarizer
A handful of SD and CF cards
4 Canon Batteries
Induro CT014 tripod
I packed all of my gear into padded Lowepro bags, and then placed those into a large, 75 liter backpack. I talk more about my kit contents in this article I posted about packing and prepping for shoots in winter conditions.

For the adventurous, some of my climbing gear included:
Black Diamond 18mm Nylon Daisy Chain
2x 30ft of 1" webbing
7 locking biners
1 Petzl Grigri 2
1 Petzl Ascension Ascender
1 9.8mm rope, 20 meter
La Sportiva Nepal EVO GTX boots
Black Diamond Cyborg crampons
On a side note, knowing that I wanted to capture some visuals of myself working meant I needed to bring a little extra gear and plan to get shots of myself. You can probably tell from the video that it's pretty rough, but for a BTS video I felt that I needed content over quality. The BTS footage was secondary and I simply didn't have the time to make it amazeballs. I found that having a GoPro attached to the top of my hiking pole made it much easier to get quick cuts and soundbytes while snowshoeing to the location. Having to stop and pull my DSLR out every time I wanted a BTS shot would have taken too much time and been a headache.
Thanks to Aaron Peterson and Dan Englund from Clear and Cold Cinema for the video footage of me rappelling.
Here are a few of the stills I captured, as seen in the video.


I spent a few weeks shooting ice climbing and landscapes while in Michigan's Upper Peninsula. If you'd like to see more, check out the Munising gallery on my website. I'm happy to answer any questions about the setup or the shoot, so feel free to leave a comment.


21 Comments
when i read the word EPIC i know a wannabe hip blogger writes BS.
I wouldn't go THAT far but i do epically hate the epic misuse/bastardization of the word epic. I think most outdoorsmen (and human-beings) feel the same.
On another note..
Im from MI and never have made it up to climb at pictured rocks. I moved to CO when I was 18 and spent my winters commuting on the weekends from Leadville or Durango to Ouray. I did however climb in MI at an old silo of a couple I met and I think they hold a mini festival at their property every year:) Maybe they will see this and confirm :D
Yeah epic is epically overused, it's just such an epic word. Epic.
jniz, I'm living just outside of Durango now, and run over to Ouray for climbing, too funny. I did hear of silo climbing in Chicago, never been there myself but in MI there's an apple orchard where they have some pretty decent climbing, it's called Peabody - http://peabodyiceclimbing.com/
No way thats the place if I'm not mistaken. Its this girl named brittany and her husband. they would tear out a few apple trees, suspend them from a crane with plywood tacked on and spray it with ice.
How do you like Durango? Get to the Sailing Hawks yet? That area of CO is amazing. I miss living there but definitely needed a break from small town life.
I'm about 45 minutes away. So far it's a been tough adjusting to small town/desert like area, but I've got just enough clientele from back home and gigs I can do remotely to get by. I love the trails nearby, but haven't been here long enough to explore most of them yet. I dig all the microbrews in Durango though for sure ;-)
I'm sorry to say it, but audio in the movie is awful. I understand
that's recorded with GoPro, but every bump is really loud and it's
impossible to concentrate on what you saying. It ruins the pleasure of
watching the video.
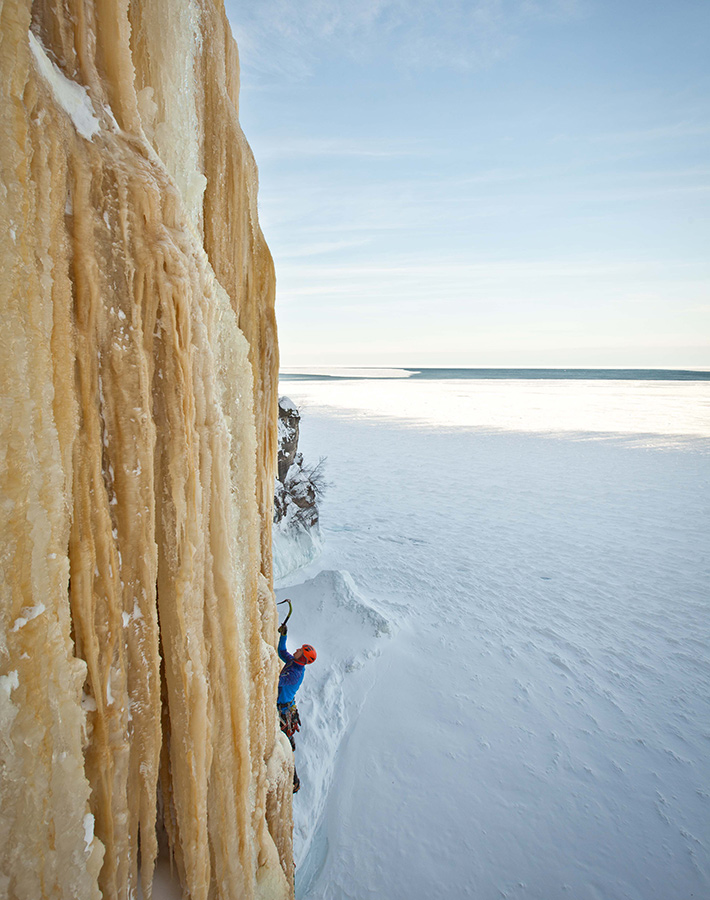
My favorite picture is 5th from the bottom -
fine composition and you can see how high this guy got. On the others
you don't really feel the high that strong.
Keep up the good work!
I completely agree about the audio. I recorded some ADR and matched it up well, but it so obviously ADR that I felt it was even more distracting than the original audio with a bit of EQ and noise cleaning. Thanks for checking it out.
Did you find out what was making all this noises Mike? Were you hitting the camera / stick it was mounted on with something? What would you do different Mike if you were to record audio with GoPro again? Dose anyone here know the solution to this problem? Would be great to learn from it! :)
Audio on Gopros are awful, the sound need to travel inside the waterproof case. Alternative, use your phone to record the audio and mix it up in post. If you're shooting outside, a mic that's fixed onto your collar could be a good idea, don't forget the windstopper to avoid SHSHHRHRHRHRHRHRHRHHRHSHHSHSHHHSSHHRHRHSHSHRHRHRSHHRHRSHRHRH
In the opening it's the sound of my snowshoes crunching through the snow. Any slight shake or bump will create a very noticeable "tick" or "pop" as well. I found that ramping up the mids and highs while lowering the low end did quite well in rescuing the natural sound, and then a gentle noise reduction helped too.
If I were to do it again? Hmm I suppose I'd pack my Zoom H1/lav mic kit in my pocket and take 5 minutes to stop and mic myself, then sync in post. I did record myself saying everything to the camera with the lav mic once I got to the lookout, but I felt that it told the story better by having me hiking.
You ever think to rappel aussie style? I've done it for some of the climbing shoots I do and it makes seeing everything below you easier
Aussie style? Got a link?
Rappelling facing down the wall.
as a professional climber... just don't do this. Rappel the standard way, unless you are a rigging specialist. Too many injuries happen and it is not efficient in the first place. You will always be able to get the shot on a standard rappel, even more so actually because you are always in a position to quickly move up and down your system.
I wouldn't call myself pro but I've been climbing 9 years and would like to think I know my way well enough. It's worked better for me but to each his own I suppose.
agreed, to each his own, especially in when it comes to climbing/rigging. But then surely you know that Aussie rappelling is fringe at best (and more of a military tactic) and no climbers ever use it. It does look badass however and as such has contributed to more than a few accidents by individuals who don't have much experience because it is trickier than a standard rappel. I just don't want another accident to happen, especially unnecessarily. To be more constructive though, here are a few reasons why I prefer a standard rappel: 1. You can use a gri-gri. This allows you to rappel on a single strand so you have more rope to work with and it auto locks so you can go hands free. 2. If you want to switch out lenses, throw in another card, eat some food, it's much easier done sitting up in the rope than facing down. 3. Because you are on a gri gri and facing up, you can quickly decend or ascend by clipping a jumar in and chnage your POV in a snap. 4. as you descend you can put cams or ice screws in for directionals insted of being relegated to the fall line.
I will admit that when I first started, in my infinite wisdom wanted so badly to Aussie style that I looked up ways to do it. I saw one accident after another online. I almost decided to do it but my buddy talked me out of it. While I eventually did Aussie I was glad to have waited till I wasn't nearly as gung-ho to fly down a wall face forward.
In the end rigging is all situational, I won't Aussie if I don't think it will be a help.
How about these 2 crazy Russian guys climbing 650m tower without rope?
http://www.youtube.com/watch?v=eUD-Au5O-30
Did you use the 16-35 for the serie ?
A bit too much of DoF to my eyes, but the serie is good.
Mike, if you want to see some inspiring videos / pictures, check out chuck fryberger climbing movies like The Scene (the best movie realisation so far), check out Sam Bié pictures too, worth watching.
Yeah I used the 16-35 II lens. Thanks for checking it out.
why didn't you just hand that poor guy the rope? :(