Amongst the drones available on the market in 2017, the DJI Spark is surely not amongst the top ones in terms of files quality. The sequences it creates are quite difficult to color grade in postproduction and thus it makes it hard for videographers to mix the clips with footage from another camera. However, there are ways to improve what you can get out of Spark’s videos. Casey Faris gives us one of the tricks he uses to maximize the dynamic range of the images.
The DJI Spark is without a doubt an incredibly attractive product to get into aerial photography and videography. But its price comes at the cost of more advanced features found on the Phantom and Mavic, such as log footage. The sequences produced by the Spark are very contrasty, sharp, and quite saturated. It’s not a bad thing for average users, but it’s far from ideal for those who want to color grade their footage.
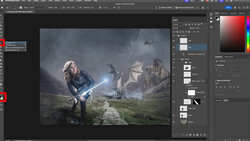
One issue is recovering details in shadows and highlights. In the video above, Faris shows how by underexposing the footage it’s possible to recover details from the shadows while keeping information in the brightest part of the image. To maximize the dynamic range in this way, he relies on DaVinci Resolve and a simple curve, but surely the same could be achieved with Adobe Premiere Pro if desired.
This technique won’t really add dynamic range to your footage, but instead, maximize the data the Spark’s system record. Note, however, that by pushing the shadows to gain details in underexposed area, the recovered zones may look a bit mushy and lack sharpness or details. But while you have the money and job to justify buying a Mavic, this is a great alternative to make the most out of Spark’s footage.

Join the Fstoppers community for free
-
Post comments and join in the discussions
-
Browse the site ad-free
-
Share your work and get featured in the community
-
Compete in the photo contests for fun and prizes
No comments yet