
One of the most consistent opportunities we have as photographers to earn money with our cameras is photographing real estate and hospitality properties, such as Airbnb rentals, and contrary to popular belief, it doesn’t take a huge investment to offer quality images for this purpose.
I have never given into the common industry advice that one must specialize to be successful in photography, preferring instead to put in the extra effort required to get good at any photo genre I dip my toes into. This has ultimately been a successful strategy for me, allowing me to create a varied selection of photo-related income streams rather than rely on just one corner of the market. Shooting real estate, hospitality, and architecture has provided an extremely stable and consistent source of income along with my other offerings, and in the five or so years I have been actively doing it professionally, I have tried a vast array of different methods and gear to create professional quality work for my clients. After all that experience testing different approaches, I came to realize it's actually quite possible to offer real estate imagery with a high level of polish without spending your life savings on gear.
While real estate photography does require a semi-specific setup, there is no need to start out with the best and most expensive equipment, and this article details my basic guidelines for what gear you should consider purchasing to start a real estate photography workflow. Yes, there are many options for higher-end kits to do the job, and I will offer some suggestions for those that want to spend a little more early on, but this “beginner’s” kit guideline is more than capable of giving you the tools you need to do it well with a little practice.
Camera
One of the areas that offers you the most budget-conscious value when equipping yourself to shoot real estate is starting with an APS-C mirrorless camera body. You can even get on quite well with an older, used camera body, because the specific workflow requirements for the process mean many of the features you pay for in a cutting-edge camera body may go completely unused.
First off, architecture work is primarily done on a tripod, due to the fact that both of the most popular and effective workflows depend on taking multiple exposures of each scene and blending them together to create the best result. Because of this fact, your camera body does not require blazing-fast autofocus (or any at all, which I will explain more in the lens section) or class-leading dynamic range. On top of this, the extra depth of field inherent in APS-C sensor-based cameras can be a boon to your workflow because it means more of your scene will be in focus compared to a full frame camera with identical aperture settings.
From my experience, the two most value-oriented camera bodies you should consider when gearing up to shoot real estate are the Fujifilm X-T2 and the Sony a6300, which can both be found on the second-hand market for around $500. As a full-time Fuji shooter myself, I do prefer the X-T2, but this decision involves some personal preference, and when purchasing, one should try to get their hands on both cameras to see which one feels more comfortable. Both cameras offer 24-megapixel resolution, which I believe to be the optimal baseline for making professional architecture-based imagery, giving you a little room to crop as needed (although it is best to frame your shot so that no cropping is required). They also both have focus peaking for easily obtaining sharp focus if using a manual focus lens, as well as some other features that will make your life easier, such as a built-in two-second shot timer.
Lens
The main requirement when choosing a lens for real estate work is that it is very wide, ultra-wide in fact. On an APS-C body, the longest focal length that is usable is 14mm (21mm full frame equivalent), and I personally believe that to be too long still. Both of the cameras I suggested in the last section have a good variety of options that are even wider, and perhaps none offers as much overall value as the 7Artisans 12mm f/2.8, which, coming in at only $150 brand new, offers a 102-degree angle of view, allowing you to shoot in more cramped spaces than with narrower options. It is a fully manual lens, meaning you will have no autofocus, but this is not a drawback. Shooting a lens as wide as 12mm at the apertures I frequently shoot real estate (f/5.6-f/8), one must only turn the focus ring until the infinity mark is lined up, and everything in your scene from about three feet on will be in complete focus, and the focus peaking feature on the aforementioned cameras can further help you confirm accurate focus quickly and easily. Since the scene will be static and you will be shooting on a tripod, you can even line up infinity and put a piece of tape on the lens to keep it in that position and forget about refocusing for the entire shoot.
For a considerably higher price, you can find even wider lenses on the market, such as the Laowa 9mm f/2.8, which is available for both cameras for about $500 new and less used. Those that desire the increased flexibility of a zoom lens can typically find the excellent Fujifilm XF 10-24mm f/4 and Sony 10-18mm f/4 lenses on the used market for under $500.
Tripod
A stable tripod is crucial in producing quality real estate images. Luckily, there is a vast variety of tripods on the market for every budget. When I first started out, I used a heavy, older tripod with thick steel legs and a video head. The extra weight and leg strength of that tripod offered me a very stable shooting platform. These days, there are some aluminum tripods that offer very good stability with less weight and bulk for not very expensive compared to some of the more established brands. One tripod I have found that offers good value for this workflow is the Vanguard Veo 3T 235ABP, which is available for $200. You can find even more affordable aluminum tripod options, but when shopping around for the best price, try to find one that has a head capable of 360-degree panoramic swiveling, the ability to easily switch to a vertical camera orientation, and a bubble level to allow you to keep your scene properly oriented as to reduce improper keystoning (the tilting of straight vertical lines in your scene).
Other Considerations
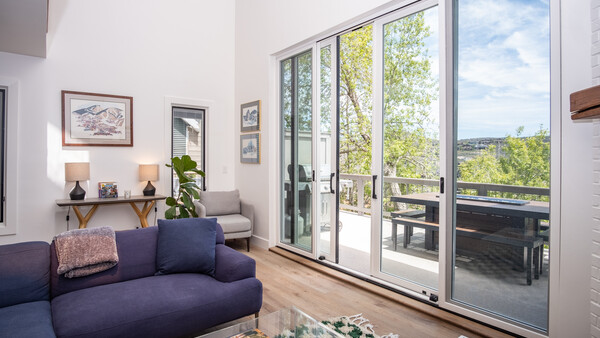
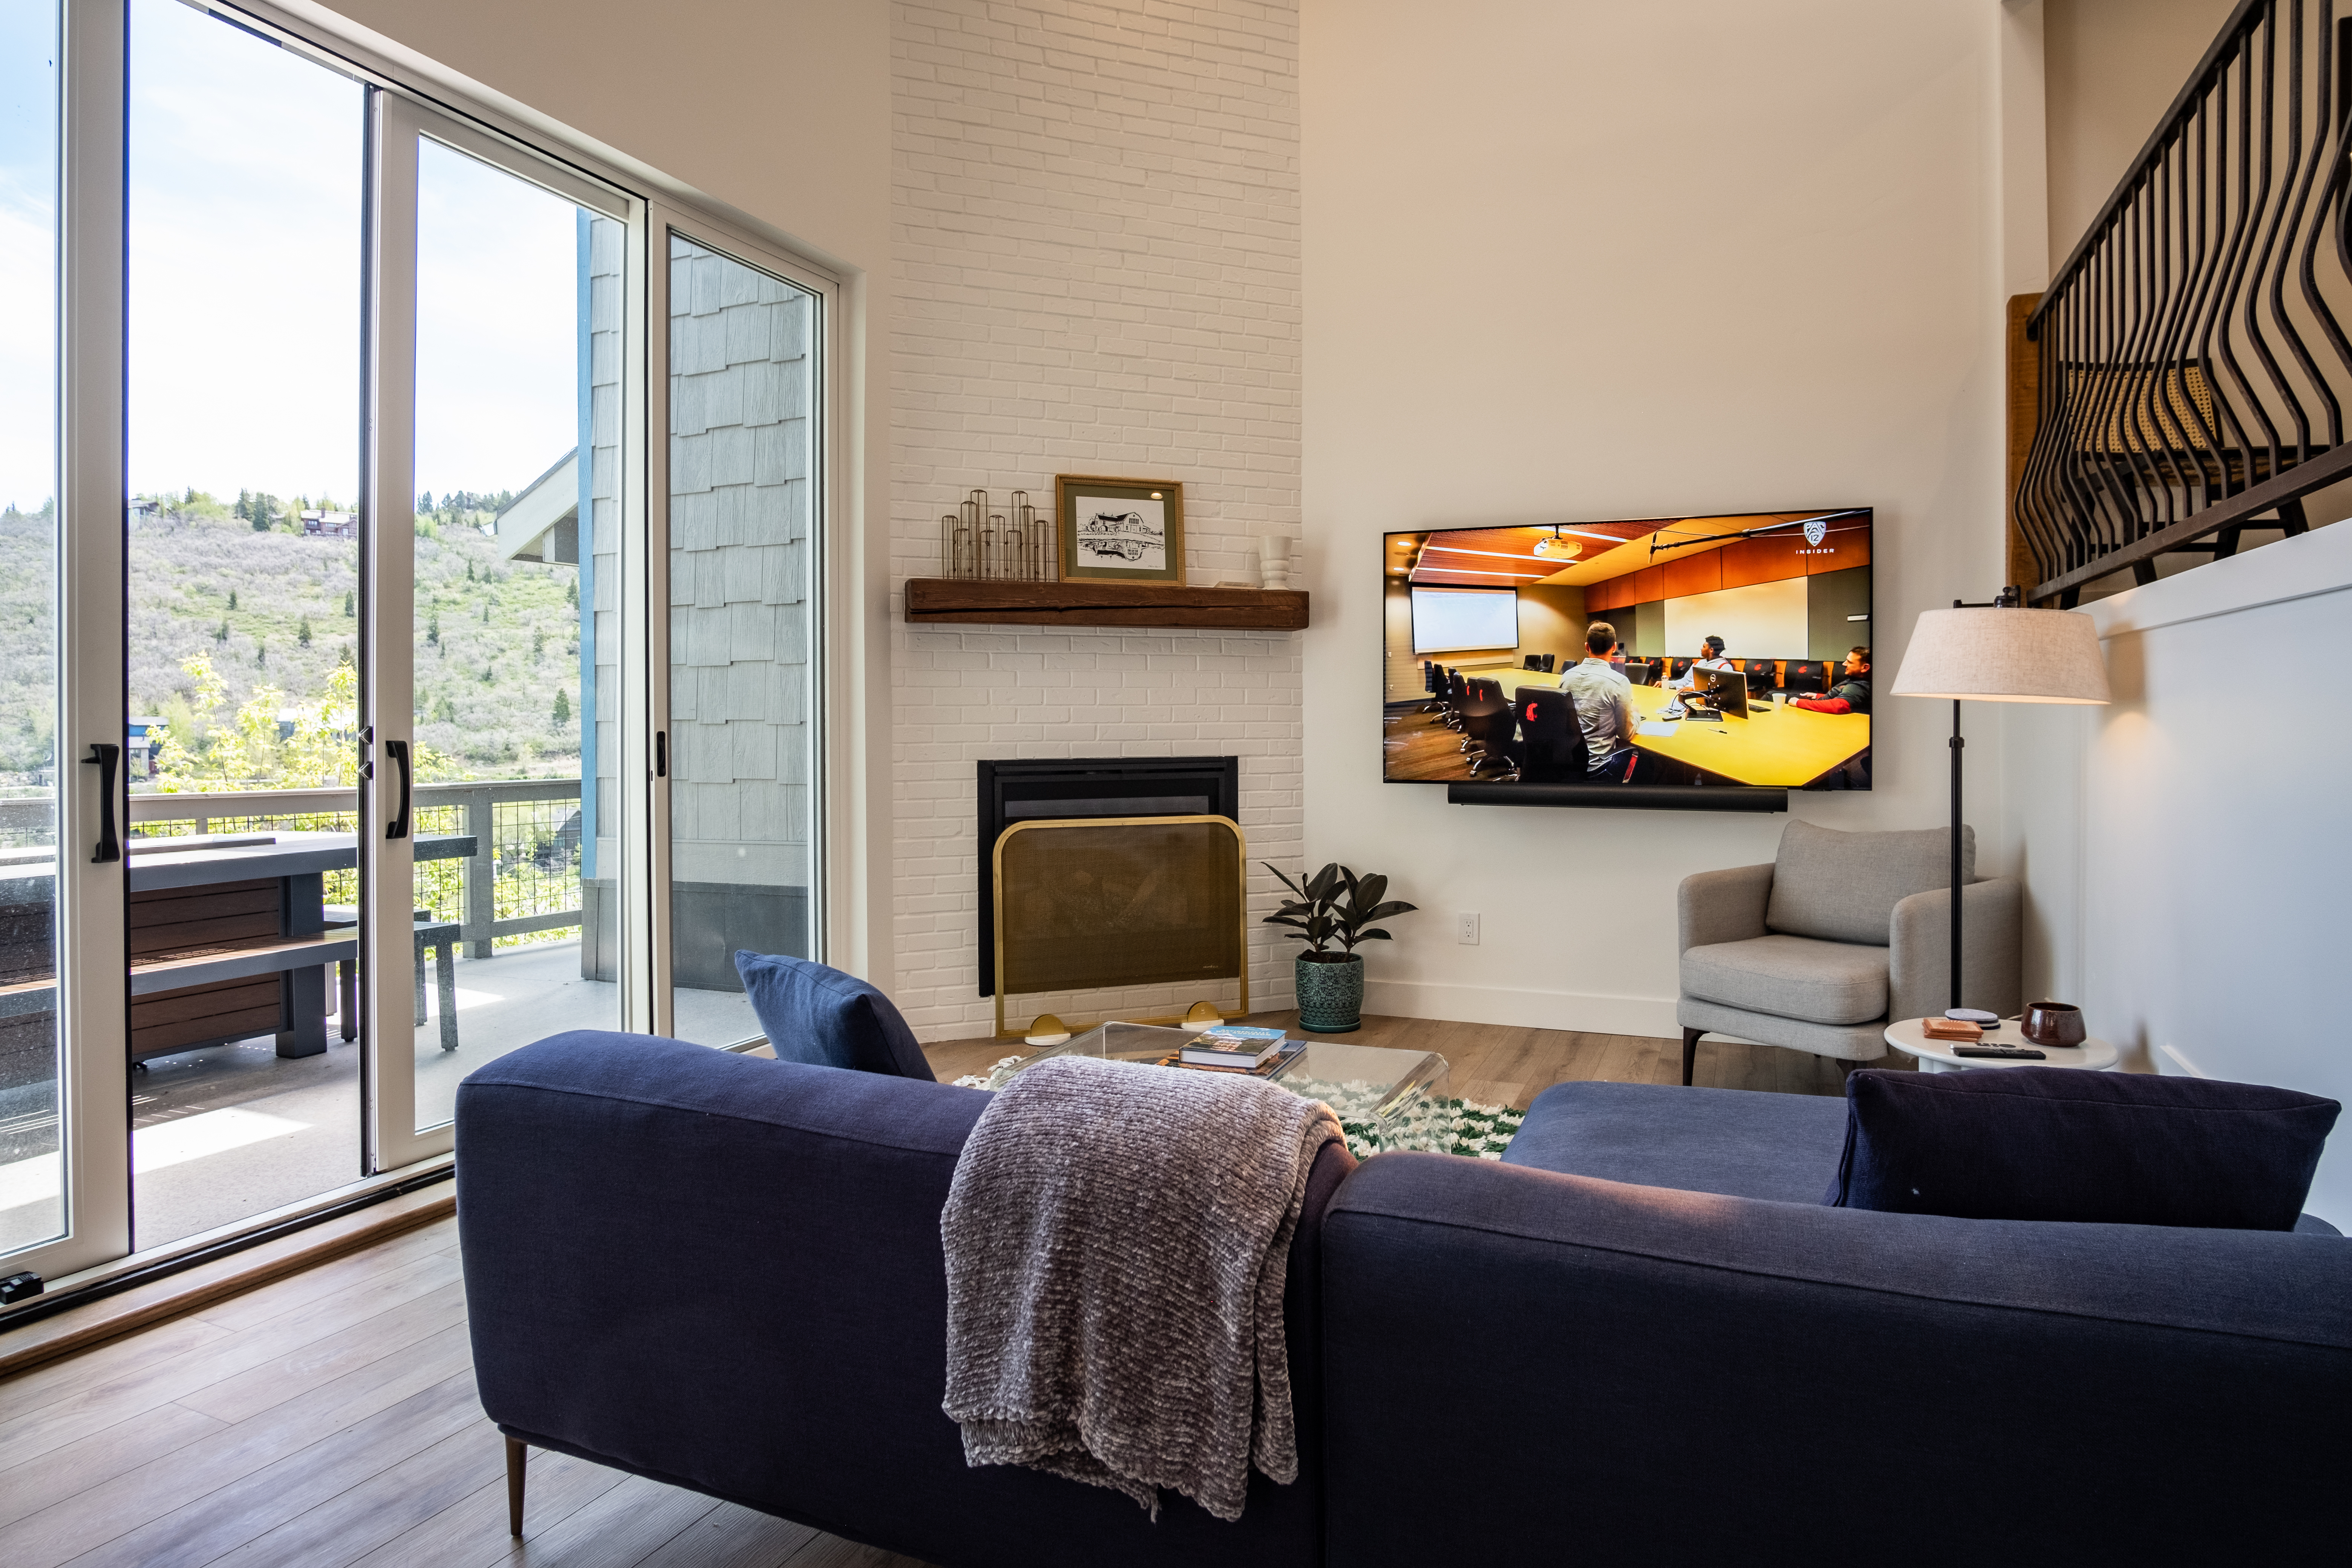
The most common way of starting out doing interior real estate photography is using a basic HDR workflow, where you take a series of images with different exposure values: underexposed, evenly exposed, and overexposed. In the editing process, these are merged together to provide a scene where your room is exposed well, but you can also see at least partially out any windows, which would otherwise be blown out due to dynamic range limitations in cameras. For those wanting to get an even more polished level of window view visibility, a technique commonly referred to as “flambient” uses a flash to boost room exposure value while setting the camera’s ambient exposure to the correct value for a perfectly clear “window pull,” as they are sometimes referred to. This technique also allows you to more accurately control white balance in the scene. I believe it is often used too aggressively, creating uncanny or unnatural images, but the flambient workflow is used by many of the very best real estate photographers in the business.
You can get started with a flambient workflow with the addition of a simple $65 Godox TT600 speedlight, but my preference for this workflow is the more powerful, but still compact, Godox AD200 for about $300, along with a wireless flash trigger, such as the $60 Godox Xpro triggers. The extra power available from the AD200 will allow you to use the flambient technique in larger rooms that need more juice to expose properly.
Additionally, a very handy tool for shooting interior work is a wireless remote camera trigger, such as the Pixel TW-283, which can be had for about $40. By remotely triggering your camera, you reduce the effect of micro-vibrations on your image from physically pressing the shutter button, but you can also just turn on your camera’s two-second timer to accomplish the same thing.
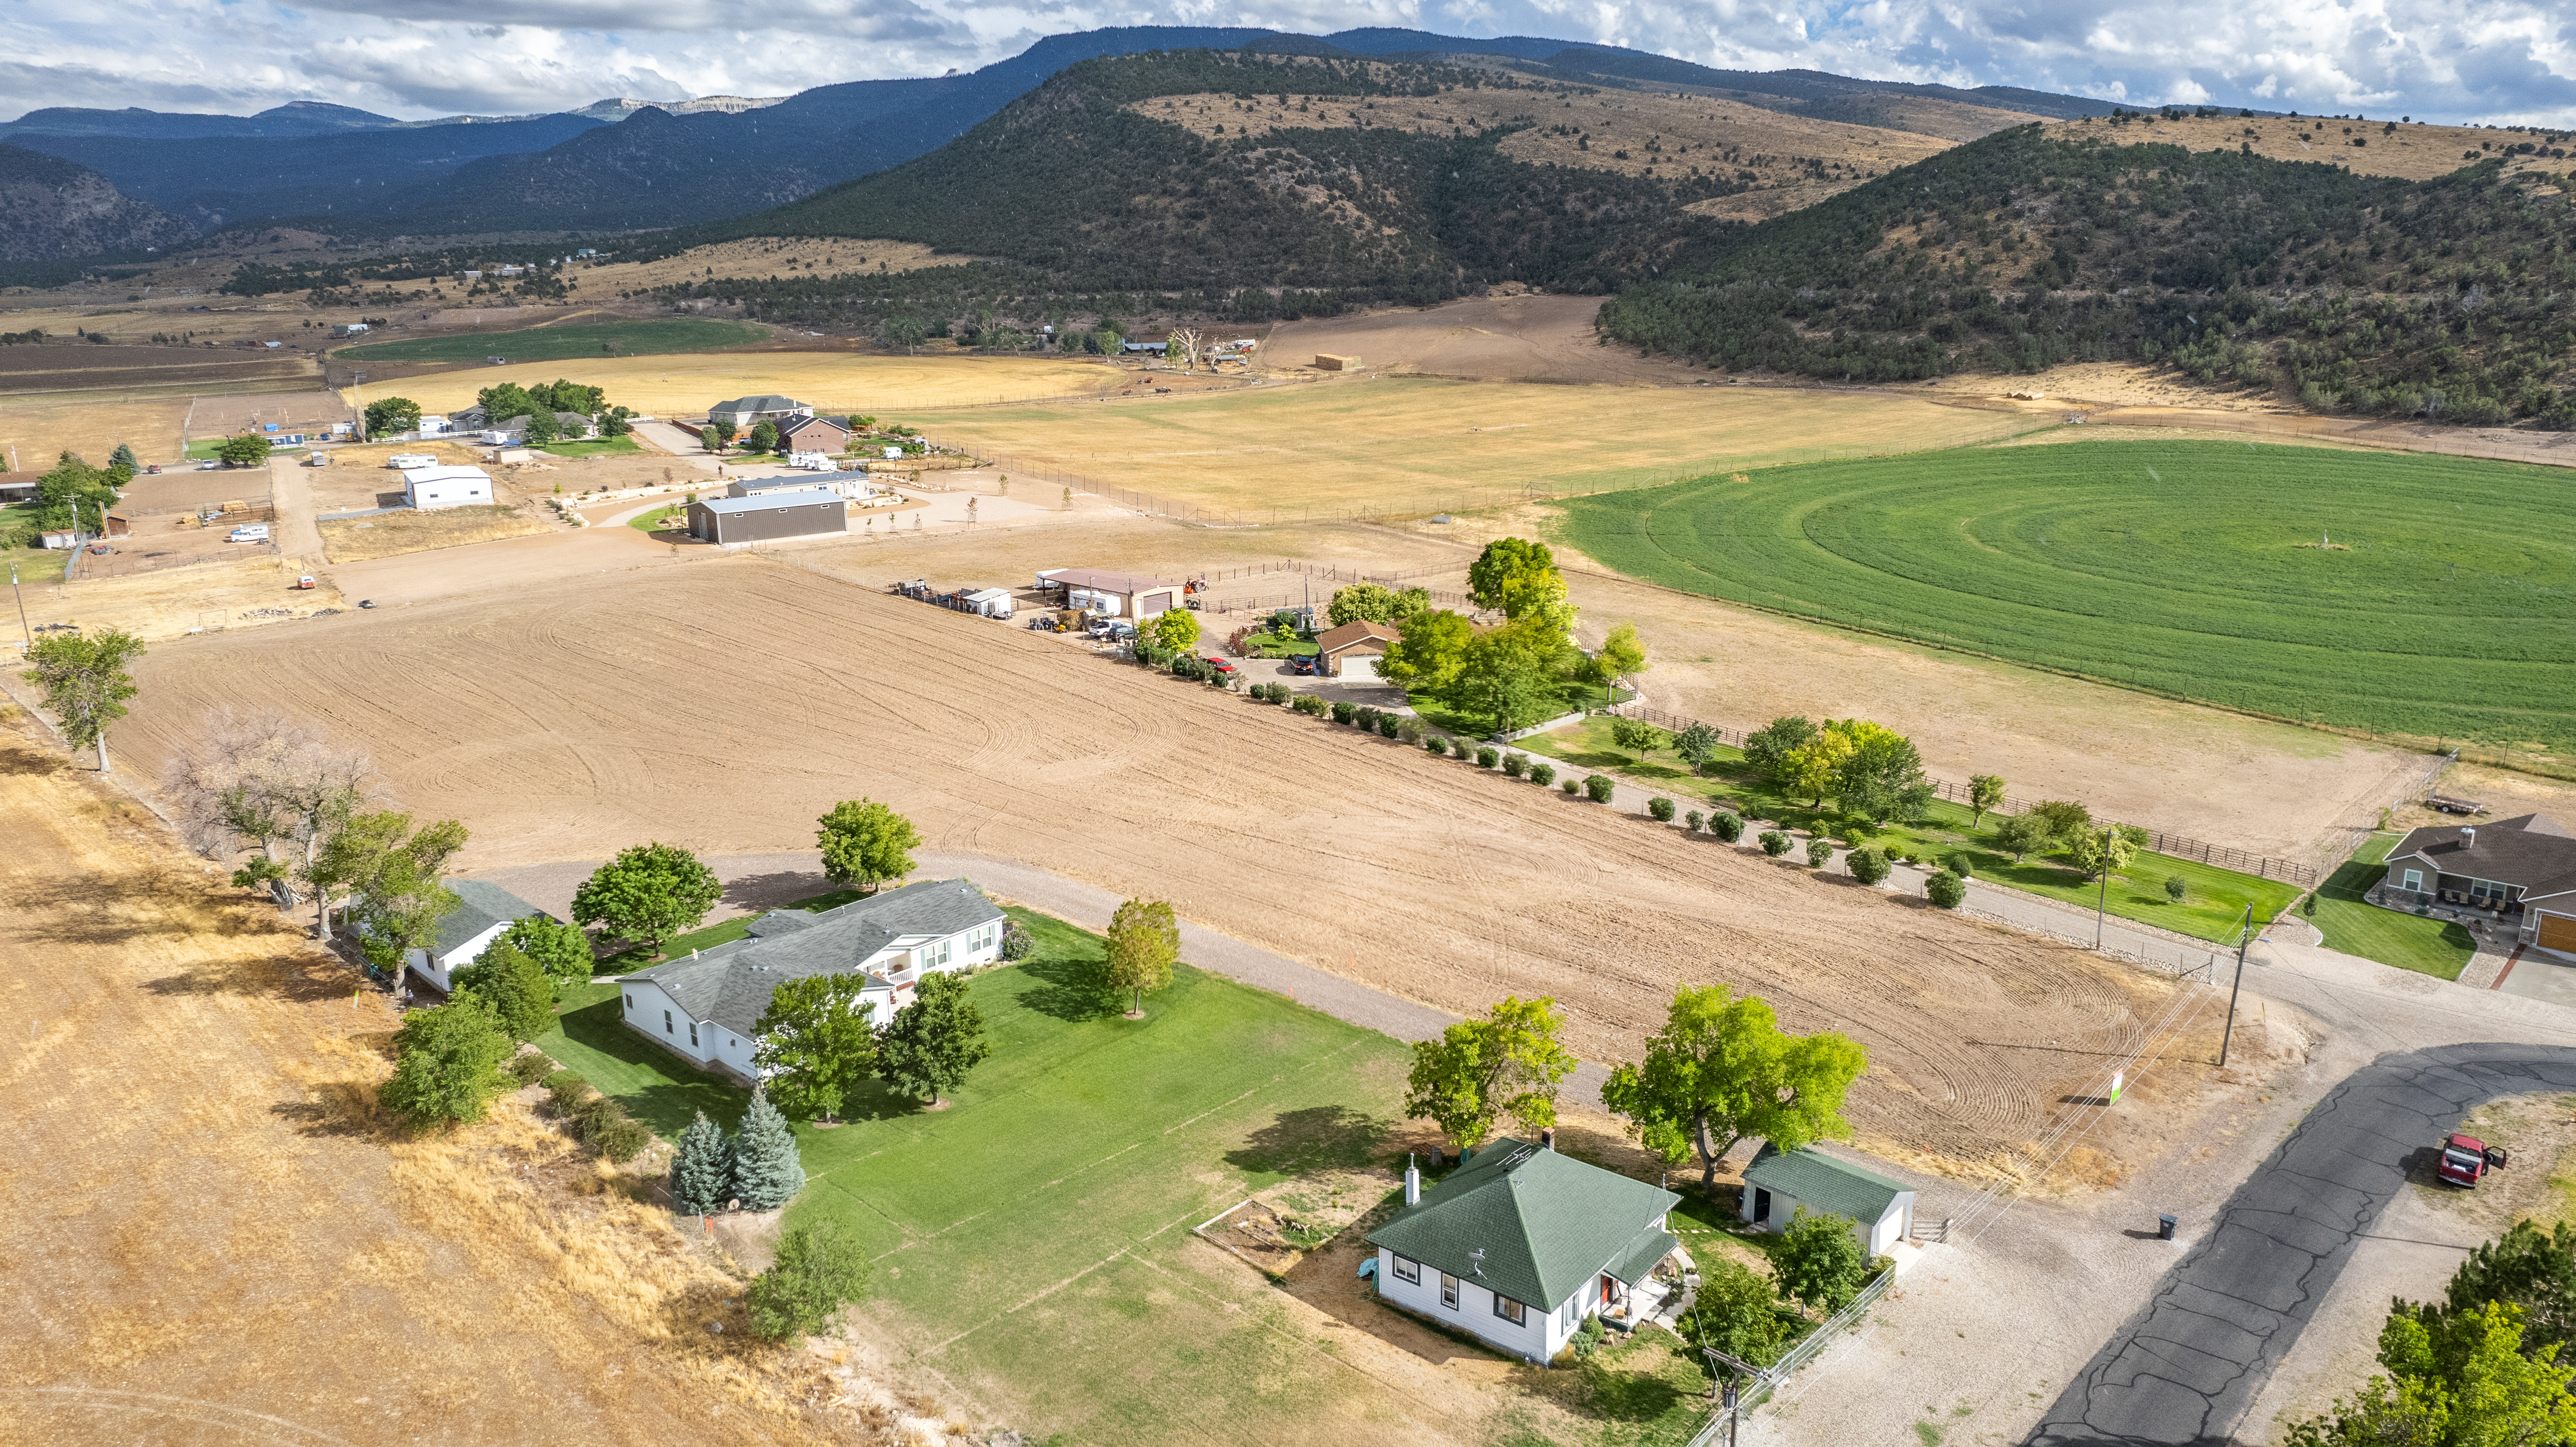
Offering drone photography as part of your real estate services is a big value for many clients, who otherwise might have to go to a separate photographer, but keep in mind that in places like the U.S., a Part 107 commercial certification is required if you are using drone imagery to earn money. For those that make the effort to get their Part 107, a very affordable first drone option is the Parrot Anafi, which can be purchased on Parrot’s Amazon store for under $400 in basic trim, and offers decent image quality. For about $1,200, you can get the much more capable DJI Mavic Air 2S, which has a bigger, better camera sensor, and helpful obstacle avoidance sensors to reduce the risk of crashing.
While this gear is not cutting edge by any means, it is more than capable of producing high-quality real estate imagery for your clients if you put in the effort required to learn how to use it properly. After you begin to build a client base and are earning money, you can think about how you want to upgrade your equipment to offer your clients higher end work, but a practiced hand could get by with just the gear on this guideline for years with very little difficulty, thus maximizing your return on investment.


Join the Fstoppers community for free
-
Post comments and join in the discussions
-
Browse the site ad-free
-
Share your work and get featured in the community
-
Compete in the photo contests for fun and prizes
12 Comments
All good suggestions… but missing a crucial piece of gear (IMO) for today's real estate and architectural photographer. Once you have one it will never leave your bag.
The CamRanger2 is such an essential piece of equipment that I would purchase one before a drone. It's no longer a luxury. This is especially true if you do "flambient" (a term I really dislike).
The CamRanger allows you to have complete control over your camera without having to be near it. You can adjust your brackets and settings from anywhere in the room. But its greatest value is in removing the need for an assistant. I can strap a monolight flash over my shoulder and actually walk into the scene to add highlight edges and fill anywhere it's needed and immediately see the results.
It's a powerful tool. It works best with an iPad or tablet but can easily work with a smartphone. The camera manufacturers have similar apps but none competes with the CamRanger's features or range. I just wish it wasn't so damn expensive.
While I agree, the price was the considering factor in leaving it out of the article, not that the overall value isn't good when you think about it. The drone adds a lot of value too though, and opens up opportunity for a whole extra up sale. While I like the camranger, I don't actually use one. Sometimes I will have an assistant, sometimes not. But the drone I use at every shoot, and that means I get paid nearly twice as much. That being said, I have a very grass roots approach to photography. You might even call it minimalist at times.
Robert if your approach is minimalist then you chose a perfect article to write.
It's true that for pure real estate a drone is almost expected. My work is architectural and interiors — it's rare to need a drone. If the client requests a drone shot there usually is enough budget to hire a drone operator. That's easier than keeping up on the Part 107 requirements, dodging urban restrictions and getting yelled at by pissed off neighbors.
There is a LOT of red tape and crap to deal with when flying thats for sure
I like and own a cam ranger but wouldn’t consider it crucial for real estate photography. It doesn’t get used on most real estate shoots for me just because it’s too slow. Also the hardware is very junky and flimsy feeling. For anything where you can take the time—vacation rentals, designer shoots, etc. it’s awesome. It’s better than shooting to a laptop when you need to style the scene and are working solo.
Colin you don't mention whether you have the first or second version but I can share that when it seems to be slow it's usually because of trying to send too high of a resolution image to your tablet. When using medium resolution JPEGs I can get a 3 shot bracket to show up within 2-3 seconds.
With all due respect, the CamRanger is not essential gear. All you need is a good app to be able to change settings on the camera and trigger it, wirelessly. Most decent cameras have wifi, so it's usually not a problem. CR is just not worth the money, and I know- I have one but never use it anymore. Just one more piece of gear you have to charge batteries for.
I appreciate we all have differing opinions… that's what makes photography so diverse. The people I've met who say the same thing about the CR usually don't shoot that much. If they did they would know that the apps don't come close to all the features or range the CR has. (I shoot Sony bodies).
If you check out Mike Kelley's video on gear he uses for architectural (here on FStoppers) he pretty much says he couldn't shoot the way he does without it. I feel the same way.
So... Are 360 images still a thing in real estate photography?
Last time I saw anything 360, was a 360 video walkthrough of a rail tunnel under construction a couple of years ago.
The matterport camera and service has sort of taken over a lot of that corner of the market
The absolute number one thing you need in your bag is a signed contract.
Another basic gear article that is ignoring the elephant in the room - all the different ways a photographer can handle the contract licensing with these new genre of architectural clients.
Agreed. Fee sharing is one way I have saved projects that were on the fence by expanding the amount of clients on a project so that all of them are paying less but I'm getting more.