In the share economy, more and more people are finding their side hustle in the form of renting out extra rooms or vacation homes through services like VRBO and Airbnb. Earlier this month, I did a quick and easy property shoot for one such hopeful side hustler. Using a minimal photo kit and about an hour of editing, I created a nice set of images, sure to help them get bookings. Here’s how I did it.
Step 1: Gear and Settings
Start with a wide-angle lens and mount your camera on a tripod just above waist height for the cleanest lines and best perspective. Shoot in the 10mm to 24mm range; anything wider gets too distorted and screams: “I’m a walk-in closet pretending to be an apartment,” while anything narrower will fail to get full room shots. Ideally, the property will look spacious while maintaining a realistic sense of scale.
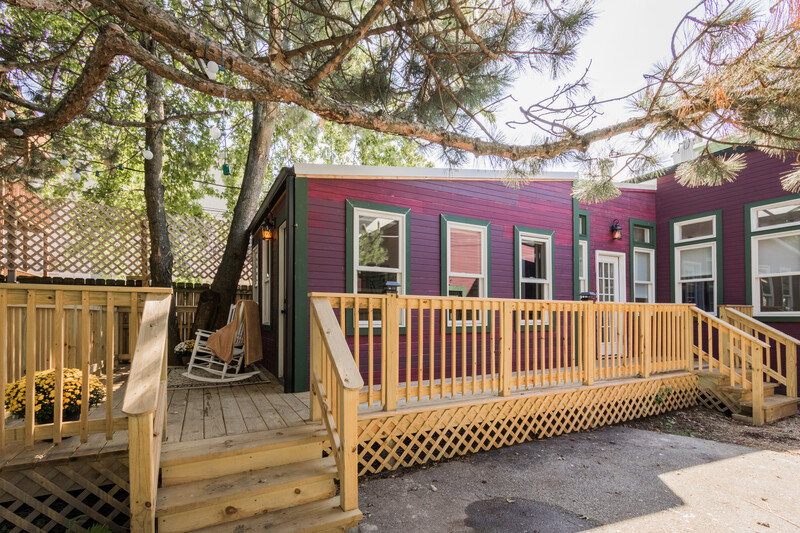
Either start or finish the shoot by photographing multiple angles of the exterior. Certain times of day will be more flattering than others. Ask the property owner when their place has the best lighting and try to work during that time of day.
In tight spaces (like bathrooms) you're bound to have a little bit of distortion like with the counter in the bottom left corner. A little distortion is ok. I shot this at 10mm. Any wider and you'd get into curving lines and crazy leaning angles.
Set your aperture to somewhere in the f/8 to f/16 range. Set your ISO as low as it can go: there’s no need to risk noise when you’re shooting on a tripod. Let the shutter speed be what it will be. Again, tripod.
Step 2: Bracket
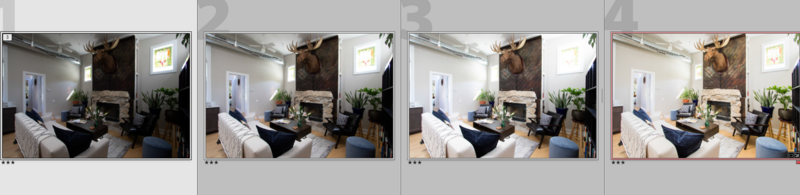
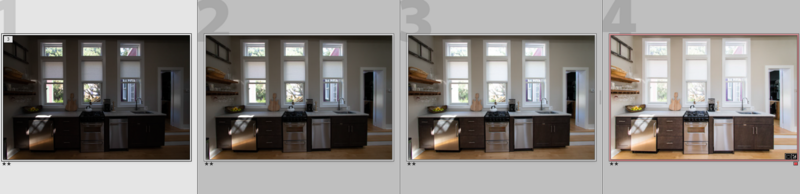
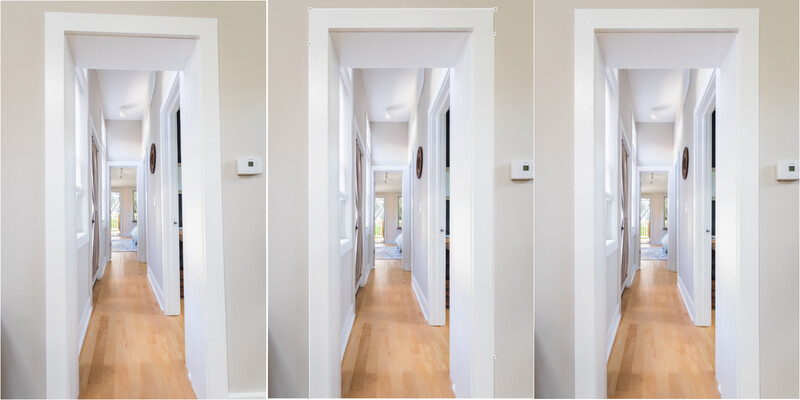
From Left to Right: -1, 0, 1, Merged HDR
From Left to Right: -1, 0, 1, Merged HDR
For all of your room shots, take three or more exposures. I shoot three images about a stop apart each (-1, 0, +1). Some people like five or seven-shot bracketing, but for this kind of application, it’s overkill. Your darkest exposure is for capturing the world outside the windows. The other two are for the interior. Make sure you’ve cleared the room of anything that might cause ghosting across multiple exposures. Ceiling fans should be turned off and small children put away in a cupboard under the stairs.
When assembling an HDR, some photographers would opt for a darker exposure in the exterior portions of the image. I tend to feel that choice makes the images feel fake. I like to have some detail in outdoor portions, but like it to feel significantly brighter (a stop or so) than the interior.
Step 3: Shoot Squares, 45s, and Details
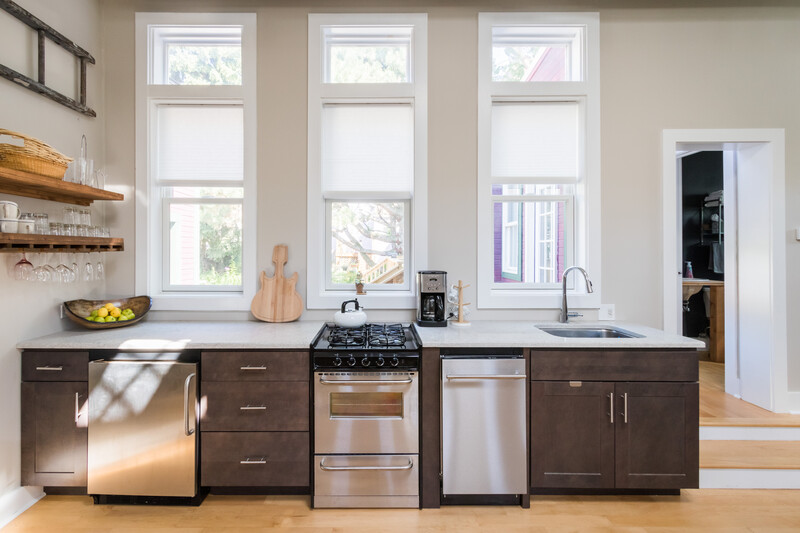
The kitchen from a squared off angle
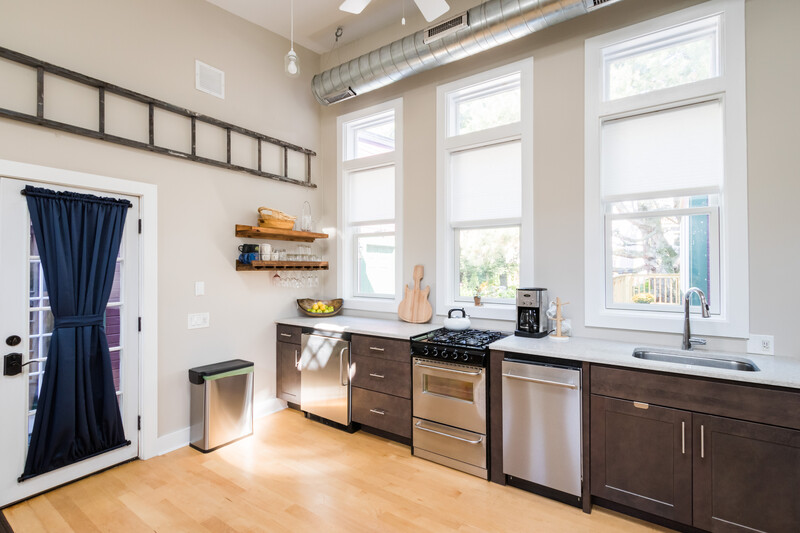
The kitchen from a 45-ish degree angle
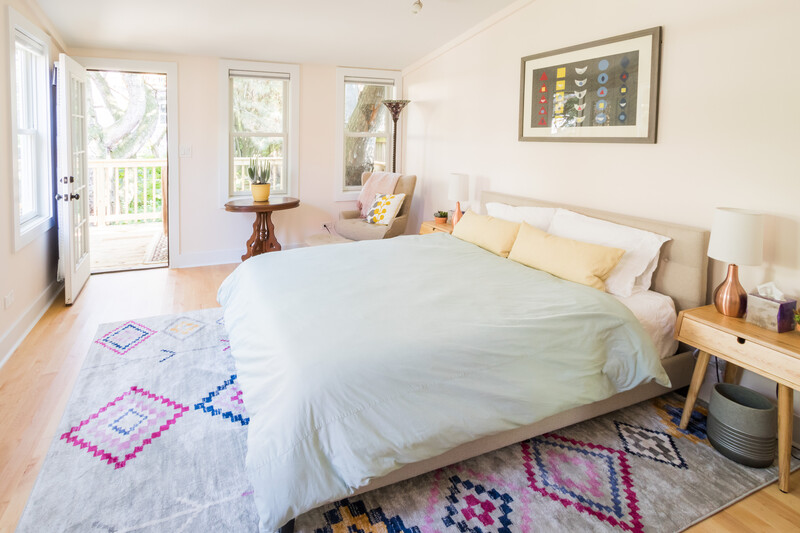
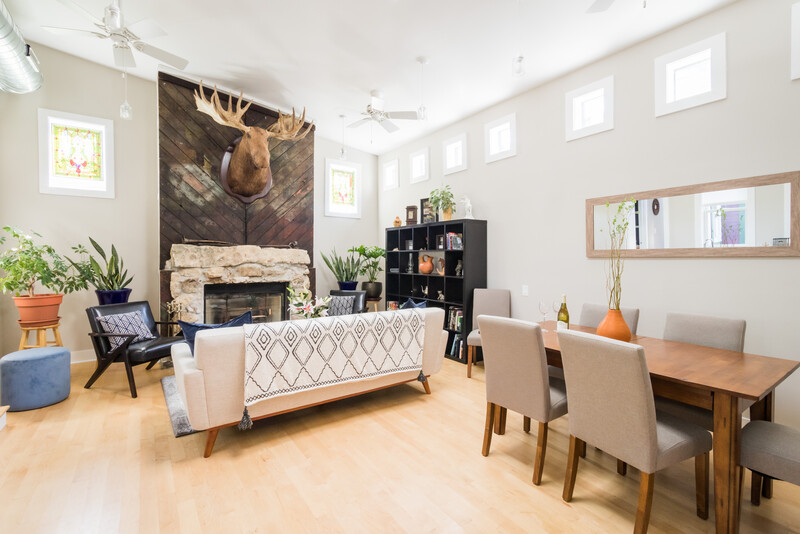
For the main room I try to provide a minimum of three perspectives to give potential renters a sense of how the space is laid out.
Keep an eye out for mirrors and make sure you position yourself and your camera so that you're not reflected. If the property owner is with you for the shoot, ask them to stand behind you to avoid reflections.
This shot gives you a sense of how the rest of the property is connected. Hallways may not seem like something you'd want to photograph, but it's helpful to include them for reference.
It’s a good rule of thumb to shoot each room from a few angles. I generally shoot a mix of squared-up shots (all of the lines form close to right angles) and 45-degree shots (shoot from the corners of the room). Some rental companies require multiple shots per room, so it's a big help if the client has several shots of each room that feel different and offer unique perspectives. Shoot as wide as your lens will let you. It’s good to have extra room for editing and cropping (more on that in step 5).
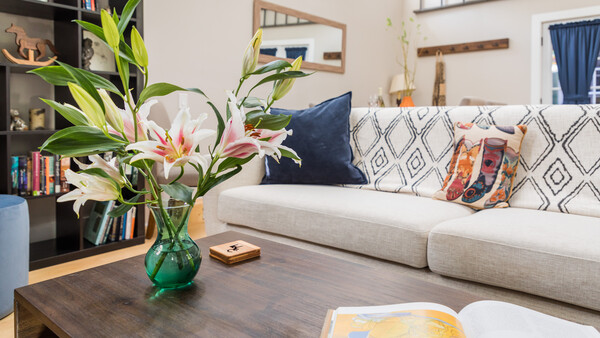
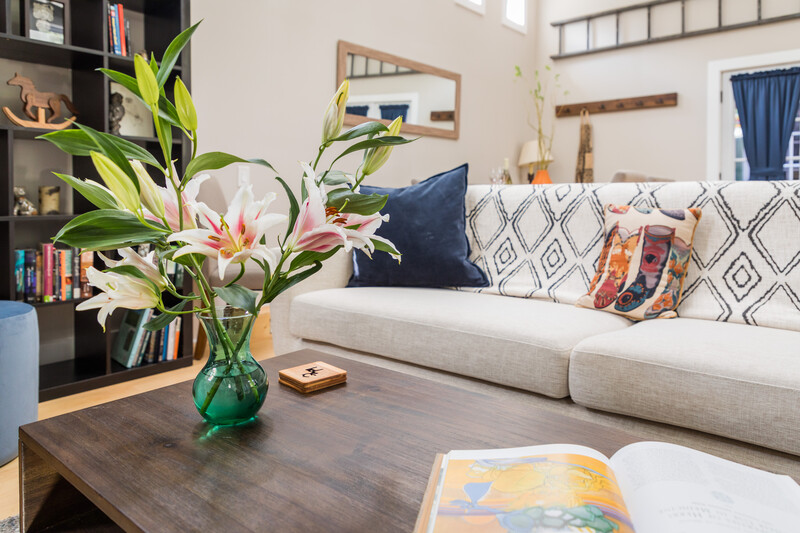
In a well-designed space like this one, make sure to take plenty of detail shots. They help sell the location and highlight the level of style and attention to detail — all important factors in and Airbnb.
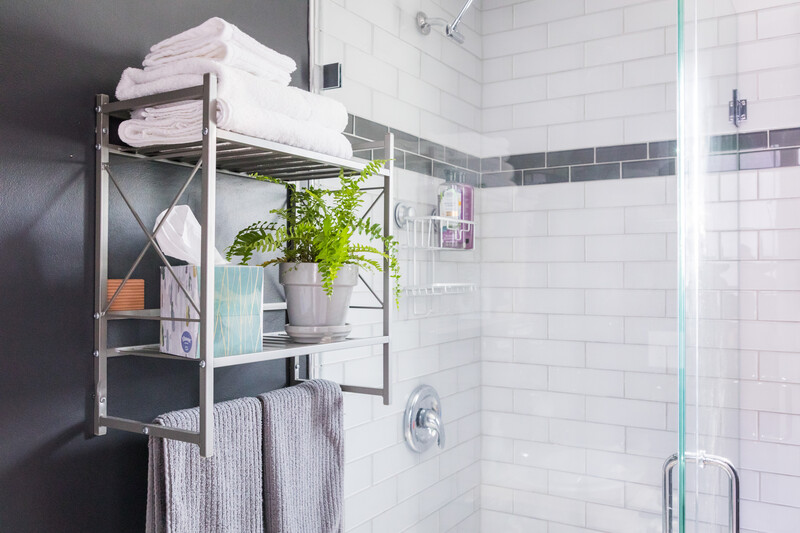
A clean, bright bathroom is a definite bonus for a rental property. Find details to highlight but limit the visibility of the toilet unless it has special features (bidet, etc). No one wants to look at a ton of photos of toilets when choosing a property.
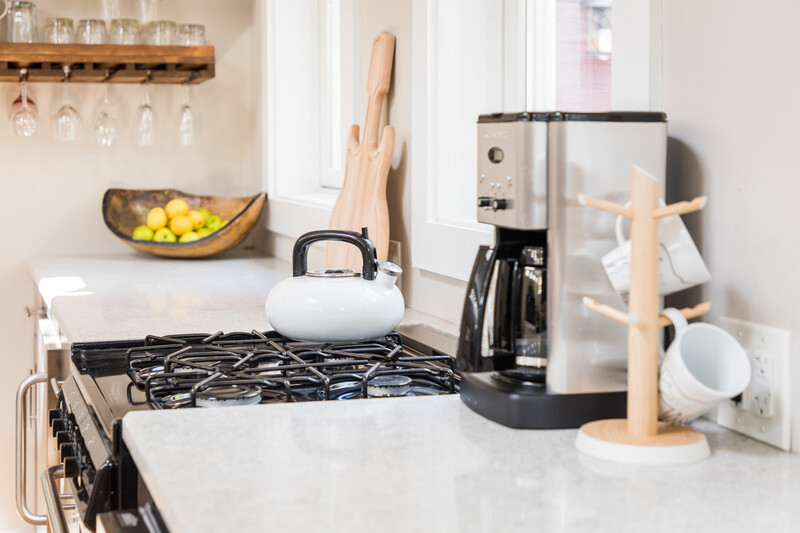
Details are important, because it’s the little touches that make listings stand out. If they have a flower arrangement or potted plants, take a few photos to tell viewers that the place is well appointed. Detail photos do not need to be bracketed. Shoot them at a wider aperture to have a more stylized, shallow depth of field look.
In a shot like this, not everything needs to be in focus.
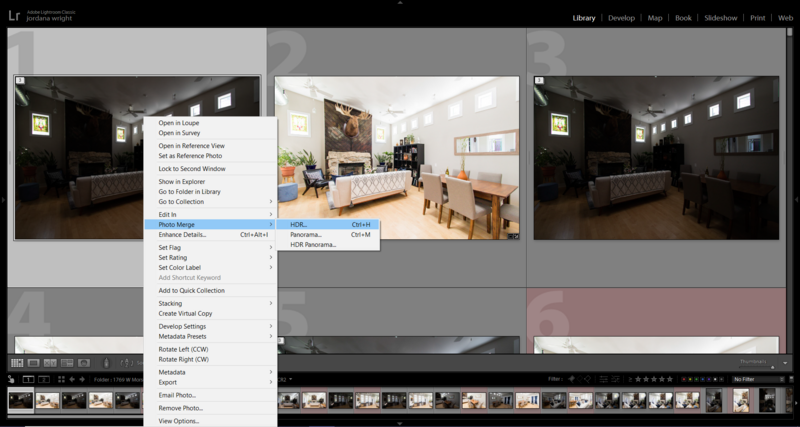
Step 4: Stack and Merge in Lightroom
A recent Lightroom update allows you to run HDR on multiple stacks of images at once. This will save you a ton of editing time. After importing your photos, highlight your bracketed images and hit Ctrl+G (Command+G for Mac) to stack a set. Side note: if you want to, you can have Lightroom auto-stack images by time elapsed between brackets of images. It works pretty well, but it isn’t foolproof. If you had any interruptions in your shoot or if you moved at a varied pace, the timing issues will throw off the whole stacking process. Either way, once all of your images are stacked, select all of the stacks and hit Ctrl+H (Command+H for Mac). Select “Auto-Align” and “Auto-Settings” as well as your desired de-ghost amount, then hit “Merge” to start running the HDR process.
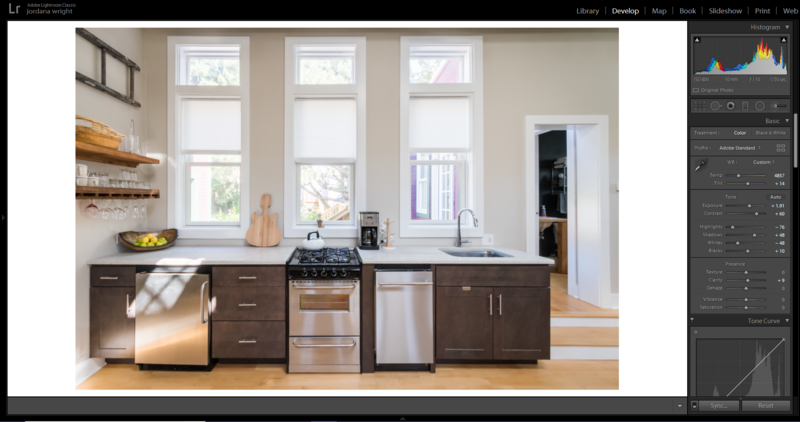
Step 5: Other Tweaks and Edits
Ideally, you want a neutral white balance and a pleasingly bright overall exposure. I like to use the eye-dropper tool for consistent white balance. Bring down the highlights and whites and bring up the blacks and shadows to create a nice, even exposure. Add a pop of contrast, and you’re ready to transform.
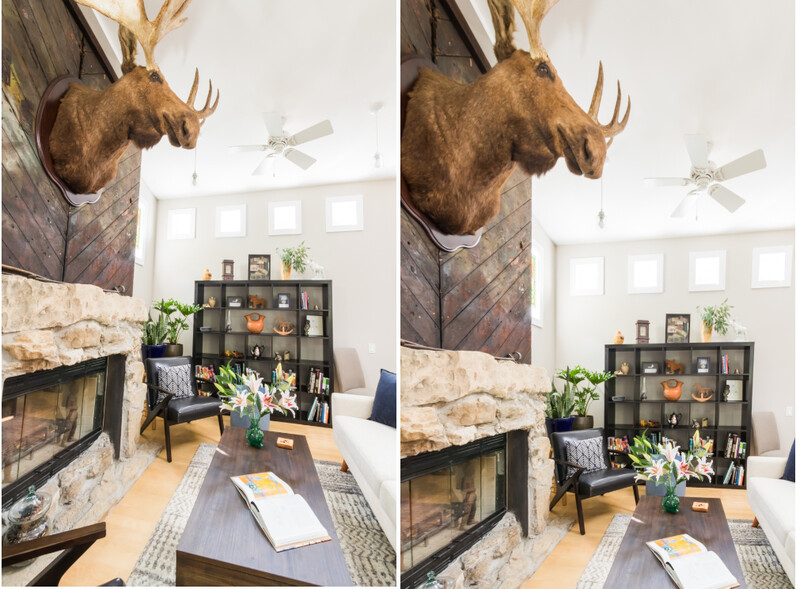
Auto Transform is a great starting place for transforming your images. It works really well 80% of the time. Unfortunately, you have to go through each HDR image and select "Auto" for each photo individually. If you copy and paste settings or sync auto-transform, there are often errors, and you’ll have to hit “Update” in the corner of the Transform panel for each individual shot anyway.
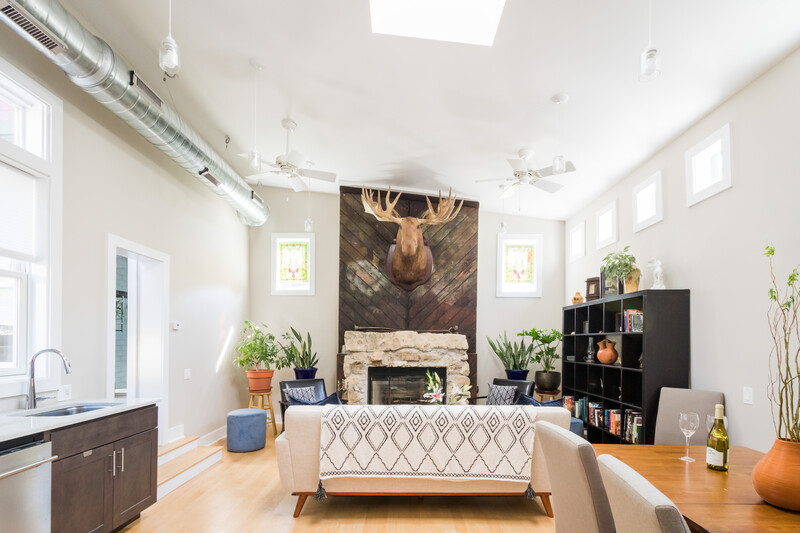
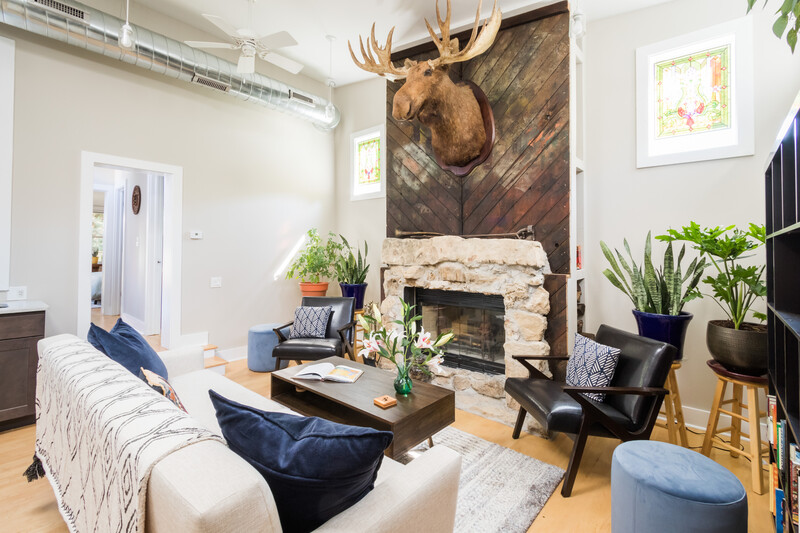
Auto Transform worked well for the furniture in this shot, but really skewed the perspective on the mounted moose.
Sometimes, it's better not to transform your images at all. The left image is the un-transformed image. You do have some slight skewing to the window frame, but when transformed, the chairs go all wonky. When it comes to Transforming, go image by image and decide what looks best.
If Auto Transform renders your image looking truly bizarre, use the guided transform tool. Pick distorted/angled lines near the edges of the frame as your reference lines. Many times, any transformation will result in an image with strange borders. Just crop the image back to a normal ratio and you’re good to go. For a little punch in my interior shots, I run a -10 post-crop vignette on all my images.
On the left, the RAW image has some perspective distortion. In this case, Auto Transform didn't dial in the angles well enough, so I dropped in guides (center image). The resulting image (right) feels much more attractive and natural.
That’s it. It's fairly simple to get all the shots quickly and easily. If you're overwhelmed, make yourself a consistent shot list to work from. Soon enough, you'll start to develop a naturally flowing system for your shoots.
Have you picked up any personal tricks for Airbnb photography? Share in the comments!
You might try using a polarizer to kill those reflections, especially in the bathroom.
I also would try shooting closer to dusk so you can better set the mood with shots that reveal the house's lighting.
I think that is actually a very well put together article for people who get started in architectural photography.
Not super high-end but pretty straight forward. And actually, your compositions work pretty well.
This is a really good, thorough beginners guide to real estate shooting. Great stuff. I’d add that auto-stack works very well if you set the duration to about 3-5 seconds. But still best to double check that everything ends up where it should be.
Congratulations! It's a piece on Fstoppers that wasn't stolen from somebody on YouTube and which is both, interesting AND informative. Let's hope that we see much more from you in the future. Thank you.
I’ve been shooting rentals and real estate for over 15 years. I went through the Airbnb Plus training(which I thought was less than stellar).
You’re giving some very basic advice. While it is not bad advice you could go into the multiple ways that real estate can be shot. Each has its purpose and a good shooter will use all of them over the years.
Super read - palatable and informative, especially for someone like myself who knows nothing about RE shooting. It all made perfect sense, wasn't in the least bit overwhelming and I definitely feel as though I've picked up some excellent starting points, thank you. I also appreciate the pro-active & helpful comments from my more experienced colleagues below.
1 stop brighter window lights- I don't understand how that looks more natural and that darker is considered fake. The human eye compensates while viewing the live scene, so the windows set at +1 stop in the photo seems unnatural and is distraction from the interior.
Because that is how photography naturally works. And I think we are used to seeing that from photos. No, it's not how our eyes work, and of course no camera can do that (yet?), but I think she meant efforts to compensate for that often come across as very Photoshopped. Because they usually are. Very few can really believably pull it off. And that would often also be dependant on which direction you can tell the outdoor light is coming from.
Darker can look fake because if you don't shoot it perfectly, or if you're not super familiar with merging photos (the auto-merge can often leave less than ideal results) you're going to have issues and imperfect results. Because this is a beginner how-to, I felt it made more sense to guide folks toward the more foolproof methods. If you are personally able to get great results with darker exposures outside the windows, then, by all means, do your thing.
Nice article. AirBnB business is booming and this article should help a lot of owners and give them ideas on how to present their properties better and give photographers just getting into the property business a good starting point.
Blech. Unfortunately, this is true for all kinds of locations one might potentially shoot. Hotels, restaurants, theaters, they all have the potential for bedbugs. They've been found in public transit and Ubers too.
Jordana, i liked your article - especially the 3 basic compositions. Regarding bedbugs - we brought bedbugs into our house a few years ago. It was a real nightmare. One thing I learned - best place to keep your luggage in a hotel is in the bathtub/shower. I think that could be good advice for camera bags during an architectural shoot too.
Thanks for the tips, Jordana. The supporting shots certainly helped get the message..
Few more tips I've read else where are to open all doors, windows, remove curtains/blinds - let all the light flow in.
Unfortunately that is all too common. I shot Virtual Tours for a few companies based in the Bay area in the late 1990s and early 2000s, it was all for less than enough to cover equipment, transportation and basic expenses.
I loved the job, I just couldn't afford to keep doing it...
I don't think things are much better for Real Estate Photography today.


18 Comments
You might try using a polarizer to kill those reflections, especially in the bathroom.
I also would try shooting closer to dusk so you can better set the mood with shots that reveal the house's lighting.
I think that is actually a very well put together article for people who get started in architectural photography.
Not super high-end but pretty straight forward. And actually, your compositions work pretty well.
This is a really good, thorough beginners guide to real estate shooting. Great stuff. I’d add that auto-stack works very well if you set the duration to about 3-5 seconds. But still best to double check that everything ends up where it should be.
Congratulations! It's a piece on Fstoppers that wasn't stolen from somebody on YouTube and which is both, interesting AND informative. Let's hope that we see much more from you in the future. Thank you.
Hahaha. Thank you! I have a few articles on fstoppers at this point. Feel free to peruse :-)
I’ve been shooting rentals and real estate for over 15 years. I went through the Airbnb Plus training(which I thought was less than stellar).
You’re giving some very basic advice. While it is not bad advice you could go into the multiple ways that real estate can be shot. Each has its purpose and a good shooter will use all of them over the years.
Super read - palatable and informative, especially for someone like myself who knows nothing about RE shooting. It all made perfect sense, wasn't in the least bit overwhelming and I definitely feel as though I've picked up some excellent starting points, thank you. I also appreciate the pro-active & helpful comments from my more experienced colleagues below.
Glad to help!
1 stop brighter window lights- I don't understand how that looks more natural and that darker is considered fake. The human eye compensates while viewing the live scene, so the windows set at +1 stop in the photo seems unnatural and is distraction from the interior.
Because that is how photography naturally works. And I think we are used to seeing that from photos. No, it's not how our eyes work, and of course no camera can do that (yet?), but I think she meant efforts to compensate for that often come across as very Photoshopped. Because they usually are. Very few can really believably pull it off. And that would often also be dependant on which direction you can tell the outdoor light is coming from.
Darker can look fake because if you don't shoot it perfectly, or if you're not super familiar with merging photos (the auto-merge can often leave less than ideal results) you're going to have issues and imperfect results. Because this is a beginner how-to, I felt it made more sense to guide folks toward the more foolproof methods. If you are personally able to get great results with darker exposures outside the windows, then, by all means, do your thing.
Nice article. AirBnB business is booming and this article should help a lot of owners and give them ideas on how to present their properties better and give photographers just getting into the property business a good starting point.
Not trying to be Debbie downer, however, be aware where you sit your gear bags. https://www.cnet.com/features/bed-bugs-are-giving-airbnb-users-headache…
Blech. Unfortunately, this is true for all kinds of locations one might potentially shoot. Hotels, restaurants, theaters, they all have the potential for bedbugs. They've been found in public transit and Ubers too.
Jordana, i liked your article - especially the 3 basic compositions. Regarding bedbugs - we brought bedbugs into our house a few years ago. It was a real nightmare. One thing I learned - best place to keep your luggage in a hotel is in the bathtub/shower. I think that could be good advice for camera bags during an architectural shoot too.
Thanks for the tips, Jordana. The supporting shots certainly helped get the message..
Few more tips I've read else where are to open all doors, windows, remove curtains/blinds - let all the light flow in.
Too bad Airbnb pays less than minimum wage.
Unfortunately that is all too common. I shot Virtual Tours for a few companies based in the Bay area in the late 1990s and early 2000s, it was all for less than enough to cover equipment, transportation and basic expenses.
I loved the job, I just couldn't afford to keep doing it...
I don't think things are much better for Real Estate Photography today.