

One of the Holy Grail quests for astrophotographers is the search for dark skies. Few of us are fortunate enough to live in ideal dark skies, but most of us are mobile enough to get to somewhere better than the center of an urban area.
In 2006, John Bortle published an article in Sky and Telescope describing an informal scale for rating your skies, now appropriately known as the Bortle scale. On his scale, 1 is best, 9 is worst. Bortle 9 is what I live under — I don’t bother with a flashlight when I go out in my backyard at midnight.
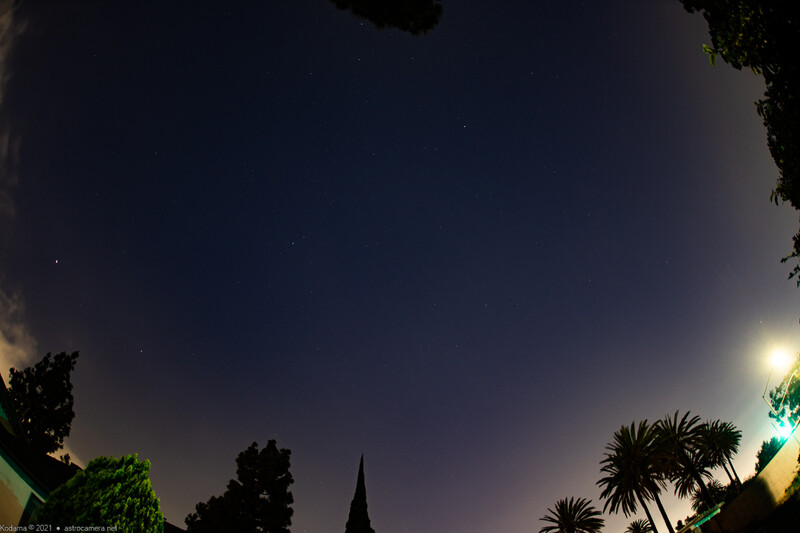

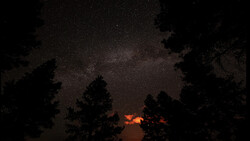
The contrast-enhanced shot above was taken after midnight with no moon in the sky. In person, only a couple of stars were visible when I took the shot. On the processed shot, I've circled the three bright stars of the prominent Summer Triangle. The other bright object on the left side of the image is Jupiter.
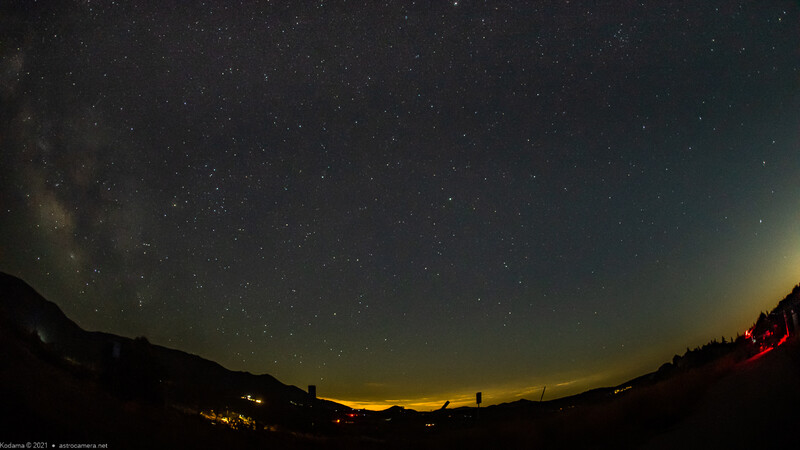
My local solution is a 100 mile (161 km) drive to my observatory at an elevation of 4,300 feet (1,310 meters), after which I’m under skies that are perhaps Bortle 4+ skies on a good night. The shot above was taken towards the southwest, where the glow of San Diego dominates the center horizon and the glow of the nearby town of Temecula and more distant Los Angeles begins on the right.

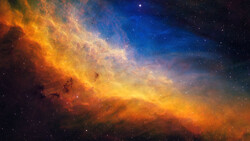
The cover photo (repeated above) was shot under first quarter moonlight in a site in San Pedro de Atacama at elevation 7,900 feet (2,407 meters) in northern Chile, which probably would be classified as a very good dark site (perhaps Bortle 1+). Despite a first quarter moon, the Milky Way is clearly visible. The volcanic peak in the background is Licancabur which is on the border between Chile and Bolivia. The top of the cone is 19,409 feet (5,916 meters).
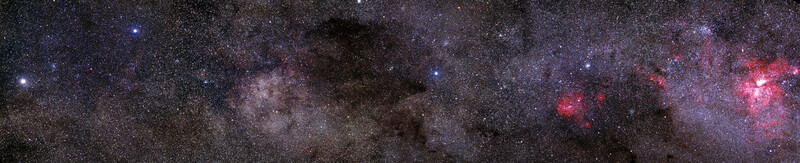
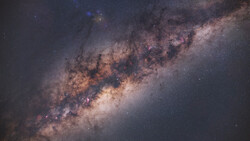
Above is a mosaic shot at (by far) the darkest site I’ve ever visited (Namibia). It is situated on a high, dry plateau at the edge of the Kalahari desert with superb conditions for astrophotography, but is a real journey to reach. The image of the southern Milky Way is a 5-panel mosaic of 40-minute exposures on medium format film.
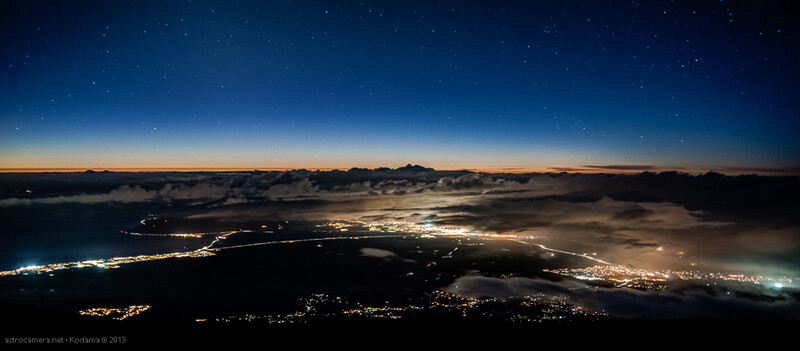
A more accessible site is Haleakala on the island of Maui. At an elevation of 10,023 feet (3,055 meters), the air is very transparent and steady, but as you can see in the image above, light pollution is clearly visible nearby. Tourism-oriented resorts and businesses outline the island shores on the left and right sides, with the central glow coming from the towns of Wailuku and Kahului, where the airport is located. On one hand, the top of the volcano is easily accessible by ordinary vehicles on a wide, paved road and is a national park. On the minus side, the peak is now so crowded that the National Park Service requires reservations to view the sunrise.
Jumping Into the Search
To aid in finding a suitably dark site, there are now several light pollution maps available on the web, as well as recommended lists of public locations with dark skies. The IDA (International Dark Sky Association) is also a source of information if you want recommendations for reducing the light footprint of your own properties.
While perusing the light pollution maps may be helpful, it’s prudent to remember that like a map of the average cloudiness of the sky, these are averages. Like the actual weather, the local conditions at a particular location are highly dependent on several factors:
- Brightness of lights in your immediate vicinity
- Lighting technologies
- Air pollution (atmospheric scattering)
- Altitude
The first point is the obvious one, which first comes to mind. Nearby lights can directly shine into your lens, causing reflection artifacts or affect your night vision. Seasonal effects include wind, fires, and fog. Holiday lighting is increasingly becoming a source of light pollution as cheap strings of LED lights are available.
A more subtle issue is the average glow of distant towns or cities, annoying especially for landscape astrophotographers. Even for deep sky photography, these distant light domes limit the direction and minimum altitude of shooting. Wide angle shots are particularly affected, with distinct gradients annoyingly spanning the photo. But even these effects vary. At my observatory, at certain times of the year, low coastal fog smothers the light domes of surrounding cities, improving the Bortle rating considerably.
Lighting Technologies
The type of lighting also plays a significant role in the severity of light pollution effects. Many older types of lighting are in specific spectral bands, allowing at least the possibility of using filters to block some of the interference. Unfortunately, from the astronomers’ viewpoint, the ugly low-pressure sodium streetlight spectrum was the easiest to block, but it was such a monochromatic orange hue that it was hard to locate your car in a parking lot!
With the widespread availability of low-power LED lighting, many lights have been switched over to take advantage of the reliability and low-cost benefits. Unfortunately, to encourage the switch to LED lighting, manufacturers engineered bluer, more natural lighting, and in doing so, we have shot ourselves in the foot. LEDs are naturally very narrow-band sources of light, but phosphors have been added to absorb and re-emit the light to cover a wider spectrum. In doing so, we’ve managed to swing the light pollution spectrum towards the blue, which scatters in our atmosphere more than lighting with a redder color, as described in a recent study.
Air Pollution (Atmospheric Scattering)
The blue light scattering problem also raises the role played by particles in the air (whether considered pollution or not). The light sources, by themselves, would not be such a problem if the light did not have a way to scatter and bounce back at us. Smoke and urban smog are the most obvious contributors, but moisture and wind-whipped dust can also subtly affect contrast in our images, even though distinct layers of haze may not be obvious to the eye.
In the daytime, you can get an idea of how much of a problem scattering is for you by blocking the sun and seeing how blue the sky looks as you get close to the sun. Ideally, the sky will look dark blue right up to the edge of the sun. At night you can do the same test with the moon. At my observatory site, the sky can often look clear to the eye, but as soon as something bright like Venus or Jupiter rises, it becomes readily apparent that sky haze is present. In long exposures, large haloes (not related to chromatic aberration) become visible.
Altitude
To get around this problem, a solution is to get higher in altitude to get above the low-lying air pollution as well as clouds. With thin and clear enough air, it’s possible to photograph the Milky Way even when the Moon (the worst natural light pollution source) is out. But even this may not be a good fix if a global event such as a large volcanic eruption has put ash high into the atmosphere. Your personal sensitivity to high altitudes may also limit this option.
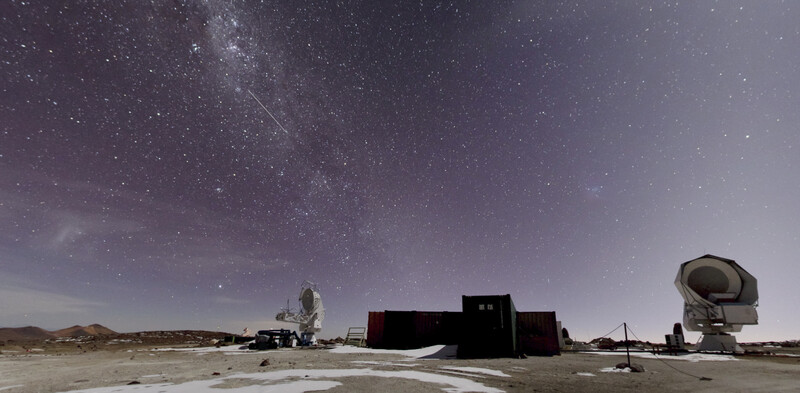
The Simons Observatory (above) in northern Chile sits at 17,000 feet (5,182 meters), with air clear enough to see the Milky Way even with a first quarter moon in the sky.
Aircraft
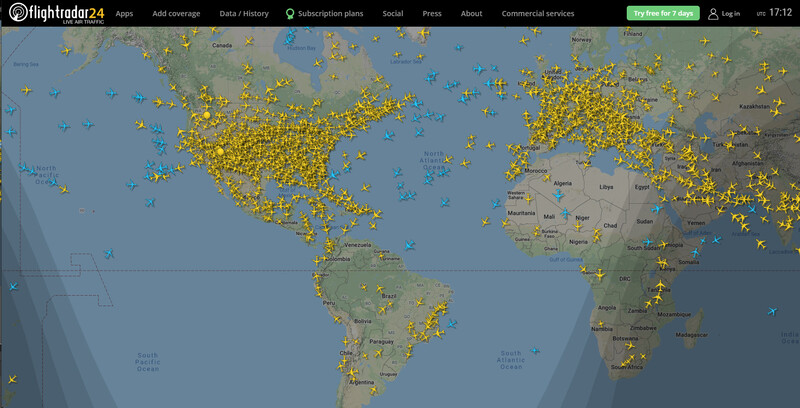
Another often ignored source of light pollution concern is aircraft traffic. These cause a double-hit -- light pollution as well as air pollution. Aircraft traffic exists at all hours of the day and night. At night, they are flying with bright navigation lights. A good strategy is to check not only light pollution maps, but also aircraft flight path maps, and choose a location appropriately.
In addition to the navigation lights of aircraft, engine exhaust is being emitted at high enough altitudes to linger for long periods, often in the form of visible contrails (high-altitude ice crystals).
What about satellites? For amateur astronomers, they are not a problem. They are much dimmer than aircraft, have no navigation beacons, and the low-flying ones are mostly visible near sunset or sunrise. For professional astronomers, they could become a problem, but amateur astronomers have larger problems to contend with.
Other Astronomers and Astrophotographers
And finally, I have to say that sometimes we are our own worst enemies. When we’re out shooting our own astrophotos, we need to keep in mind that 50 meters away, another astrophotographer may be trying to do his own thing. Lighting up the landscape with your flashlight may interfere with the next person’s shot. Your cellphone or camera rear screen may be as bad. Even the self-timer countdown flasher or memory card write light could be a problem, so have some black tape handy to suppress these sources of light.
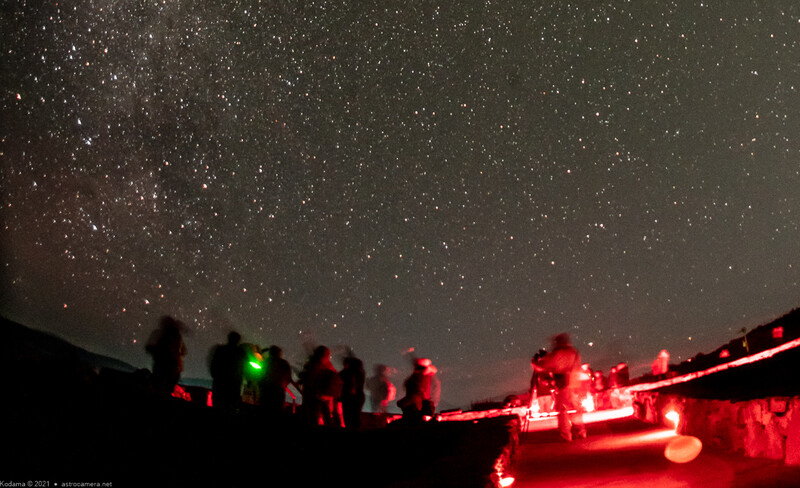
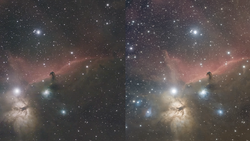
As an astrophotographer, it’s also a good idea to avoid groups of amateur astronomers doing visual astronomy. They will often have groups of people with flashlights pointing everywhere, including directly at your camera. Green laser pointers are often a problem too and are bright enough to be picked up in photos (look closely at the image above) even when moved around. For this reason (as well as for eye safety), I strongly discourage the use of them as polar “finders” or pointers to targets.
Have you got a good location to recommend? Please add your comments below!

Join the Fstoppers community for free
-
Post comments and join in the discussions
-
Browse the site ad-free
-
Share your work and get featured in the community
-
Compete in the photo contests for fun and prizes
7 Comments
I have been using LightPollutionMap for years and is bookmarked in my browser. The site is very handy using in conjunction with Google Earth Street View/Terrain layers.
I can still find a clear sky, but now the Star Link satellites get in the way.
What kind of shooting do you do and where? So far I've found the Starlink satellites actually hard to see when they've reached their final orbits and actually, I've never personally been able to catch them in a photo. Lots of other brighter satellites, however, do occasionally show up (usually big spent boosters), and actually have been showing up for years before Starlinks were launched.
Real easy to capture Starlink. In this image there is a string of 9 and others as well.
f/2.8 | 10 sec | ISO 1600 | 15mm
Personally I've yet to do much astrophotography, got into it a bit a few years back using a point and shoot camera. Favorite is to try and capture a long exposure of water with the night sky.
Was planning to head out a few weeks ago and make an attempt to capture the milky way as I've yet to do that. Used stellarium to plan a time and night, by sheer coincidence the time that would work great had multiple Starlink satellites in the way. Having seen others complain online it discouraged me from even trying. Figured I'll try my luck another night or just photograph the sky with them in it.
As to location north western Minnesota.
Thanks for the interesting picture (Stonehenge clone in Minnesota?) and exposure settings. I use the same speed lens and opening and ISO and vary from shorter and longer exposures than your example and have not successfully captured a train of Starlinks even though I have intentionally tried (using Stellarium and Heavens Above). Perhaps a longer twilight at higher latitude than mine makes a difference too.
It looks like the ones you've captured are after a recent launch when they are still bunched together and in low orbit. When they reach their final position they are much dimmer (magnitude 4.5+). As for eliminating them, try taking two consecutive 10 sec. shots and combining them in Photoshop using "Darken" as the combine method. The satellite trails should all disappear. I wouldn't let Starlink or other satellites discourage you. There have been numerous brighter satellites than Starlink for a long time and they have not stopped anyone from doing astrophotography.
PIxinsight and some other dedicated astro photo processing software packages can generate a "rejection map" easily and quickly.
This rejection map will erase multiple Starlink trails instantly.
The concerns expressed by folks who are unaware of the relevant astro photo processing routines as they relate to removing Starlink trails can be alleviated by a little bit of research.