
Finding new ways to evolve creatively is a never-ending process. Take a deeper dive at implementing audio into your workflow in this follow-up focused on photographers and writers.
Using existing tools in new ways to enhance your skill set and make life easier is imperative. Learning audio as a photographer, I've found it helpful to utilize analogies that parallel photography concepts. Last fall, I documented my audio journey with part one of this series, and want to take a closer look at pairing audio with photography and written work.
Check Your Settings
Setting Levels
The first, most important step in setting up an audio recorder is setting audio levels. It’s akin to photographing within a histogram. Anything clipped will be lost data, so before you hit record, a sound check is like a test shot. Levels are relative to the distance to your subject and will vary by environment. A great series of tutorials come from Brian Miller Magic who does a fantastic job of explaining practical audio concepts in a non-technical but accurate way.
Stereo Versus Mono
Mono is ideal for podcasts and YouTube videos that are more conversational. You want the listener to hear audio out of both headphones for a more balanced quality especially if it’s only one person talking. Stereo is going to be more ideal for more cinematic work.
Bit Rate
Similar to camera bit depth or resolution, a higher bit rate will ensure higher quality at the costs of eating up storage space and processing power. WAV 16 and 24-bit files are uncompressed or lossless in quality, again, at the cost of larger file sizes. MP3 files are compressed and therefore lossy but take up less space while preserving quality within the audible range. i.e. MP3 32 kbit/s, 64 kbit/s, 96 kbit/s, 128 kbit/s, 192 kbit/s, 256 kbit/s, and 320 kbit/s.
Sampling Rate
Think frames per second but for audio. The higher the sampling rate, the more complete the audio recording will be between highs and lows i.e. 44.1 KHz, 48 KHz, and 96 KHz.
Hold
Finally, after you hit record, don't overlook the “Hold” button. It will help assure the recorder remains as you set it. That said, you should still check often to make sure it’s still rolling. The feeling of a stopped recorder is akin to photographing without a working memory card or an improperly loaded roll of film.
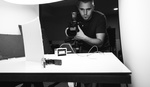
Get In Close
The closer you are to your source, the less background noise will interfere with the quality (signal to noise ratio). In the words of Westcott-pro James Schmelzer, "light in close falls off fast." Acoustics are fairly similar in that closing the distance to your subject, you’re setting levels (think exposing for light) for that specific audio, to better focus on the subject. The closer you can get to the audio source, the cleaner the track will be with less background noise. Even if you’re simply transcribing an interview, you’ll have better accuracy with a service like Trint.
In the event that some audio may spike in volume and clip, some recorders allow simultaneous recording of two tracks set with different levels for redundancy. Additional settings such as a "low cut filter' and "peak reduction” help eliminate low or high volume sounds for better signal to noise ratio.
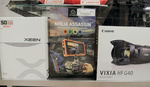
Choose Your Weapon
Handheld Audio Recorder
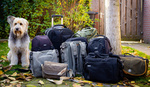
Last fall, I picked up a Tascam DR-05 (replaced by the DR-05x) which is great for field work and conversations at a table without having access to personal microphones. My handheld recorder stays in my MindShift Gear 26L backpack with a notepad, pen, camera, flash, and a couple of lenses. It’s versatile and can be mounted to a camera's hot shoe where video tracks will get a remarkable upgrade in sound quality. Depending on the device, you may have the option of a second recording, i.e. "dual record" or "padded track," on the device. I discovered that a handheld microphone mounted to a DSLRs hot shoe physically interferes with using the viewfinder, and to some extent, the LCD. Hot shoe adapters have a tendency to let the microphone spin loose which is risky on the go, especially in crowded areas. For occasional use or in a pinch, this is a solution.
As a time saver: if I am recording audio while taking notes, say during a seminar or more formal interview, typically I’ll write down the track time in my notes to reference later. Tracks can be digitally marked for referencing later using the recorder.
Shotgun Microphones
A shotgun mic is much more suited for on-camera video work. You’ll have to hit record on the recorder once to power on the microphones, but you don’t need to record to the device itself unless you want a backup or audio-only track. I did notice noise from manipulating camera controls in the audio while using a handheld audio recorder. A shock-mounted shotgun microphone mounted to an extension would get it further away from the camera like the Tascam DR10-SG, as would mounting the microphone on a boom pole.
Lavalier Microphones
A lavalier microphone paired with a portable audio recorder is going to get really close to your subject for high-quality sound. The audio track can later be paired video from any camera for improved sound in a podcast, YouTube video, or for narration. That opens the door to capturing relatively decent quality video from an inexpensive camera or even a mobile device, while massively upgrading audio by getting close to your subject with a compact, yet high-quality, solution. The overall production value is better with clean sound and simple setup.
My favorite option currently is a lavalier microphone, namely the Tascam DR-10L. In creating my monthly column for a local magazine, Foodographer, I’m photographing and writing the copy, which means concurrently doing many things well. Wearing a lavalier microphone allows me to photograph while casually interviewing folks, free to move about and refrain from taking written notes. The screw down lock secures the external microphone so it won’t unplug from the digital recorder, providing added peace of mind.I’m not concerned with audio quality beyond referencing it later when writing. With a lavalier microphone, a level around 55, a bit rate of WAV 16, and a sample rate of 44.1 KHz are fine for what I need.
Other Considerations
Redundancy is key in all situations. I recently arrived at a location to photograph and interview a park ranger, and the AAA batteries for my Tascam DR-10L lavalier microphone were dead. The DR-05 has an input for connecting an external mic with the “Mic Power” setting as “On.” The flexibility gave me the option of having a lavalier microphone out of the way and unobtrusive when my spare AAA batteries were drained. It seems a missed opportunity that DR-05 recorder is devoid of a screw down lock for external mics but it’s a solution all the same.
While this is geared towards photographers, writers, YouTubers, podcasters, and I'd love to hear what audio pros find helpful when explaining tips to newcomers. Are you using audio recorders in the same or different ways? Let us know in the comments below.


Spot on...but I prefer Zoom recorders :-)
I had a DR-05, good to use either mono or with a line feed, but useless in stereo. Two omni mics right next to each other have NO stereo spread. It's essentially wobbly mono, for lack of a better description. I returned the DR-05 and picked up a DR-07 Mk II (now replaced by the DR-07X) and if you're looking at one of these, spend the extra $30 on the DR-07X (you can still get the DR-07 Mk II on Amazon for $110 as well). The stereo spread from the two cardiods is not only better, but adjustable between XY or AB, giving some sonic landscape variance. So if you're thinking about the DR-05/DR-05x, I would instead recommend the DR-07 Mk II or DR-07X.
I believe it. For what I need right now anyway the DR-05 is great. The interface on the DR-05x is nicer. A few years ago I had a DR-07 Mk II, until it ended up crushed inside of a checked Pelican case while traveling. It was great but I didn’t have it long enough to really dive in. The DR-05 was the best option (bought in store), I guess after the DR-07 Mk II was discontinued and before the DR-07X was released.
"The higher the sampling rate, the more complete the audio recording will be between highs and lows i.e. 44.1 KHz, 48 KHz, and 96 KHz."
Honestly, you'd need a pretty good audio system playing from either a WAV or FLAC in a good listening environment while concentrating on the audio to hear the actual difference and even then, I'm pretty convinced that 99% of people who claim to hear a difference are full of crap so for the sake of everyone that has to invest bandwidth into downloading your files, just set it to 44.1 HKz and move on with your life. You're probably recording yourself talking, not playing recording engineer for an orchestral rendition of Stravinsky.
Useful video, thanks. For me, gain is like ISO speed. Higher gain is louder but noisier. As you said, saturation (0 dB and higher) is like burning out your highlights.