
Maybe it’s nostalgia or maybe it’s a design classic. Whichever way you look at it, the Nintendo Game Boy and its camera accessory have achieved cult status among photographers and gamers alike thanks to the distinctive lo-fi digital images it creates.
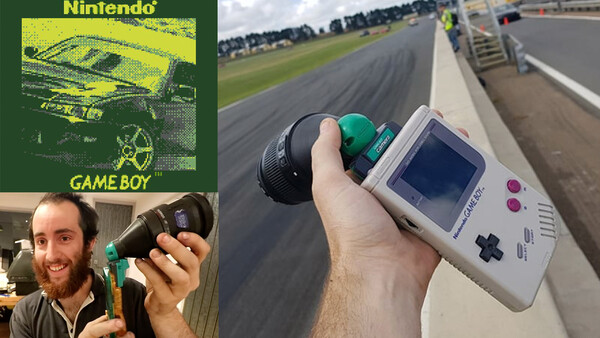
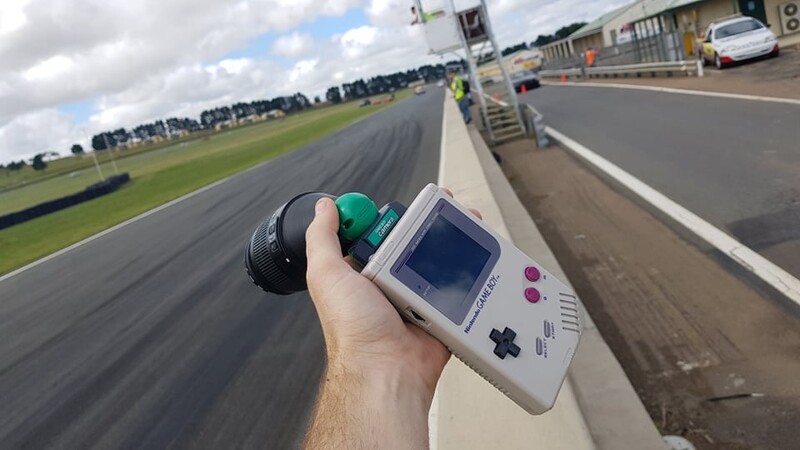
Thousands of enthusiasts have modded the Game Boy, but has anyone ever tricked out the camera with a DSLR zoom lens? That’s exactly what one Australian YouTuber has just done with spectacular results.
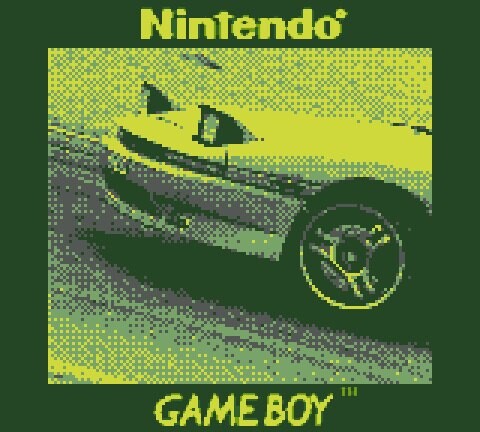
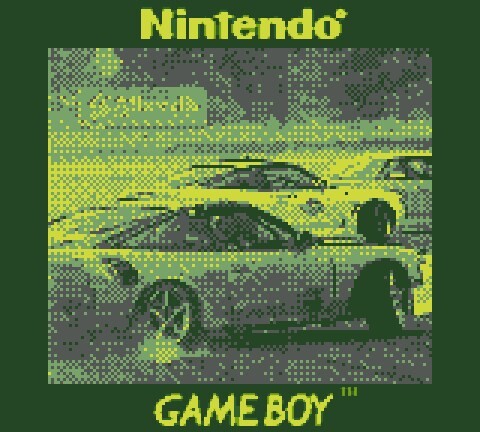
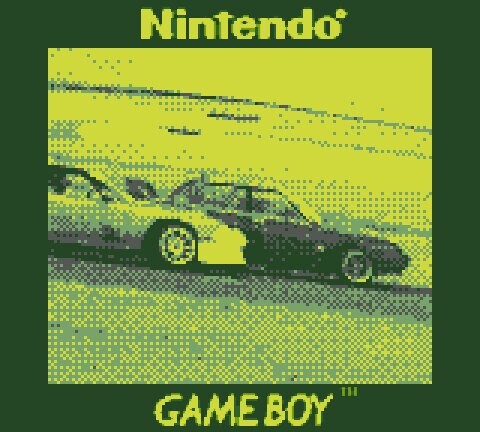
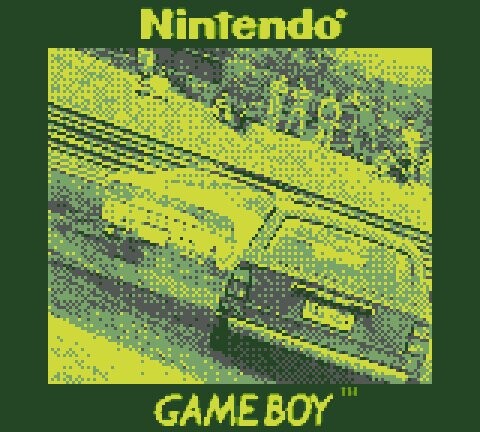
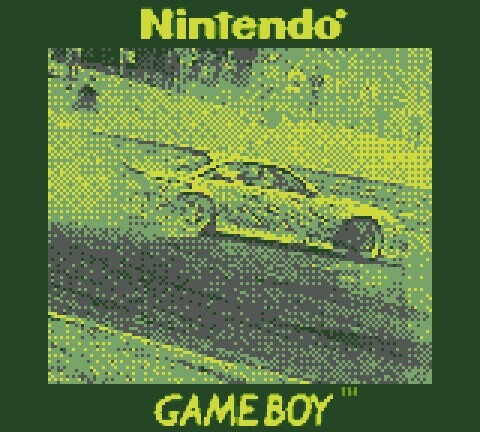
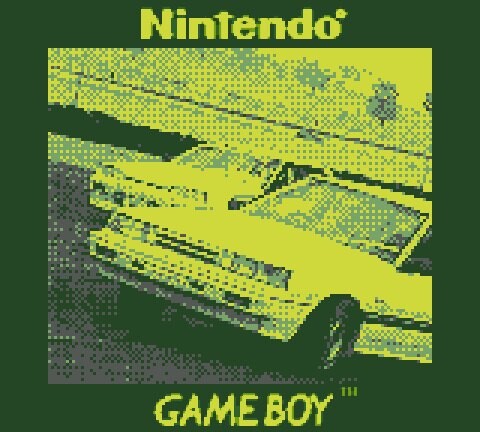
Conor Merrigan recently wowed the internet when he posted drift car photos on Facebook that were taken on a Nintendo Game Boy modded with a Canon EF zoom lens. The post has been shared thousands of times and has attracted thousands of comments. Many people were so dumbfounded they asked if the images were real.
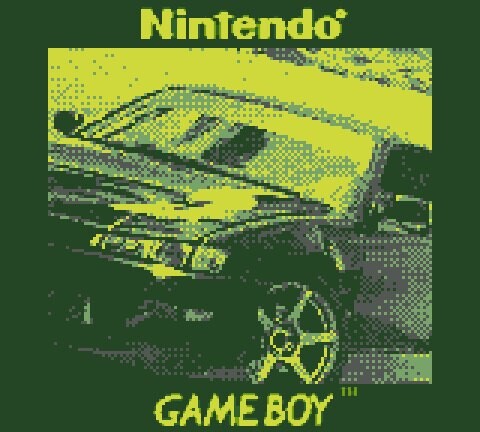
Released in 1998, the Game Boy Camera was an accessory that slotted into Nintendo’s wildly successful Game Boy console line that had been around since 1989. The reason behind the Game Boy Camera’s popularity is not its impressive specs, but quite the opposite. The camera boasts a 128 x 128 pixel CMOS sensor that creates 128 x 112-pixel images. The cartridge of each camera can hold up to 30 images using just four shades of gray.
Depending on which accessories and cables you have for your Game Boy, the images can be edited on the console, and even be printed using the Game Boy Printer.
So, how did Merrigan achieve these incredible results? His YouTube video, Hacking an Original Gameboy Camera Modding for DSLR lenses, details much of this journey, but I also got in touch with him to ask a few questions about the process.
The first step was to be able to transfer the images to his computer. Using a link cable, he added an Arduino to his Game Boy setup. This tricks the Game Boy into thinking a printer is attached. With freely available Github code, the Arduino captures the output of the “print.” You can then copy and paste these lines of numbers to the Arduino Game Boy Printer Emulator and choose from different grayscale palettes from each generation of Game Boy. This outputs a digital version of your images for you to save and share.

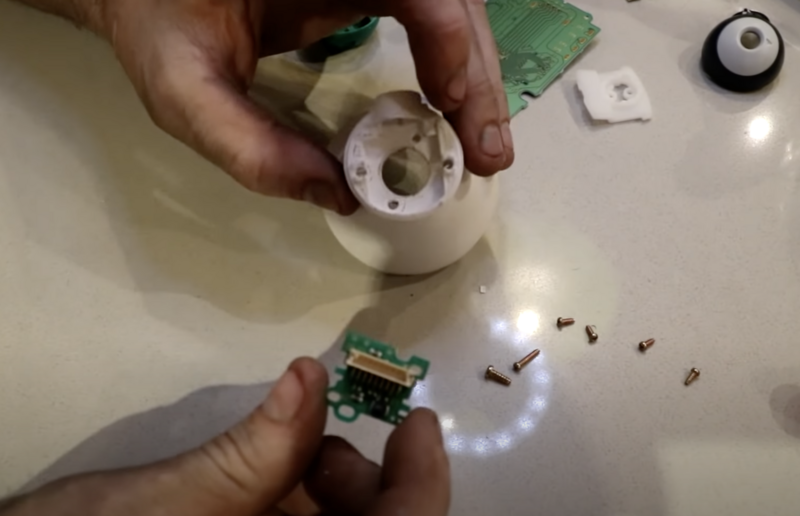
Next Merrigan disassembled a Game Boy Camera. Taking something apart would make me a nervous wreck, so I asked him if he was nervous during this part. “I knew the inside of the camera would be pretty simple going off how old it is, and they aren't very expensive, so I wasn't too worried about pulling it apart,” he explained.
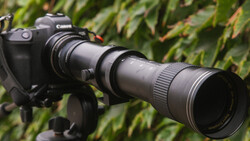
The next part of the process was 3D-printing an adapter to attach a lens to the camera sensor. The file for this is already freely available on Thingiverse. It only took Merrigan two attempts to get the distance between the lens and the sensor right. “If it was a higher resolution sensor, I think it would have taken more fine-tuning, but because it's such low resolution you can’t tell if it’s not quite right.” The video ends with a few successful shots using the Game Boy with the attached lens at home.
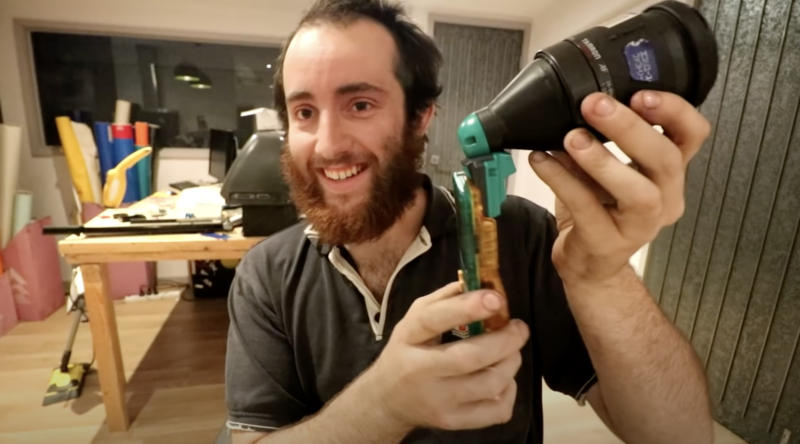
Fast-forward to January 2022 for the real magic. I was astonished to see the incredible photos Merrigan had taken at the drift track posted on social media. By this stage, he’d swapped out the Tamron lens for a Canon EF mount lens. I asked him what led him to this decision.
It was due to the sensor being so small. It’s only about 5mm, so it has a huge crop factor. The Canon lens was the widest angle one I own that still had manual focus, and even then, it was very zoomed in.
I bought the Tamron lens for a few dollars, so I use it for experiments like this just to make sure the 3D-printed part did not damage the lens. Once it seemed to be solid and attach and detach nicely, I was happy to put the better Canon lens on.
I was curious to know what the creative controls were like with this setup:
The focus is manually adjustable like if it was attached to a normal camera. The aperture is not adjustable, but I’m sure there would be lenses out there that have a mechanically adjustable aperture if you needed it. The Game Boy Camera has built-in controls for contrast and brightness, and this is enough to get the shot you’re after.
Ergonomics are a key factor for many photographers on why they prefer certain brands or models of camera, so how comfortable was it to use the Game Boy given that it looks quite front-heavy?
It’s pretty awkward! You need to support the lens and Game Boy with each hand. From a structural point of view, it feels okay, but having the lens hanging off the camera game cartridge seems to flex it enough that it loses connection and glitches out. Being right-handed, it was easiest to set the focus ring with my right hand on an object in the distance I wanted to get the cars at while supporting the camera with the left. I would then swap my right hand to the Game Boy to press the A and B buttons and support the lens with my left.
You can imagine turning up to photography meet with this setup would garner a lot of attention, but not so much at the drift track.
A few people commented on it, but it didn’t get a lot of attention. I was also carrying a full-size VHS camcorder, so I stood out a bit. The most popular era for drifting is the 80s and 90s, so a lot of people are wanting to capture that feel in videos and photos. It’s not uncommon to see people with film cameras, VHS cameras, and other weird things like a Game Boy. On the day I shot these images, there was even someone there shooting Super 8. Although it was one of the stranger devices in the photographer area, it wasn't as stand-out as you would expect.
Finally, I asked Merrigan about all the comments from people who said they were keen to see these images as NFTs or as prints.
A lot of people have asked me but there are two issues. Firstly, I don’t know much about minting NFTs. The second issue is one I have come across before. Now that the photos have been shared around, people will move on to other things. If I was to make NFTs or posters, it’s nearly impossible to reach the original audience that liked it in the first place. If you could predict that people would want to buy copies and you could attach that information to the posts before they go viral, then you could do well. Once you miss that first 24 hours, you have missed 95% of your audience.
All images were used with the kind permission of Conor Merrigan.


Join the Fstoppers community for free
-
Post comments and join in the discussions
-
Browse the site ad-free
-
Share your work and get featured in the community
-
Compete in the photo contests for fun and prizes
1 Comment
Better use a L glass to maximize the sharpness!