
Virtually all photographers' portfolios have some form of studio work in it. The clean white background has been used the world over, from high-fashion shoots to everyday e-commerce. Here's an effective way to give your model or product shoots a touch more class for little to no cost.
The real problem with shooting on plain backgrounds is that your subject can often look like they have been cut out and stuck on. Changing the lighting to form shadows around the model can help anchor them to the environment, but the overall look can still come across a little cheap and uninspiring.
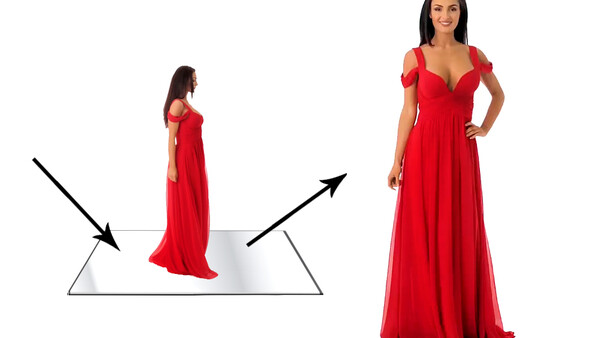
One way to add more interest yet still keep the same even backdrop is to make the floor reflective so the product or model now looks like they are firmly fixed in situ. I also feel like this enhancement adds more depth to the image spatially, as well as giving the work a touch more class to it. I know the difference is only subtle but it will help to separate the final shots away from the everyday cut-out you may see on many e-commerce sites or stock image libraries.
I have found the best way to achieve this kind of reflection is with a sheet of clear Perspex or glass placed directly underneath the subject. For small product shots, you can easily borrow the glass from a picture frame. For models or anything larger, a sheet of Perspex is the best option and gives identical results to the glass as well as being a lot less likely to crack or shatter.

Here you can see the sheet in placed on our video setup at my friend's studio. Note how the square sheet sits flush with the floor so the thickness of the plastic is not overly important. We opted for the thinnest sheet available at 2 millimeters thick which did the job perfectly and cost around $40. Anything thicker would have been considerably more money and also increased the chances of a visible horizon line from the sheet showing in the shot.
Getting Your Angles Right
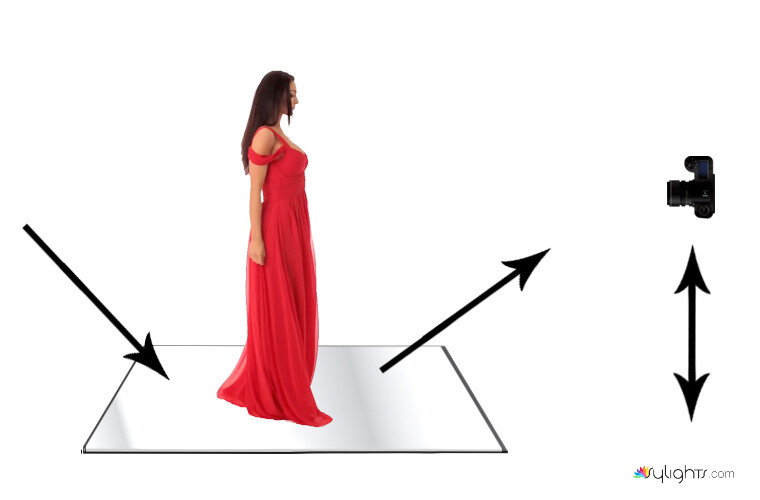
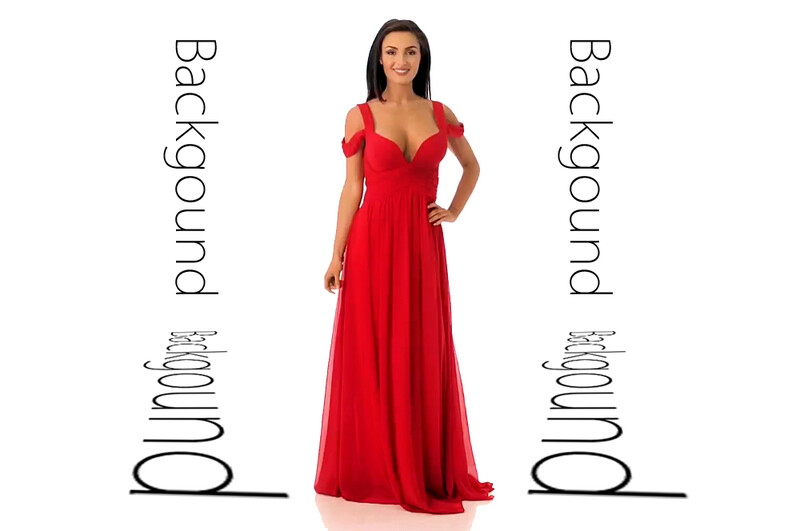
One thing you need to remember with this kind of setup is how the angle of your camera to the subject will affect what the camera picks up from the reflected floor. If you have your model or product sitting on a reflective surface and you can't see a reflection, your camera is probably at too low of an angle for you to see it. Play around with the height and tilt of the tripod until this changes. What you also need to consider now that the floor is reflective is it not only reflects the subject, but it's also showing the surroundings too. This is great for the setup above as the floor is essentially showing the background behind the model which was already evenly lit. This means we didn't need to light the floor at all as what you are seeing to the left and right of the model is actually the reflected background.
Horizon Lines
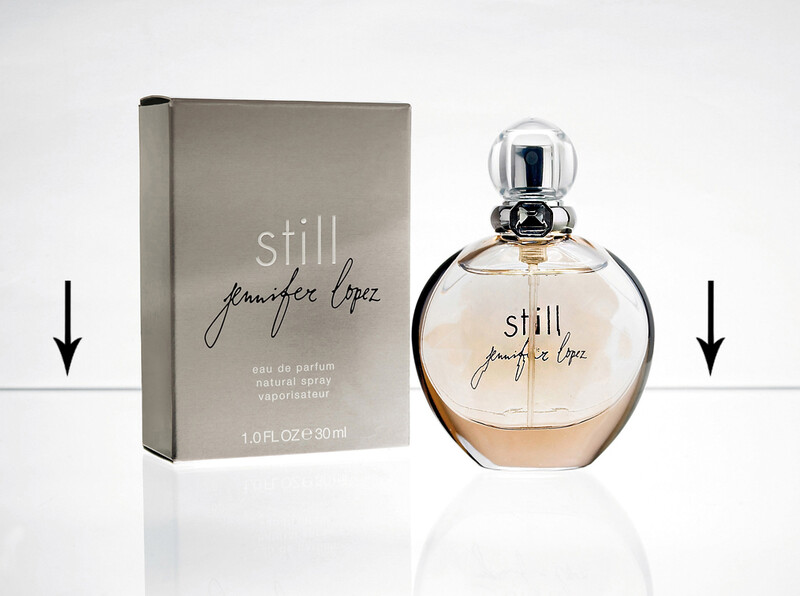
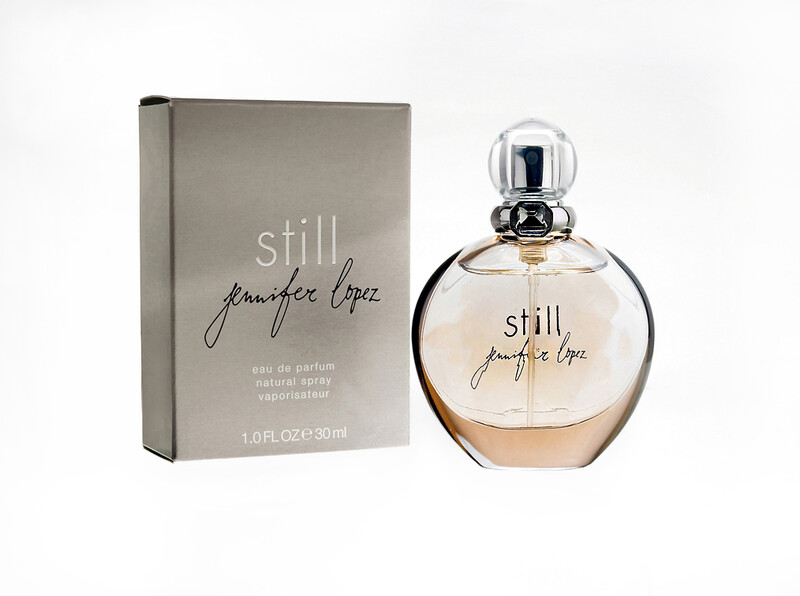
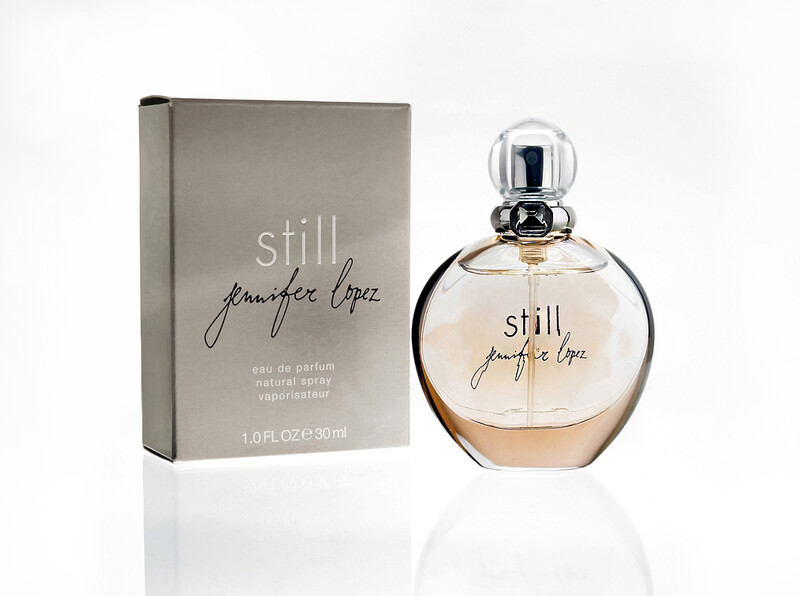
Depending on how big and thick your sheet of Perspex is and what depth of field you are shooting at, sometimes you may find you have a visible horizon line from the back of the sheet in your shot. There are times when this effect may actually be desirable, but if you would rather not have one then try moving the back of the sheet further way from the camera while keeping your subject in the same position. Alternatively, try shooting at a shallower depth of field so that line blends into the background. As I briefly mentioned above the other benefit of using a 2 millimeter sheet of Perspex is the fact that a horizon line was much harder to see because its profile is so thin. The product shot above was done on a much thicker sheet of glass.
If for whatever reason you have trouble getting rid of the horizontal line then it is easy enough to remove in postproduction.
Alternatives to Clear Perspex or Glass
There are definitely other ways to achieve this look, but I have found that a rigid sheet of either glass or Perspex gives the best results for the least amount of work. If your products are particularly small and you don't have a pane of glass handy, then try using a mirror to give you those reflections. Personally, I find the reflection from a mirror to be a little too strong and distracting so use with caution. I have also tried various reflective white materials which can work well as long as nothing moves. If you have a model standing on it then it easily wrinkles and creases up. You'll either spend lots of time trying to pull them out between shots or have to laboriously Photoshop them in post afterwards. I have also tried various reflective paints on the floor, but the end result is not anywhere near as effective, plus you'll need to regularly add additional coats of paint over time. Lastly, you could opt for the famous shower panel which many photographers like to use. For those who haven't seen this in action, it's a large white sheet of plastic which is used in bathrooms to waterproof walls. This is definitely a possible candidate, but they can be rather expensive depending on which country you live in. Here in the U.K., I could buy several sheets of clear Perspex for the same price of one shower panel.

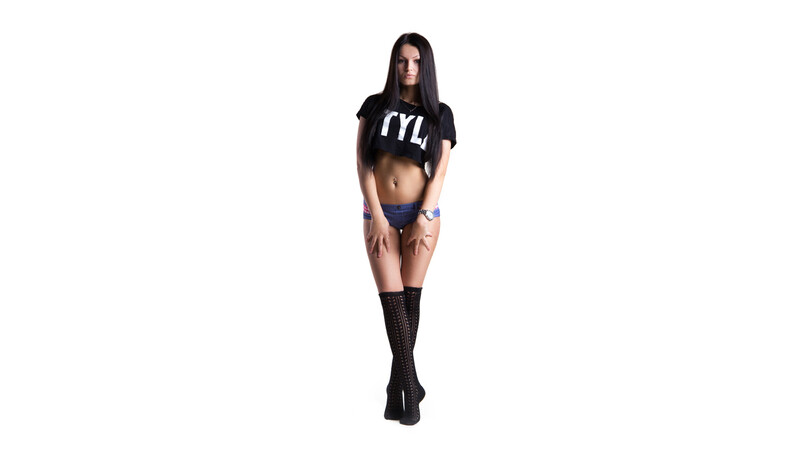
The other major benefit of using a clear sheet of plastic is that you are not restricted to just using it on white backgrounds. As you can see in the image above by just replacing the white for black we have created a totally different look altogether.
So there you have it, a quick and cheap way to enhance the look of your studio work. I know some of you might think these reflections could be easily recreated in Photoshop, but I can assure you if you plan to add this studio effect to your repertoire and use with any kind of regularity then its much better to make the small investment and capture it in camera.
Do any of you already use this technique? I'd love to see some examples in the comments section if you do.


Join the Fstoppers community for free
-
Post comments and join in the discussions
-
Browse the site ad-free
-
Share your work and get featured in the community
-
Compete in the photo contests for fun and prizes
21 Comments
Same technique. I had removed part of the reflection in post for client.
Very nice! thanks for share...
Thanks for these ideas. I've been using a large sheet of glossy white cardboard which gives a sort of drop shadow, which I like but have felt it's a bit dullish. I'll try the glass and perspex and compare, maybe it will spice up the shadow with a bit more reflected colour.
You're very welcome James! I always love using this technique when I get the chance. As mentioned above, the beauty of using something clear is that you can use it on things other than white. Really does open up a variety of possibilities...
I am using white plexiglass for tabltops and it adds depth to the final image
That's great to hear! I really think it adds a touch of class to the work...
I bought one a few months ago and really helped me a lot, is a poster size for easy traveling and i use it on studio and location like you can see on this photo.
Very nice! thanks for the share.
How do you find it for getting scratched if you're transporting it around?
British=Perspex, American=Plexiglass
I used a sheet of white plexiglass in my studio for precisely the same thing. Now that all my work is on location is found a really inexpensive alternative from Home Depot (courtesy of Zack Arias) - tileboard. I get the same effect and did I mention that it is really inexpensive? I still use smaller sheets of plexi for product work.
My bad David, I didn't think to check if the name was the same in the states!
As for the tileboard you mention, I do talk about that above but call it a "shower panel". I went onto Zack's website to link to the post he wrote many years ago but the page in question had all the images missing and a notice about server problems he is having so I had to leave it out.
Tileboards are none existent in the UK and shower panels which are very similar can cost $200! (Not a typo.)
Thanks for your reply!
Nice little article. I have used both white and black Plexiglass with much success.
Awesome, thanks! I always think it adds a touch of class to a shot...
My very next investments after I got my Speedotron pack and lights back in the early 80's were a handful of rolls of seamless paper and two 4x4 pieces of plexiglass. One black and one white. I cut my teeth practicing tabletop photography on them. This remains one of my favorite photos from those early days, entitled Attraction. This is a low res version pulled off a Kodak Photo CD (I'm dating myself, I know) but I had a gorgeous Cibachrome of it printed. It's true what they say: you never forget your first. ;)
Timeless David! Love it.
The product shots of mine above are almost 10 years old now. I still think its a good look!
Thanks for the share...
For white backgrounds I sometimes use white plexi, but often it ends up scratched and might bend your reflections out of shape – which can be a hassle without a stable surface underneath. For black I painted a thick tempered sheet of glass on one side, it´s stabile and don't get scratched. To get rid of any double reflections, as those given by ordinary mirrors, I use a sheet of hi gloss metal (as used for mirrors in public restrooms, 800x800x2mm). The mirroring gets a little less contrast (as preferred) and pulls a little towards the warmer tones, BUT you can fade the reflection into every color background as it is a 100% reflection. Often the client want the picture to work everywhere, and you don't want to make changes to your setup too often och take several photos on different backgrounds. Time is money!
Thanks for the tips Andreas, I'll have to try them out...
This technique requires transparency to fade out the reflection. Save as PNG for use on the web, and as a (flattened) PSD for InDesign – then you can put it over every background.
Sounds great!
I had a problem with clear perspex or glass. I was getting a double reflection. One from the top surface and one from the bottom. Not so much of a problem if you have some distance between you and the subject, but I didn't like it for close up work. I prefer the solid colours for that.
Hey Neil, yes double reflections can be a problem but it tends to be with thicker materials. I haven't experienced any for a while. The model shots above are shot on such a thin sheet of plastic (2mm) you only see one...
Where do you buy these large sheets.