
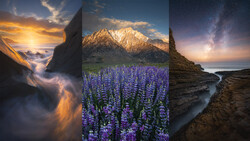
Long exposure photography is one of the most effective ways to convey movement in a still image. Whether it’s the soft blur of flowing water, the streaking motion of clouds, or the hypnotic trails of city lights, long exposure transforms scenes into something beyond what the human eye can perceive.
In my experience, mastering this technique requires a balance of planning, patience, and the right tools. I want to break down the fundamentals, starting from the beginning—from essential gear to shooting techniques and how to refine your images in post-processing.
 What Is Long Exposure Photography?
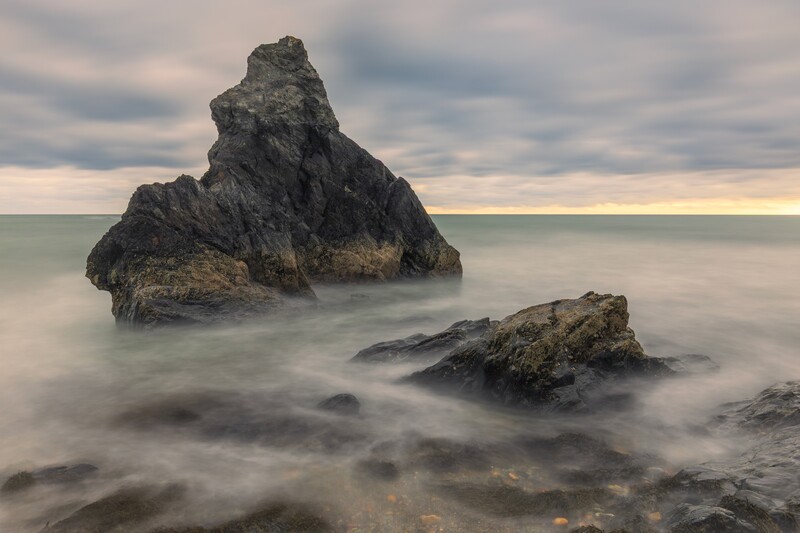
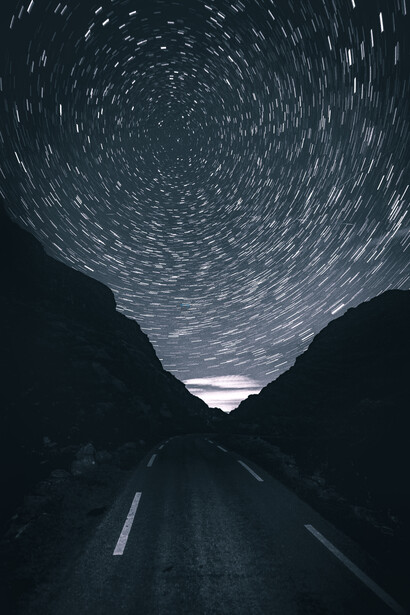
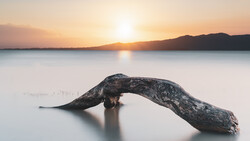
Long exposure photography involves using a slow shutter speed to capture an image over an extended period. Instead of freezing a moment in time, this technique records movement within the frame. Water turns to silk, clouds stretch across the sky, and city lights create glowing paths.
Timing is critical. Early mornings, late evenings, or overcast days are ideal, as lower light levels help extend exposure time without overexposing the image. When shooting in brighter conditions, neutral density (ND) filters become essential.
Essential Gear for Long Exposure Photography
Before diving into technique, having the right equipment makes a significant difference:
-
Sturdy Tripod – Even the slightest movement can ruin a long exposure. A solid tripod ensures sharpness.
-
Neutral Density (ND) Filters – These reduce light entering the lens, allowing for longer exposures even in daylight. ND filters come in different strengths, measured in stops (e.g., 6-stop, 10-stop).
-
Remote Shutter Release – Pressing the shutter by hand can introduce vibration. A remote shutter or a camera’s built-in timer minimizes this risk.
-
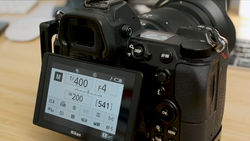
Manual Mode – Shooting in manual mode allows full control over shutter speed, aperture, and ISO. Keep ISO low (100 or 200) to maintain image quality and reduce noise.
 Techniques for Capturing Stunning Long Exposures
1. Creating Silky Water Effects
Long exposures are perfect for capturing the movement of waterfalls, rivers, and oceans. I typically use shutter speeds between 1/4 second to 30 seconds, depending on how smooth I want the water to appear. The faster the water moves, the shorter the exposure needed. ND filters help achieve longer exposures without overexposing highlights. Don't go too crazy here, though—the longer the exposure time, the more movement in the water and the less texture it retains, resulting in more like milk instead of water.
2. Capturing Cloud Motion
Slow-moving clouds can create a dynamic, painterly effect. For this, I use exposures ranging from 10 seconds to several minutes, depending on wind speed. On days with fast-moving clouds, a 30-second exposure can create dramatic results. The key here, I find, is to experiment with different lengths of exposure times—but don't overexpose, as if you blow those highlights, you're done for.
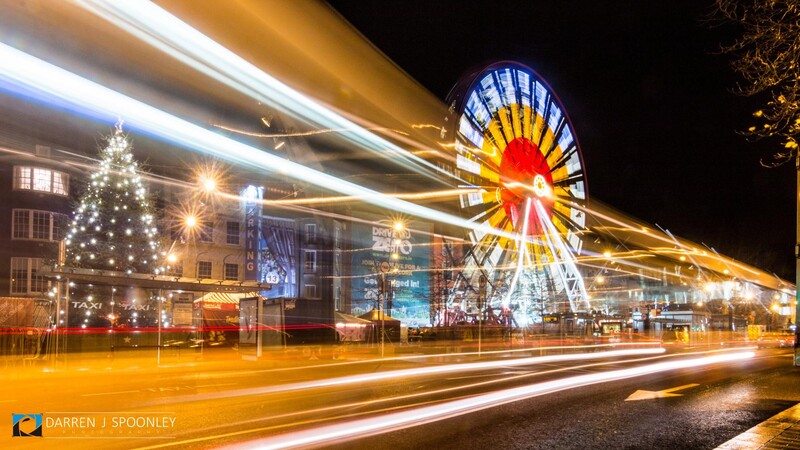
3. Shooting Light Trails in Urban Environments
Long exposures at night can transform passing vehicles into glowing streams of light. A shutter speed of 10–30 seconds works well for capturing traffic trails. Adjust this based on traffic speed and density—faster-moving cars require shorter exposures. Again, highlights are the challenge here; bright city lights can easily overexpose your shot. If you live near a big city, then you have ample opportunities to experiment. If you don't, then even a single car—possibly your own—can also help you create some fantastic light streaks in your shots. Of course, safety should always be top of your mind, not only because you have your expensive gear out in a public place at night, but also because it is night. It's hard to navigate around when you can't see your feet, other than the lights of a vehicle approaching, which—let's face it—might not even see you.
 Composition Tips for Long Exposure Photography
Long exposure photography isn’t just about movement—it’s also about composition. In reality, it's no different from a standard photo; the elements still need to be strong. Here’s what I focus on when framing my shots:
-
Foreground Interest – Adding rocks, trees, or urban structures creates depth and anchors the viewer’s eye.
-
Leading Lines – Rivers, roads, or shorelines guide the eye through the image, making compositions feel balanced.
-
Horizon Placement – Keeping the horizon level maintains a polished look, while placing it according to the rule of thirds enhances composition.
I have written another article specifically on composition—you can check that out here.
 Post-Processing Long Exposure Images
Post-processing refines long exposure shots by correcting exposure, contrast, and sharpness. Key adjustments I make include:
-
Increasing Contrast – Helps define elements that may appear too soft due to long exposure.
-
Enhancing Clarity & Dehaze – Particularly useful for revealing detail in water and sky.
-
Reducing Noise – Even at low ISO, long exposures can introduce noise. Noise reduction tools help clean up the image without sacrificing detail.
One key point here is to ensure you get it right in camera. If you underexpose the shot in the field, then it will be harder to bring up the shadows—and if you overexpose, then the image is toast.
Have Fun
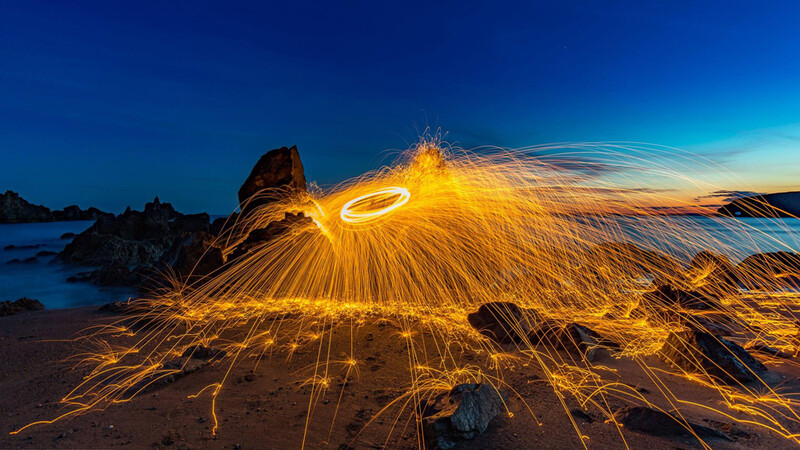
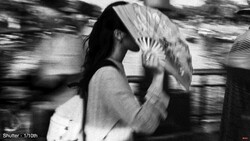
The most important thing is to have fun while you are learning. I have made many mistakes along the way, and each of them taught me something—be that what not to do, or, thankfully, more of what to actually do. Trying different techniques and styles will expand your creativity and, of course, your competence and skills. There are many long exposure techniques that I have experimented with. Some worked, and others didn't. Some were enjoyable, and others were not. And some hurt (like the spinning wire wool image above), and some didn't. Just heading out with your camera to see what happens is the best start. If you don't, then perhaps you will never know if your idea would have worked, and you 100% won't have learned anything new—other than that staying at home with your camera in your bag doesn't create images. But we already knew that.
 Final Thoughts
Long exposure photography is a game-changer for landscape and urban photographers. Mastering it means understanding light, movement, and composition. The best way to improve is through practice—experiment with different shutter speeds, weather conditions, and compositions to see how they impact your final image.
What’s Your Best Long Exposure Shot?
Drop a comment below with your photos—I’d love to see how you’ve applied these techniques, and of course, share any that I might have missed above.

Join the Fstoppers community for free
-
Post comments and join in the discussions
-
Browse the site ad-free
-
Share your work and get featured in the community
-
Compete in the photo contests for fun and prizes
1 Comment
EXCELLINT INFO! A few thing not mentioned in tools 1.Today they make filters for the rear of the camera Haida Rear Lens ND Filter Kit where you take out a frame and install a frame to hold a filter, info about using rear filters is light coming in the front with a filter up front you will notice say going a panorama a blue hump in the middle for the sky, I know not doing a panorama here, but with the filter at the rear of the lens you will not get that hump, just info! If you want to have some milky surf, or river BUT do not want the clouds to also be blurred and do not want to merge a still clouds image with your milky image here is some info, Back when Sony Cameras first out mode 1's and 2's you were able to download apps to the camera from
https://www.playmemoriescameraapps.com/portal/
The main one I used the most, but all are fun to use, is the "Digital Filter". It will take two image and merge in camera. What you do is in manual mode for each image, you can use any camera setting even a selected WB different from the other image. You do the settings for the sky and then settings for the foreground, it will also do a third area. Always do the the regular exposure first and the long exposure last.
I used it mainly for doing Milky Way's over lit towns or areas with dark sky but with lit foregrounds, short exposer for ground and long exposure for the sky. Once you play with it and experiment you can get the right settings saved and use again. It does the heavy work also before sending to the SD card you can adjust the horizon and output is either jpeg or RAW or both. I used with my A7SM1 for years but using with my A7RM2 was great for sunset/rises for the use with preprogramed in the app. Sorry you can no longer buy any apps and downloading all ready bought by you only ends this year. If you find a used Mod 1 or 2 at a company you could ask if they have one with the apps still on a camera.