

Contrary to delusional beliefs, not everyone is hooked up to a high-speed connection capable of streaming 8k video at magnificent buttery smoothness. Extremely fast connectivity is an amazing thing that is still out of reach for the vast majority of users. You can't assume that the viewers of your website are going to be piloting a computer hard-lined into the latest fiber optic goodness. Instead, we have to optimize for the most common user in order to give them the best experience possible without sacrificing image quality.
Format
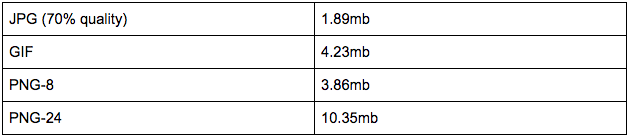
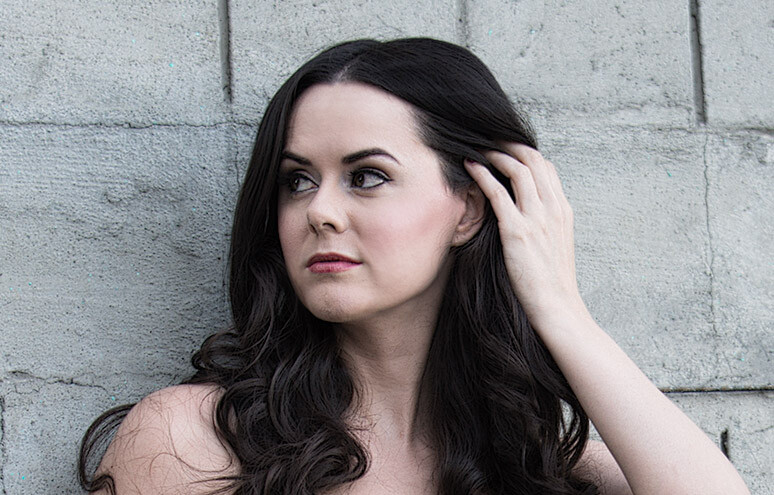
The most common image formats that can be used on the web are JPG, PNG, and GIF. Which should you use? For web developers looking to maximize the performance of a website using images, for a variety of reasons the answer is "it depends". However, for photographers who are only worried about using image formats to display photographs, the answer is simple. JPG is really the only option, all of the others are radically sub-par for the job of displaying photographs on a website. Don't even consider using them. By using anything other than JPG your website will instantly take a hit to its load time. For example, the table below presents the file size of the image above exported in each file type at 2880x1922.
Resolution
As time moves forward the sheer number of pixels that screens can display continues to skyrocket. There was a time when 800x600 represented the vast majority of the web. Now we have high-resolution displays capable of displaying 15-megapixel images at full resolution with the rise of 8k screens seemingly on the cusp of arrival. With that in mind, what resolution is best for your website? For now, I currently recommend exporting your images at about 2880x1800. (Adjusting slightly for aspect ratio.) This covers the vast majority of screens out there while still looking good even on monster displays without sacrificing too much performance.
Bringing The File Size Down Further
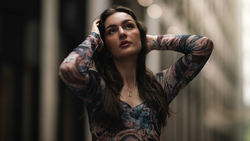
Even though JPG in the above chart is a clear winner, the file size of almost 2mb is still far too heavy in my books. The reason for this is that the export tools in most major photo editors are atrocious at efficiently exporting images. Thus, we are forced to turn to dedicated image optimization tools in order to get the most efficient file size for our photographs. The tool I choose to use it ImageOptim, which has a great desktop app for Mac OS and a web tool for all other platforms. I use it because it works great at the wonderful price point of free. As an example, the JPG above was cycled through ImageOptim (also set to 70% JPG quality) after export from Lightroom and that brutal 1.89mb was crushed down to 0.72mb which is a pretty considerable impact on file size for almost no visible loss in image quality. Don't believe me? Check out the 100% crop before/after below, can you tell the difference? Neither can I.

Conclusion
Ensuring that your web page loads quickly can go a long way towards making sure that users don't abandon your page due to frustration or boredom. Having a strong export strategy designed to produce high-quality images without large file sizes is a key to achieving fast load times. By optimizing the choices you make during the export workflow and by leveraging third party image optimizers you can transform a sluggish and annoying website into one that springs into life almost instantly for the viewer.


Join the Fstoppers community for free
-
Post comments and join in the discussions
-
Browse the site ad-free
-
Share your work and get featured in the community
-
Compete in the photo contests for fun and prizes
6 Comments
Never would've thought to use a different program to compress my jpegs (I've always just used "save for web" in PS). I'll definitely be giving ImageOptim a try.
I use JPEGminiPro for all of my online photos. On the homepage of my website it cut the total page size from about 20MB to 5MB (desktop/full res images). The mobile-sized images are a small fraction of that.
I use JPEGmini too for Facebook posts. According to FB, "To avoid compression when you upload your cover photo, make sure the file size is less than 100KB." I don't know if they have a compression cutoff and don't touch files that are under 100KB, but I try to start with the smallest file size possible just in case.
Interesting - I thought the limit for FB is based on max. dimension being 2048px. Or maybe it is both?
Whoa. So you export a 70% JPEG from Lightroom, then run it through that app also set at 70% JPEG?
I always thought compressing an already-compressed JPEG was blasphemy but that comparison says otherwise.
Yup, thats exactly my process. :)
Unless there's some unique approach to lossy JPEG compression algorithms with apps like ImageOptim (and I'm betting not), I'm not seeing where a third-party app is advantageous if you're working in Photoshop. The Photoshop Save For Web applet has a setting that allows you to define the maximum file size. Unfortunately they don't make it obvious, you need to click the down arrow in the upper right of the SFW screen to bring it up, as you can see in the screen grabs below. You then apply your max size desired and save.
Granted, you need to examine the saved file to make sure you haven't sacrificed image quality by compressing to heavily, but once you have a working compression setting, then you're free to batch your files to your desired size. Below also are two 100% snaps of a file saved directly from an imported RAW file via standard JPEG save in Photoshop at quality setting 12 (yielding a 471k file), and the SFW file set at 100k. That's roughly 21% of the "standard" JPEG save file size, versus roughly 38% in your example, and was created directly from the original file and not taking a secondary re-compression hit.